In this tutorial you will learn how to convert website to android app using Android Studio.
在本教程中,您将学习如何使用Android Studio将网站转换为android应用。
Before reading this tutorial I hope that you already have basic knowledge of Android App Development. Otherwise you won’t be able to understand anything.
在阅读本教程之前,我希望您已经具有Android App Development的基本知识。 否则,您将无法理解任何内容。
What I will do here is simply open the website in webview with a loading bar so that it will look like we are using an android app.
我在这里要做的就是简单地在Webview中使用加载栏打开网站,以便看起来我们正在使用android应用。
By using this method you can convert website or wordpress blog into android application. You can follow this link to see an example app that I have created using this process.
通过使用此方法,您可以将网站或wordpress博客转换为android应用程序。 您可以点击此链接查看我使用此过程创建的示例应用程序。
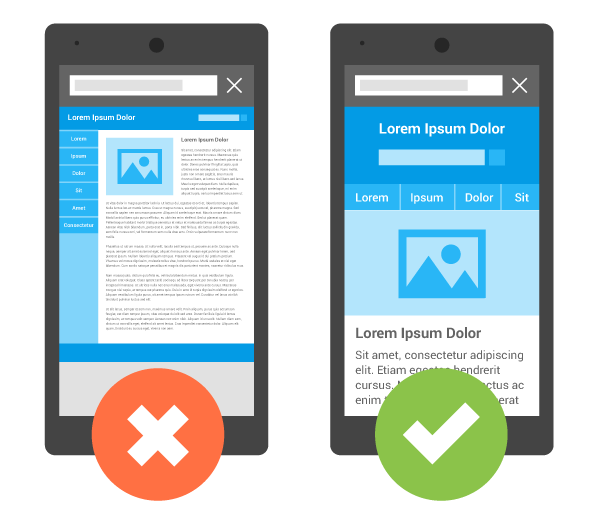
Note: Make sure the website for which you want to create app is responsive, otherwise the app will not look proper.
注意:请确保您要为其创建应用程序的网站具有响应能力,否则该应用程序将无法正常显示。
If you want to integrate admob and google analytics in your app then you can follow below tutorials.
如果您想将admob和Google Analytics(分析)集成到您的应用中,则可以按照以下教程进行操作。
Also Read: Android Google Analytics Integration Tutorial
另请参阅: Android Google Analytics(分析)集成教程
Also Read: Android AdMob Tutorial
另请参阅: Android AdMob教程
如何将网站转换为Android App (How to Convert Website to Android App)
Create an android studio project with the website name.
使用网站名称创建一个android studio项目。
Add internet access permission to AndroidManifest.xml file.
将互联网访问权限添加到AndroidManifest.xml文件。
<uses-permission android:name="android.permission.INTERNET"/>Add following code in activity_main.xml file. Here I have added a horizontal progress bar with a webview.
在activity_main.xml文件中添加以下代码。 在这里,我添加了带有Webview的水平进度条。
activity_main.xml
activity_main.xml
<RelativeLayout xmlns:android="http://schemas.android.com/apk/res/android"xmlns:tools="http://schemas.android.com/tools"android:layout_width="match_parent"android:layout_height="match_parent"tools:context="com.myudaipurcity.MainActivity"><ProgressBarandroid:id="@+id/progressBar"style="?android:attr/progressBarStyleHorizontal"android:layout_width="fill_parent"android:layout_height="5dp"android:progressDrawable="@drawable/bg_progress_bar_webview" /><WebViewandroid:id="@+id/webView"android:layout_width="match_parent"android:layout_height="match_parent"android:layout_below="@+id/progressBar"/>
</RelativeLayout>
Create an xml file inside drawable folder and add following code in it. It is a custom background for progress bar. You can change the color by changing color code in res/values/color.xml file.
在drawable文件夹中创建一个xml文件,并在其中添加以下代码。 这是进度条的自定义背景。 您可以通过更改res / values / color.xml文件中的颜色代码来更改颜色。
bg_progress_bar_webview.xml
bg_progress_bar_webview.xml
<?xml version="1.0" encoding="utf-8"?>
<layer-list xmlns:android="http://schemas.android.com/apk/res/android" ><itemandroid:id="@android:id/background"android:drawable="@color/colorAccent"/><item android:id="@android:id/secondaryProgress"><scaleandroid:drawable="@color/colorPrimary"android:scaleWidth="100%" /></item><item android:id="@android:id/progress"><scaleandroid:drawable="@color/colorPrimary"android:scaleWidth="100%" /></item></layer-list>
Add following code in MainActivity.java file. The code is self explanatory, I have added comments where ever required.
在MainActivity.java文件中添加以下代码。 该代码是不言自明的,我在需要的地方添加了注释。
package com.thecrazyprogrammer;import android.app.Activity;
import android.os.Bundle;
import android.view.KeyEvent;
import android.view.View;
import android.webkit.WebChromeClient;
import android.webkit.WebView;
import android.webkit.WebViewClient;
import android.widget.ProgressBar;public class MainActivity extends Activity {WebView webView;ProgressBar progressBar;String URL = "https://www.thecrazyprogrammer.com/";@Overrideprotected void onCreate(Bundle savedInstanceState) {super.onCreate(savedInstanceState);setContentView(R.layout.activity_main);progressBar = (ProgressBar) findViewById(R.id.progressBar);webView = (WebView)findViewById(R.id.webView);webView.getSettings().setJavaScriptEnabled(true);//loading progressbarwebView.setWebChromeClient(new WebChromeClient() {public void onProgressChanged(WebView view, int progress){progressBar.setProgress(progress);if (progress == 100) {progressBar.setVisibility(View.GONE);} else {progressBar.setVisibility(View.VISIBLE);}}});webView.setWebViewClient(new WebViewClient() {@Overridepublic boolean shouldOverrideUrlLoading(WebView view, String url){view.loadUrl(url);return true;}});webView.loadUrl(URL);}//enabling back button to go to previous page@Overridepublic boolean onKeyDown(int keyCode, KeyEvent event) {if (event.getAction() == KeyEvent.ACTION_DOWN) {switch (keyCode) {case KeyEvent.KEYCODE_BACK:if (webView.canGoBack()) {webView.goBack();} else {finish();}return true;}}return super.onKeyDown(keyCode, event);}
}
Finally save and run the project. Below is a screenshot how the app will look like.
最后保存并运行项目。 以下是该应用程序的屏幕截图。

Comment below if you have queries related to above tutorial for how to convert website to android application.
如果您对以上教程有疑问,请在下面评论,有关如何将网站转换为android应用程序。
翻译自: https://www.thecrazyprogrammer.com/2017/08/convert-website-android-app.html