3. 与 Spring Boot 整合
3.1 框架整合
依赖
<dependencies><dependency><groupId>org.springframework.boot</groupId><artifactId>spring-boot-starter-thymeleaf</artifactId></dependency><dependency><groupId>org.springframework.boot</groupId><artifactId>spring-boot-starter-web</artifactId></dependency><dependency><groupId>org.apache.shiro</groupId><artifactId>shiro-spring-boot-web-starter</artifactId><version>1.9.1</version></dependency><dependency><groupId>com.baomidou</groupId><artifactId>mybatis-plus-boot-starter</artifactId><version>3.5.2</version></dependency><dependency><groupId>org.springframework.boot</groupId><artifactId>spring-boot-devtools</artifactId><scope>runtime</scope><optional>true</optional></dependency><dependency><groupId>mysql</groupId><artifactId>mysql-connector-java</artifactId><scope>runtime</scope></dependency><dependency><groupId>org.springframework.boot</groupId><artifactId>spring-boot-configuration-processor</artifactId><optional>true</optional></dependency><dependency><groupId>org.projectlombok</groupId><artifactId>lombok</artifactId><optional>true</optional></dependency>
</dependencies>
配置文件
spring:datasource:type: com.zaxxer.hikari.HikariDataSourcedriver-class-name: com.cj.mysql.jdbc.Driverurl: jdbc:mysql://localhost:3306/shiro-db?characterEncoding=utf-8&useSSL=falseusername: rootpassword: xxxxxxxjackson:date-format: yyyy-MM-dd HH:mm:sstime-zone: GMT+8
mybatis-plus:configuration:log-impl: org.apache.ibatis.logging.stdout.StdOutImplmapper-locations: classpath:mapper/*.xml
shiro:loginUrl: /myController/login
3.2 登录认证实现
核心代码:
@Configuration
public class ShiroConfig {@Autowiredprivate MyRealm myRealm;/*** 配置 SecurityManager*/@Beanpublic DefaultWebSecurityManager defaultWebSecurityManager() {// 1. 创建 defaultWebSecurityManager 对象DefaultWebSecurityManager defaultWebSecurityManager = newDefaultWebSecurityManager();// 2. 创建加密对象,并设置相关属性HashedCredentialsMatcher matcher = new HashedCredentialsMatcher();// 2.1 采用 md5 加密matcher.setHashAlgorithmName("MD5");// 2.2 迭代加密次数matcher.setHashIterations(3);// 3 将加密对象存储到 myRealm 中myRealm.setCredentialsMatcher(matcher);// 4 将 myRealm 存入 defaultWebSecurityManager 对象defaultWebSecurityManager.setRealm(myRealm);// 5 返回return defaultWebSecurityManager;}/*** 配置 Shiro 内置过滤器拦截范围*/@Beanpublic DefaultShiroFilterChainDefinition shiroFilterChainDefinition() {DefaultShiroFilterChainDefinition chainDefinition= new DefaultShiroFilterChainDefinition();// 设置不认证可以访问的资源chainDefinition.addPathDefinition("/myController/userLogin", "anon");chainDefinition.addPathDefinition("/login", "anon");// 设置需要进行登录认证的拦截范围chainDefinition.addPathDefinition("/**", "authc");return chainDefinition;}
}
@Component
public class MyRealm extends AuthorizingRealm {@Autowiredprivate UserService userService;/*** 自定义授权方法*/@Overrideprotected AuthorizationInfo doGetAuthorizationInfo(PrincipalCollection principalCollection) {return null;}/*** 自定义登录认证方法*/@Overrideprotected AuthenticationInfo doGetAuthenticationInfo(AuthenticationToken authenticationToken) throws AuthenticationException {// 1. 获取用户名String username = authenticationToken.getPrincipal().toString();// 2. 根据用户名查询用户User user = userService.getUserInfoByName(username);// 3. 判断并将数据完成封装if (user != null) {return new SimpleAuthenticationInfo(authenticationToken.getPrincipal(),user.getPwd(),ByteSource.Util.bytes("salt"),username);}return null;}
}
3.3 多个 realm 的认证策略设置
3.3.1 实现原理
当应用程序配置多个 Realm 时,例如:用户名密码校验、手机号验证码校验等等。Shiro 的 ModularRealmAuthenticator 会使用内部的
AuthenticationStrategy 组件判断认证是成功还是失败。
AuthenticationStrategy 是一个无状态的组件,它在身份验证尝试中被询问 4 次(这 4 次交互所需的任何必要的状态将被作为方法参
数):
- 在所有 Realm 被调用之前
- 在调用 Realm 的 getAuthenticationInfo 方法之前
- 在调用 Realm 的 getAuthenticationInfo 方法之后
- 在所有 Realm 被调用之后
认证策略的另外一项工作就是聚合所有 Realm 的结果信息封装至一个 AuthenticationInfo 实例中,并将此信息返回,以此作为
Subject 的身份信息。
Shiro 中定义了 3 种认证策略的实现:
| AuthenticationStrategy class | 描述 |
|---|---|
AtLeastOneSuccessfulStrategy | 只要有一个(或更多)的 Realm 验证成功,那么认证将视为成功 |
FirstSuccessfulStrategy | 第一个 Realm 验证成功,整体认证将视为成功,且后续 Realm 将被忽略 |
AllSuccessfulStrategy | 所有 Realm 成功,认证才视为成功 |
ModularRealmAuthenticator 内置的认证策略默认实现是 AtLeastOneSuccessfulStrategy 方式。可以通过配置修改策略。
3.3.2 代码实现
核心代码:
/*** 配置 SecurityManager*/
@Bean
public DefaultWebSecurityManager defaultWebSecurityManager() {// 1. 创建 defaultWebSecurityManager 对象DefaultWebSecurityManager defaultWebSecurityManager = newDefaultWebSecurityManager();// 多个 Realm 认证策略配置// 2. 创建认证对象,并设置认证策略ModularRealmAuthenticator modularRealmAuthenticator = new ModularRealmAuthenticator();// 所有 Realm 成功 才算认证成功modularRealmAuthenticator.setAuthenticationStrategy(new AllSuccessfulStrategy());defaultWebSecurityManager.setAuthenticator(modularRealmAuthenticator);// 3. 封装 Realm 集合List<Realm> list = new ArrayList<>();list.add(myRealm);list.add(myRealm2);defaultWebSecurityManager.setRealms(list);// 4 返回return defaultWebSecurityManager;
}
3.4 remember me 功能
Shiro 提供了记住我(RememberMe)的功能,比如访问一些网站时,关闭了浏览器,下次再打开时还是能记住你是谁, 下次访问时无
需再登录即可访问。
基本流程
-
首先在登录页面选中 RememberMe 然后登录成功;如果是浏览器登录,一般会把 RememberMe 的 Cookie 写到客户端并保存下
来;
-
关闭浏览器再重新打开;会发现浏览器还是记住你的;
-
访问一般的网页服务器端,仍然知道你是谁,且能正常访问;
-
但是,如果我们访问电商平台时,如果要查看我的订单或进行支付时,此时还是需要再进行身份认证的,以确保当前用户还是你。
核心代码
@Bean
public DefaultWebSecurityManager defaultWebSecurityManager() {// 1. 创建 defaultWebSecurityManager 对象DefaultWebSecurityManager defaultWebSecurityManager = newDefaultWebSecurityManager();// 2. 创建加密对象,并设置相关属性HashedCredentialsMatcher matcher = new HashedCredentialsMatcher();// 2.1 采用 md5 加密matcher.setHashAlgorithmName("MD5");// 2.2 迭代加密次数matcher.setHashIterations(3);// 3 将加密对象存储到 myRealm 中myRealm.setCredentialsMatcher(matcher);// 4 将 myRealm 存入 defaultWebSecurityManager 对象defaultWebSecurityManager.setRealm(myRealm);// 设置 rememberMe 功能defaultWebSecurityManager.setRememberMeManager(cookieRememberMeManager());// 5 返回return defaultWebSecurityManager;
}public SimpleCookie rememberMeCookie() {SimpleCookie simpleCookie = new SimpleCookie("rememberMe");// 设置跨域// simpleCookie.setDomain("domain");simpleCookie.setPath("/");simpleCookie.setHttpOnly(true);simpleCookie.setMaxAge(30*24*60*60);return simpleCookie;
}public CookieRememberMeManager cookieRememberMeManager() {CookieRememberMeManager cookieRememberMeManager = new CookieRememberMeManager();cookieRememberMeManager.setCookie(rememberMeCookie());cookieRememberMeManager.setCipherKey("806823".getBytes());return cookieRememberMeManager;
}/*** 配置 Shiro 内置过滤器拦截范围*/
@Bean
public DefaultShiroFilterChainDefinition shiroFilterChainDefinition() {DefaultShiroFilterChainDefinition chainDefinition= new DefaultShiroFilterChainDefinition();// 设置不认证可以访问的资源chainDefinition.addPathDefinition("/myController/userLogin", "anon");chainDefinition.addPathDefinition("/myController/login", "anon");// 设置需要进行登录认证的拦截范围chainDefinition.addPathDefinition("/**", "authc");// 添加存在用户的过滤器( rememberMe )chainDefinition.addPathDefinition("/**", "user");return chainDefinition;
}
3.5 用户登录认证后登出
用户登录后,配套的有登出操作。直接通过Shiro过滤器即可实现登出
核心代码
@Bean
public DefaultShiroFilterChainDefinition shiroFilterChainDefinition() {DefaultShiroFilterChainDefinition chainDefinition= new DefaultShiroFilterChainDefinition();// 设置不认证可以访问的资源chainDefinition.addPathDefinition("/myController/userLogin", "anon");chainDefinition.addPathDefinition("/myController/login", "anon");// 配置登出过滤器chainDefinition.addPathDefinition("/logout", "logout");// 设置需要进行登录认证的拦截范围chainDefinition.addPathDefinition("/**", "authc");// 添加存在用户的过滤器( rememberMe )chainDefinition.addPathDefinition("/**", "user");return chainDefinition;
}
3.6 授权、角色认证
3.6.1 授权
用户登录后,需要验证是否具有指定角色指定权限。Shiro 也提供了方便的工具进行判断。
这个工具就是 Realm 的 doGetAuthorizationInfo 方法进行判断。触发权限判断的有两种方式
- 在页面中通过shiro:属性判断
- 在接口服务中通过注解@Requires进行判断
3.6.2 后端接口服务
通过给接口服务方法添加注解可以实现权限校验,可以加在控制器方法上,也可以加在业务方法上,一般加在控制器方法上。常用注解如
下:
-
@RequiresAuthentication验证用户是否登录,等同于方法subject.isAuthenticated()
-
@RequiresUser验证用户是否被记忆
登录认证成功subject.isAuthenticated()为true
登录后被记忆subject.isRemembered()为true
-
@RequiresGuest验证是否是一个guest的请求,是否是游客的请求
此时subject.getPrincipal()为null
-
@RequiresRoles验证subject是否有相应角色,有角色访问方法,没有则会抛出异常
AuthorizationException。例如:@RequiresRoles(“aRoleName”)
void someMethod();
只有subject有aRoleName角色才能访问方法someMethod()
-
@RequiresPermissions验证subject是否有相应权限,有权限访问方法,没有则会抛出异常
AuthorizationException。例如:@RequiresPermissions (“file:read”,”wite:aFile.txt”)
void someMethod();
subject必须同时含有file:read和wite:aFile.txt权限才能访问方法someMethod()
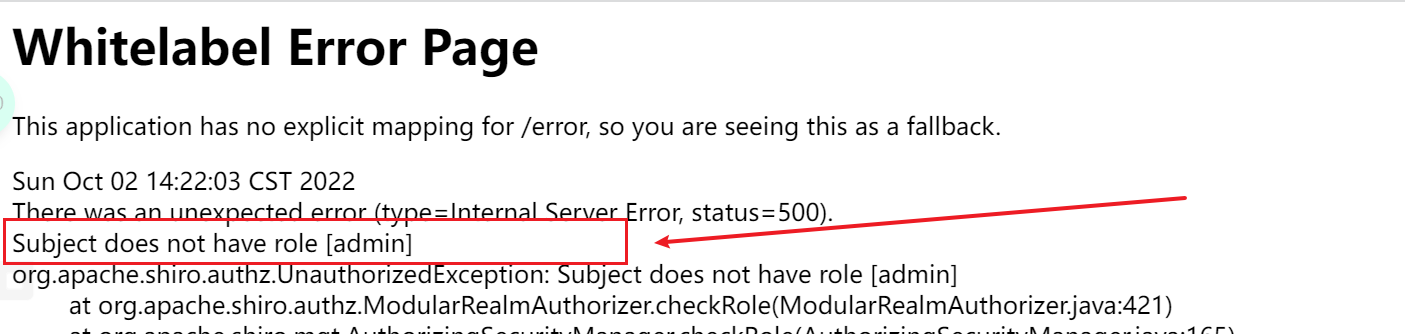
3.6.3 授权验证- - 没有角色无法访问
核心代码:
@GetMapping("/userLoginRoles")
@RequiresRoles("admin")
@ResponseBody
public String userLoginRoles() {System.out.println("登录认证验证角色");return "验证角色成功";
}

3.6.4 授权验证- - 获取角色进行验证
修改MyRealm方法
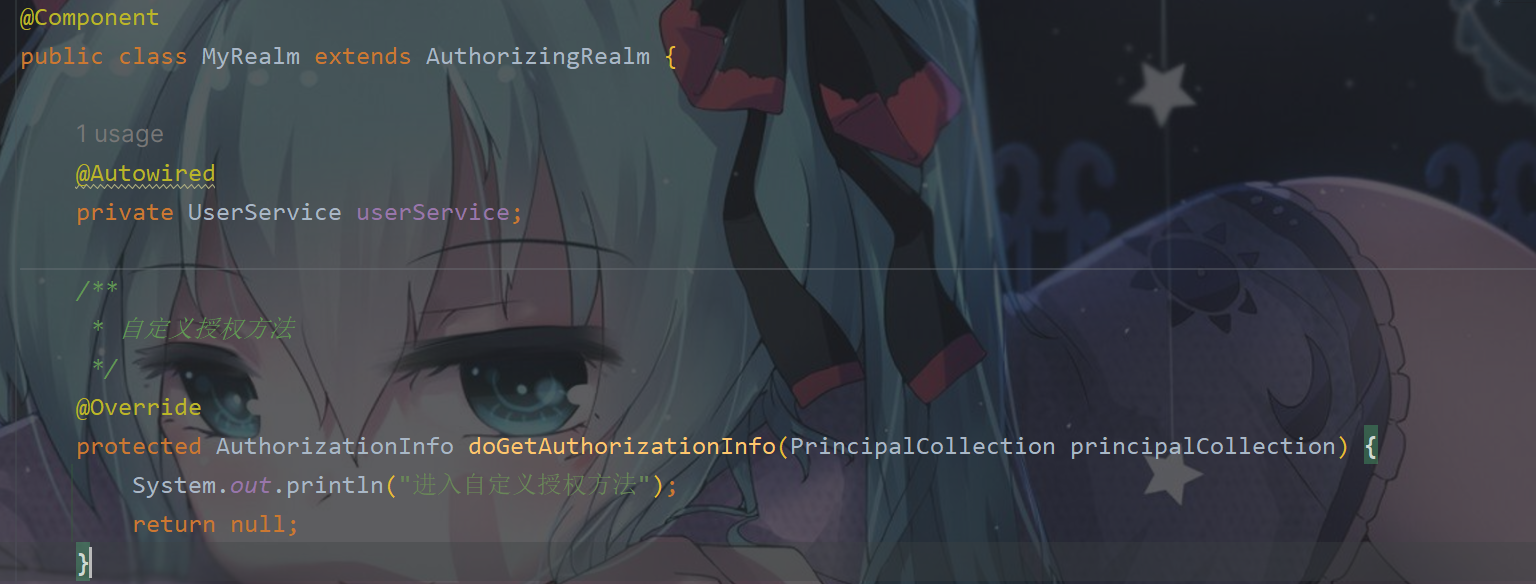
/*** 自定义授权方法:获取当前登录用户权限信息,返回给 Shiro 用来进行授权对比*/
@Override
protected AuthorizationInfo doGetAuthorizationInfo(PrincipalCollection principalCollection) {System.out.println("进入自定义授权方法");// 1. 创建对象,存储当前登录的用户的权限和角色SimpleAuthorizationInfo info = new SimpleAuthorizationInfo();// 2. 存储角色info.addRole("admin");// 3. 返回return info;
}


接下来实现对数据库整合进行操作
创建库表
CREATE TABLE `role`
(`id` BIGINT(20) NOT NULL AUTO_INCREMENT COMMENT '编号',`name` VARCHAR(30) DEFAULT NULL COMMENT '角色名',`desc` VARCHAR(50) DEFAULT NULL COMMENT '描述',`realname` VARCHAR(20) DEFAULT NULL COMMENT '角色显示名',PRIMARY KEY (`id`)
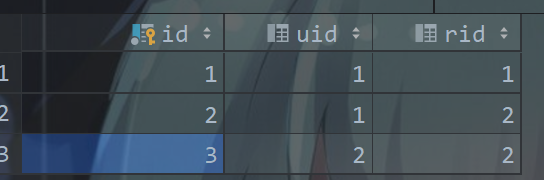
) ENGINE = INNODBAUTO_INCREMENT = 2DEFAULT CHARSET = utf8 COMMENT ='角色表';CREATE TABLE `role_user`
(`id` BIGINT(20) NOT NULL AUTO_INCREMENT COMMENT '编号',`uid` BIGINT(20) DEFAULT NULL COMMENT '用户 id',`rid` BIGINT(20) DEFAULT NULL COMMENT '角色 id',PRIMARY KEY (`id`)
) ENGINE = INNODBAUTO_INCREMENT = 2DEFAULT CHARSET = utf8 COMMENT ='角色用户映射表';

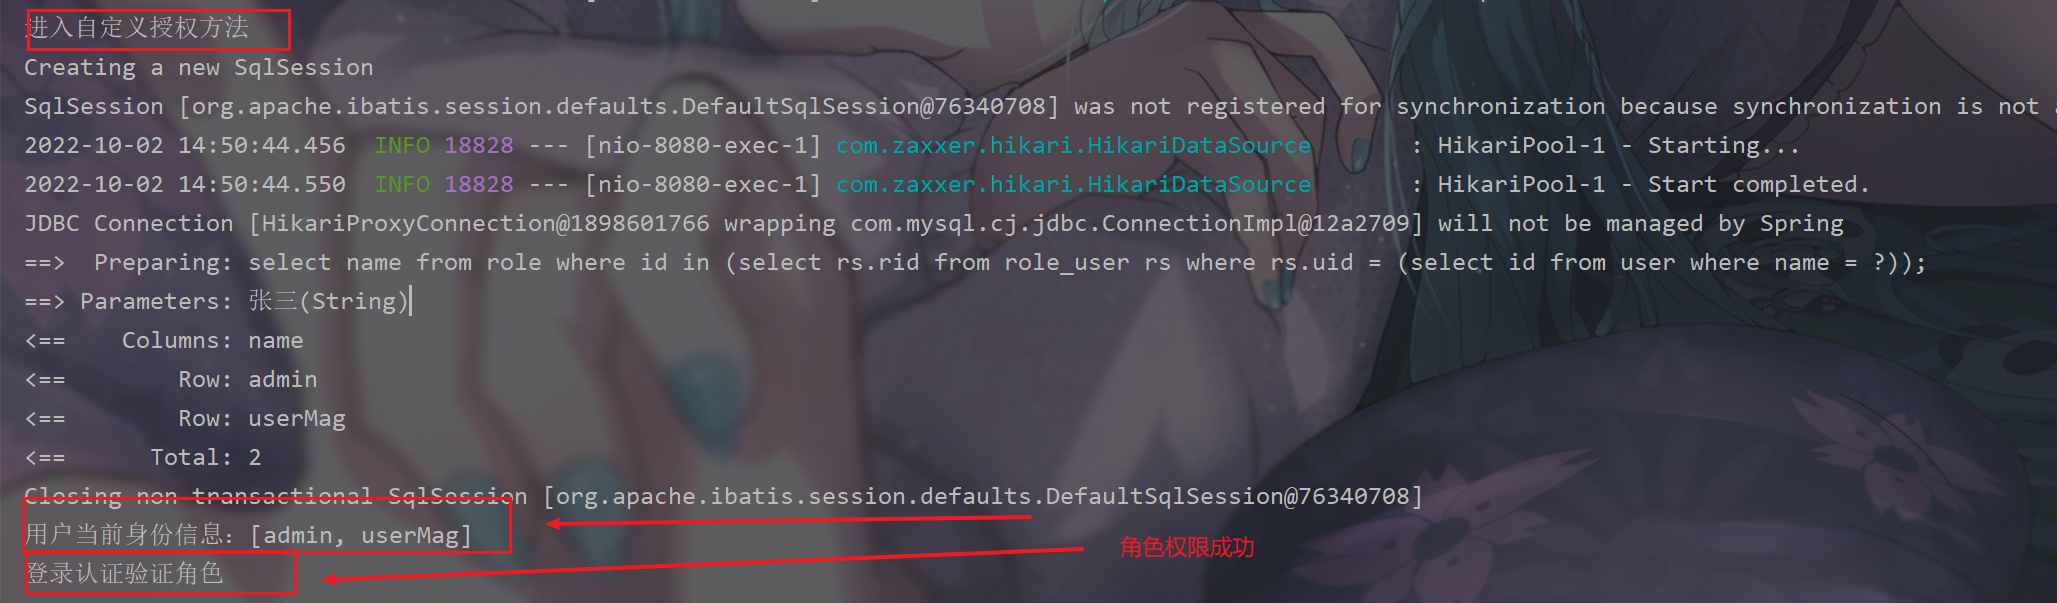
根据用户名查询对应角色信息
<!--List<String> getUserRoleInfo(@Param("principal") String principal);-->
<select id="getUserRoleInfo" resultType="java.lang.String">select namefrom rolewhere id in (select rs.ridfrom role_user rswhere rs.uid = (select id from user where name = #{principal}));
</select>
MyRealm 方法改造
/*** 自定义授权方法:获取当前登录用户权限信息,返回给 Shiro 用来进行授权对比*/
@Override
protected AuthorizationInfo doGetAuthorizationInfo(PrincipalCollection principalCollection) {System.out.println("进入自定义授权方法");// 1. 获取当前用户身份信息String principal = principalCollection.getPrimaryPrincipal().toString();List<String> roles = userService.getUserRoleInfo(principal);System.out.println("用户当前身份信息:" + roles);// 2. 创建对象,存储当前登录的用户的权限和角色SimpleAuthorizationInfo info = new SimpleAuthorizationInfo();info.addRoles(roles);// 3. 返回return info;
}
3.6.5 授权验证- -获取权限进行验证
获取权限验证和获取角色相类似
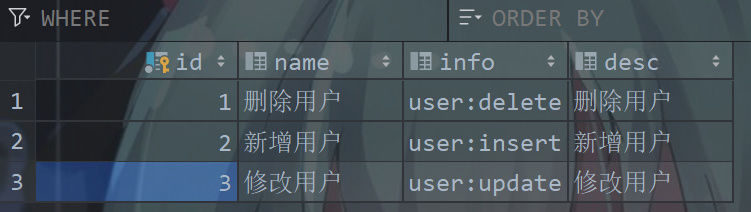
创建库表
CREATE TABLE `permissions` (
`id` BIGINT(20) NOT NULL AUTO_INCREMENT COMMENT '编号',
`name` VARCHAR(30) DEFAULT NULL COMMENT '权限名',
`info` VARCHAR(30) DEFAULT NULL COMMENT '权限信息',
`desc` VARCHAR(50) DEFAULT NULL COMMENT '描述',
PRIMARY KEY (`id`)
) ENGINE=INNODB AUTO_INCREMENT=2 DEFAULT CHARSET=utf8 COMMENT='权限表';
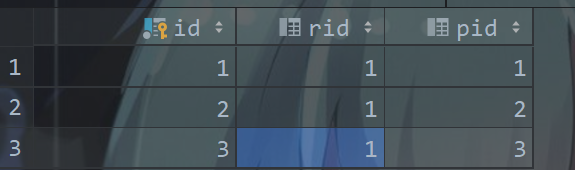
CREATE TABLE `role_ps`
(`id`  BIGINT(20) NOT NULL AUTO_INCREMENT COMMENT '编号',`rid` BIGINT(20) DEFAULT NULL COMMENT '角色 id',`pid` BIGINT(20) DEFAULT NULL COMMENT '权限 id',PRIMARY KEY (`id`)
) ENGINE = INNODBAUTO_INCREMENT = 2DEFAULT CHARSET = utf8 COMMENT ='角色权限映射表';
根据角色名查询对应权限信息
<!--List<String> getUserPermissionInfo(@Param("roles") List<String> roles);-->
<select id="getUserPermissionInfo" resultType="java.lang.String">select info from permissions where id in (select pid from role_ps where rid in (select idfrom rolewhere name in<foreach collection="roles" item="name" open="(" close=")">#{name}</foreach>))
</select>
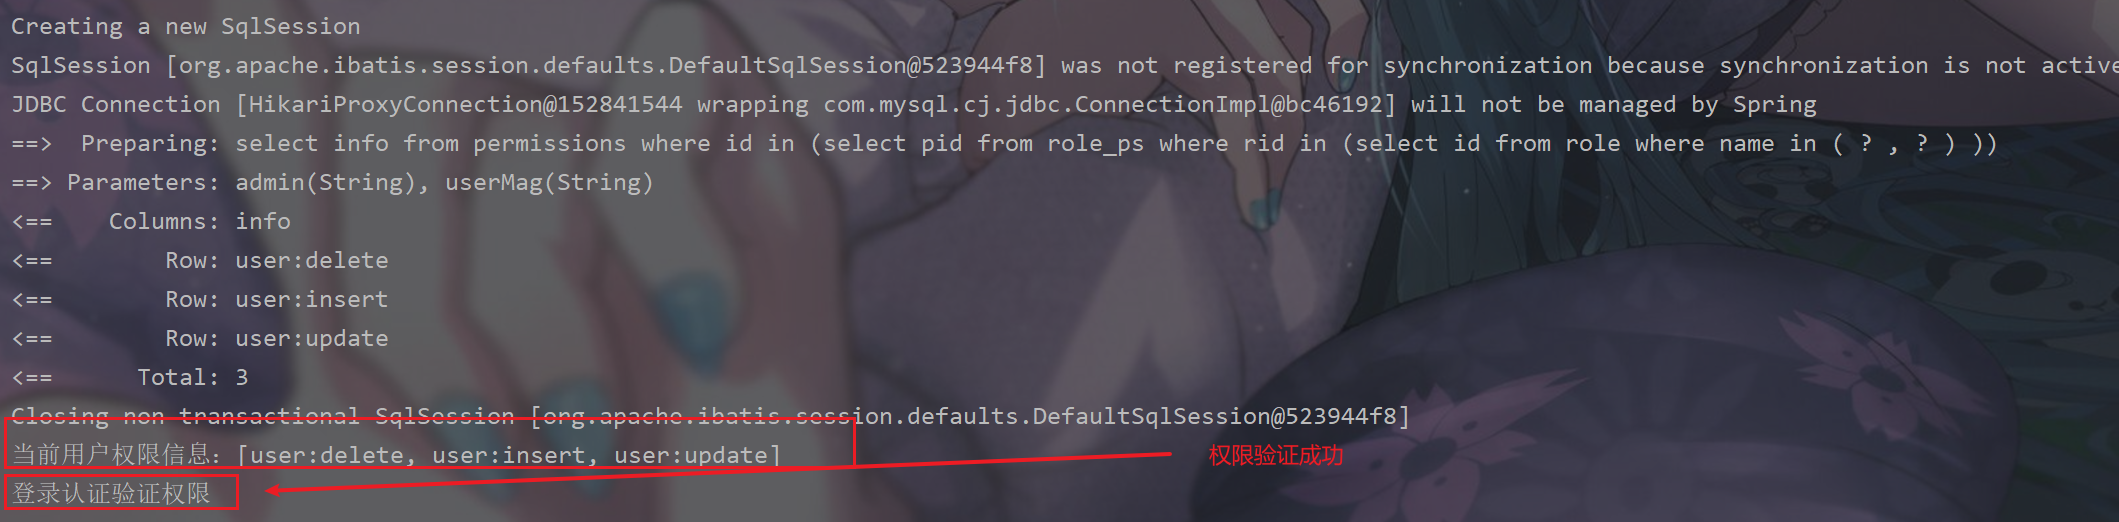
MyRealm 方法改造
protected AuthorizationInfo doGetAuthorizationInfo(PrincipalCollection principalCollection) {System.out.println("进入自定义授权方法");// 1. 获取当前用户身份信息String principal = principalCollection.getPrimaryPrincipal().toString();List<String> roles = userService.getUserRoleInfo(principal);System.out.println("当前用户角色信息:" + roles);// 2. 获取该身份对应权限信息List<String> permissions = userService.getUserPermissionInfo(roles);System.out.println("当前用户权限信息:" + permissions);// 2. 创建对象,存储当前登录的用户的权限和角色SimpleAuthorizationInfo info = new SimpleAuthorizationInfo();info.addRoles(roles);info.addStringPermissions(permissions);// 3. 返回return info;}
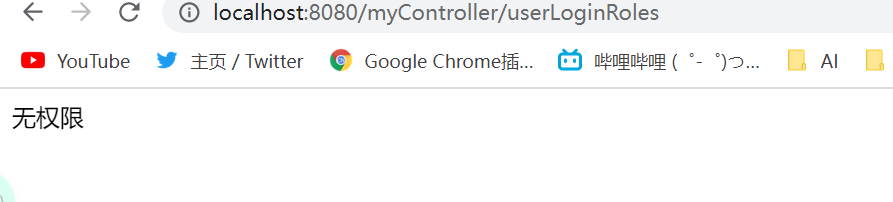
3.6.6 授权验证- -异常处理
核心代码:
/*** @description: 认证异常处理类* @author: ~Teng~* @date: 2022/10/2 15:19*/
@RestControllerAdvice
public class PermissionsException {@ExceptionHandler(UnauthorizedException.class)public String unauthorizedException(Exception ex) {return "无权限";}@ExceptionHandler(AuthenticationException.class)public String authorizationException(Exception ex) {return "权限验证失败";}
}
3.6.7 前端页面授权验证
添加依赖
<dependency><groupId>com.github.theborakompanioni</groupId><artifactId>thymeleaf-extras-shiro</artifactId><version>2.1.0</version>
</dependency>
配置类添加新配置
// 用于解析 thymeleaf 中的 shiro:相关属性
@Bean
public ShiroDialect shiroDialect() {return new ShiroDialect();
}
Thymeleaf 中常用的 shiro:属性
guest 标签
<shiro:guest>
</shiro:guest>
用户没有身份验证时显示相应信息,即游客访问信息。user 标签
<shiro: user >
</shiro:user>
用户已经身份验证/记住我登录后显示相应的信息。authenticated 标签
<shiro:authenticated>
</shiro:authenticated>
用户已经身份验证通过,即 Subject.login 登录成功,不是记住我登录的。notAuthenticated 标签
<shiro:notAuthenticated>
</shiro:notAuthenticated>
用户已经身份验证通过,即没有调用 Subject.login 进行登录,包括记住我自动登录的也属于未进行身份验证。principal 标签
<shiro: principal/>
<shiro:principal property="username"/>
相当于((User)Subject.getPrincipals()).getUsername()。lacksPermission 标签
<shiro:lacksPermission name="org:create">
</shiro:lacksPermission>
如果当前 Subject 没有权限将显示 body 体内容。hasRole 标签
<shiro:hasRole name="admin">
</shiro:hasRole>
如果当前 Subject 有角色将显示 body 体内容。hasAnyRoles 标签
<shiro:hasAnyRoles name="admin,user">
</shiro:hasAnyRoles>
如果当前 Subject 有任意一个角色(或的关系)将显示 body 体内容。lacksRole 标签
<shiro:lacksRole name="abc">
</shiro:lacksRole>
如果当前 Subject 没有角色将显示 body 体内容。hasPermission 标签
<shiro:hasPermission name="user:create">
</shiro:hasPermission>
如果当前 Subject 有权限将显示 body 体内容
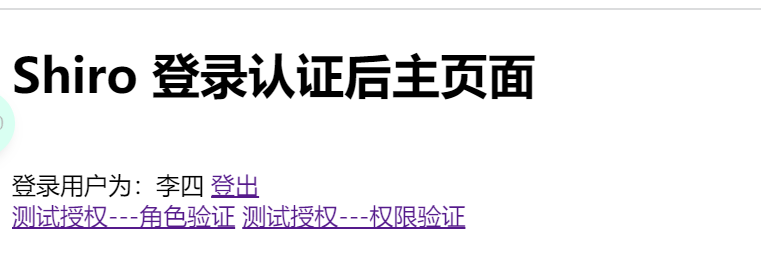
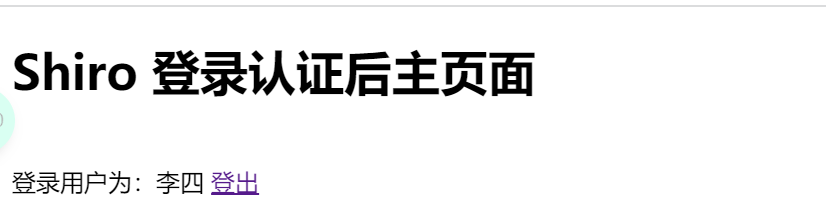
改造 main.html
<h1>Shiro 登录认证后主页面</h1>
<br>
登录用户为:<span th:text="${session.user}"></span>
<a href="/logout">登出</a>
<br/>
<a shiro:hasRole="admin" href="/myController/userLoginRoles">测试授权-角色验证</a>
<br>
<a shiro:hasPermission="user:delete" href="/myController/userPermissions">测试授权-权限验证</a>

3.7 会话管理
3.7.1 SessionManager
会话管理器,负责创建和管理用户的会话(Session)生命周期,它能够在任何环境中在本地管理用户会话,即使没有Web/Servlet/EJB容
器,也一样可以保存会话。默认情况下,Shiro会检测当前环境中现有的会话机制(比如Servlet容器)进行适配,如果没有(比如独立应
用程序或者非Web环境),它将会使用内置的企业会话管理器来提供相应的会话管理服务,其中还涉及一个名为SessionDAO的对象。
SessionDAO负责Session的持久化操作(CRUD),允许Session数据写入到后端持久化数据库。
3.7.2 会话管理实现
SessionManager 由 SecurityManager 管理。Shiro提供了三种实现
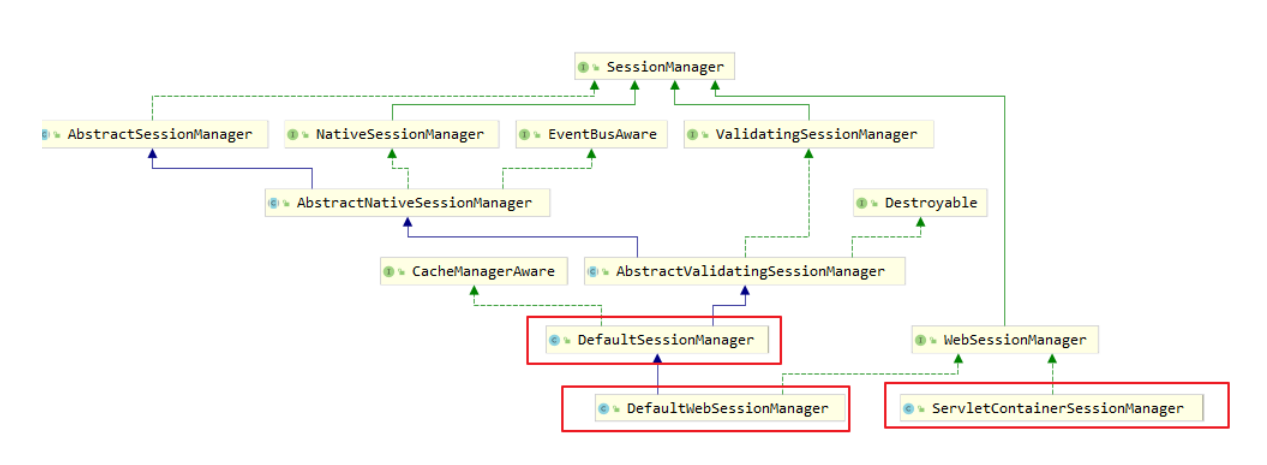
DefaultSessionManager:用于JavaSE环境ServletContainerSessionManager:用于web环境,直接使用Servlet容器的会话DefaultWebSessionManager:用于web环境,自己维护会话(不使用Servlet容器的会话管理)
3.7.3 获得 session 方式
// 1. 实现
Session session = SecurityUtils.getSubject().getSession();
session.setAttribute("key", "value");
// 2. 说明
/*** Controller 中的 request,在 shiro 过滤器中的 doFilerInternal 方法,被包装成* ShiroHttpServletRequest。* SecurityManager 和 SessionManager 会话管理器决定 session 来源于 ServletRequest* 还是由 Shiro 管理的会话。* 无论是通过 request.getSession 或 subject.getSession 获取到 session,操作* session,两者都是等价的。*/