Eclipse2022创建SSM项目及问题解决
使用Eclipse创建SSM项目的过程中会遇到一些问题,相对于IDEA而言更为繁琐,该篇文章是在使用Eclipse2022,并且设备上已经安装、配置好了Tomcat和Maven的基础之上进行的,目的是为了记录在Eclipse上成功创建并配置一个基础的能成功跑起来的SSM项目的流程。
1、创建Maven项目。File -> New -> Maven Project

2、 按照下图选择,创建简单Maven,然后点击Next。
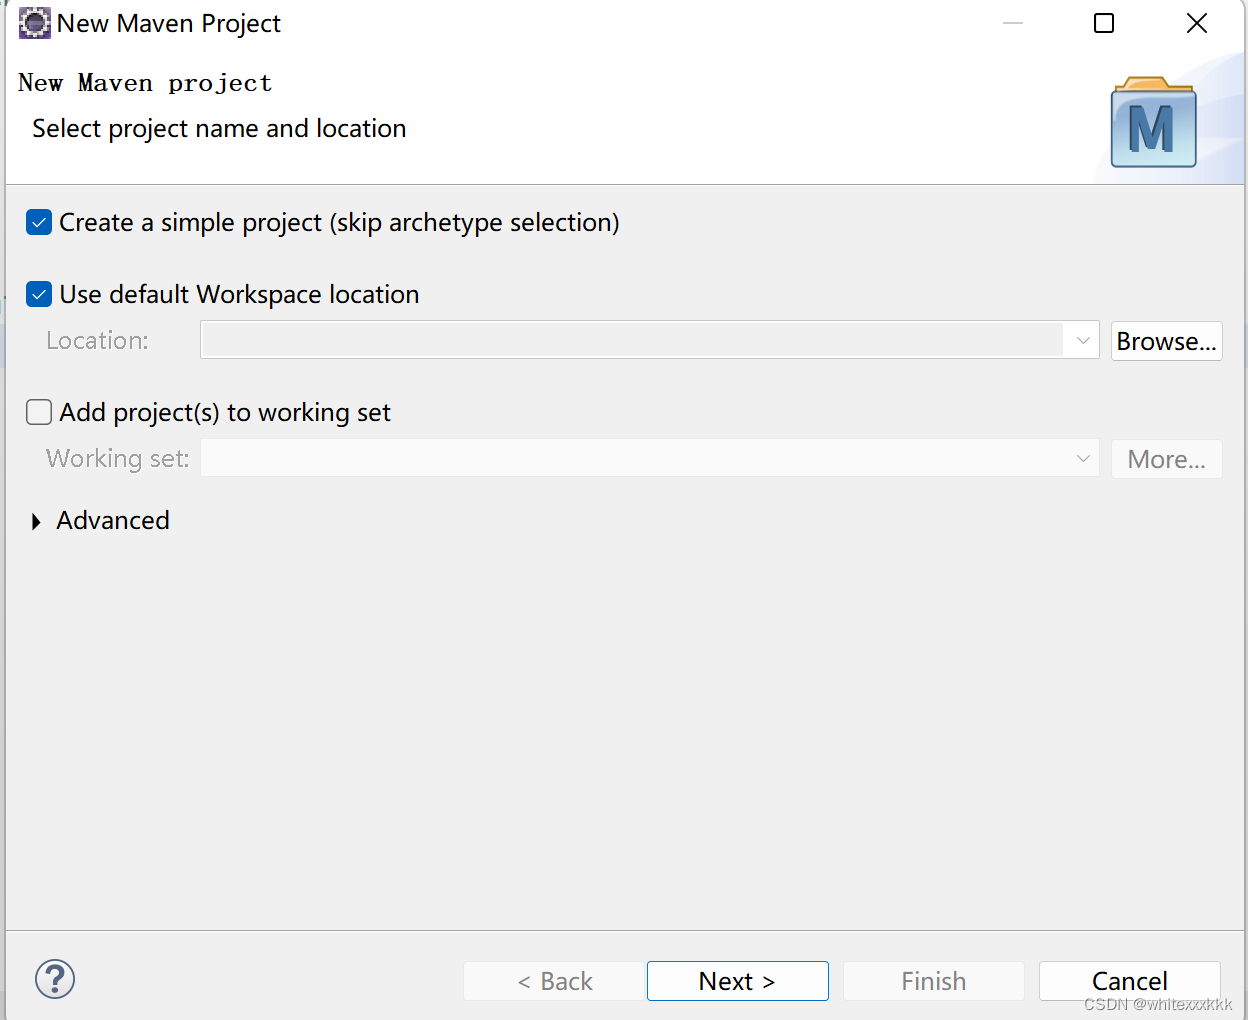
因为不明原因,2022的Eclipse如果不选择Create a simple project这一项,在后续选择原型阶段将没有原型可选,从而无法创建Maven工程。而这里未能选择的动态Web模块后续可以手动添加。
3、 如下图所示输入group id & artifact id,具体内容可以根据自身需求来写,输入完毕后点击Finish完成。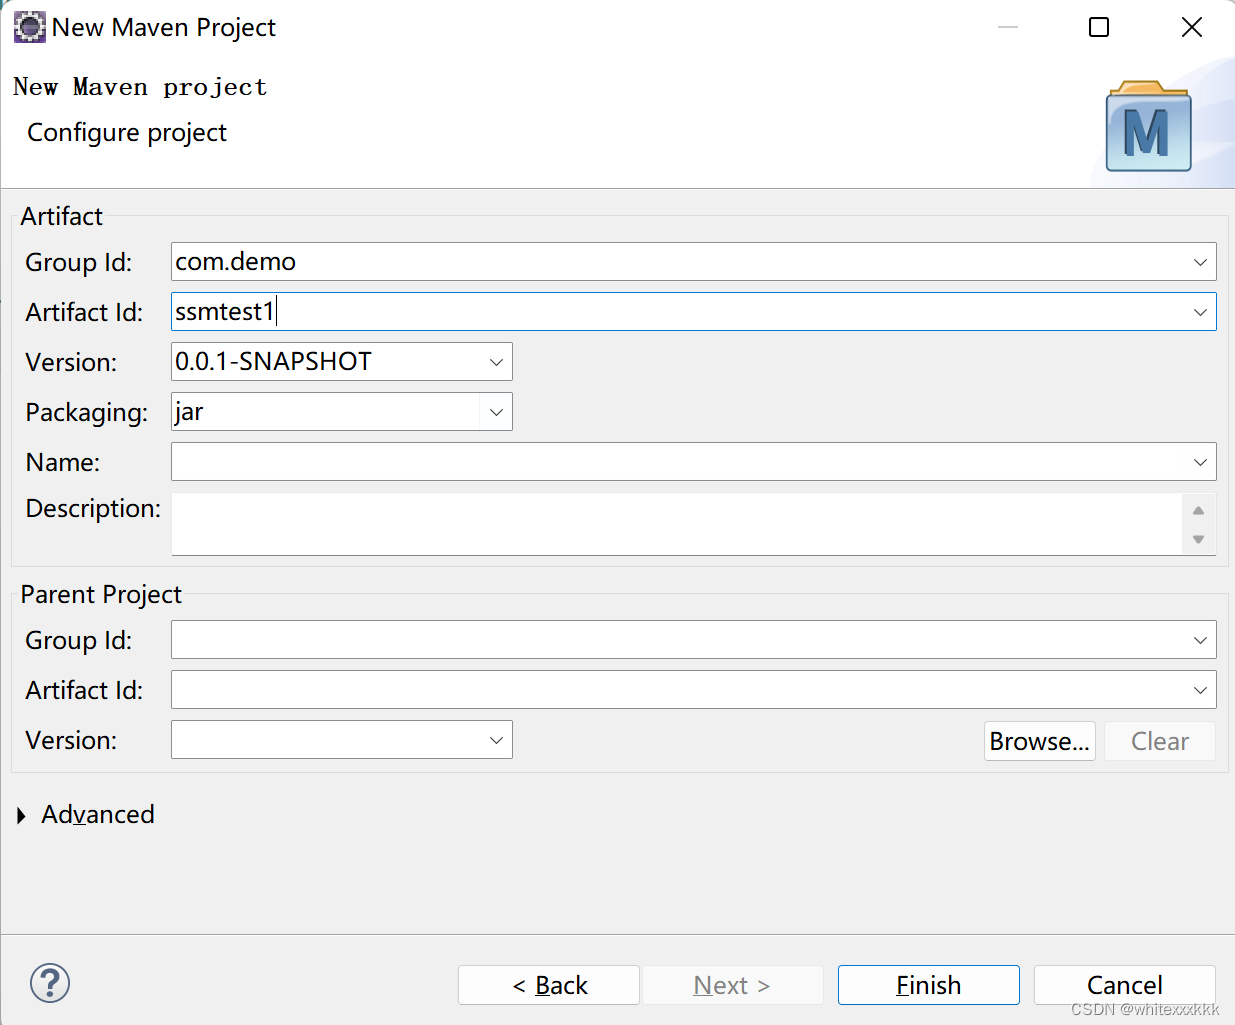
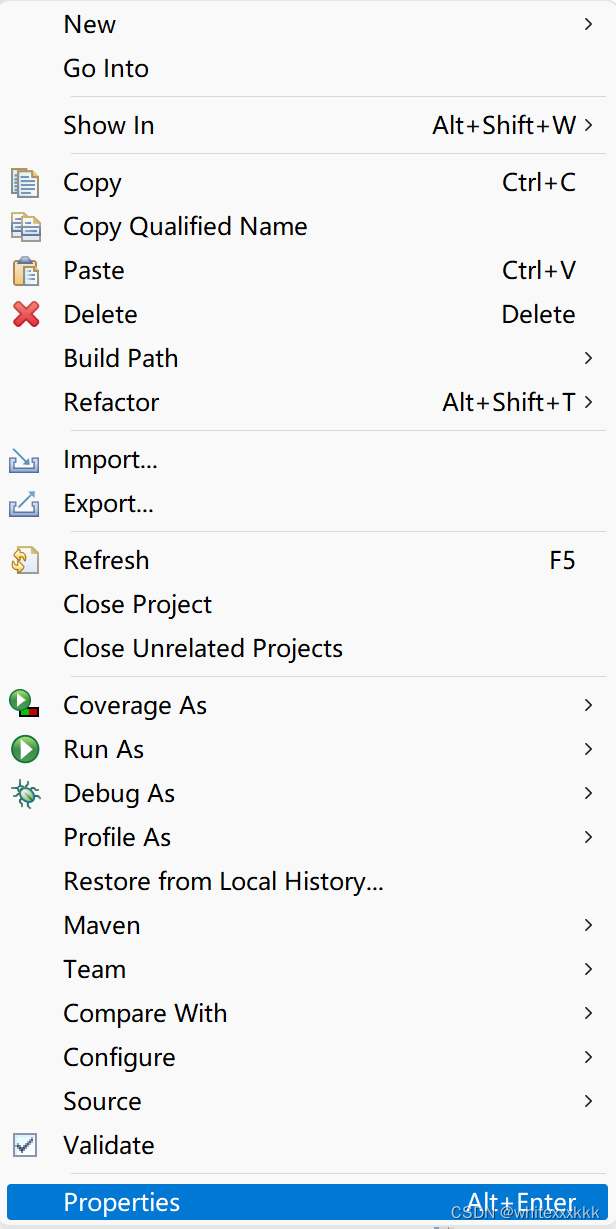
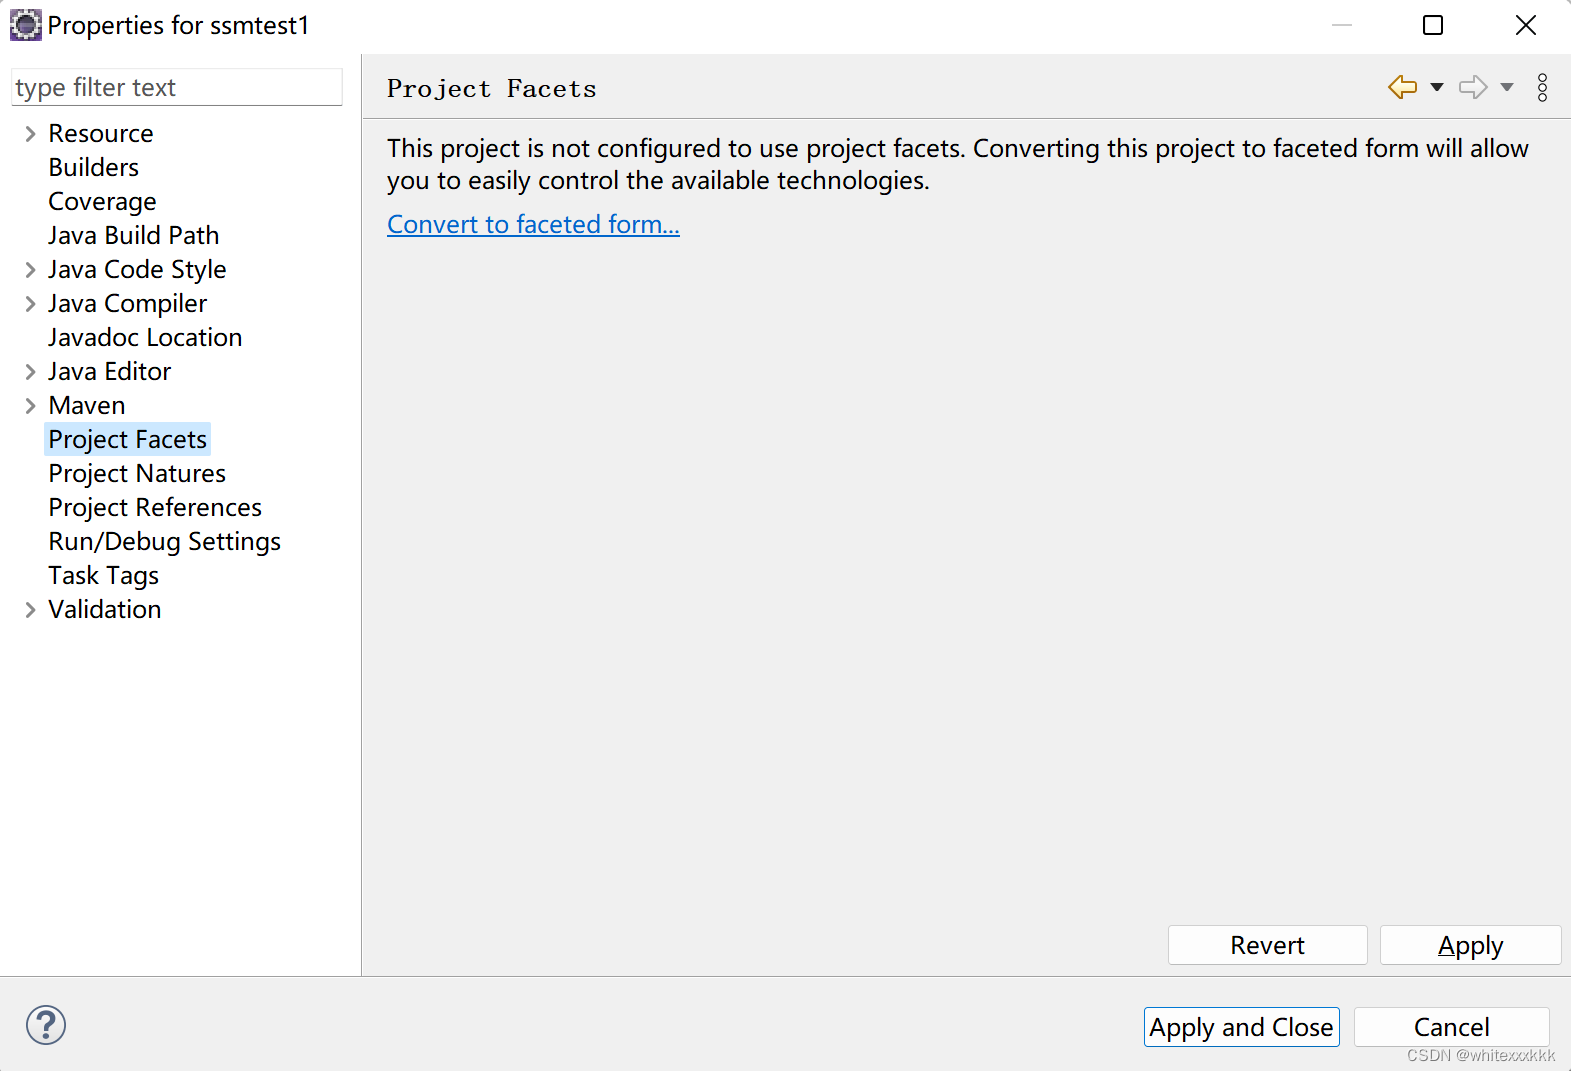
4、项目创建完成后,右键项目点击属性按钮,打开项目的属性窗口。
5、首先添加刚才未能添加上的动态Web模块。点击Project Factes -> Convert to faceted form,勾选动态Web模块,具体版本可根据需要选择,然后点击Apply应用。
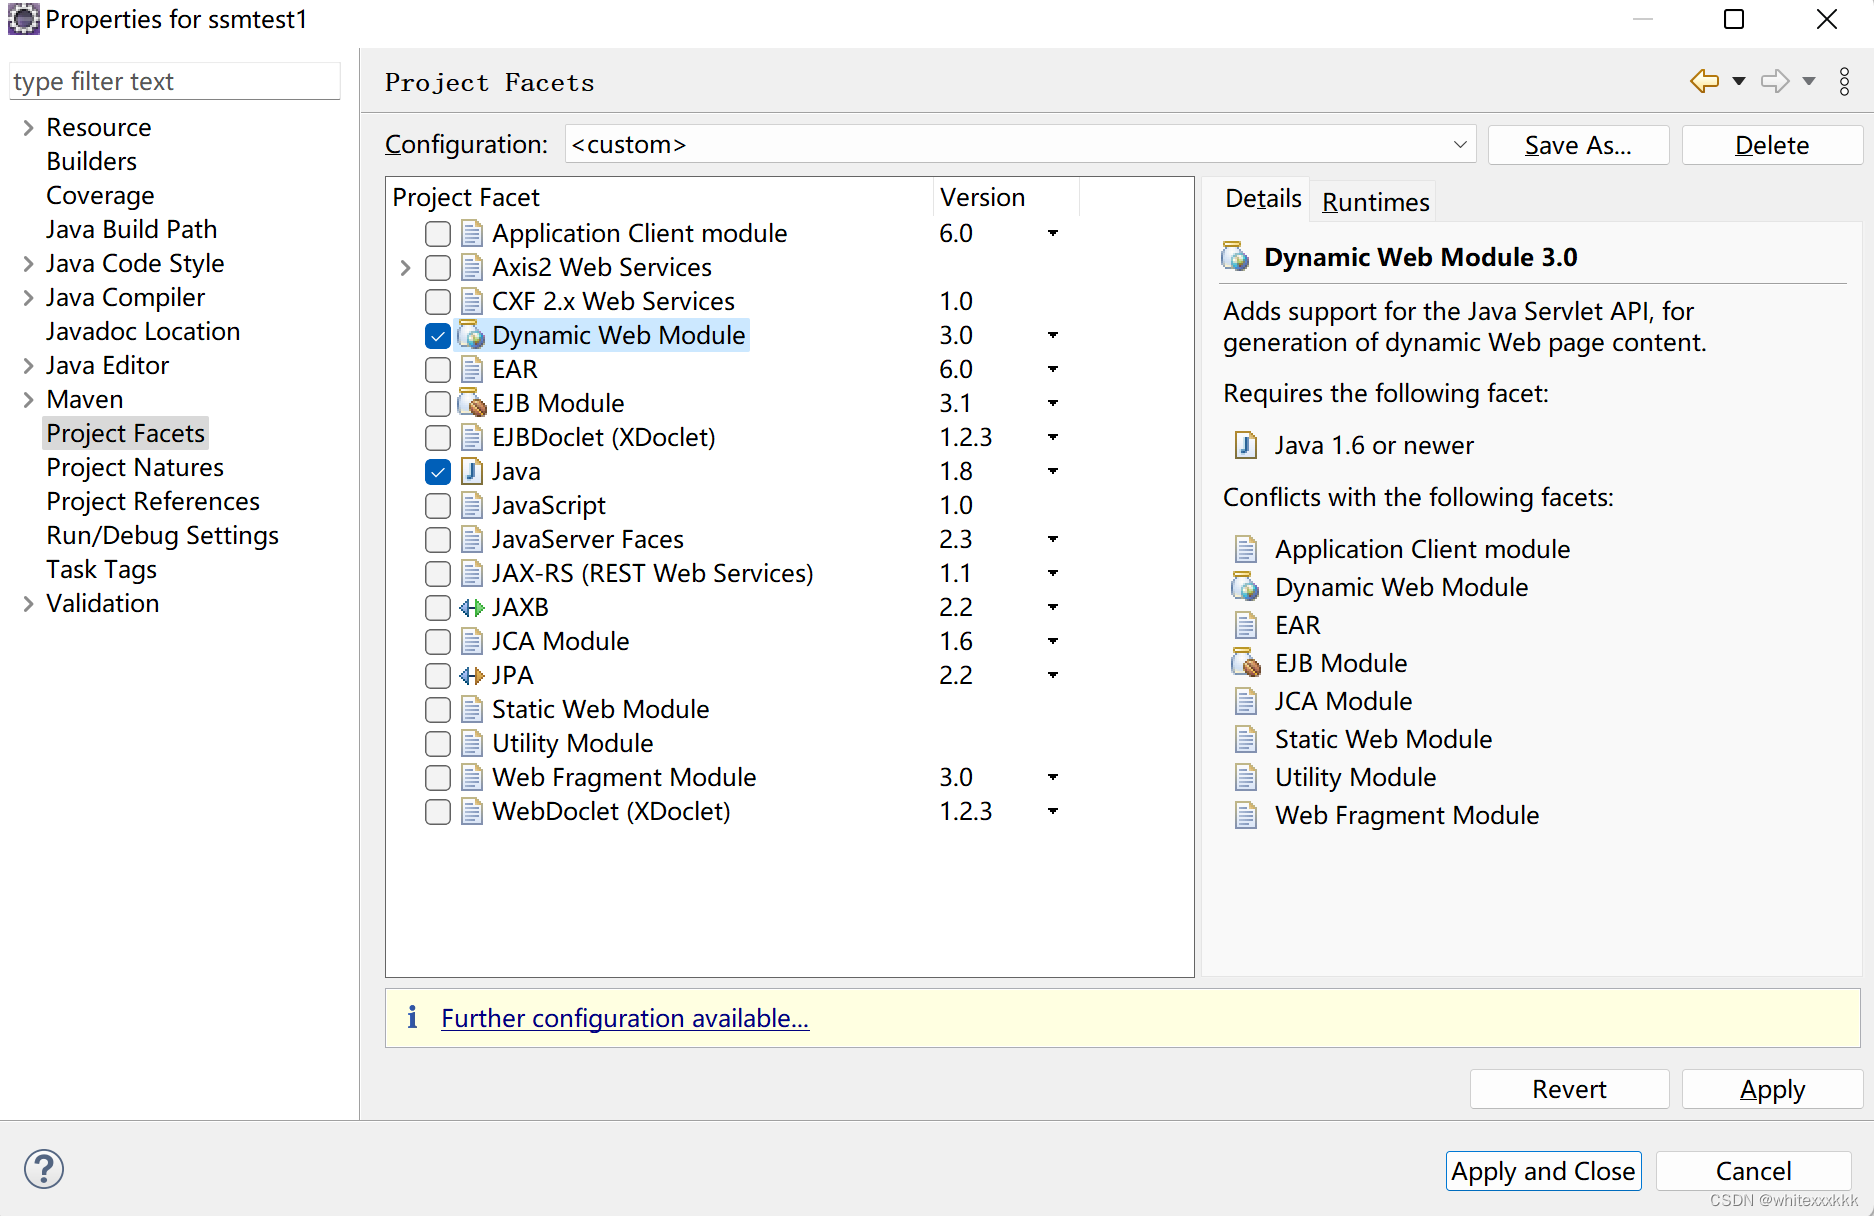
注:由于未知原因,我这里设置一遍动态Web模块会失效,表现为在tomcat add and remove中不显示该项目,这时重新勾选一遍动态Web模块即可。
6、同样在项目属性窗口中,进入Project Natures选项卡。
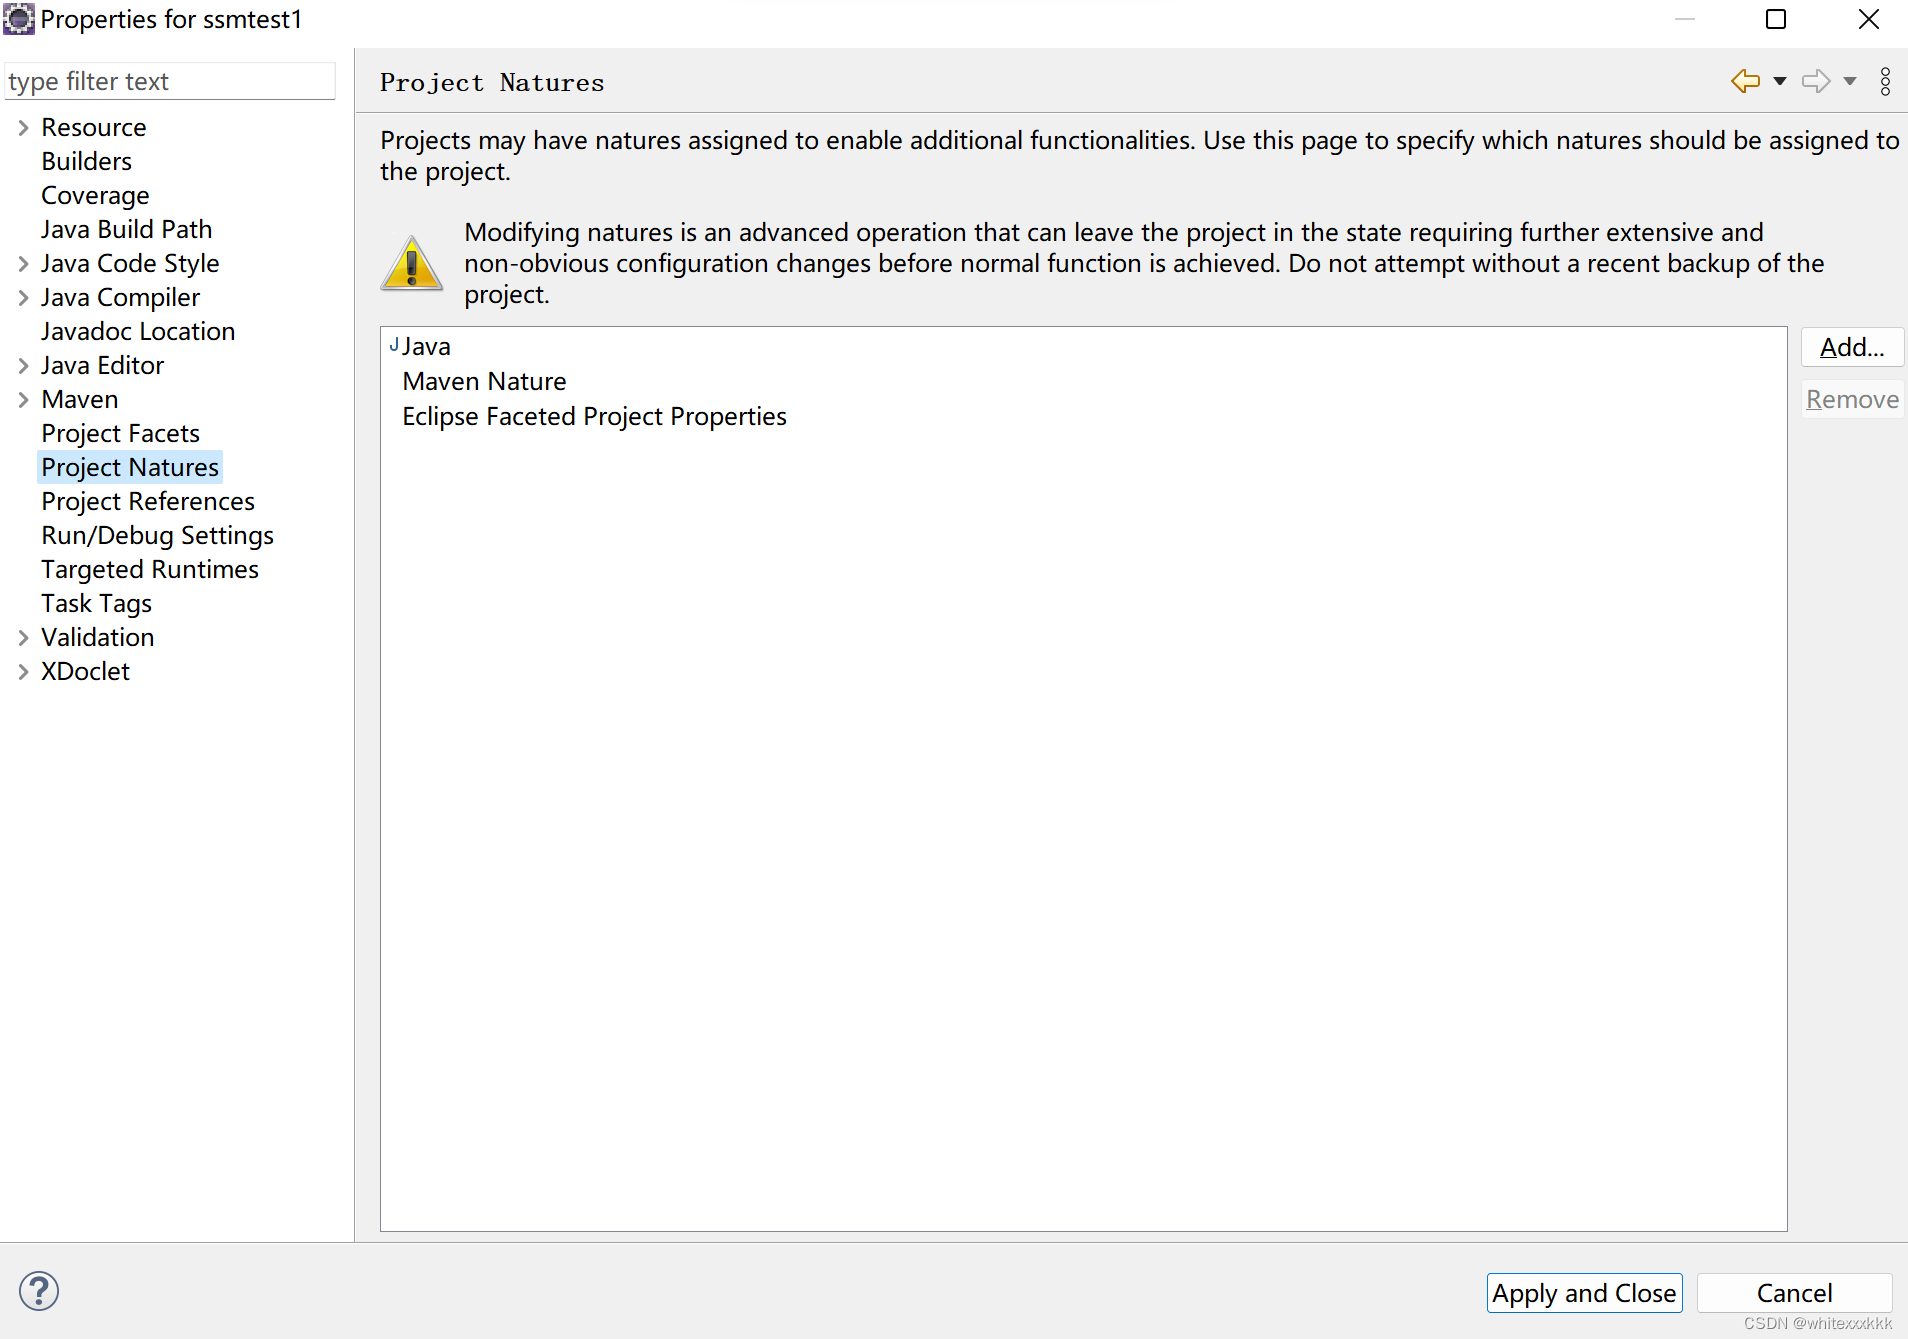
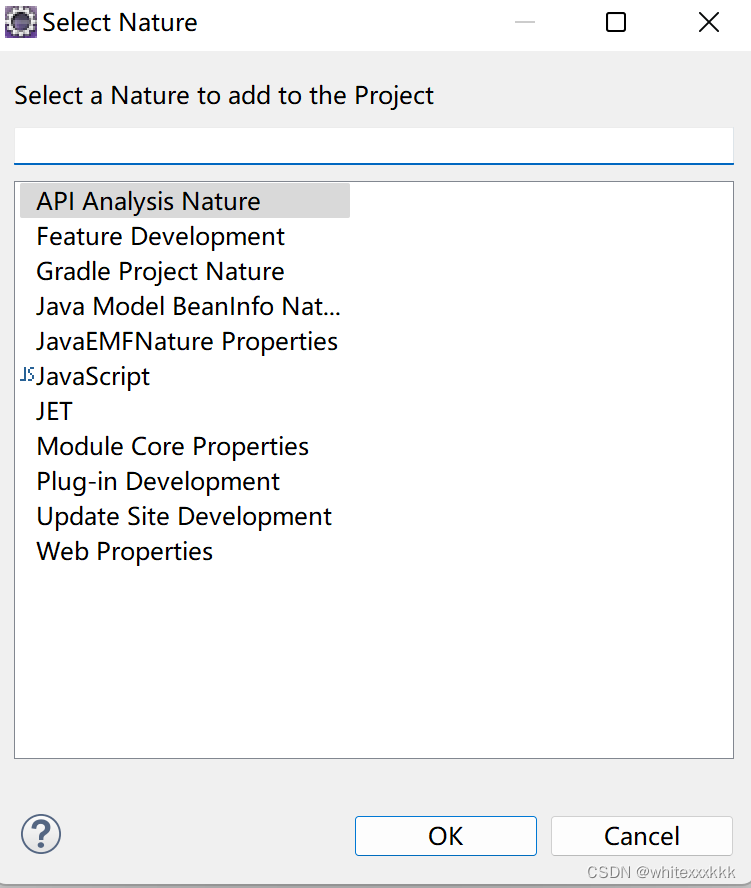
7、此时可以发现项目的Nature很少,点击右侧Add按钮,弹出抽口点击OK,逐个添加JavaScript、Web Properties、JavaEMFNature Properties。
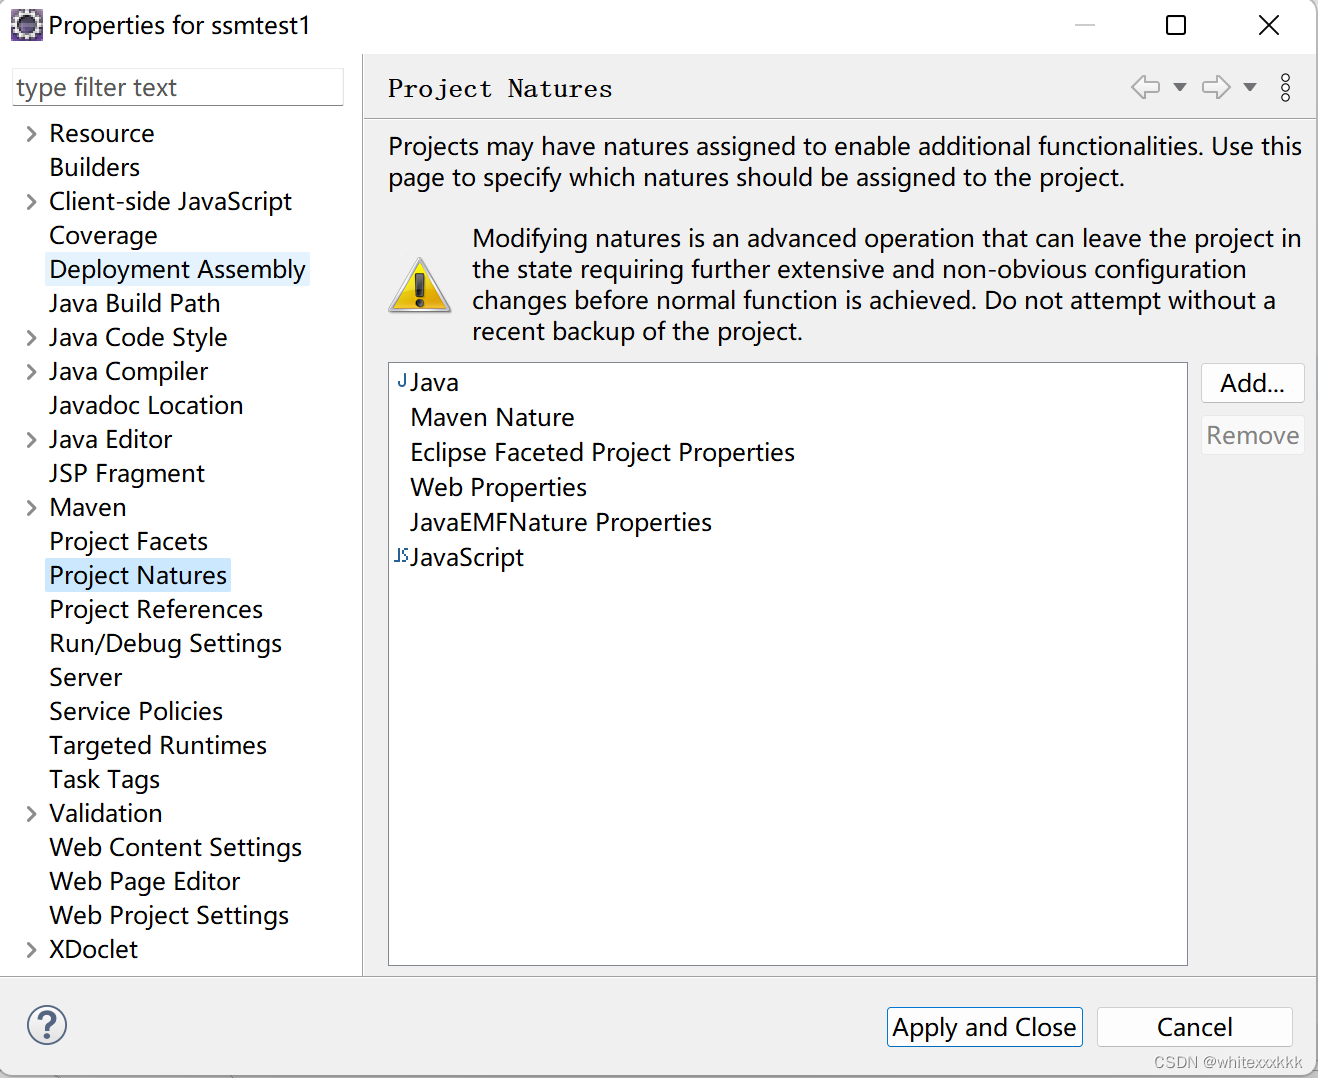
8、添加完成之后的界面如下,此时点击Apply and Close,然后重新打开项目属性界面、点击进入Deployment Assembly选项卡。
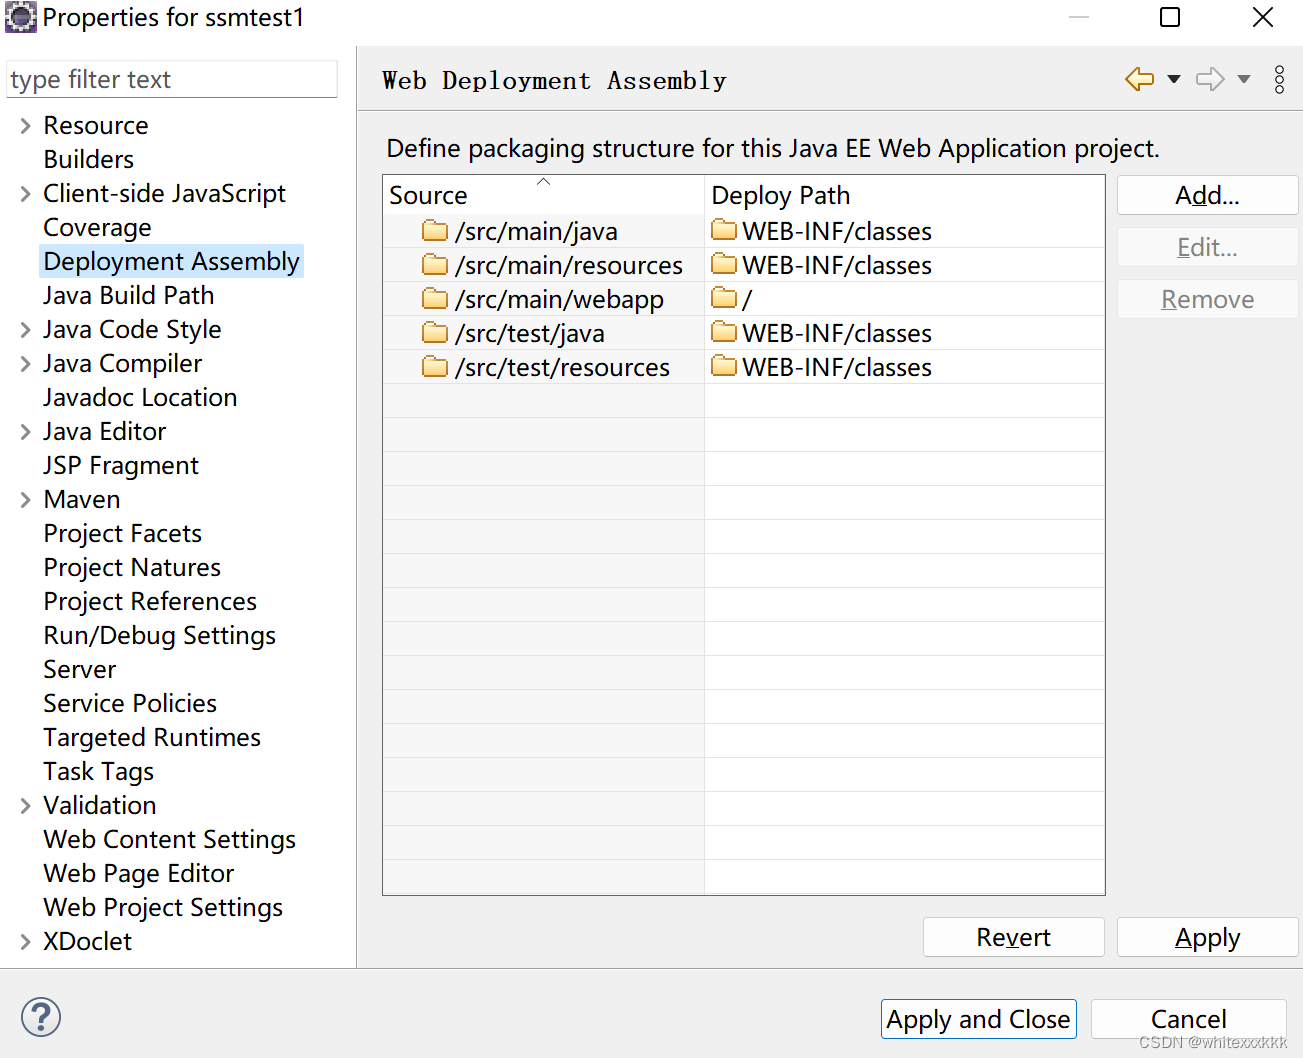
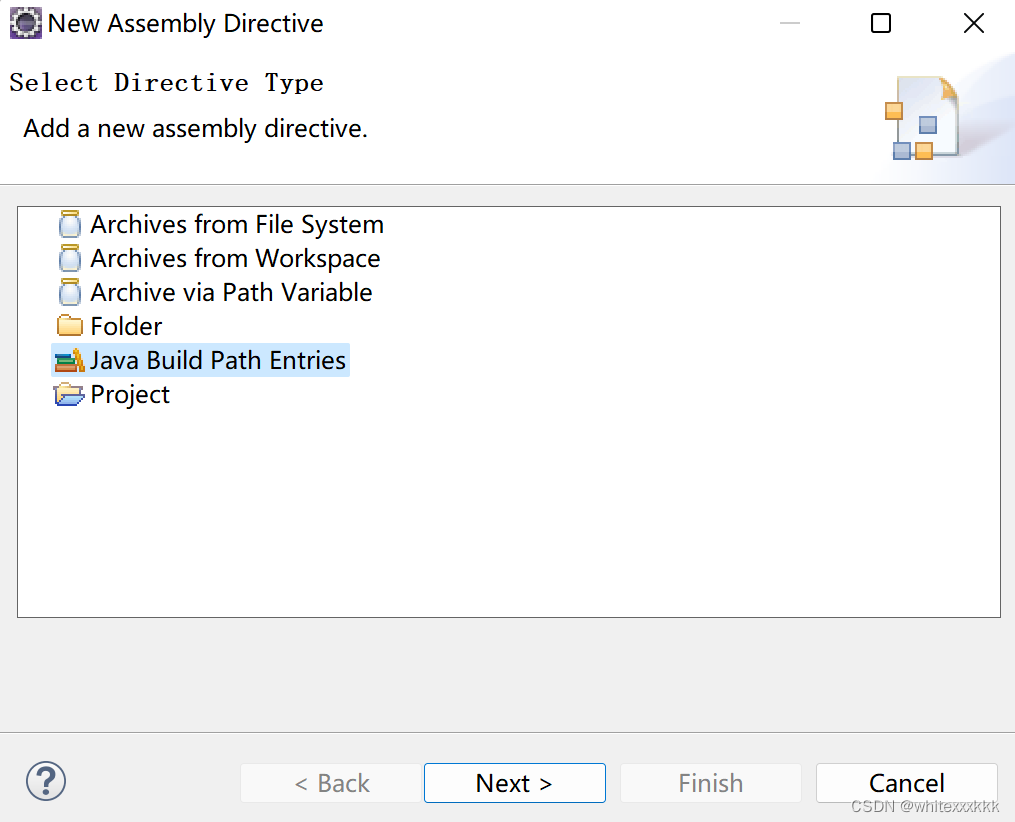
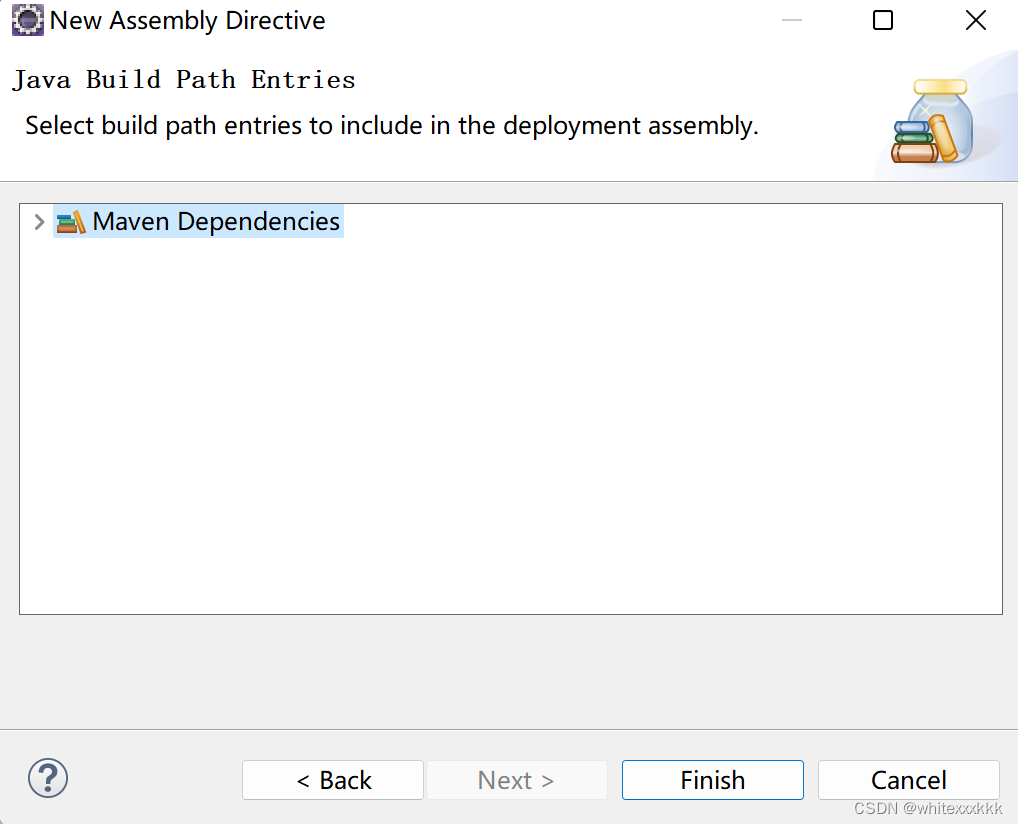
9、点击右侧Add按钮、选中Java Build Path Entries进入下一步、选中Maven Dependencies点击Finish完成,然后关闭项目属性界面。
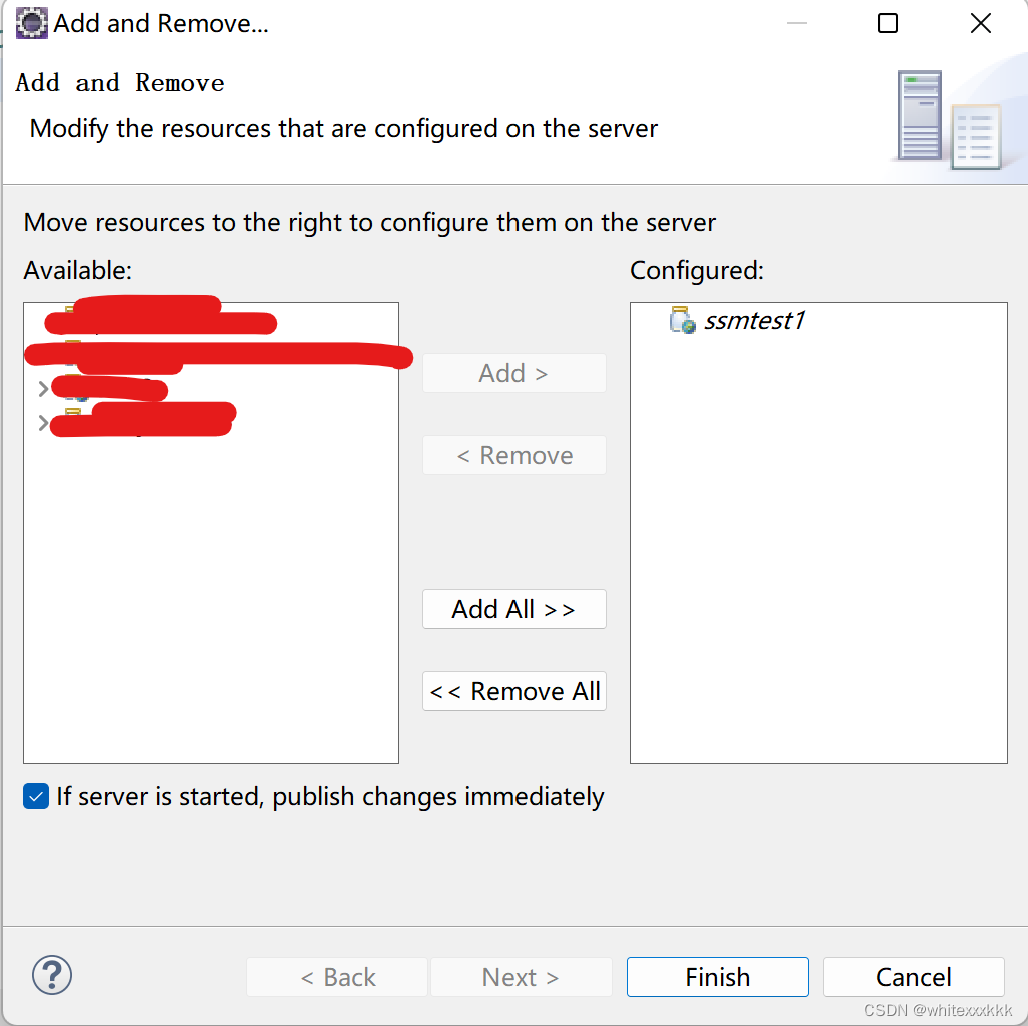
10、打开Servers窗口,右键已经配置好的Tomcat,点击Add and Remove选项来到Add and Remove窗口,选中刚才创建的项目,点击中间的Add按钮,将其移动到有右侧,然后点击Finish完成。

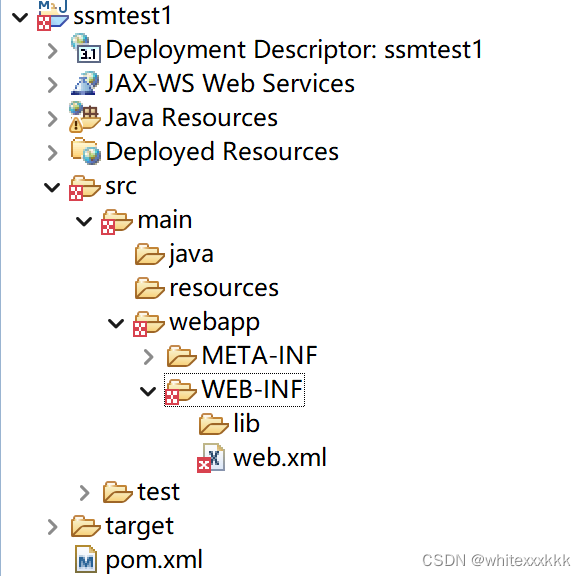
11、在项目的 src/main/webapp/WEB-INF 路径下创建并配置 web.xml
web.xml内容示例:
<?xml version="1.0" encoding="UTF-8"?>
<web-app xmlns="http://xmlns.jcp.org/xml/ns/javaee"xmlns:xsi="http://www.w3.org/2001/XMLSchema-instance"xsi:schemaLocation="http://xmlns.jcp.org/xml/ns/javaee http://xmlns.jcp.org/xml/ns/javaee/web-app_3_1.xsd"version="3.1"><display-name>SpringMVCDemo Web Application</display-name><welcome-file-list><welcome-file>index.html</welcome-file></welcome-file-list><servlet><servlet-name>mvc-dispatcher</servlet-name><servlet-class>org.springframework.web.servlet.DispatcherServlet</servlet-class><load-on-startup>1</load-on-startup><init-param><param-name>contextConfigLocation</param-name><param-value>classpath:springmvc-servlet.xml</param-value></init-param></servlet><servlet-mapping><servlet-name>mvc-dispatcher</servlet-name><url-pattern>/</url-pattern></servlet-mapping><filter><filter-name>encodingFilter</filter-name><filter-class>org.springframework.web.filter.CharacterEncodingFilter</filter-class><init-param><param-name>encoding</param-name><param-value>UTF-8</param-value></init-param><init-param><param-name>forceEncoding</param-name><param-value>true</param-value></init-param></filter><filter-mapping><filter-name>encodingFilter</filter-name><url-pattern>/*</url-pattern></filter-mapping>
</web-app>
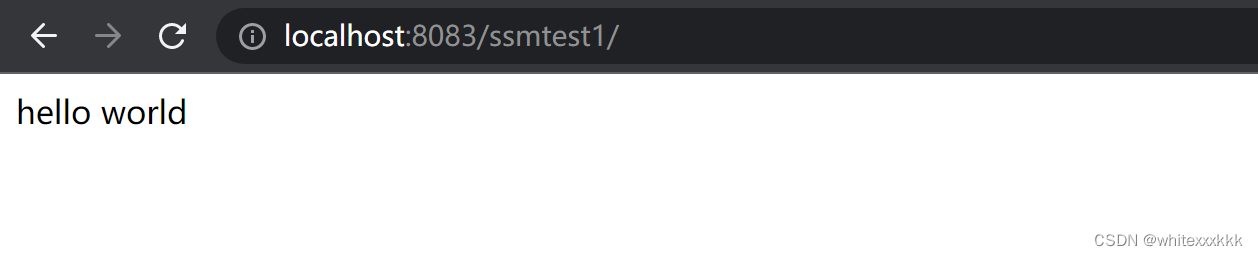
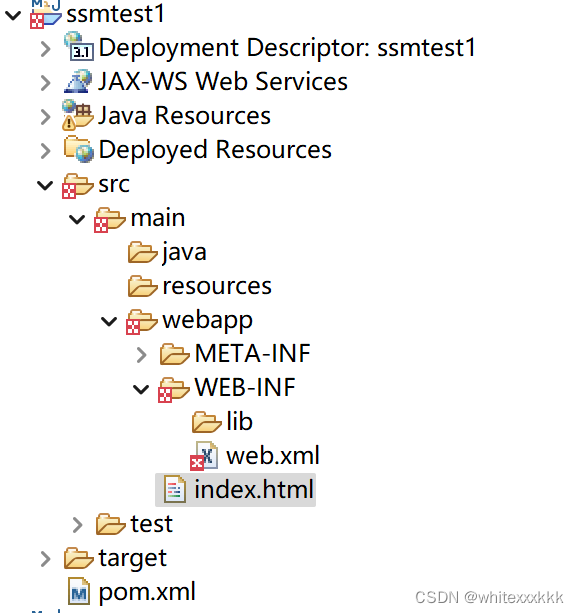
12、在 webapp 目录下创建欢迎页面 index.html,随便写入一些内容
index.html内容示例:
<html><head><title>index</title></head><body>hello world</body>
</html>
13、resources路径下,添加并配置springmvc-servlet.xml文件,示例内容如下

springmvc-servlet.xml
<?xml version="1.0" encoding="UTF-8"?>
<beans xmlns="http://www.springframework.org/schema/beans"xmlns:xsi="http://www.w3.org/2001/XMLSchema-instance"xmlns:context="http://www.springframework.org/schema/context"xmlns:mvc="http://www.springframework.org/schema/mvc"xmlns:jpa="http://www.springframework.org/schema/data/jpa"xmlns:tx="http://www.springframework.org/schema/tx"xsi:schemaLocation="http://www.springframework.org/schema/beans http://www.springframework.org/schema/beans/spring-beans.xsdhttp://www.springframework.org/schema/context http://www.springframework.org/schema/context/spring-context.xsdhttp://www.springframework.org/schema/mvc http://www.springframework.org/schema/mvc/spring-mvc.xsdhttp://www.springframework.org/schema/data/jpa http://www.springframework.org/schema/data/jpa/spring-jpa.xsdhttp://www.springframework.org/schema/tx http://www.springframework.org/schema/tx/spring-tx.xsd"><!--指明 controller 所在包,并扫描其中的注解--><context:component-scan base-package="com.company.demo"/><!-- 静态资源(js、image等)的访问 --><mvc:default-servlet-handler/><!-- 开启注解 --><mvc:annotation-driven/></beans>
14、配置pom文件,添加SSM框架maven依赖,内容示例如下,版本可自行选择。
<project xmlns="http://maven.apache.org/POM/4.0.0" xmlns:xsi="http://www.w3.org/2001/XMLSchema-instance" xsi:schemaLocation="http://maven.apache.org/POM/4.0.0 https://maven.apache.org/xsd/maven-4.0.0.xsd"><modelVersion>4.0.0</modelVersion><groupId>com.demo</groupId><artifactId>ssmtest1</artifactId><version>0.0.1-SNAPSHOT</version><properties><spring.version>4.2.6.RELEASE</spring.version></properties><dependencies><dependency><groupId>org.springframework</groupId><artifactId>spring-webmvc</artifactId><version>${spring.version}</version></dependency><dependency><groupId>org.springframework.data</groupId><artifactId>spring-data-jpa</artifactId><version>1.10.1.RELEASE</version></dependency><dependency><groupId>com.mchange</groupId><artifactId>c3p0</artifactId><version>0.9.5.2</version></dependency><dependency><groupId>javax.servlet</groupId><artifactId>jstl</artifactId><version>1.2</version></dependency></dependencies><build><finalName>springmvcdemo</finalName><plugins><plugin><groupId>org.apache.maven.plugins</groupId><artifactId>maven-compiler-plugin</artifactId><configuration><source>1.8</source><target>1.8</target></configuration></plugin></plugins></build>
</project>
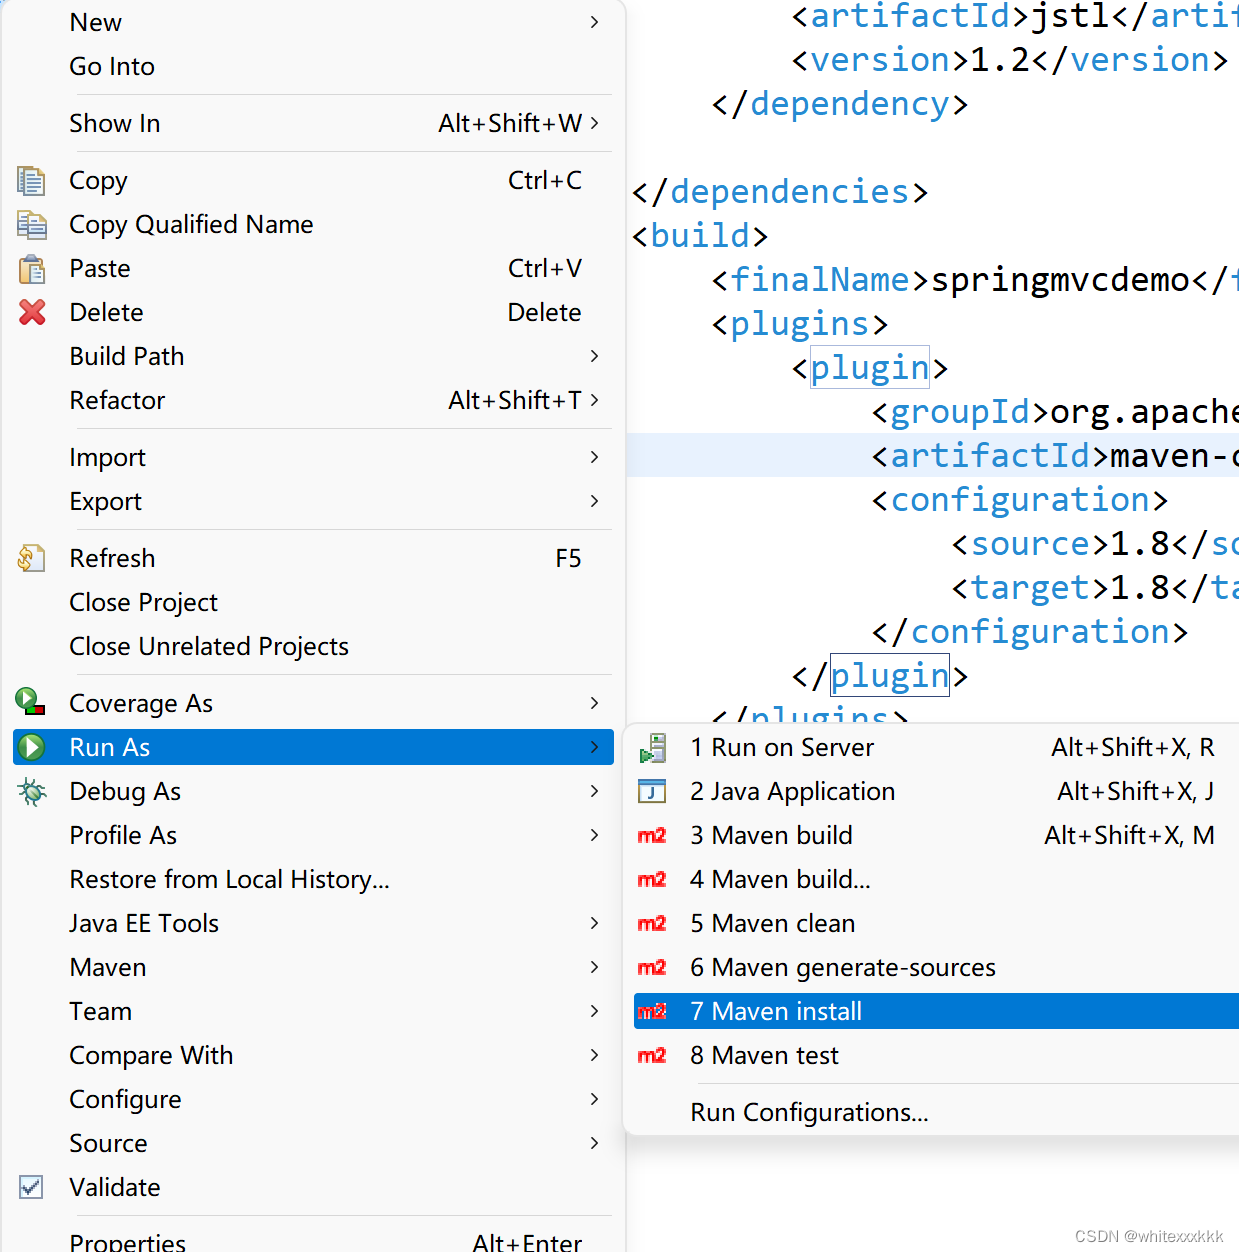
15、右键项目名 -> Run As -> Maven install。下载并加载maven依赖。
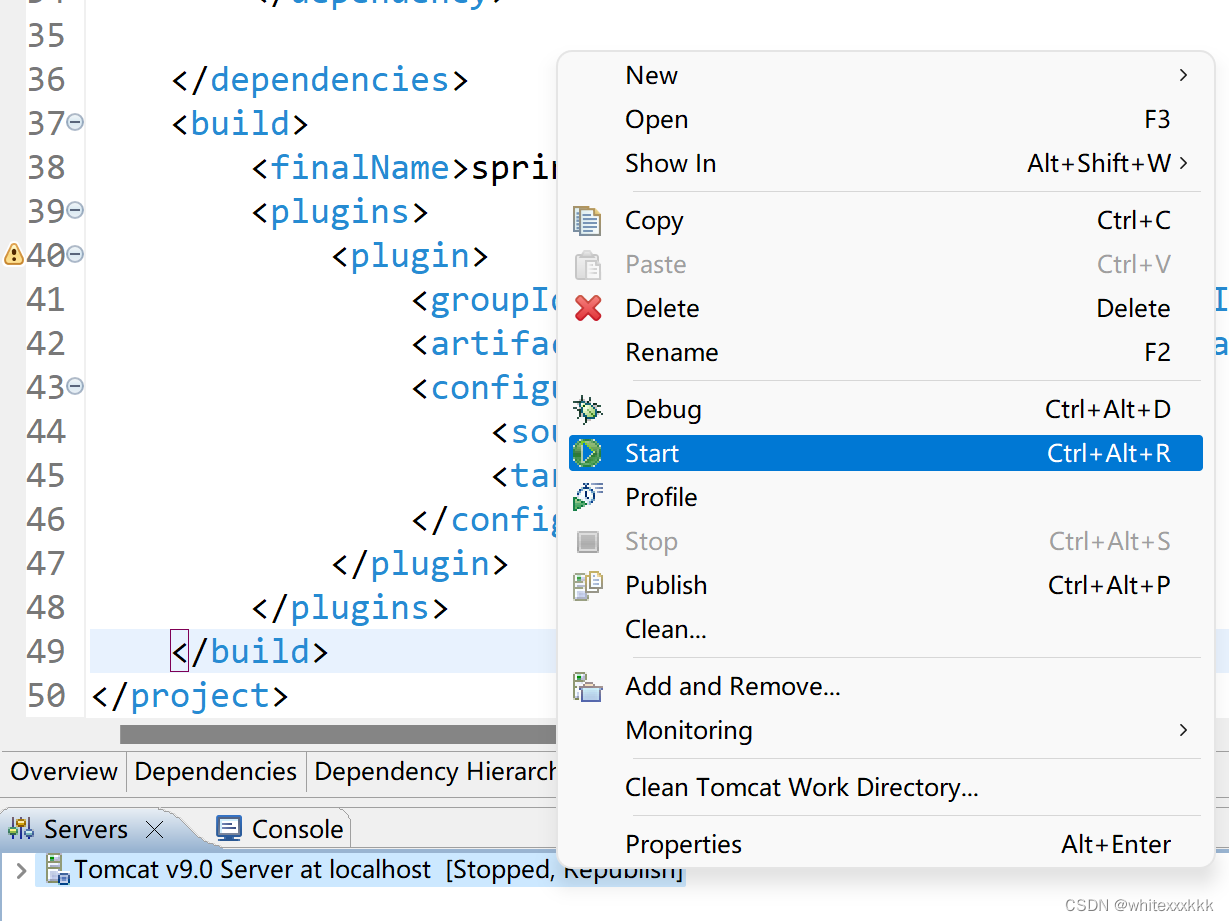
16、安装成功后启动tomcat
17、然后在对应url访问项目欢迎页面即可,我这里的tomcat端口是8083。