文章目录
- 01.知识概述部分
- 02.知识回顾说明
- 03.实时同步服务监控软件部署:
- 存储服务器部署
- 第一个里程:安装监控数据变化的软件
- 第二个里程:监控命令使用
- 事件信息:inotify软件采用触发机制进行监控
- 可监听的事件
- 实现永久监控目录中数据变化 inotifywait -m 目录
- 实现目录中数据递归监控: inotifywait -rm 目录
- 实现目录中数据排除监控功能↓
- 将无用的信息进制输出
- 指定输出信息格式↓
- 04.利用同步利用脚本方式实现
- 编写脚本思路:
- 1)发现变化的数据信息 inotifywait
- 2)将变化的数据进行传输 rsync
- 3)监控操作和同步操作建立联系
- 脚本解释过程:
- 脚本内容: while死循环 read 自动赋值
- 守护进程方式运行脚本:
- 05.利用软件实现实时同步过程
- sersync软件部署过程:
- 第一个里程:下载软件二进制包
- 第二个里程:解压软件,并保存到相应目录中
- 第三个里程:修改sersync配置文件 看11点30的视频
- 第四个里程:启动服务程序
- 实时同步服务出现异常:
- 课程知识总结说明
- 作业:
01.知识概述部分
1)实时同步服务命令参数
2)利用脚本实现实时同步
3)利用实时同步软件程序 sersync lsync(扩展)
02.知识回顾说明
1) NFS服务配置参数 (用户映射)
anonuid: 指定用户映射信息(uid) 默认映射用户为nfsnobodyanongid: 指定用户组映射信息(gid) 默认映射用户组为nfsnobody
2)NFS服务相关命令
rpcinfo 查看NFS服务注册信息showmount 查看可以挂载存储目录信息exportfs 管理NFS服务运行状态
3)NFS客户端操作说明
a 客户端挂载操作 临时挂载 永久挂载
b 客户端挂载参数 defaults
4)NFS服务企业应用
弃用NFS方案(解决耦合度过高问题)
03.实时同步服务监控软件部署:
https://man.linuxde.net/inotifywait inotifywait的man手册
存储服务器部署
第一个里程:安装监控数据变化的软件
条件:确认epel源可以使用
yum install -y inotify-tools
语法结构:
inotifywait 参数 事件 监控目录
第二个里程:监控命令使用
https://www.cnblogs.com/zoe233/p/12035383.html【集群实战】inotify
[root@nfs01 ~ 12:06:07]$ rpm -ql inotify-tools
语法结构:inotifywait --help
inotifywait  参数  事件  监控目录
inotifywait  目录         默认只监控一次
[root@nfs01 ~ 12:07:16]$ inotifywait /data
Setting up watches.
Watches established.
/data/ OPEN 123.txt
/usr/bin/inotifywait     ----监控数据变化命令
/usr/bin/inotifywatch    ----统计数据变化次数    添加 删除  修改
-m    是要持续监视变化。
-r    使用递归形式监视目录。
-q    输出少量信息(只输出事件信息)
-e    指定要监视的事件信息。
-d    类似-m参数,后台运行,会有日志,守护进程模式
-c    每列有,分隔 (MySQL便于生成表格,便于恢复数据和迁移)
事件信息:inotify软件采用触发机制进行监控
可监听的事件

实现永久监控目录中数据变化 inotifywait -m 目录
-m|--monitor    Keep listening for events forever. 保持永久监控
-d|--daemon     Same as --monitor类似-m参数
实现目录中数据递归监控: inotifywait -rm 目录
-r|--recursive Watch directories recursively.监控目录中子目录数据变化
实现目录中数据排除监控功能↓
--exclude  <pattern>
Exclude all events on files matching the extended regular expression <pattern>
排除指定数据信息不要进行监控(区分大小写识别)--excludei <pattern> Like --exclude but case insensitive.
排除指定数据信息不要进行监控(忽略大小写识别)
将无用的信息进制输出
-q|--quiet Print less (only print events). 输出少量信息(只输出事件信息)
指定输出信息格式↓
--timefmt
strftime-compatible format string for use with %T in --format string.
定义显示的时间格式信息(时间格式的定义和 date命令类似)↓

--format
Print using a specified printf-like format string; read the man page for more details.指定输出信息格式,指定文件变化的详细信息。↓ %e显示触发事件信息   %w显示监控目录信息   %f触发事件数据信息

-c|--csv      	Print events in CSV format.   (MySQL)以csV格式打印事件。
-e|--event <event1> [ -e|--event <event2> ... ]         Listen for specific event(s)指定监视事件信息
04.利用同步利用脚本方式实现
编写脚本思路:
1)发现变化的数据信息 inotifywait
inotifywait -mrq --format "%w%f"  /date -e "close_write,move,create,dalete"  数据信息
inotifywatch:可以收集被监视的文件系统使用度统计数据,指文件系统事件发生的次数统计。
2)将变化的数据进行传输 rsync
rsync -az 数据信息 rsync_backup@172.16.1.41::backup --password-file=/etc/rsync.paasswd
3)监控操作和同步操作建立联系
shell脚本循环语句
· for 循环语句 ----有限循环
· while 循环语句 ----无限循环
条件为真就会一直循环↓

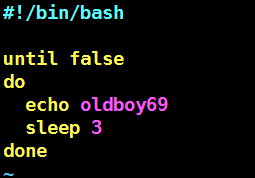
· until 循环语句 ----无限循环
条件为假就会一直循环↓
脚本解释过程:
inotifywait -mrq --format "%w%f" /data -e "close_write,move,create,delete"|while read data_info信息   --- 赋值 买一 --- 循环动作 增一
dorsync -az  $data_info --delete  rsync_backup@172.16.1.41::backup  --password-file=/etc/rsync.password
done
脚本内容: while死循环 read 自动赋值
#!/bin/bash
inotifywait -mrq --format "%w%f" /data -e "close_write,move,create,delete"|while read data_info
dorsync -az  /data/ --delete  rsync_backup@172.16.1.41::backup  --password-file=/etc/rsync.passwd
done[root@nfs01 ~ 10:42:32]$ sh /server/scripts/date.sh[root@nfs01 ~ 10:32:00]$ ll /data
total 0
-rw-r--r-- 1 root root 0 Jan 13 12:10 123.txt
[root@nfs01 ~ 10:38:45]$ touch /data/234.txt
[root@nfs01 ~ 10:38:54]$ touch /data/2345.txt
[root@nfs01 ~ 10:41:13]$ vim /etc/rsyncd.conf
[root@nfs01 ~ 10:41:51]$ touch /data/245.txt
[root@nfs01 ~ 10:42:47]$ [root@backup ~ 10:42:41]# ll /backup/
total 0
-rw-r--r-- 1 rsync rsync 0 Jan 13 12:10 123.txt
-rw-r--r-- 1 rsync rsync 0 Jan 14 10:41 2345.txt
-rw-r--r-- 1 rsync rsync 0 Jan 14 10:38 234.txt
-rw-r--r-- 1 rsync rsync 0 Jan 14 10:42 245.txt
守护进程方式运行脚本:
[root@nfs01 ~ 10:53:20]$ nohup /server/scripts/date.sh &
[2] 7889
[root@nfs01 ~ 10:53:34]$ nohup: ignoring input and appending output to ‘nohup.out’

05.利用软件实现实时同步过程
https://www.cnblogs.com/zoe233/p/12035383.html【集群实战】inotify
sersynv ----实时同步软件 部署前提(inotify-tools rsync守护进程模式)
诞生过程:金山公司开发人员 周洋 ----数据实时同步(inotify+rsync 脚本)----开发实时同步程序(inotify+rsync) https://github.com/wsgzao/sersync
LNMP LNMT
L(linux)N(nginx)M(MYSQL)P(php python)
sersync软件部署过程:
第一个里程:下载软件二进制包
https://github.com/wsgzao/sersync
第二个里程:解压软件,并保存到相应目录中
[root@nfs01 tools 11:29:17]$ yum install -y unzip[root@nfs01 tools 11:30:07]$ cd /server/tools[root@nfs01 tools 11:30:07]$ unzip sersync-master.zip  [root@nfs01 tools 11:30:42]$ cd sersync-master/[root@nfs01 sersync-master 11:33:32]$ tar xf sersync2.5.4_64bit_binary_stable_final.tar.gz [root@nfs01 sersync-master 11:33:49]$ tree
.
├── GNU-Linux-x86
│   ├── confxml.xml
│   └── sersync2
├── inotify-tools-3.14.tar.gz
├── README.md
├── rsync-3.1.1.tar.gz
└── sersync2.5.4_64bit_binary_stable_final.tar.gz1 directory, 6 files[root@nfs01 sersync-master 11:34:09]$ mkdir /usr/local/sersync[root@nfs01 sersync-master 11:34:45]$ mv GNU-Linux-x86/* /usr/local/sersync/
第三个里程:修改sersync配置文件 看11点30的视频
vim confxml.xml
6 <filter start="false"> ----排除指定数据不要进行同步(默认关闭)
7 <exclude expression="(.*)\.svn"></exclude>
8 <exclude expression="(.*)\.gz"></exclude>
9 <exclude expression="^info/*"></exclude>
10 <exclude expression="^static/*"></exclude>
11 </filter>12 <inotify> ----监控事件信息
13 <delete start="true"/>
14 <createFolder start="true"/>
15 <createFile start="false"/>
16 <closeWrite start="true"/>
17 <moveFrom start="true"/>
18 <moveTo start="true"/>
19 <attrib start="false"/>
20 <modify start="false"/>
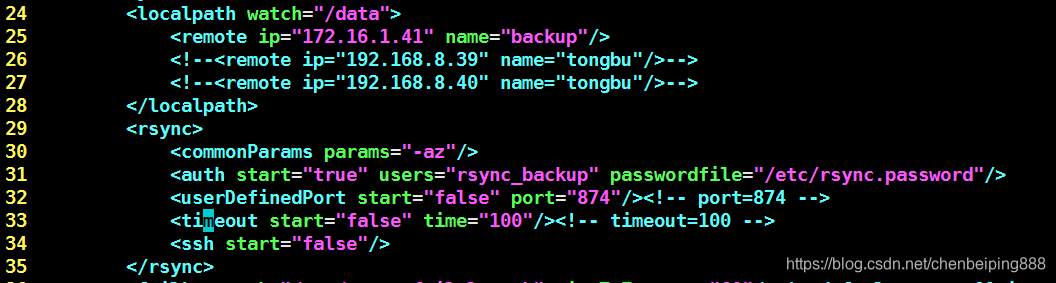
21 </inotify>24 <localpath watch="/opt/tongbu"> ----实现实时同步配置
25 <remote ip="127.0.0.1" name="tongbu1"/>
26 <!--<remote ip="192.168.8.39" name="tongbu"/>-->
27 <!--<remote ip="192.168.8.40" name="tongbu"/>-->
28 </localpath>
29 <rsync>
30 <commonParams params="-artuz"/>
31 <auth start="false" users="root" passwordfile="/etc/rsync.pas"/>
32 <userDefinedPort start="false" port="874"/><!-- port=874 -->
33 <timeout start="false" time="100"/><!-- timeout=100 -->
34 <ssh start="false"/>
35 </rsync>
第四个里程:启动服务程序
先将命令写进环境变量,或者将命令放到/usr/bin下面
vim /etc/profile
export PATH=/usr/local/sbin:/usr/local/bin:/usr/sbin:/usr/bin:/root/bin:/usr/local/sersync[root@nfs01 sersync 11:57:24]# mv sersync2 sersync[root@nfs01 ~ 11:56:47]# sersync -h    查看软件参数
set the system param
execute:echo 50000000 > /proc/sys/fs/inotify/max_user_watches
execute:echo 327679 > /proc/sys/fs/inotify/max_queued_events
parse the command param
参数-d:启用守护进程模式
参数-r:在监控前,将监控目录与远程主机用rsync命令推送一遍
c参数-n: 指定开启守护线程的数量,默认为10个
参数-o:指定配置文件,默认使用confxml.xml文件
(/opt/sersync/confxml.xml)sersync  -dro  /usr/local/sersync/confxml.xml 参数-m:单独启用其他模块,使用 -m refreshCDN 开启刷新CDN模块
参数-m:单独启用其他模块,使用 -m socket 开启socket模块
参数-m:单独启用其他模块,使用 -m http 开启http模块
不加-m参数,则默认执行同步程序--include=PATTERN 指定不排除而需要传输的文件模式
--include="oldboy03.txt"
实时同步服务出现异常:
修改配置文件参数,进行调试
<debug start="true"/>
linux系统软件安装方法:
1)yum安装软件方式
2)rpm安装软件方式
3)编译安装软件方式
4)二进制包安装软件
课程知识总结说明
1)实时同步监控软件命令 inotifywait命令使用
2)实时同步服务脚本实现 脚本编写思路 while循环语句 while read 变量
3)实时同步服务软件实现 sersync
部署过程(二进制方式) — 配置文件编写 — 利用sersync命令如何启动服务
作业:
- lsync软件实现实时同步方法
http://www.mamicode.com/info-detail-2476271.html