目录
- 1.@EnableAsync 注解
- 1.1 配置类使用示例
- 1.2 复制请求上下文
- 2.用法1:@Async 注解
- 2.1 测试Controller
- 2.2 测试Service
- 2.3 测试ServiceImpl
- 2.4.测试
- 4.用法2:直接使用 taskExecutor 做异步
- 4.1 重新实现:测试ServiceImpl
- 4.2 测试
- 5.@Async异步不生效原因
在 Spring Boot 中,可以通过 @EnableAsync 注解来启动异步方法调用的支持,通过 @Async 注解来标识异步方法,让方法能够在异步线程中执行。下面分别介绍它们的使用方法。
1.@EnableAsync 注解
@EnableAsync是一个 Spring Boot 中用于启动异步方法调用的注解。使用@EnableAsync注解时,需要将其放置在一个配置类上,并且在配置类中通过@Bean方法创建一个线程池。
下面举个例子:
1.1 配置类使用示例
AsyncTaskExecutorConfig 类通过 @EnableAsync 注解来启用异步方法调用,然后在配置类中通过 @Bean 方法创建了一个名为 asyncExecutor 的线程池,用于执行异步方法。
import com.demo.async.ContextCopyingDecorator;
import org.springframework.context.annotation.Bean;
import org.springframework.context.annotation.Configuration;
import org.springframework.core.task.TaskExecutor;
import org.springframework.scheduling.annotation.EnableAsync;
import org.springframework.scheduling.concurrent.ThreadPoolTaskExecutor;import java.util.concurrent.ThreadPoolExecutor;/*** <p> @Title AsyncTaskExecutorConfig* <p> @Description 异步线程池配置** @author ACGkaka* @date 2023/4/24 19:48*/
@EnableAsync
@Configuration
public class AsyncTaskExecutorConfig {/*** 核心线程数(线程池维护线程的最小数量)*/private int corePoolSize = 10;/*** 最大线程数(线程池维护线程的最大数量)*/private int maxPoolSize = 200;/*** 队列最大长度*/private int queueCapacity = 10;@Beanpublic TaskExecutor taskExecutor() {ThreadPoolTaskExecutor executor = new ThreadPoolTaskExecutor();executor.setCorePoolSize(corePoolSize);executor.setMaxPoolSize(maxPoolSize);executor.setQueueCapacity(queueCapacity);executor.setThreadNamePrefix("MyExecutor-");// for passing in request scope context 转换请求范围的上下文executor.setTaskDecorator(new ContextCopyingDecorator());// rejection-policy:当pool已经达到max size的时候,如何处理新任务// CALLER_RUNS:不在新线程中执行任务,而是有调用者所在的线程来执行executor.setRejectedExecutionHandler(new ThreadPoolExecutor.CallerRunsPolicy());executor.setWaitForTasksToCompleteOnShutdown(true);executor.initialize();return executor;}
}
1.2 复制请求上下文
ContextCopyingDecorator 类使用了装饰者模式,用于将主线程中的请求上下文拷贝到异步子线程中,并且在异步子线程执行之后清空请求的上下文。
import org.slf4j.MDC;
import org.springframework.core.task.TaskDecorator;
import org.springframework.security.core.context.SecurityContext;
import org.springframework.security.core.context.SecurityContextHolder;
import org.springframework.web.context.request.RequestAttributes;
import org.springframework.web.context.request.RequestContextHolder;import java.util.Map;/*** <p> @Title ContextCopyingDecorator* <p> @Description 上下文拷贝装饰者模式** @author ACGkaka* @date 2023/4/24 20:20*/
public class ContextCopyingDecorator implements TaskDecorator {@Overridepublic Runnable decorate(Runnable runnable) {try {// 从父线程中获取上下文,然后应用到子线程中RequestAttributes requestAttributes = RequestContextHolder.currentRequestAttributes();Map<String, String> previous = MDC.getCopyOfContextMap();SecurityContext securityContext = SecurityContextHolder.getContext();return () -> {try {if (previous == null) {MDC.clear();} else {MDC.setContextMap(previous);}RequestContextHolder.setRequestAttributes(requestAttributes);SecurityContextHolder.setContext(securityContext);runnable.run();} finally {// 清除请求数据MDC.clear();RequestContextHolder.resetRequestAttributes();SecurityContextHolder.clearContext();}};} catch (IllegalStateException e) {return runnable;}}
}
2.用法1:@Async 注解
@Async注解是一个 Spring Boot 中用于标识异步方法的注解,通过在方法上添加@Async注解,可以让该方法在异步线程中执行。
下面举个例子:
2.1 测试Controller
DemoController 类中声明了 /demo/test 接口,接口中调用了 demoService.testError() 方法。
import com.demo.common.Result;
import com.demo.service.DemoService;
import org.springframework.beans.factory.annotation.Autowired;
import org.springframework.web.bind.annotation.RequestMapping;
import org.springframework.web.bind.annotation.RestController;/*** <p> @Title DemoController* <p> @Description 测试Controller** @author ACGkaka* @date 2023/4/24 18:02*/
@RestController
@RequestMapping("/demo")
public class DemoController {@Autowiredprivate DemoService demoService;@RequestMapping("/test")public Result<Object> test() {Result<Object> result = Result.succeed();System.out.println("start...");demoService.testError();System.out.println("end...");return result;}
}
2.2 测试Service
/*** <p> @Title DemoService* <p> @Description 测试Service** @author ACGkaka* @date 2023/4/24 18:13*/
public interface DemoService {/*** 测试异常*/void testError() throws InterruptedException;
}
2.3 测试ServiceImpl
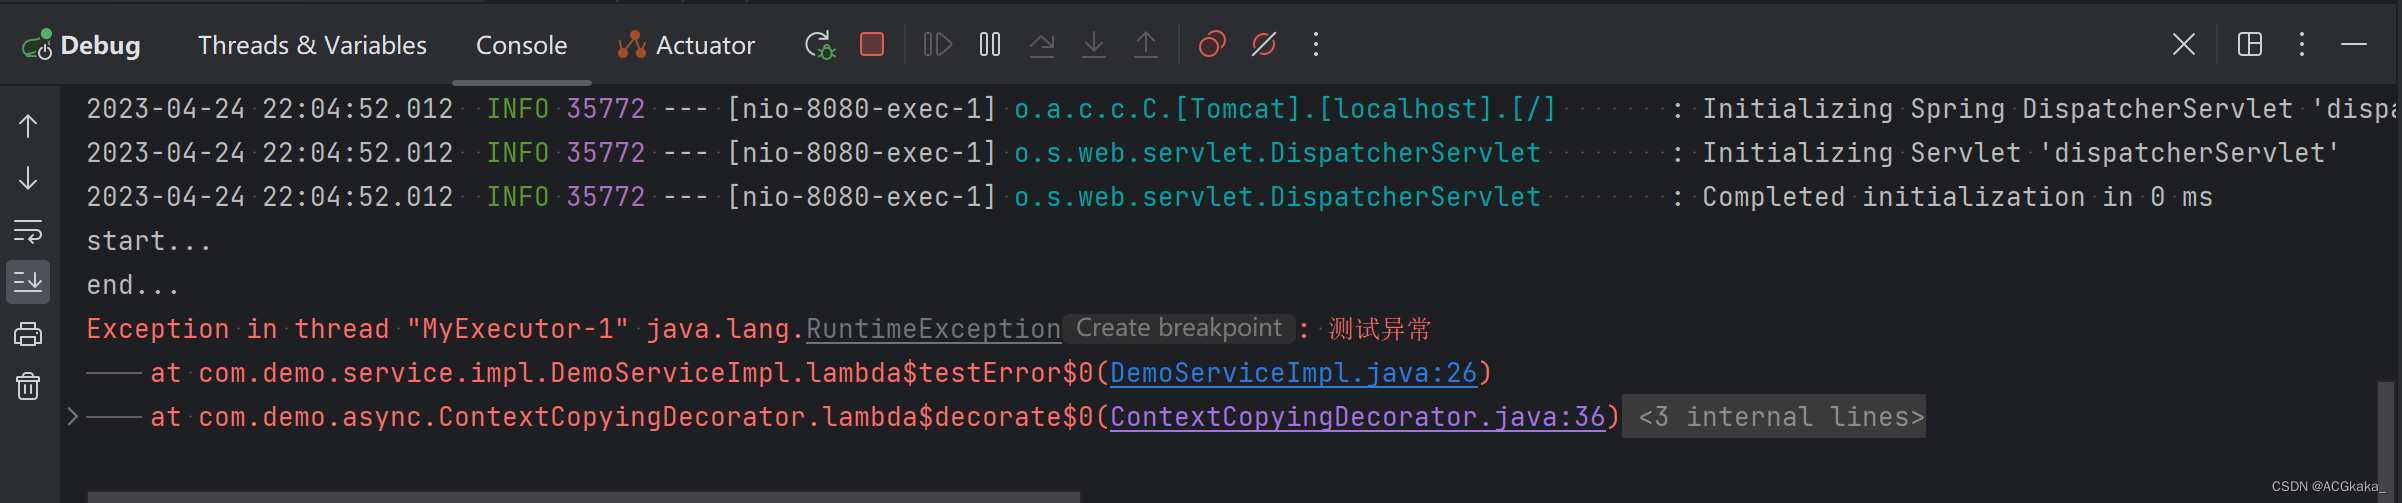
DemoServiceImpl 类使用了 @Async 注解,用于异步调用,testError() 方法中抛出了异常,用于测试异步执行。
这里 @Async 注解的 value 值指定了我们在配置类中声明的 taskExecutor 线程池。
- 假如只配置了一个线程池,直接用
@Async注解就会用自定义的线程池执行。 - 假如配置了多个线程池,用
@Async("name")来指定使用哪个线程池,如果没有指定,会用默认的 SimpleAsyncTaskExecutor 来处理。
import com.demo.service.DemoService;
import org.springframework.scheduling.annotation.Async;
import org.springframework.stereotype.Service;/*** <p> @Title DemoServiceImpl* <p> @Description 测试ServiceImpl** @author ACGkaka* @date 2023/4/24 18:14*/
@Service
public class DemoServiceImpl implements DemoService {@Async("taskExecutor")@Overridepublic void testError() throws InterruptedException {throw new RuntimeException("测试异常");}
}
2.4.测试
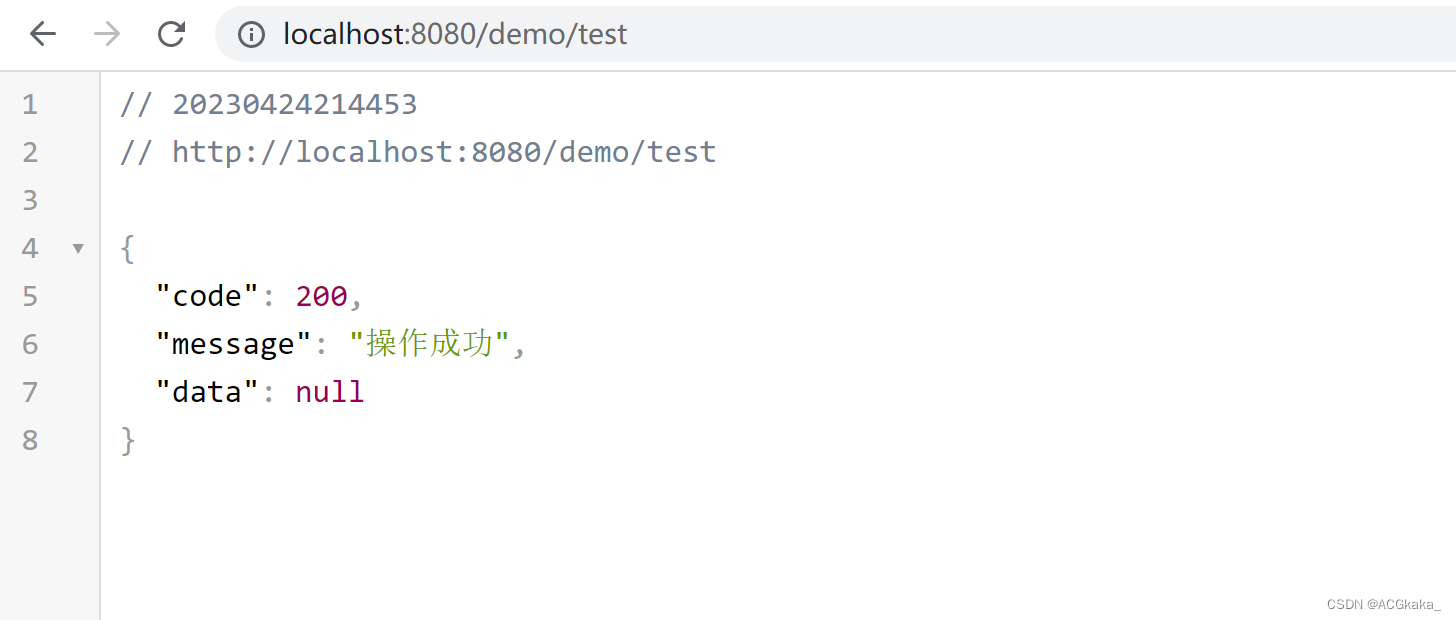
访问接口:http://localhost:8080/demo/test
访问结果如下,可见异常并没有接口返回正常的结果,异步测试成功。
4.用法2:直接使用 taskExecutor 做异步
由于我们在第1步中,将异步线程池注入到了 taskExecutor Bean 容器中,我们就可以直接通过 @Autowired 或者 @Resource 获取到线程池,然后使用。
我们通过直接使用 taskExecutor 线程池的方式,重新实现 DemoServiceImpl.java:
4.1 重新实现:测试ServiceImpl
import com.demo.service.DemoService;
import org.springframework.beans.factory.annotation.Autowired;
import org.springframework.beans.factory.annotation.Qualifier;
import org.springframework.core.task.TaskExecutor;
import org.springframework.stereotype.Service;/*** <p> @Title DemoServiceImpl* <p> @Description 测试ServiceImpl** @author ACGkaka* @date 2023/4/24 18:14*/
@Service
public class DemoServiceImpl implements DemoService {@Qualifier("taskExecutor")@Autowiredprivate TaskExecutor taskExecutor;@Overridepublic void testError() {taskExecutor.execute(() -> {throw new RuntimeException("测试异常");});}
}
4.2 测试
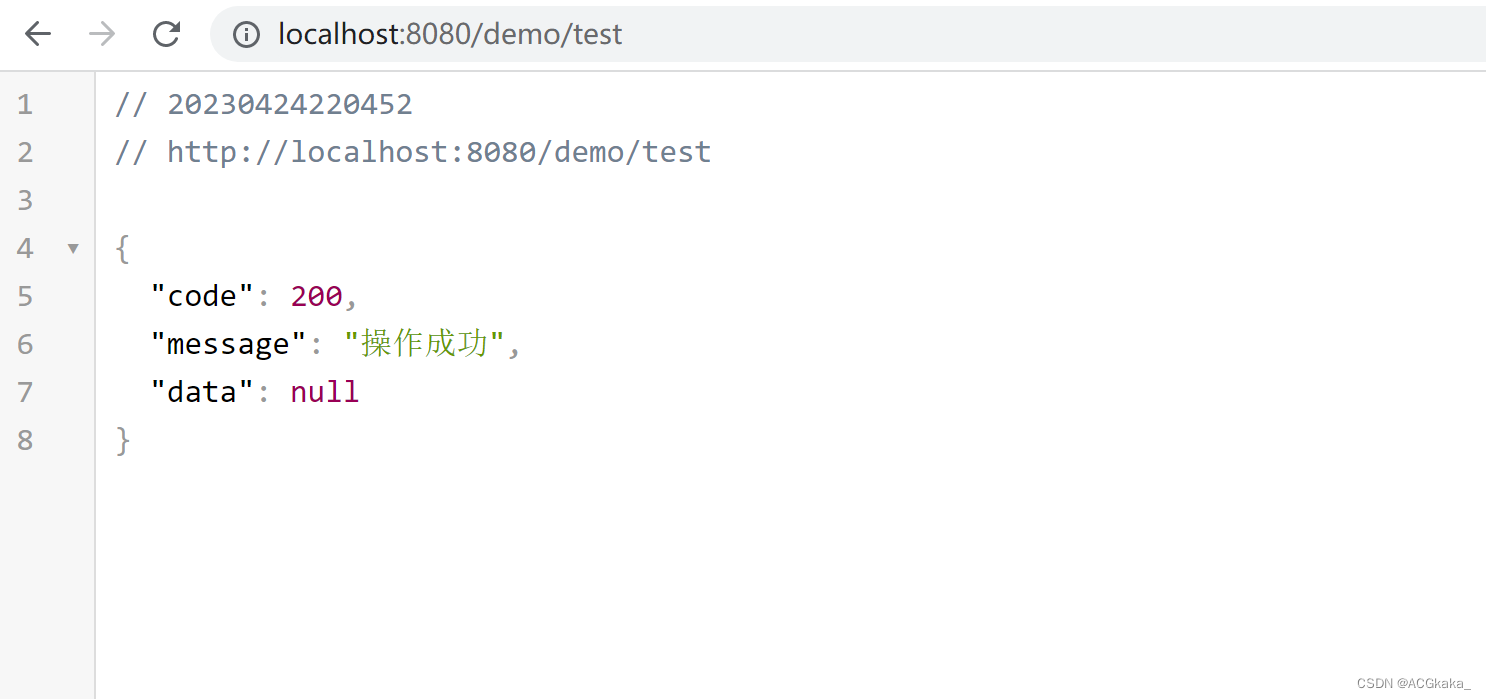
访问接口:http://localhost:8080/demo/test
访问结果如下,可见异常并没有接口返回正常的结果,异步测试成功,直接使用线程池的方式也可行。
5.@Async异步不生效原因
1)@SpringBootApplication 启动类或配置类当中没有添加 @EnableAsync 注解。
(补充:项目中除了启动类和配置类外,任何一个注入到 Bean 容器中的类添加 @EnableAsync 注解都可以,但是规范用法是在启动类和配置类中添加注解。)
2)异步方法使用注解@Async的返回值只能为void或者Future。
3)异步方法不能使用static修饰
4)异步类没有使用 @Component 注解(或其他注解)导致spring无法扫描到异步类
5)异步方法不能与异步方法在同一个类中
6)类中需要使用@Autowired或@Resource等注解自动注入,不能自己手动new对象
7)在 @Async 方法上标注 @Transactional 是没用的。 在 @Async 方法调用的方法上标注@Transactional 有效。
8)调用被 @Async 标记的方法的调用者不能和被调用的方法在同一类中不然不会起作用!!!!!!!
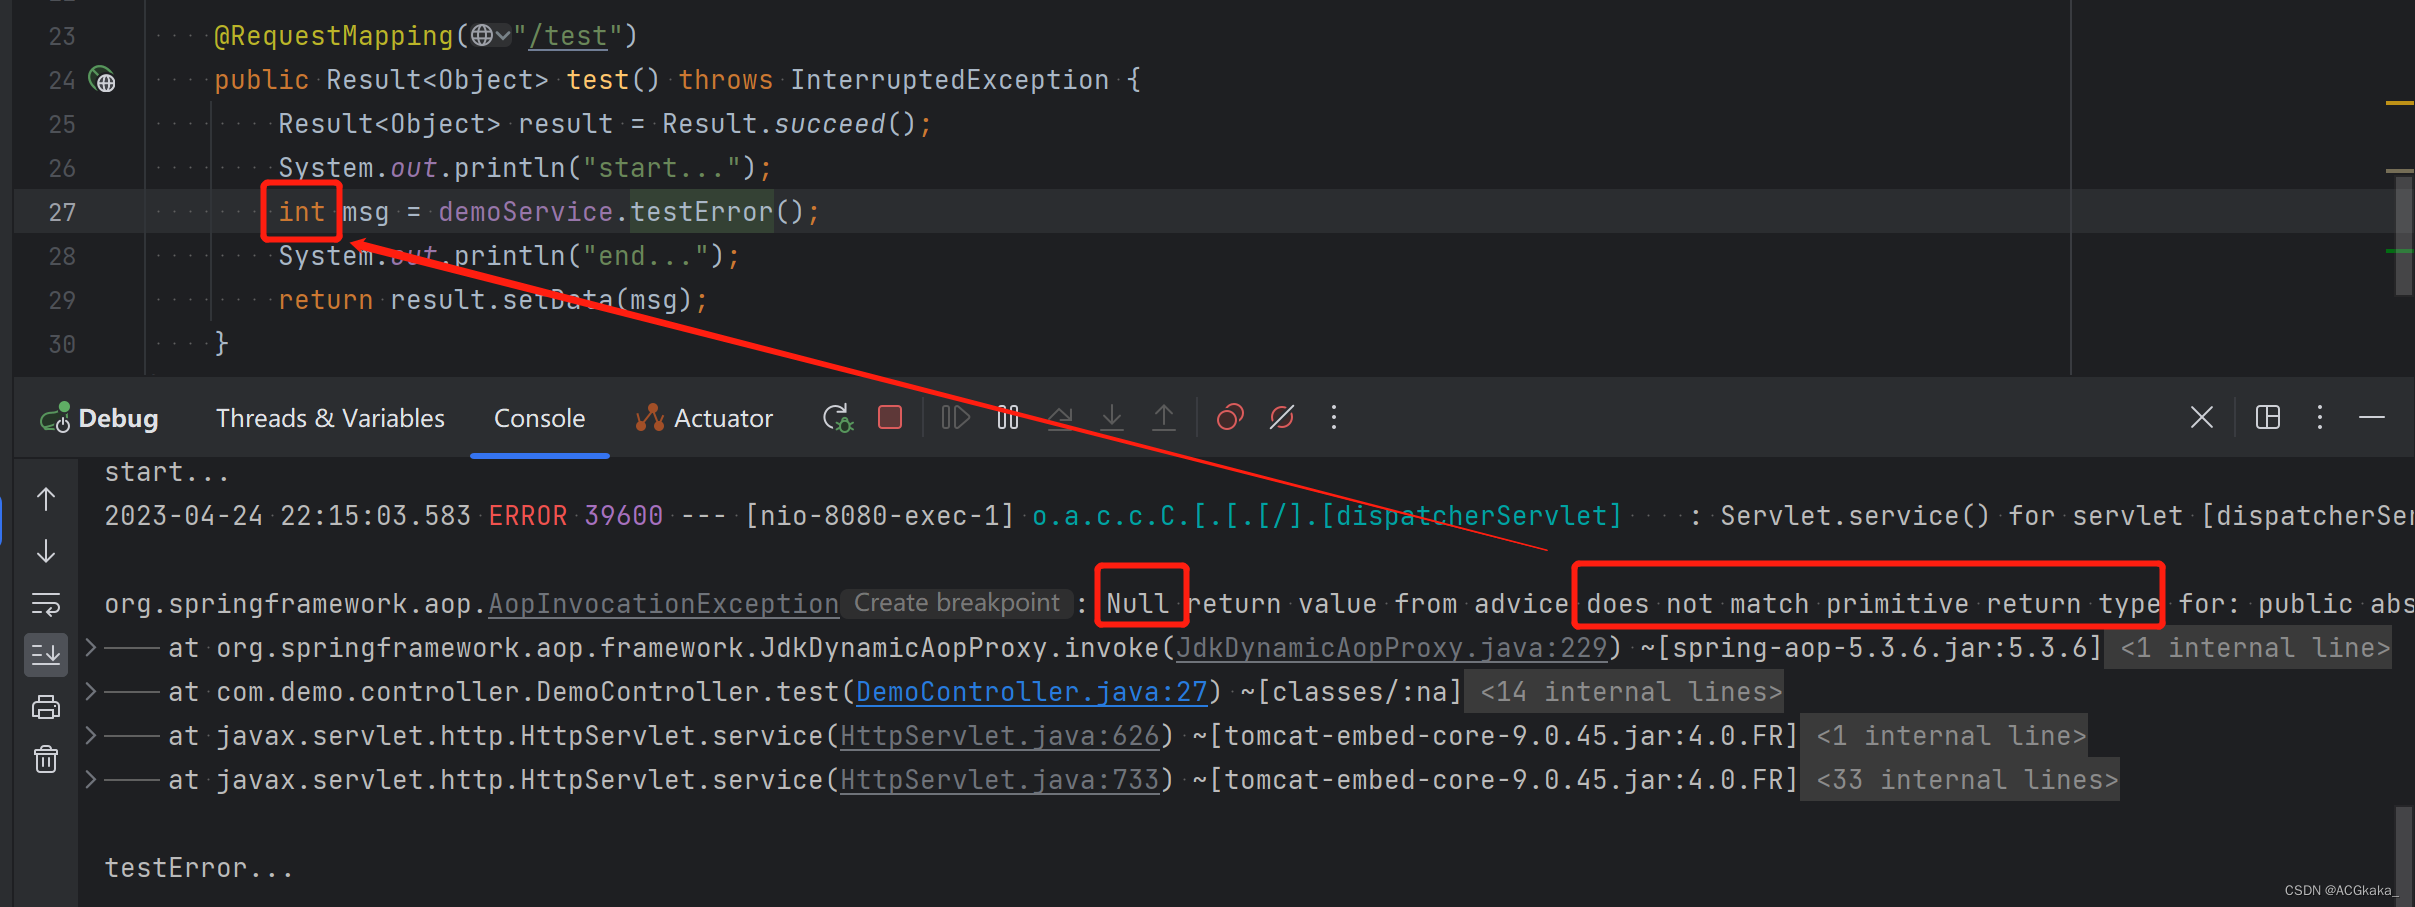
9)使用 @Async 时是获取不到方法的返回值的,拿到的值为 null,如果返回的值是原始类型int、double、long等(不能为 null),就会报错。
整理完毕,完结撒花~ 🌻
参考地址:
1.@EnableAsync@Async基本使用方法,https://www.cnblogs.com/fzhblog/p/14012401.html
2.spring boot- @EnableAsync和@Async(Spring boot 注解@Async不生效 无效 不起作用),https://blog.csdn.net/inthat/article/details/111162059