WPF拖动改变大小系列
第一节 Grid内控件拖动调整大小
第二节 Canvas内控件拖动调整大小
第三节 窗口拖动调整大小
第四节 附加属性实现拖动调整大小
第五章 拓展更多调整大小功能(本章)
文章目录
- WPF拖动改变大小系列
- 前言
- 一、添加的功能
- 1、任意控件DragResize
- 2、边界限制
- 3、交叉拖动
- 4、拖动点模板
- 5、拖动点容器模板
- 6、整体模板
- 7、窗口平滑拖动
- 8、拖动事件
- 9、其他功能
- (1)适应MinWidth、MinHeight
- (2)适应MaxWidth、MaxHeight
- (3)适配任意dpi
- 二、完整代码
- 三、使用示例
- 0、基础功能
- (1)、引用命名空间
- (2)、使用附加属性
- (3)、窗口注意事项
- 1、DragResize
- 2、边界限制
- 3、交叉拖动
- 4、拖动点布局模板
- (1)自定义圆点
- (2)4个顶点
- (3)单独定制每个点
- 5、拖动点容器模板
- (1)无Margin
- (2)设置Margin
- 6、整体模板
- 7、窗口平滑拖动
- 8、拖动事件
- 9、其他功能
- (1)适应MinWidth、MinHeight
- (2)适应MaxWidth、MaxHeight
- 总结
前言
上一章我们已经实现了任意控件统一的拖动调整功能,能够方便的给任意控件设置拖动调整大小。开发过程中发现还是有些功能可以继续拓展的,比如cs代码触发拖动、自定义模板、交叉拖动、限制拖动范围等功能。有功能实现起来不算太容易,却很有实用价值。
一、添加的功能
在第四章基础上添加了如下功能。
1、任意控件DragResize
我们知道wpf的Window有DragMove功能,在鼠标左键按下事件中调用此方法就能实现拖动功能很方便。对于调整大小也可以实现类似的DragResize功能, 实际效果和点击画板拖出一个形状差不多。
代码示例如下:
/// <summary>/// 手动触发拖动改变大小,与Window.DragMove类似,只能在鼠标左键按下时调用。/// 实际效果和点击画板拖出一个形状差不多。/// 此方法为拓展方法,FrameworkElement的子类控件(即有宽高属性的控件)都可以调用此方法。/// </summary>/// <param name="elememt"></param>/// <returns>返回Task,await等待拖动完成</returns>/// <exception cref="InvalidOperationException"></exception>public static async Task DragResize(this FrameworkElement elememt){if (Mouse.LeftButton != MouseButtonState.Pressed){throw new InvalidOperationException("Left button down to call this method");}if (elememt.Parent == null && elememt is not Window){throw new InvalidOperationException("Element should be on the visual tree");}//生成Resizeable对象,第四章完整代码中。//获取右下角Thumb//手动触发Thumb拖动事件//等待拖动完成}
2、边界限制
添加一个IsResizeInBounds附加属性,表示拖动范围是否在父控件内。
代码示例如下:
public static bool GetIsResizeInBounds(DependencyObject obj)
{return (bool)obj.GetValue(IsResizeInBoundsProperty);
}public static void SetIsResizeInBounds(DependencyObject obj, bool value)
{obj.SetValue(IsResizeInBoundsProperty, value);
}/// <summary>
/// 是否在父控件范围内拖动
/// </summary>
public static readonly DependencyProperty IsResizeInBoundsProperty =DependencyProperty.RegisterAttached("IsResizeInBounds", typeof(bool), typeof(Resize), new PropertyMetadata(false));
第四章的拖动逻辑中添加相应的限制功能,本质上就是判断如果超出边界则控件刚好依附在边界上,代码如下:
var dx = left - margin.Left;var dy = top - margin.Top;if (GetIsResizeInBounds(c)){var pos = c.GetPosition();var parent = _resizeTarget.Parent as FrameworkElement;Size size;if (parent == null){size.Width = SystemParameters.PrimaryScreenWidth;size.Height = SystemParameters.PrimaryScreenHeight;}else{size.Width = parent.ActualWidth;size.Height = parent.ActualHeight;}if (pos.X + dx < 0){left = -pos.X + margin.Left;width = pos.X + c.ActualWidth;}else if (pos.X + dx + width > size.Width){width = size.Width - pos.X;right = margin.Right + c.ActualWidth - width;}if (pos.Y + dy < 0){top = -pos.Y + margin.Top;height = pos.Y + c.ActualHeight;}else if (pos.Y + dy + height > size.Height){height = size.Height - pos.Y;bottom = margin.Bottom + c.ActualHeight - height;}}
3、交叉拖动
交叉拖动是曾经用gdi画图时会出现的一种情况,gdi绘制的宽高可以为负数,所以可以直接穿过起点反向拖动也能绘制出图形。在wpf中的控件是不支持宽高负数的,所以我们需要用其他方式实现。
下列步骤以横向为例:
(1)判断控件边界
if (width < 0)
(2)固定到控件边界
SetTargetMargin为前3章的集合,根据不同控件类型比如Window是设置Left、Top、Grid则设置Margin等。minWidth是控件的MinWidth属性。margin参考第四张完整代码。
if (thumb.HorizontalAlignment == HorizontalAlignment.Left)
//左拖动点
{SetTargetMargin(new Thickness(margin.Left + c.Width - minWidth, margin.Top, margin.Right - c.Width + minWidth, margin.Bottom));
}
else
//右拖动点
{SetTargetMargin(new Thickness(margin.Left - c.Width + minWidth, margin.Top, margin.Right + c.Width - minWidth, margin.Bottom));
}
(3)事件转移
//当前拖动点触发鼠标弹起事件
MouseButtonEventArgs upEvent = new MouseButtonEventArgs(Mouse.PrimaryDevice, Environment.TickCount, MouseButton.Left)
{ RoutedEvent = UIElement.MouseLeftButtonUpEvent };
thumb.RaiseEvent(upEvent);
//反向拖动点触发鼠标按下事件
MouseButtonEventArgs downEvent = new MouseButtonEventArgs(Mouse.PrimaryDevice, Environment.TickCount, MouseButton.Left)
{ RoutedEvent = UIElement.MouseLeftButtonDownEvent };
t.RaiseEvent(downEvent);
4、拖动点模板
添加附加属性ThumbsTemplate
public static ControlTemplate GetThumbsTemplate(DependencyObject obj)
{return (ControlTemplate)obj.GetValue(ThumbsTemplateProperty);
}public static void SetThumbsTemplate(DependencyObject obj, ControlTemplate value)
{obj.SetValue(ThumbsTemplateProperty, value);
}/// <summary>
/// 拖动点的模板
/// </summary>
public static readonly DependencyProperty ThumbsTemplateProperty =DependencyProperty.RegisterAttached("ThumbsTemplate", typeof(ControlTemplate), typeof(Resize), new PropertyMetadata(null));
生成拖动点时会应用模板
var thumbsTemplate = GetThumbsTemplate(_resizeTarget);
thumb.Template = thumbsTemplate;
5、拖动点容器模板
拖动点的容器模板,主要用于设置margin调整拖动点的整体位置,添加附加属性ThumbsPanel。
public static ItemsPanelTemplate GetThumbsPanel(DependencyObject obj){return (ItemsPanelTemplate)obj.GetValue(ThumbsPanelProperty);}public static void SetThumbsPanel(DependencyObject obj, ItemsPanelTemplate value){obj.SetValue(ThumbsPanelProperty, value);}/// <summary>/// 拖动点的容器,主要用于设置margin/// </summary>public static readonly DependencyProperty ThumbsPanelProperty =DependencyProperty.RegisterAttached("ThumbsPanel", typeof(ItemsPanelTemplate), typeof(Resize), new PropertyMetadata(null));
生成拖动点布局时会应用模板
var itemsPanel = GetThumbsPanel(_resizeTarget);
_defalutPanel.ItemsPanel = itemsPanel;
6、整体模板
拖动点模板和拖动点布局模板已经很大程度灵活了使用,如果需要更高的定制性,直接使用整体模板,整体模板赋值后拖动点模板和拖动点布局模板会失效。此功能与第四章的ResizeTemplate相同但名称改为Template。基本规则是第一级控件为容器、第二级控件为Thumb类型自动识别为拖动点,拖动方向由HorizontalAlignment和VerticalAlignment决定。
7、窗口平滑拖动
之所有要对窗口拖动平滑处理是因为,自定义的调整大小只能设置Window的Left、Top、Width、Height,当窗口进行左或上拖动时右或下会出现残影,这种情况通过SetWindowPos和MoveWindow也无法改善。在不使用窗口自带的拖动功能的情况下,目前笔者研究出的方法就是使用透明窗口全屏,控件模拟窗口进行拖动。当然这种实现的限制就是一定要透明窗口,AllowTransparency为true或者WindowChrome的GlassFrameThickness为-1。
因为这种实现还不是很完美对装饰器不兼容,所以提供IsWindowDragSmooth属性,可以打开和关闭功能。
public static bool GetIsWindowDragSmooth(DependencyObject obj)
{return (bool)obj.GetValue(IsWindowDragSmoothProperty);
}public static void SetIsWindowDragSmooth(DependencyObject obj, bool value)
{obj.SetValue(IsWindowDragSmoothProperty, value);
}/// <summary>
/// 拖拽窗口调整大小是否平滑处理,作用是避免拖拽窗口左上时右下闪烁。
/// 此属性只对窗口有效
/// 此属性为true时需要透明窗口才能生效,即AllowTransparency为true或者WindowChrome的GlassFrameThickness为-1。
/// 当前版本不兼容有装饰器的窗口,拖动中装饰器可能会显示在窗口外面。
/// </summary>
// Using a DependencyProperty as the backing store for IsWindowDragSmooth.  This enables animation, styling, binding, etc...
public static readonly DependencyProperty IsWindowDragSmoothProperty =DependencyProperty.RegisterAttached("IsWindowDragSmooth", typeof(bool), typeof(Resize), new PropertyMetadata(false));
8、拖动事件
提供3个拖动事件,拖动开始、拖动变化、拖动结束。
代码示例如下:
/// <summary>
///  拖动开始事件
/// </summary>
public static readonly RoutedEvent DragResizeStartedEvent = EventManager.RegisterRoutedEvent("DragResizeStarted", RoutingStrategy.Direct, typeof(EventHandler<DragResizeStartedEventArgs>), typeof(Resize));
/// <summary>
/// 拖动变化事件
/// </summary>
public static readonly RoutedEvent DragResizeDeltaEvent = EventManager.RegisterRoutedEvent("DragResizeDelta", RoutingStrategy.Direct, typeof(EventHandler<DragResizeDeltaEventArgs>), typeof(Resize));
/// <summary>
/// 拖动结束事件
/// </summary>
public static readonly RoutedEvent DragResizeCompletedEvent = EventManager.RegisterRoutedEvent("DragResizeCompleted", RoutingStrategy.Direct, typeof(EventHandler<DragResizeCompletedEventArgs>), typeof(Resize));
9、其他功能
(1)适应MinWidth、MinHeight
在第四章完整带的基础上将边界判断修改为控件的MinWidth、MinHeight即可。
横向
if (width >= minWidth/*原本是0*/)
{//略
}
纵向与横向逻辑一致,修改对应变量即可,略
(2)适应MaxWidth、MaxHeight
超过了最大值需要进行修正示例如下
横向:
if (width > c.MaxWidth)
{if (thumb.HorizontalAlignment == HorizontalAlignment.Left){left += width - c.MaxWidth;right = margin.Right;}else{left = margin.Left;right += width - c.MaxWidth;}width = c.MaxWidth;
}
纵向与横向逻辑一致,修改对应变量即可,略。
(3)适配任意dpi
所有改变坐标以及大小的代码已经适配了任意dpi。
主要注意的就是PointToScreen得到的坐标需要dpi转换。
下列是获取dpi的方法。
static Point GetDpiFromVisual(Visual visual)
{var source = PresentationSource.FromVisual(visual);var dpiX = 96.0;var dpiY = 96.0;if (source?.CompositionTarget != null){dpiX = 96.0 * source.CompositionTarget.TransformToDevice.M11;dpiY = 96.0 * source.CompositionTarget.TransformToDevice.M22;}return new Point(dpiX, dpiY);
}
二、完整代码
vs2022 wpf .net 6.0 项目,包含了第四章的功能,不需要重复下载。
https://download.csdn.net/download/u013113678/88749991
三、使用示例
0、基础功能
这个是与第四章一致的基础功能。
(1)、引用命名空间
Window 的其他属性略
<Window xmlns:ac="clr-namespace:AC"/>
(2)、使用附加属性
需要某个控件可以拖动调整大小则
<Grid ac:Resize.IsResizeable="True" />
(3)、窗口注意事项
当Window需要使用此功能时
<Window ac:Resize.IsResizeable="True" />
Window的拖动点会放在子控件的装饰层,需要注意以几点:
①Window必须有子控件,子控件有装饰层(大部分控件都有装饰层比如Grid、Border、Button等)。
②子控件不可限定大小需要,跟随窗口大小变化。
③此功能与Window自带的调整大小区别是,此功能可以用于无边框窗口以及自定义拖动点。
1、DragResize
DragResize需要在鼠标左键按下事件中使用,对已存在的控件或者动态生成控件使用。此方法不需要ac:Resize.IsResizeable="True"也可以使用。
xaml
<Window x:Class="WpfResize.MainWindow"xmlns="http://schemas.microsoft.com/winfx/2006/xaml/presentation"xmlns:x="http://schemas.microsoft.com/winfx/2006/xaml"xmlns:d="http://schemas.microsoft.com/expression/blend/2008"xmlns:mc="http://schemas.openxmlformats.org/markup-compatibility/2006"xmlns:local="clr-namespace:WpfResize"mc:Ignorable="d"Title="MainWindow" Height="450" Width="800"WindowStyle="None"ResizeMode="NoResize"><Grid x:Name="grid" Background="SeaGreen"  MouseLeftButtonDown="Window_MouseLeftButtonDown"/>
</Window>
因为是拓展方法,所以获取到控件对象直接调用DragResize即可。
cs
using AC;
using System.Windows;
using System.Windows.Controls;
using System.Windows.Input;
using System.Windows.Media;namespace WpfResize
{/// <summary>/// Interaction logic for MainWindow.xaml/// </summary>public partial class MainWindow : Window{public MainWindow(){InitializeComponent();}private async void Window_MouseLeftButtonDown(object sender, MouseButtonEventArgs e){//生成控件var border = new Border();border.Background = Brushes.Azure;border.Width = 0;border.Height = 0;//加入到容器grid.Children.Add(border);//拖出控件await border.DragResize();//如果宽高为0则移除if (border.Width == 0|| border.Height == 0){grid.Children.Remove(border);}}}
}
效果预览
注:qq录制鼠标出现了偏移
2、边界限制
设置ac:Resize.IsResizeInBounds="True"即可。边界限制的范围是父控件。
xaml
<Window x:Class="WpfResize.MainWindow"xmlns="http://schemas.microsoft.com/winfx/2006/xaml/presentation"xmlns:x="http://schemas.microsoft.com/winfx/2006/xaml"xmlns:d="http://schemas.microsoft.com/expression/blend/2008"xmlns:mc="http://schemas.openxmlformats.org/markup-compatibility/2006"xmlns:local="clr-namespace:WpfResize"xmlns:ac="clr-namespace:AC"mc:Ignorable="d"Title="MainWindow" Height="450" Width="800"WindowStyle="None"ResizeMode="NoResize"     ><Grid x:Name="grid" Background="SeaGreen"><Border BorderThickness="1" BorderBrush="White" Margin="40"><StackPanel><Border ac:Resize.IsResizeable="True" ac:Resize.IsResizeInBounds="False" Background="White" Height="100" Width="200"  CornerRadius="10" ><TextBlock HorizontalAlignment="Center" VerticalAlignment="Center" Text="不限制边界"></TextBlock></Border><Border ac:Resize.IsResizeable="True" ac:Resize.IsResizeInBounds="True"  Margin="0,20,0,0" Background="White" Height="100" Width="200"  CornerRadius="10" ><TextBlock HorizontalAlignment="Center" VerticalAlignment="Center" Text="限制边界"></TextBlock></Border></StackPanel></Border></Grid>
</Window>
效果预览
注:qq录制鼠标出现了偏移

3、交叉拖动
通过附加属性ac:Resize.IsAllowsCrossover设置是否交叉拖动,默认为true。
xaml
<Window x:Class="WpfResize.MainWindow"xmlns="http://schemas.microsoft.com/winfx/2006/xaml/presentation"xmlns:x="http://schemas.microsoft.com/winfx/2006/xaml"xmlns:d="http://schemas.microsoft.com/expression/blend/2008"xmlns:mc="http://schemas.openxmlformats.org/markup-compatibility/2006"xmlns:local="clr-namespace:WpfResize"xmlns:ac="clr-namespace:AC"mc:Ignorable="d"Title="MainWindow" Height="450" Width="800"WindowStyle="None"ResizeMode="NoResize"     ><Grid x:Name="grid" Background="SeaGreen"><StackPanel><Border  Margin="0,20,0,0"  ac:Resize.IsResizeable="True" ac:Resize.IsAllowsCrossover="False"  Background="White" Height="100" Width="200"  CornerRadius="10" ><TextBlock HorizontalAlignment="Center" VerticalAlignment="Center" Text="不允许交叉拖动"></TextBlock></Border><Border ac:Resize.IsResizeable="True" ac:Resize.IsAllowsCrossover="True"   Margin="0,20,0,0" Background="White" Height="100" Width="200"  CornerRadius="10" ><TextBlock HorizontalAlignment="Center" VerticalAlignment="Center" Text="允许交叉拖动"></TextBlock></Border></StackPanel></Grid>
</Window>
效果预览
注:qq录制鼠标出现了偏移
4、拖动点布局模板
通过ac:Resize.ThumbsTemplate设置拖动点模板
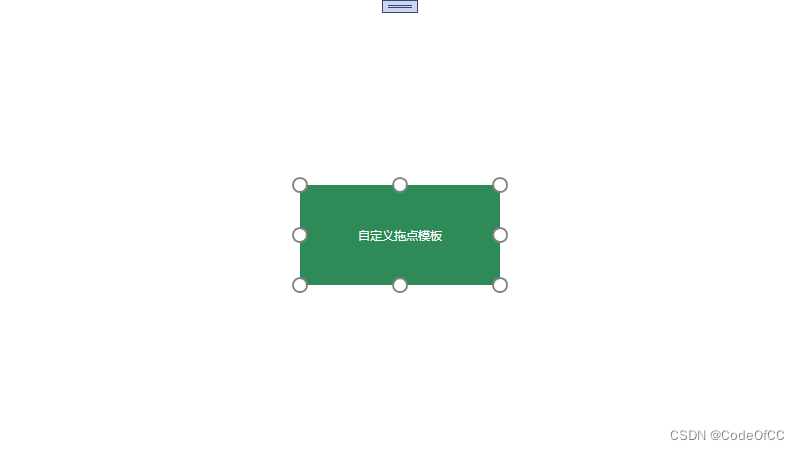
(1)自定义圆点
xaml
<Window x:Class="WpfResize.MainWindow"xmlns="http://schemas.microsoft.com/winfx/2006/xaml/presentation"xmlns:x="http://schemas.microsoft.com/winfx/2006/xaml"xmlns:d="http://schemas.microsoft.com/expression/blend/2008"xmlns:mc="http://schemas.openxmlformats.org/markup-compatibility/2006"xmlns:local="clr-namespace:WpfResize"xmlns:ac="clr-namespace:AC"mc:Ignorable="d"Title="MainWindow" Height="450" Width="800"  ><Grid x:Name="grid" Background="White"><Grid  Margin="0,20,0,0"  ac:Resize.IsResizeable="True" ac:Resize.IsAllowsCrossover="False"  Background="SeaGreen " Height="100" Width="200" ><ac:Resize.ThumbsTemplate><ControlTemplate  ><Border BorderBrush="Gray" BorderThickness="2" CornerRadius="8"  Background="White" Width="16" Height="16"/></ControlTemplate></ac:Resize.ThumbsTemplate><TextBlock HorizontalAlignment="Center" VerticalAlignment="Center" Foreground="White" Text="自定义拖动点模板"></TextBlock></Grid></Grid>
</Window>
效果预览
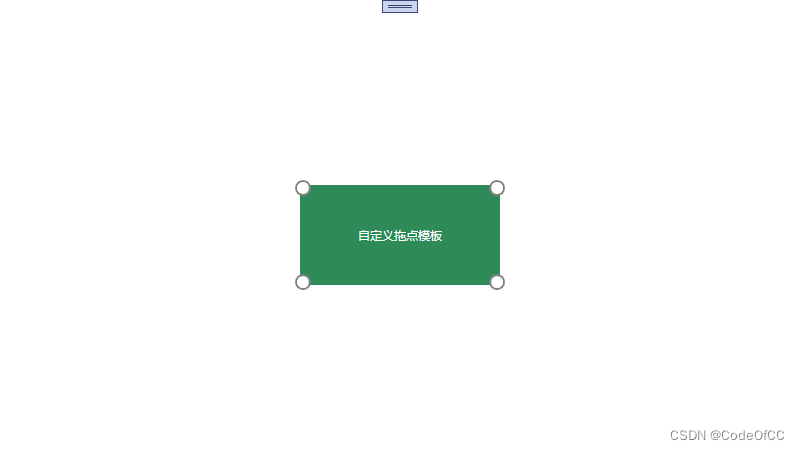
(2)4个顶点
xaml
<Window x:Class="WpfResize.MainWindow"xmlns="http://schemas.microsoft.com/winfx/2006/xaml/presentation"xmlns:x="http://schemas.microsoft.com/winfx/2006/xaml"xmlns:d="http://schemas.microsoft.com/expression/blend/2008"xmlns:mc="http://schemas.openxmlformats.org/markup-compatibility/2006"xmlns:local="clr-namespace:WpfResize"xmlns:ac="clr-namespace:AC"mc:Ignorable="d"Title="MainWindow" Height="450" Width="800"  WindowStyle="None"ResizeMode="NoResize"><Grid x:Name="grid" Background="White"><Grid  Margin="0,20,0,0"  ac:Resize.IsResizeable="True" ac:Resize.IsAllowsCrossover="False"  Background="SeaGreen " Height="100" Width="200" ><ac:Resize.ThumbsTemplate><ControlTemplate ><Border x:Name="brd" BorderBrush="Gray" BorderThickness="2" CornerRadius="8"  Background="White" Width="16" Height="16"/><!--通过触发器隐藏4条边上的点--><ControlTemplate.Triggers><!--左右两条边上的点--><Trigger Property="HorizontalAlignment" Value="Stretch"><Setter TargetName="brd" Property="Visibility" Value="Collapsed" ></Setter></Trigger><!--上下两条边上的点--><Trigger Property="VerticalAlignment" Value="Stretch"><Setter TargetName="brd" Property="Visibility" Value="Collapsed" ></Setter></Trigger></ControlTemplate.Triggers></ControlTemplate></ac:Resize.ThumbsTemplate><TextBlock HorizontalAlignment="Center" VerticalAlignment="Center" Foreground="White" Text="自定义拖动点模板"></TextBlock></Grid></Grid>
</Window>
效果预览
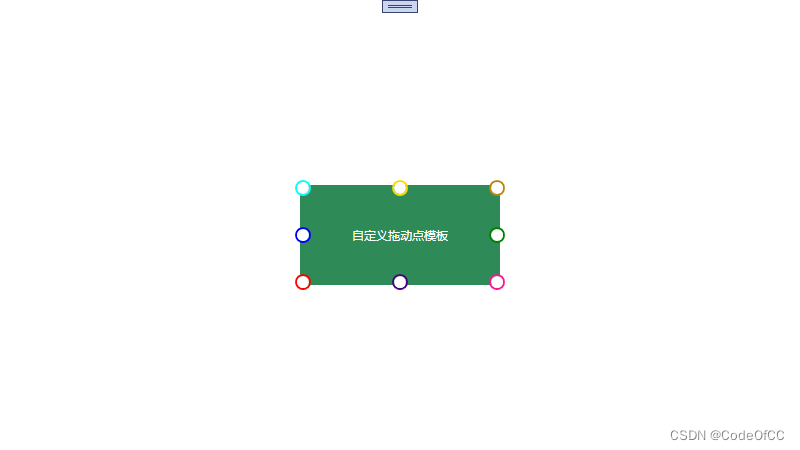
(3)单独定制每个点
通过MultiTrigger触发器来区分每个点。
xaml
<Window x:Class="WpfResize.MainWindow"xmlns="http://schemas.microsoft.com/winfx/2006/xaml/presentation"xmlns:x="http://schemas.microsoft.com/winfx/2006/xaml"xmlns:d="http://schemas.microsoft.com/expression/blend/2008"xmlns:mc="http://schemas.openxmlformats.org/markup-compatibility/2006"xmlns:local="clr-namespace:WpfResize"xmlns:ac="clr-namespace:AC"mc:Ignorable="d"Title="MainWindow" Height="450" Width="800"  WindowStyle="None"ResizeMode="NoResize"><Grid x:Name="grid" Background="White"><Grid  Margin="0,20,0,0"  ac:Resize.IsResizeable="True" ac:Resize.IsAllowsCrossover="False"  Background="SeaGreen" Height="100" Width="200" ><ac:Resize.ThumbsTemplate><ControlTemplate ><Border x:Name="brd" BorderBrush="Gray" BorderThickness="2" CornerRadius="8"  Background="White" Width="16" Height="16"/><ControlTemplate.Triggers><!--左上--><MultiTrigger><MultiTrigger.Conditions><Condition Property="HorizontalAlignment" Value="Left" ></Condition><Condition Property="VerticalAlignment" Value="Top" ></Condition></MultiTrigger.Conditions><Setter TargetName="brd" Property="BorderBrush" Value="Aqua"></Setter></MultiTrigger><!--右上--><MultiTrigger><MultiTrigger.Conditions><Condition Property="HorizontalAlignment" Value="Right" ></Condition><Condition Property="VerticalAlignment" Value="Top" ></Condition></MultiTrigger.Conditions><Setter TargetName="brd" Property="BorderBrush" Value="DarkGoldenrod"></Setter></MultiTrigger><!--右下--><MultiTrigger><MultiTrigger.Conditions><Condition Property="HorizontalAlignment" Value="Right" ></Condition><Condition Property="VerticalAlignment" Value="Bottom" ></Condition></MultiTrigger.Conditions><Setter TargetName="brd" Property="BorderBrush" Value="DeepPink"></Setter></MultiTrigger><!--左下--><MultiTrigger><MultiTrigger.Conditions><Condition Property="HorizontalAlignment" Value="Left" ></Condition><Condition Property="VerticalAlignment" Value="Bottom" ></Condition></MultiTrigger.Conditions><Setter TargetName="brd" Property="BorderBrush" Value="Red"></Setter></MultiTrigger><!--上--><MultiTrigger><MultiTrigger.Conditions><Condition Property="HorizontalAlignment" Value="Stretch" ></Condition><Condition Property="VerticalAlignment" Value="Top" ></Condition></MultiTrigger.Conditions><Setter TargetName="brd" Property="BorderBrush" Value="Gold"></Setter></MultiTrigger><!--下--><MultiTrigger><MultiTrigger.Conditions><Condition Property="HorizontalAlignment" Value="Stretch" ></Condition><Condition Property="VerticalAlignment" Value="Bottom" ></Condition></MultiTrigger.Conditions><Setter TargetName="brd" Property="BorderBrush" Value="Indigo"></Setter></MultiTrigger><!--左--><MultiTrigger><MultiTrigger.Conditions><Condition Property="HorizontalAlignment" Value="Left" ></Condition><Condition Property="VerticalAlignment" Value="Stretch" ></Condition></MultiTrigger.Conditions><Setter TargetName="brd" Property="BorderBrush" Value="Blue"></Setter></MultiTrigger><!--右--><MultiTrigger><MultiTrigger.Conditions><Condition Property="HorizontalAlignment" Value="Right" ></Condition><Condition Property="VerticalAlignment" Value="Stretch" ></Condition></MultiTrigger.Conditions><Setter TargetName="brd" Property="BorderBrush" Value="Green"></Setter></MultiTrigger></ControlTemplate.Triggers></ControlTemplate></ac:Resize.ThumbsTemplate><TextBlock HorizontalAlignment="Center" VerticalAlignment="Center" Foreground="White" Text="自定义拖动点模板"></TextBlock></Grid></Grid>
</Window>
效果预览
5、拖动点容器模板
通过ac:Resize.ThumbsPanel设置拖动点容器模板,主要作用是设置margin,方便调整拖动点的偏移。
默认的容器有Margin="-3"的偏移。
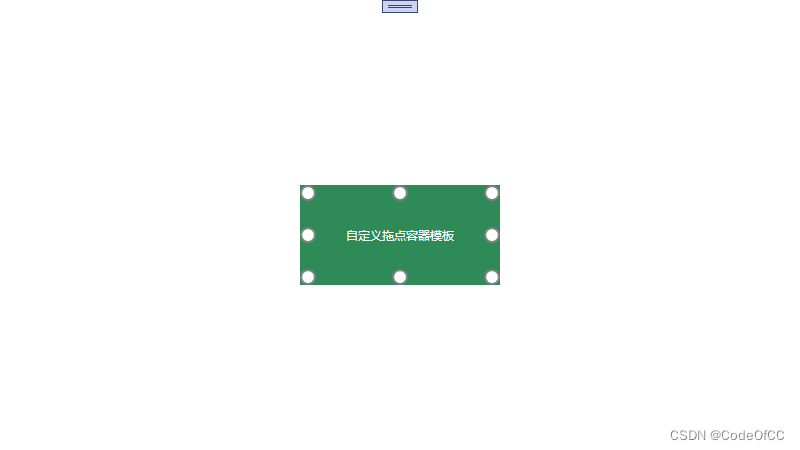
(1)无Margin
此示例是为了说明无Margin的情况。
xaml
<Window x:Class="WpfResize.MainWindow"xmlns="http://schemas.microsoft.com/winfx/2006/xaml/presentation"xmlns:x="http://schemas.microsoft.com/winfx/2006/xaml"xmlns:d="http://schemas.microsoft.com/expression/blend/2008"xmlns:mc="http://schemas.openxmlformats.org/markup-compatibility/2006"xmlns:local="clr-namespace:WpfResize"xmlns:ac="clr-namespace:AC"mc:Ignorable="d"Title="MainWindow" Height="450" Width="800"  WindowStyle="None"ResizeMode="NoResize"><Grid x:Name="grid" Background="White"><Grid  Margin="0,20,0,0"  ac:Resize.IsResizeable="True" ac:Resize.IsAllowsCrossover="False"  Background="SeaGreen " Height="100" Width="200" ><ac:Resize.ThumbsTemplate><ControlTemplate ><Border x:Name="brd" BorderBrush="Gray" BorderThickness="2" CornerRadius="8"  Background="White" Width="16" Height="16"/></ControlTemplate></ac:Resize.ThumbsTemplate><ac:Resize.ThumbsPanel><ItemsPanelTemplate><Grid></Grid></ItemsPanelTemplate></ac:Resize.ThumbsPanel><TextBlock HorizontalAlignment="Center" VerticalAlignment="Center" Foreground="White" Text="自定义拖点容器模板"></TextBlock></Grid></Grid>
</Window>
效果预览
(2)设置Margin
Margin设置为拖动点的一半大小就刚好在边线中间。
xaml
<Window x:Class="WpfResize.MainWindow"xmlns="http://schemas.microsoft.com/winfx/2006/xaml/presentation"xmlns:x="http://schemas.microsoft.com/winfx/2006/xaml"xmlns:d="http://schemas.microsoft.com/expression/blend/2008"xmlns:mc="http://schemas.openxmlformats.org/markup-compatibility/2006"xmlns:local="clr-namespace:WpfResize"xmlns:ac="clr-namespace:AC"mc:Ignorable="d"Title="MainWindow" Height="450" Width="800"  WindowStyle="None"ResizeMode="NoResize"><Grid x:Name="grid" Background="White"><Grid  Margin="0,20,0,0"  ac:Resize.IsResizeable="True" ac:Resize.IsAllowsCrossover="False"  Background="SeaGreen " Height="100" Width="200" ><ac:Resize.ThumbsTemplate><ControlTemplate ><Border x:Name="brd" BorderBrush="Gray" BorderThickness="2" CornerRadius="8"  Background="White" Width="16" Height="16"/></ControlTemplate></ac:Resize.ThumbsTemplate><ac:Resize.ThumbsPanel><ItemsPanelTemplate><Grid Margin="-8"></Grid></ItemsPanelTemplate></ac:Resize.ThumbsPanel><TextBlock HorizontalAlignment="Center" VerticalAlignment="Center" Foreground="White" Text="自定义拖点容器模板"></TextBlock></Grid></Grid>
</Window>
效果预览

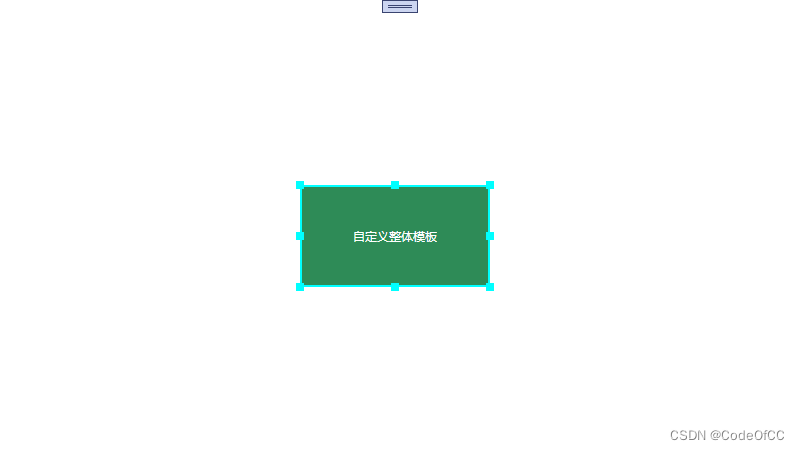
6、整体模板
设置整体模板Template后会覆盖拖动点模板和拖动点布局模板。规则是第一级控件为容器、第二级控件为Thumb类型自动识别为拖动点,拖动方向由HorizontalAlignment和VerticalAlignment决定, 即可以有任意个拖动点Thumb,也可以放任意其他控件。
<Window x:Class="WpfResize.MainWindow"xmlns="http://schemas.microsoft.com/winfx/2006/xaml/presentation"xmlns:x="http://schemas.microsoft.com/winfx/2006/xaml"xmlns:d="http://schemas.microsoft.com/expression/blend/2008"xmlns:mc="http://schemas.openxmlformats.org/markup-compatibility/2006"xmlns:local="clr-namespace:WpfResize"xmlns:ac="clr-namespace:AC"mc:Ignorable="d"Title="MainWindow" Height="450" Width="800"  WindowStyle="None"ResizeMode="NoResize"><Grid x:Name="grid" Background="White"><Grid  Margin="0,20,0,0"  ac:Resize.IsResizeable="True"   Background="SeaGreen " Height="100" Width="200" ><ac:Resize.Template><ControlTemplate ><Grid  Margin="-4"><Grid.Resources><Style TargetType="Thumb"><Setter Property="Width" Value="8"></Setter><Setter Property="Height" Value="8"></Setter><Setter Property="Template"><Setter.Value><ControlTemplate><Border  Background="Aqua"></Border></ControlTemplate></Setter.Value></Setter></Style></Grid.Resources><Border BorderBrush="Aqua"  BorderThickness="2" Margin="4"></Border><!--左--><Thumb   HorizontalAlignment="Left"  Cursor="SizeWE"/><!--上--><Thumb   VerticalAlignment="Top" Cursor="SizeNS"/><!--右--><Thumb   HorizontalAlignment="Right"  Cursor="SizeWE"/><!--下--><Thumb    VerticalAlignment="Bottom" Cursor="SizeNS"/><!--左上--><Thumb    HorizontalAlignment="Left" VerticalAlignment="Top" Cursor="SizeNWSE"/><!--右上--><Thumb    HorizontalAlignment="Right" VerticalAlignment="Top"  Cursor="SizeNESW"/><!--右下--><Thumb    HorizontalAlignment="Right" VerticalAlignment="Bottom"  Cursor="SizeNWSE"/><!--左下--><Thumb    HorizontalAlignment="Left" VerticalAlignment="Bottom" Cursor="SizeNESW"/></Grid></ControlTemplate></ac:Resize.Template><TextBlock HorizontalAlignment="Center" VerticalAlignment="Center" Foreground="White" Text="自定义整体模板"></TextBlock></Grid></Grid>
</Window>
效果预览
7、窗口平滑拖动
窗口为透明窗口(AllowTransparency为true或者WindowChrome的GlassFrameThickness为-1),附加属性 ac:Resize.IsWindowDragSmooth设置为true即可以实现平滑拖动。
注:当前版本和装饰器不兼容,拖动时装饰器可能显示在窗口外面,谨慎使用此属性
<Window x:Class="WpfResize.MainWindow"xmlns="http://schemas.microsoft.com/winfx/2006/xaml/presentation"xmlns:x="http://schemas.microsoft.com/winfx/2006/xaml"xmlns:d="http://schemas.microsoft.com/expression/blend/2008"xmlns:mc="http://schemas.openxmlformats.org/markup-compatibility/2006"xmlns:local="clr-namespace:WpfResize"xmlns:ac="clr-namespace:AC"mc:Ignorable="d"Title="MainWindow" Height="450" Width="800"  WindowStyle="None"ResizeMode="NoResize"AllowsTransparency="True"ac:Resize.IsResizeable="True"ac:Resize.IsWindowDragSmooth="True"><Grid Background="SeaGreen "/>
</Window>
作为对比先展示非平滑拖动
注:qq录制鼠标出现了偏移
设置平滑拖动效果预览
注:qq录制鼠标出现了偏移
8、拖动事件
3个事件,拖动开始ac:Resize.DragResizeStarted、拖动变化ac:Resize.DragResizeDelta、拖动结束ac:Resize.DragResizeCompleted
xaml
<Window x:Class="WpfResize.MainWindow"xmlns="http://schemas.microsoft.com/winfx/2006/xaml/presentation"xmlns:x="http://schemas.microsoft.com/winfx/2006/xaml"xmlns:d="http://schemas.microsoft.com/expression/blend/2008"xmlns:mc="http://schemas.openxmlformats.org/markup-compatibility/2006"xmlns:local="clr-namespace:WpfResize"xmlns:ac="clr-namespace:AC"mc:Ignorable="d"Title="MainWindow" Height="450" Width="800"  ><Grid Background="SeaGreen "><Border Background="Aqua" Width="200" Height="200"   ac:Resize.IsResizeable="True"  ac:Resize.DragResizeStarted="Border_DragResizeStarted"  ac:Resize.DragResizeCompleted="Border_DragResizeCompleted" ac:Resize.DragResizeDelta="Border_DragResizeDelta"></Border></Grid>
</Window>
cs
using AC;
using System;
using System.Windows;
using System.Windows.Controls;
using System.Windows.Input;
using System.Windows.Media;namespace WpfResize
{/// <summary>/// Interaction logic for MainWindow.xaml/// </summary>public partial class MainWindow : Window{public MainWindow(){InitializeComponent();}private void Border_DragResizeStarted(object sender, DragResizeStartedEventArgs e){Console.WriteLine("开始拖动");}private void Border_DragResizeCompleted(object sender, DragResizeCompletedEventArgs e){Console.WriteLine("结束拖动");}private void Border_DragResizeDelta(object sender, DragResizeDeltaEventArgs e){Console.WriteLine("横向变化:"+e.HorizontalChange+ " 纵向变化:"+e.VerticalChange+ " 宽变化:" + e.WidthChange + " 高变化:" + e.HeightChange);}}
}
效果预览
注:qq录制鼠标出现了偏移
9、其他功能
(1)适应MinWidth、MinHeight
xaml
<Window x:Class="WpfResize.MainWindow"xmlns="http://schemas.microsoft.com/winfx/2006/xaml/presentation"xmlns:x="http://schemas.microsoft.com/winfx/2006/xaml"xmlns:d="http://schemas.microsoft.com/expression/blend/2008"xmlns:mc="http://schemas.openxmlformats.org/markup-compatibility/2006"xmlns:local="clr-namespace:WpfResize"xmlns:ac="clr-namespace:AC"mc:Ignorable="d"Title="MainWindow" Height="450" Width="800"  ><Grid Background="SeaGreen "><Border Background="Aqua" MinWidth="100" MinHeight="100" Width="200" Height="200"   ac:Resize.IsResizeable="True"  ></Border></Grid>
</Window>
效果预览
注:qq录制鼠标出现了偏移

(2)适应MaxWidth、MaxHeight
xaml
<Window x:Class="WpfResize.MainWindow"xmlns="http://schemas.microsoft.com/winfx/2006/xaml/presentation"xmlns:x="http://schemas.microsoft.com/winfx/2006/xaml"xmlns:d="http://schemas.microsoft.com/expression/blend/2008"xmlns:mc="http://schemas.openxmlformats.org/markup-compatibility/2006"xmlns:local="clr-namespace:WpfResize"xmlns:ac="clr-namespace:AC"mc:Ignorable="d"Title="MainWindow" Height="450" Width="800"  ><Grid Background="SeaGreen "><Border Background="Aqua" MaxWidth="200" MaxHeight="200" Width="100" Height="100"   ac:Resize.IsResizeable="True"  ></Border></Grid>
</Window>
效果预览

总结
以上就是今天要讲的内容,拓展后的功能更加全面以及兼容性更强了,比如DragRezie就可以用于画板,边界限制也是比较实用的功能,拖动点模板简化了自定义的难度,拖动事件可以用于实现撤销重做功能,窗口平滑拖动优化了使用体验。但是还是有些功能不够完,需要后期继续优化。总的来说,本文实现的拖动调整大小模块已经变得更加方便实用,后期还会继续完善优化。