文章目录
- 一、Nginx简介
- 二、编译安装Nginx,以及优化服务
- 2.1、编译安装nginx
- 2.1.1 xftp导入nginx依赖包
- 2.1.2 yum安装依赖包
- 2.1.3 解压软件包,并配置configure进行编译安装
- 2.1.4 优化执行路径并创建不可登录的程序用户
- 2.1.5 制作管理脚本
- 2.2 Nginx的访问状态统计
- 2.2.1 修改配置文件
- 2.2.2 验证效果
- 2.2.3 常见错误
- 2.3 Nginx验证功能
- 2.3.1 修改配置文件
- 三、配置虚拟主机
- 3.1 基于域名
- 3.1.1 修改配置文件
- 3.1.2 准备测试页
- 3.1.4 测试
- 3.2 基于IP
- 3.2.1 新增网卡
- 3.2.2 修改配置文件
- 3.2.3 hosts增加映射
- 3.2.4 测试
- 3.3 基于端口号
- 3.3.1修改配置文件
- 3.3.2 验证效果
一、Nginx简介
- 一款高性能、轻量级Web服务软件
- 稳定性高
- 系统资源消耗低
- 对HTTP并发连接的处理能力高
- 单台物理服务器可支持30000~50000个并发请求
二、编译安装Nginx,以及优化服务
2.1、编译安装nginx
2.1.1 xftp导入nginx依赖包

2.1.2 yum安装依赖包
yum -y install pcre-devel zlib-devel
2.1.3 解压软件包,并配置configure进行编译安装
tar zxf nginx-1.12.2.tar.gz
cd nginx-1.12.2/./configure \
--prefix=/usr/local/nginx \
--user=nginx \
--group=nginx \
--with-http_stub_status_modulemake && make install
2.1.4 优化执行路径并创建不可登录的程序用户
ln -s /usr/local/nginx/sbin/nginx /usr/binuseradd -M -s /sbin/nologin nginxnginx  ##开启服务
netstat -anpt | grep nginx ###查看nginx服务是否开启
2.1.5 制作管理脚本
#!/bin/bash
#chkconfig: 35 20 80
#description: nginx server
PROG="/usr/local/nginx/sbin/nginx"
PIDF="/usr/local/nginx/logs/nginx.pid"case "$1" instart)$PROG;;stop)killall -s QUIT $(cat $PIDF);;restart)$0 stop$0 start;;reload)killall -s HUP $(cat $PIDF);;*)echo "Usage: $0 {start|stop|reload|status}"exit 1
esac
exit 0chmod +x /etc/init.d/nginx   ##增加权限
chkconfig --add nginx
2.2 Nginx的访问状态统计
2.2.1 修改配置文件
vi /usr/local/nginx/conf/nginx.confuser  nginx nginx   ##user  nobody为user  nginx nginx
error_log  logs/error.log  info ###去除#使服务生效events {use epoll; worker_connections  1024;
}###在server模块里的error_page上面增加下面的模块
location ~ /status { stub_status  on;access_log  off;} nginx -t  ##查看语法是否正确
nginx: the configuration file /usr/local/nginx/conf/nginx.conf syntax is ok
nginx: configuration file /usr/local/nginx/conf/nginx.conf test is successful
2.2.2 验证效果

2.2.3 常见错误
nginx -t检查语法都正确但是无法访问服务
1、关闭服务systemctl stop nginx
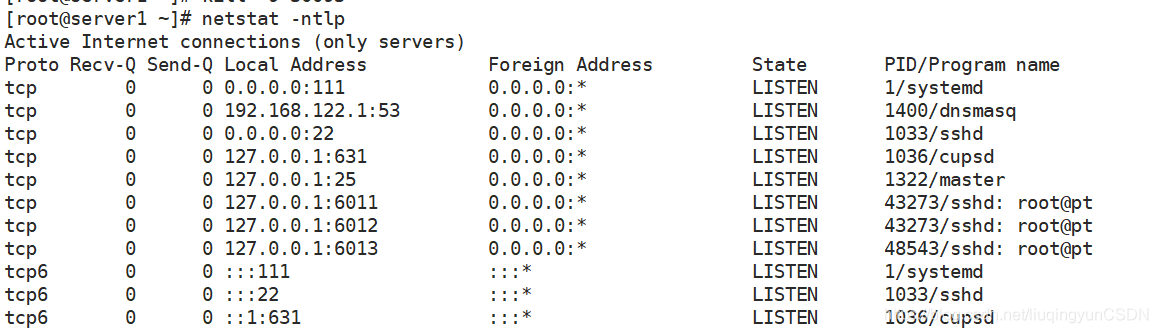
2、netstat -ntlp 查看所有端口状态发现服务关闭之后还是有nginx端口被占用
3、kill -9 [ 进程号 ]
4、重新启动程序即可正常访问
2.3 Nginx验证功能
2.3.1 修改配置文件
yum -y install httpd-toolshtpasswd -c /usr/local/nginx/passwd.db lisi ##创建一个密码登录的账户vi /usr/local/nginx/conf/nginx.conf三、配置虚拟主机
3.1 基于域名
3.1.1 修改配置文件
vi /usr/local/nginx/conf/nginx.confserver {listen 80;server_name www.test1.com;charset utf-8;access_log logs/test1.com.access.log main;location / {root /var/www/test1;index index.html index.htm;}在最后添加server {listen 80;server_name www.test2.com;charset utf-8;access_log logs/test2.com.access.log;location / {root /var/www/test2;index index.html index.htm;}error_page 500 502 503 504 /50x.html;location = /50x.html {root html;}}3.1.2 准备测试页
mkdir -p /var/www/test1
mkdir -p /var/www/test2
echo "<h1>this is test1 web</h1>" > /var/www/test1/index.html
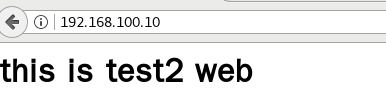
echo "<h1>this is test2 web</h1>" > /var/www/test2/index.htmlsystemctl restart nginx3.1.4 测试


3.2 基于IP
3.2.1 新增网卡
ifconfig ens33:1 192.168.100.10/24
ip addr
3.2.2 修改配置文件
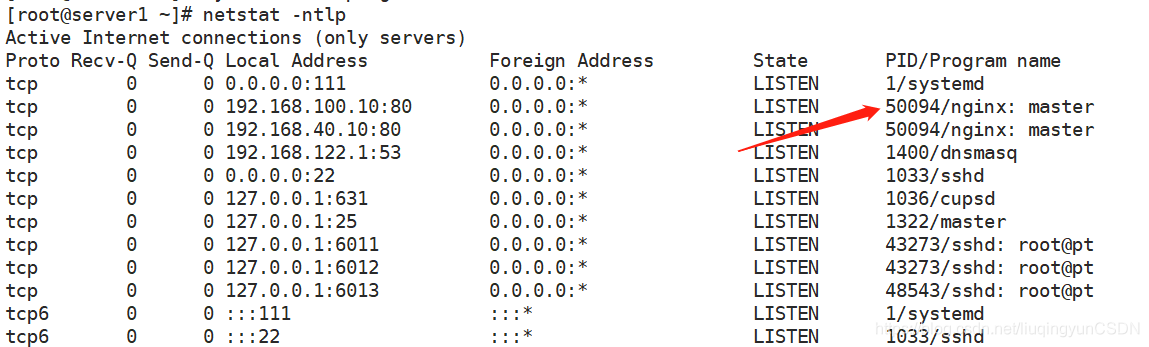
server {listen 192.168.40.10:80;server_name www.test1.com;charset utf-8;access_log logs/test1.com.access.log main;location / {root /var/www/test1;index index.html index.htm;}server {listen 192.168.100.10:80;server_name www.test2.com;charset utf-8;access_log logs/test2.com.access.log;location / {root /var/www/test2;index index.html index.htm;}error_page 500 502 503 504 /50x.html;location = /50x.html {root html;}}3.2.3 hosts增加映射
vi /etc/hosts

3.2.4 测试
systemctl restart nginx

3.3 基于端口号
3.3.1修改配置文件
vi /usr/local/nginx/conf/nginx.confserver {listen 192.168.100.10:8080;server_name www.test2.com;charset utf-8;access_log  logs/test2.com.access.log;location / {root    /var/www/test2;index   index.html index.htm;}error_page   500 502 503 504  /50x.html;location = /50x.html {root   html;}}
systemctl restart nginx
3.3.2 验证效果