如何在aws部署web网站
We have been telling too many theoretical stories in Part 1a, 1b, and 2a of this series. It is time to get our hands dirty and start the action we have been teasing with for too long. From this point, we will be setting up a scalable website. The setup will be in two modes. The infrastructure will be set up using Terraform and it will be set up using the AWS Console. At the end of this piece, you will be able to create a static website in Amazon S3.
在本系列的第1a,1b和2a部分中,我们讲了太多的理论故事。 现在是时候弄脏我们的手,并开始进行我们为时已久的戏弄了。 至此,我们将建立一个可扩展的网站。 设置将有两种模式。 该基础设施将使用Terraform进行设置,并将使用AWS控制台进行设置。 在本文的最后,您将能够在Amazon S3中创建一个静态网站。
Let us BeginThe first stage here is to set up the Amazon S3 bucket, which serves two purposes:
让我们开始吧这里的第一步是设置Amazon S3存储桶,它有两个作用:
- The location to save the website files (HTML, CSS, and Javascript) files 网站文件(HTML,CSS和Javascript)文件的保存位置
- The webserver to serve the website files on the browser. Like every other web server out there; Apache or Nginx. 用于在浏览器上提供网站文件的Web服务器。 像其他所有Web服务器一样; Apache或Nginx。
The first step is to ensure you have an AWS account. Go to https://portal.aws.amazon.com/billing/signup#/start. The signup process is free, though you will be asked to provide your card details. We will ensure we keep the cost of running this website to the barest minimum, so we do not incur any significant cost to host this website.
第一步是确保您拥有一个AWS账户。 转到https://portal.aws.amazon.com/billing/signup#/start 。 注册过程是免费的,但是会要求您提供卡的详细信息。 我们将确保将本网站的运营成本保持在最低水平,因此我们不会为托管该网站带来任何可观的费用。
When the AWS account is activated, login to the AWS Console.
激活AWS帐户后,登录到AWS控制台。
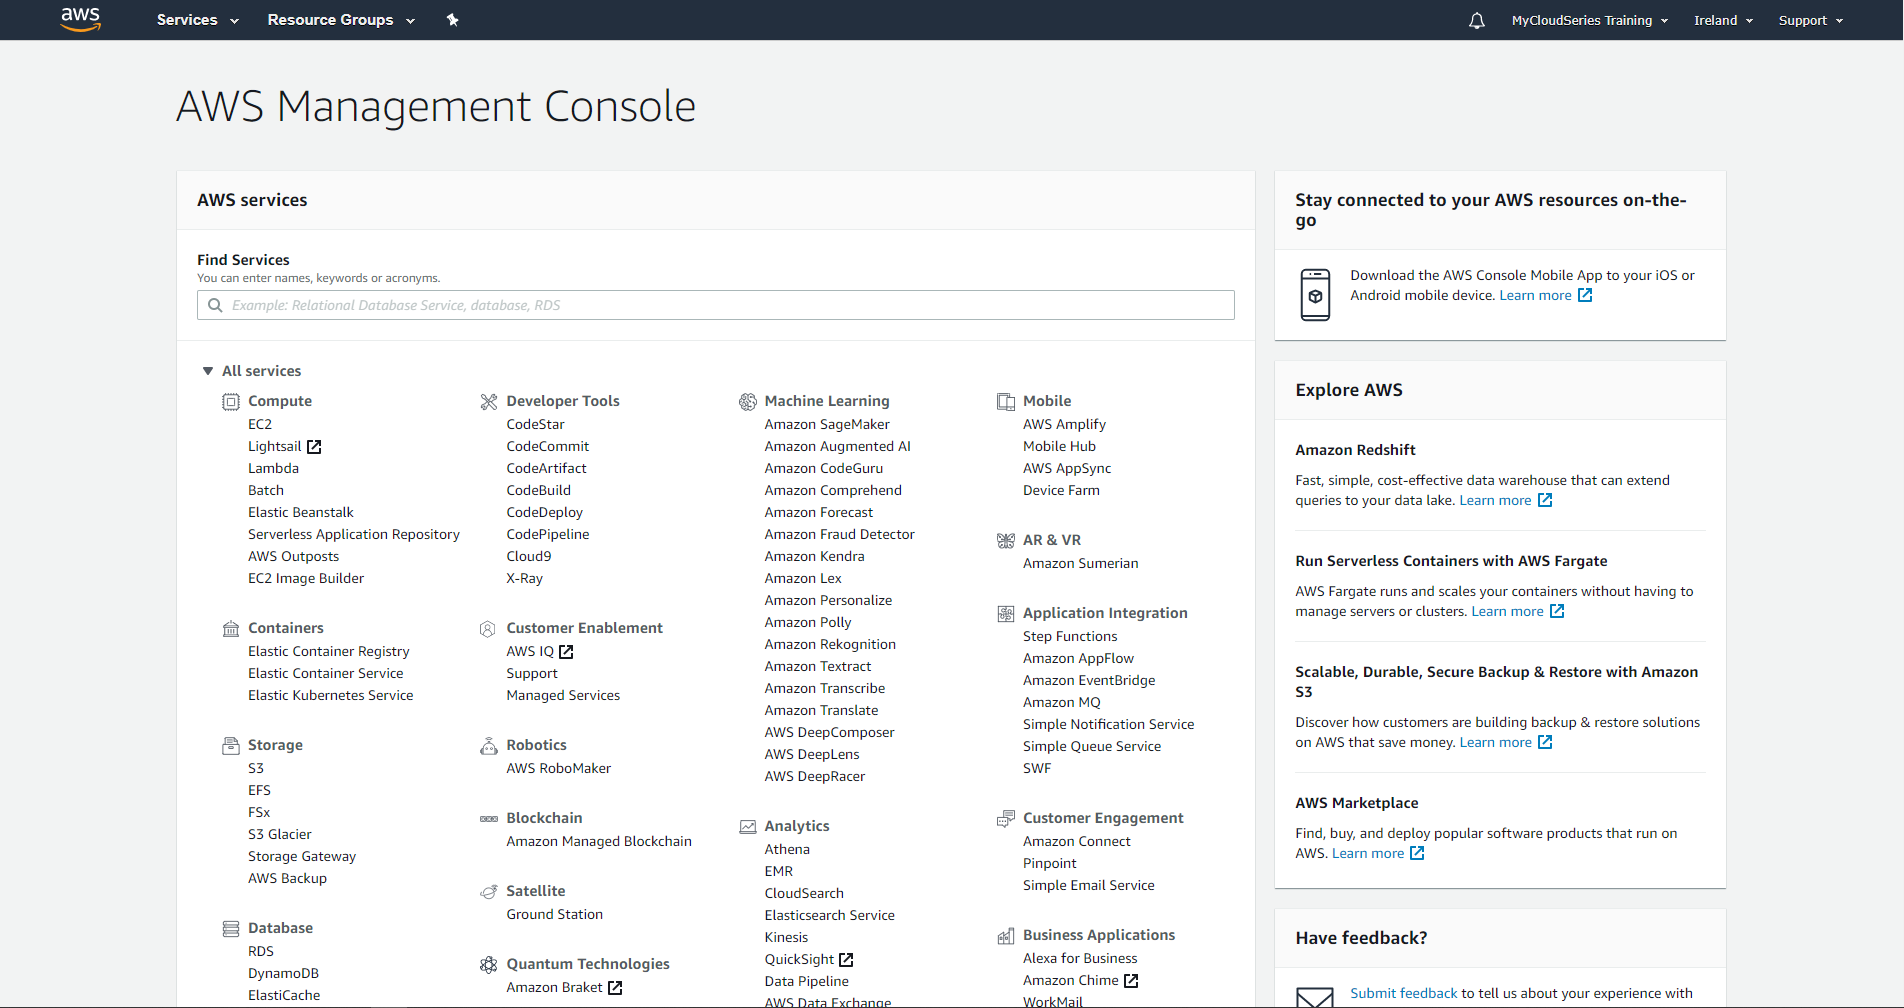
The figure above is the page we land on when the login is successful. It shows the list of AWS services. Our focus is to create an S3 bucket to host our website. We will create the bucket and write a simple HTML website and upload it to the S3 bucket.
上图是登录成功后进入的页面。 它显示了AWS服务列表。 我们的重点是创建一个S3存储桶以托管我们的网站。 我们将创建存储桶并编写一个简单HTML网站,并将其上传到S3存储桶。
Creating the S3 BucketTo create the S3 bucket, search for S3 on the AWS Management Console.
创建S3存储桶要创建S3存储桶,请在AWS管理控制台上搜索S3。
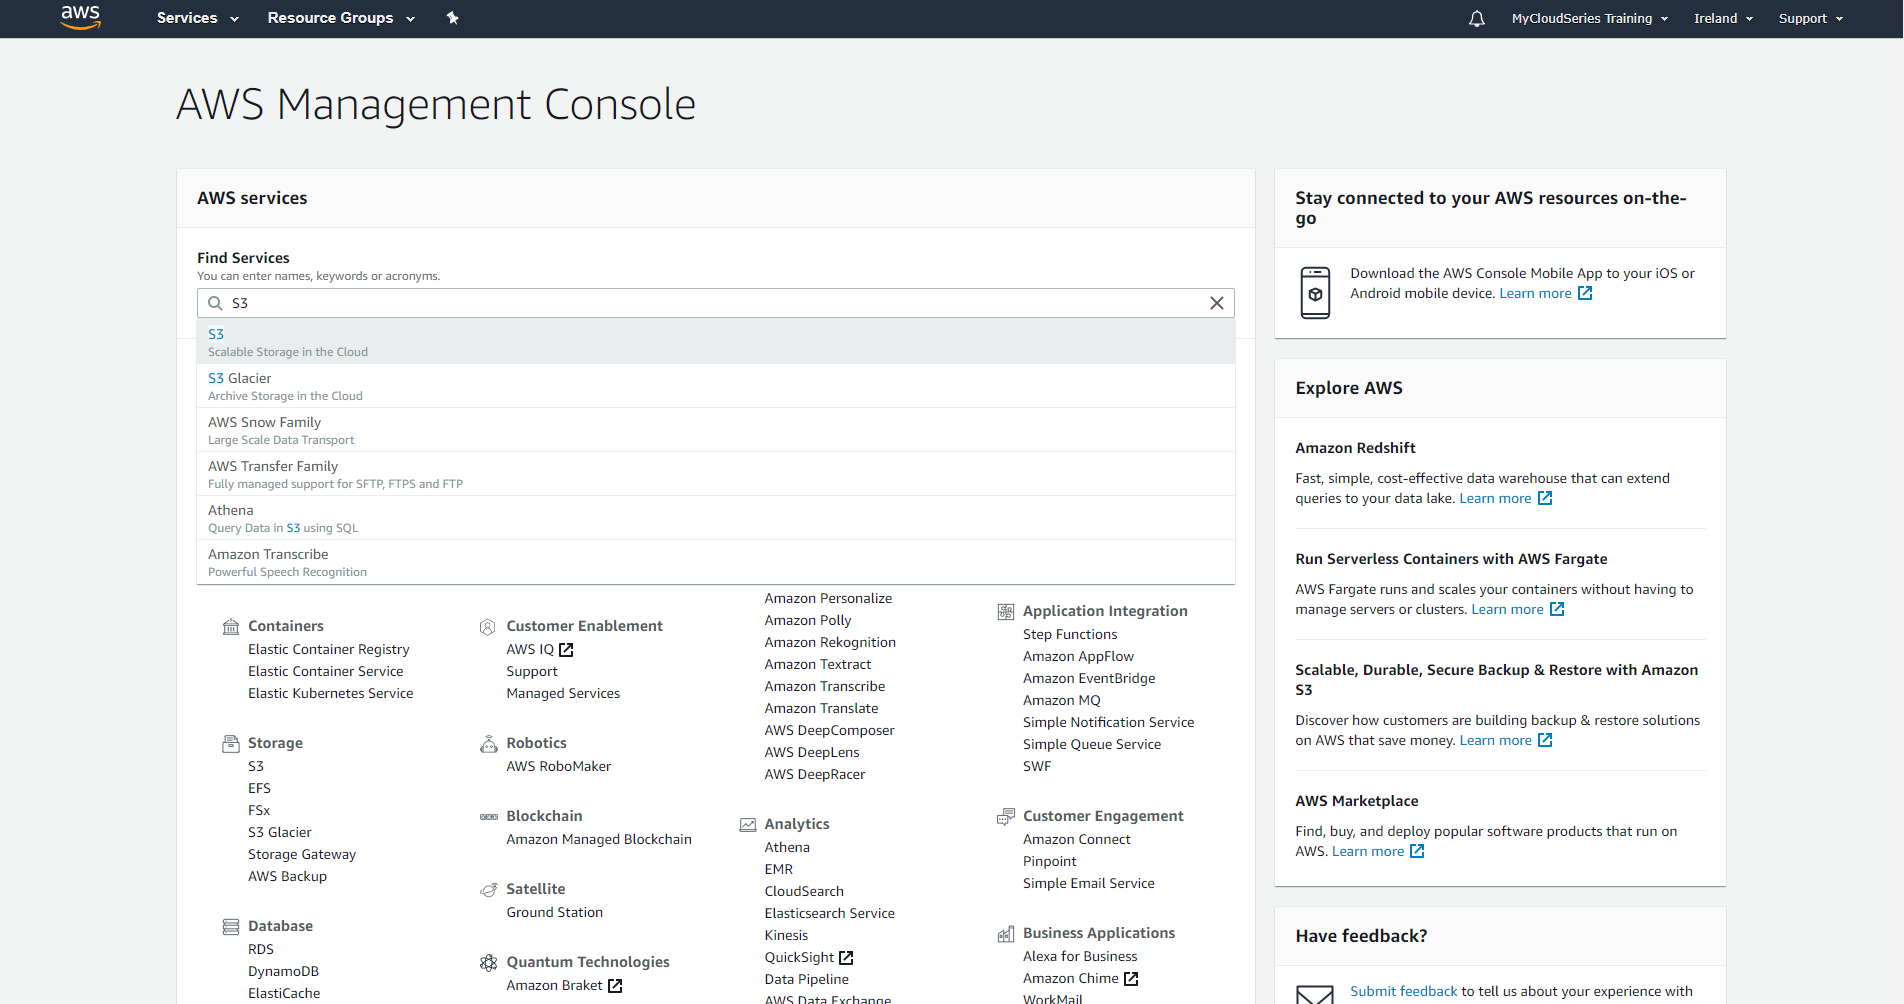
Click on the S3 link to load the Amazon S3 console.
单击S3链接以加载Amazon S3控制台。
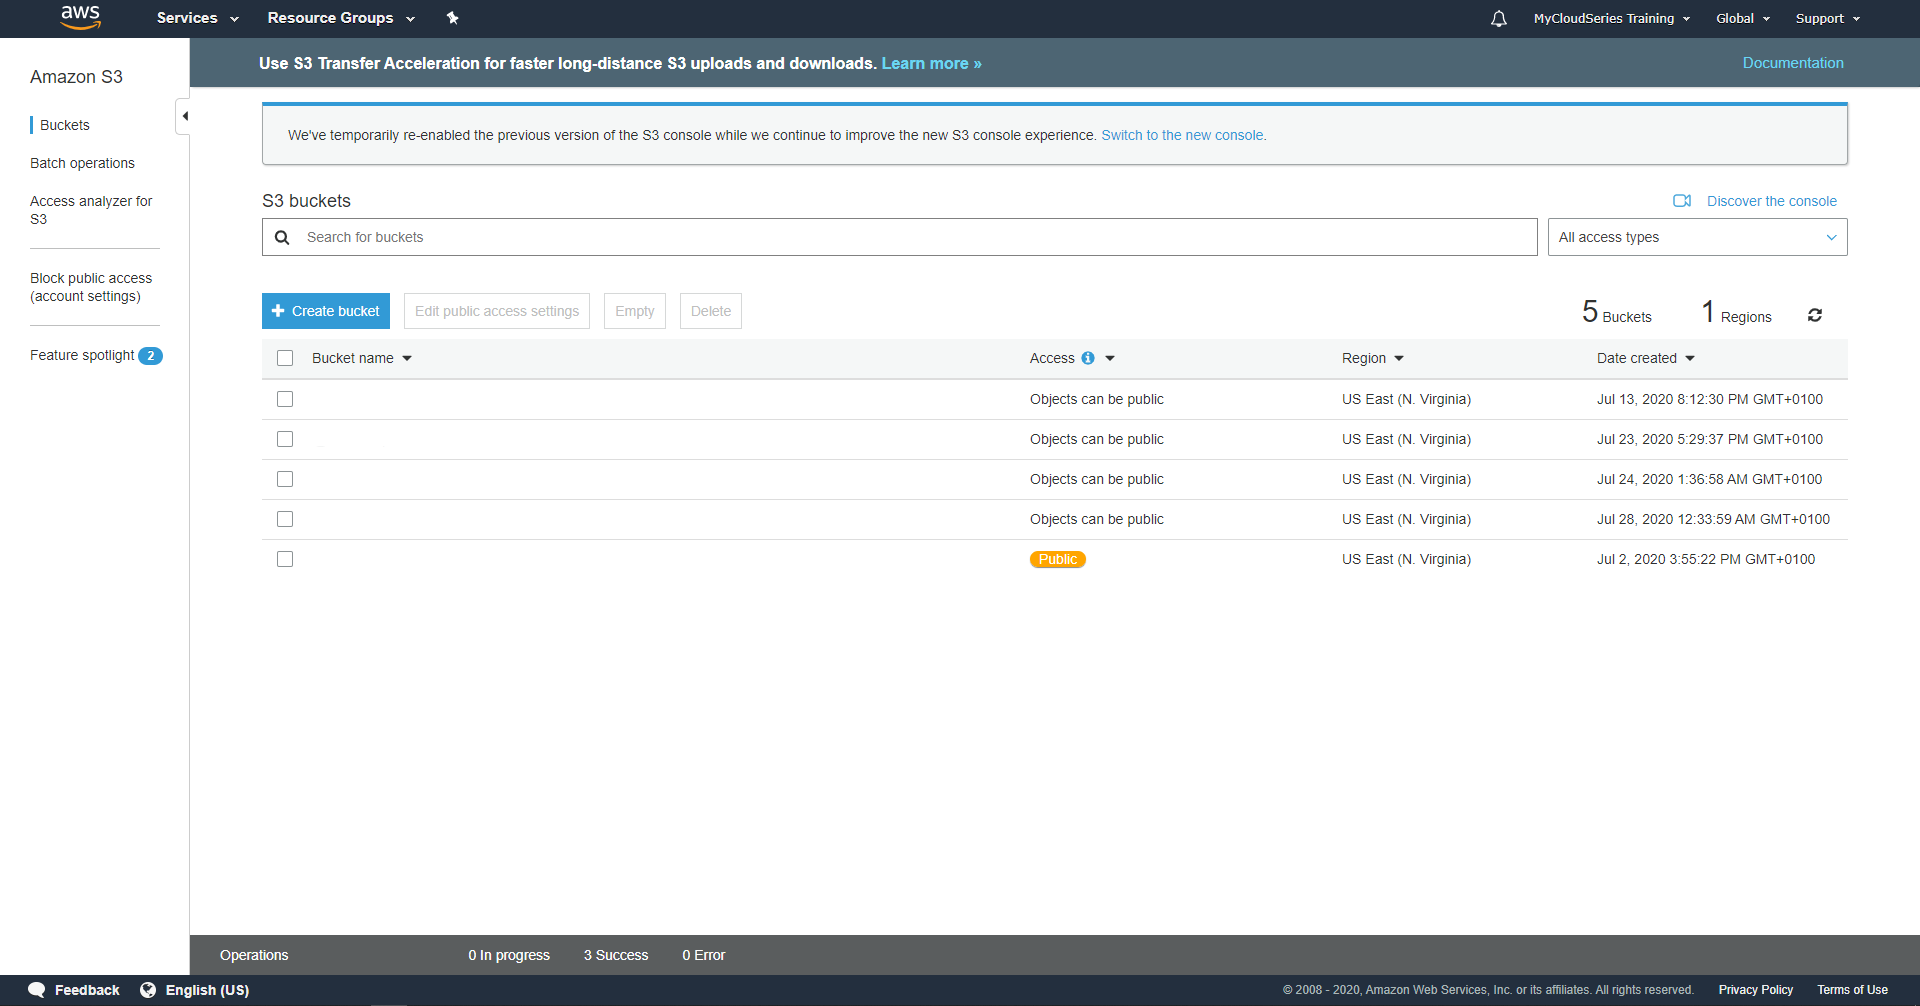
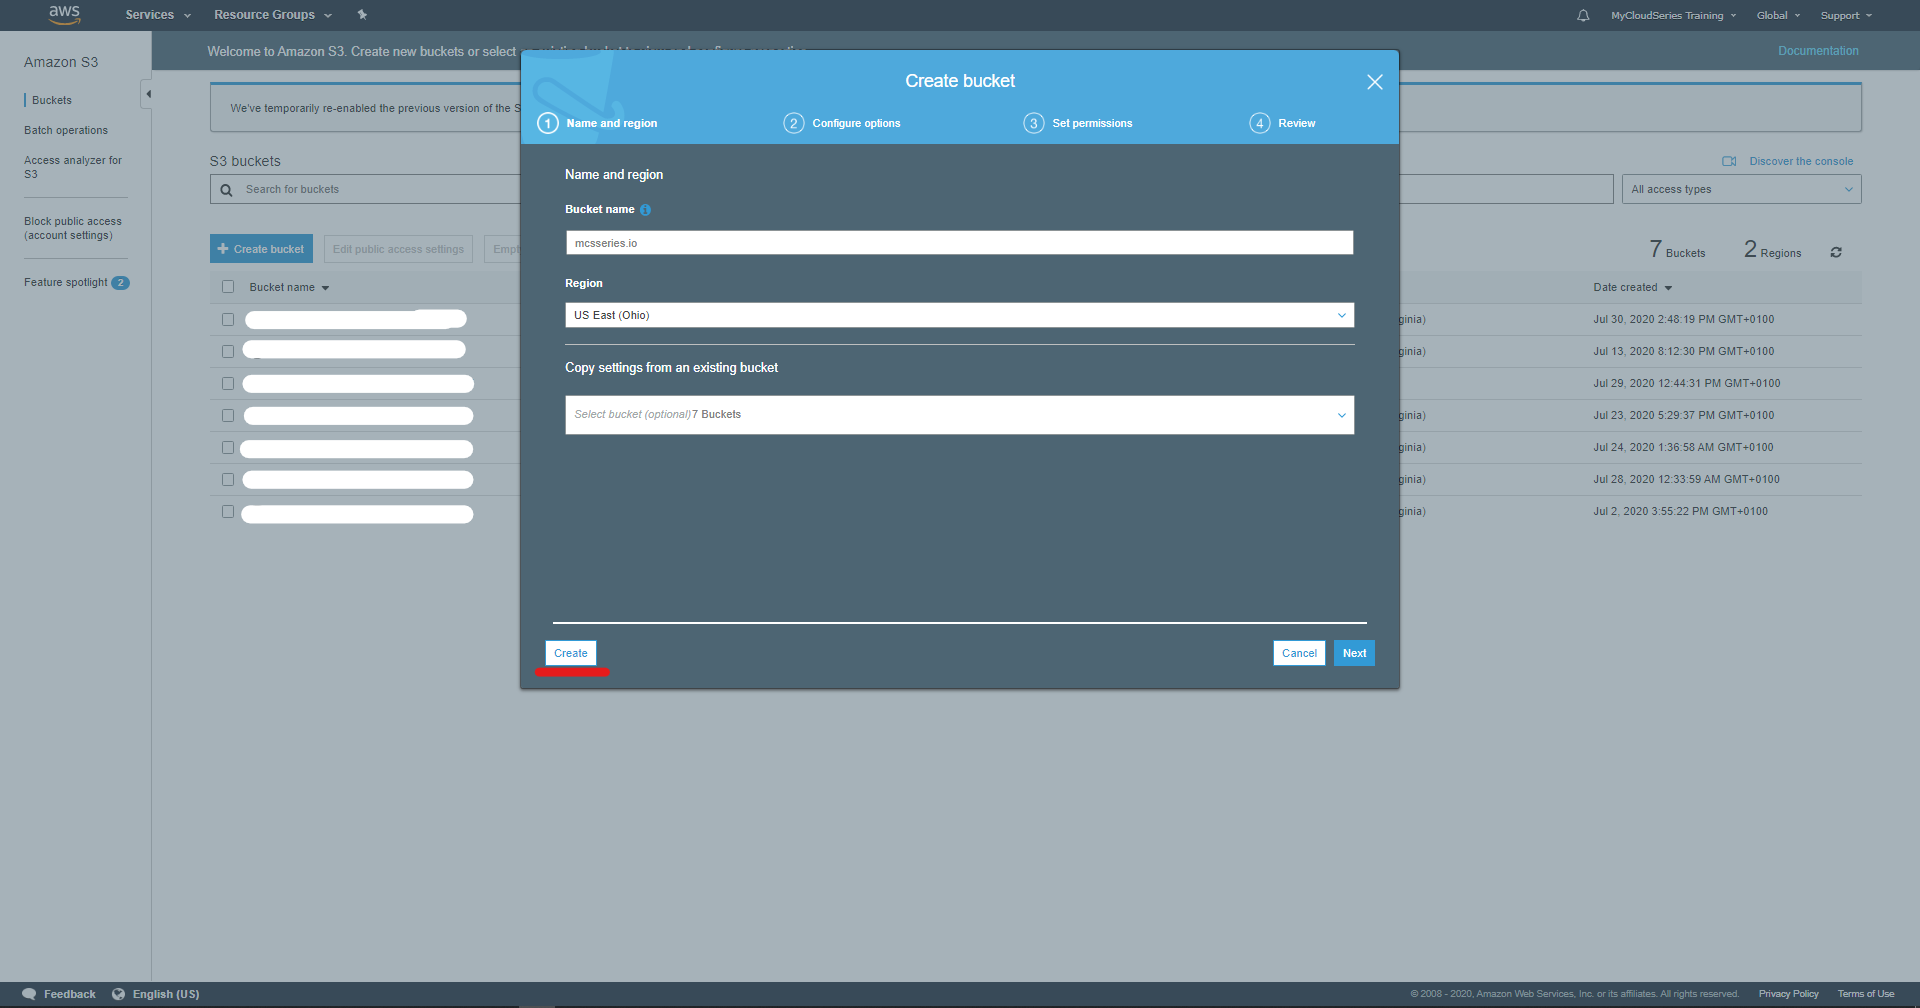
The S3 Management console shows the list of existing buckets and an option to create new buckets. To create a bucket, click on the Create Bucket button. To create the bucket, then type the name of the bucket.
S3管理控制台显示现有存储桶的列表以及创建新存储桶的选项。 要创建存储桶,请单击创建存储桶按钮。 要创建存储桶,然后输入存储桶的名称。
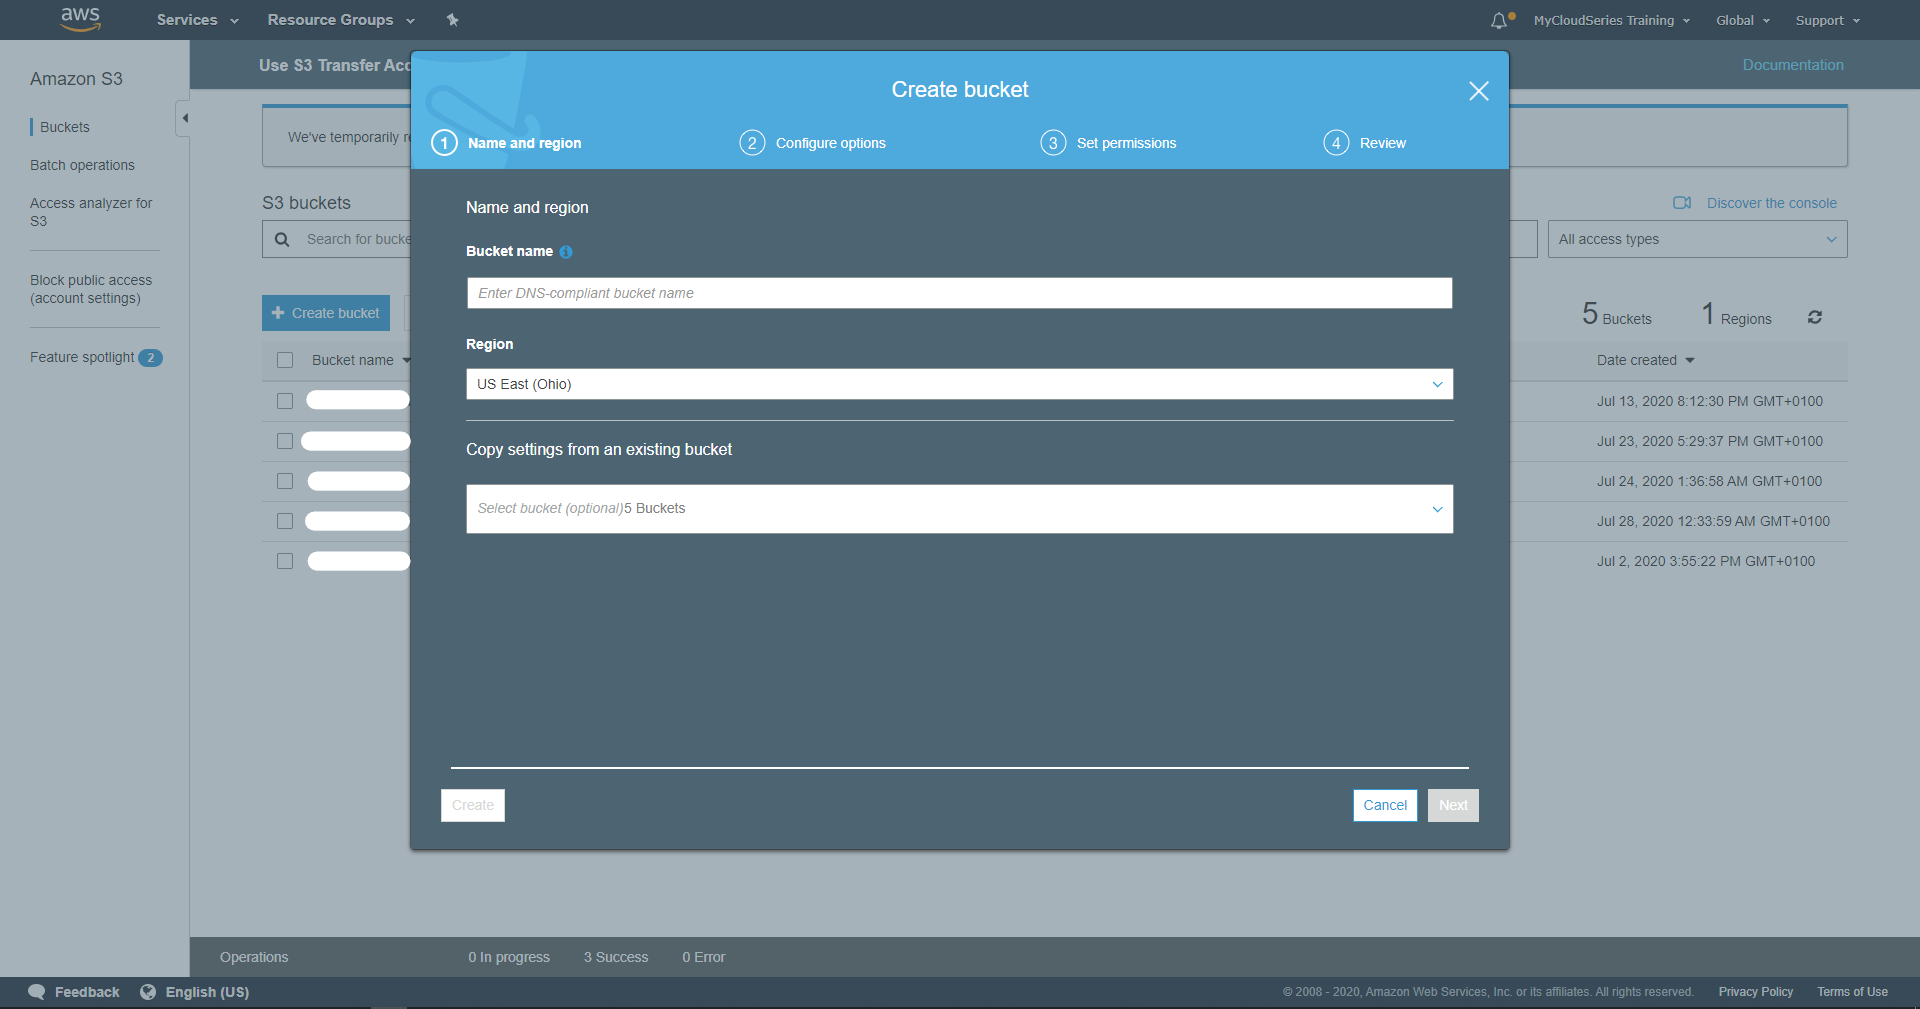
Ensure the name of the bucket is the same as the domain name for the website. For example; if the domain name is scrapersloung.io, then the bucket name must be mcsseries.io. S3 buckets also support sub-domains, so you can host, a subdomain on S3, but it has to be in a different bucket and not the same bucket where the domain was created. After typing the name of the bucket; click on the Create button.
确保存储桶的名称与网站的域名相同。 例如; 如果域名是scrapersloung.io,然后桶名称必须是mcsseries.io。 S3存储桶还支持子域,因此您可以在S3上托管一个子域,但是它必须位于不同的存储桶中,而不能与创建域的存储桶相同。 键入存储桶的名称后; 单击创建按钮。
The create button will then create the bucket and it becomes visible as one of the lists of buckets.
然后,创建按钮将创建存储桶,并显示为存储桶列表之一。

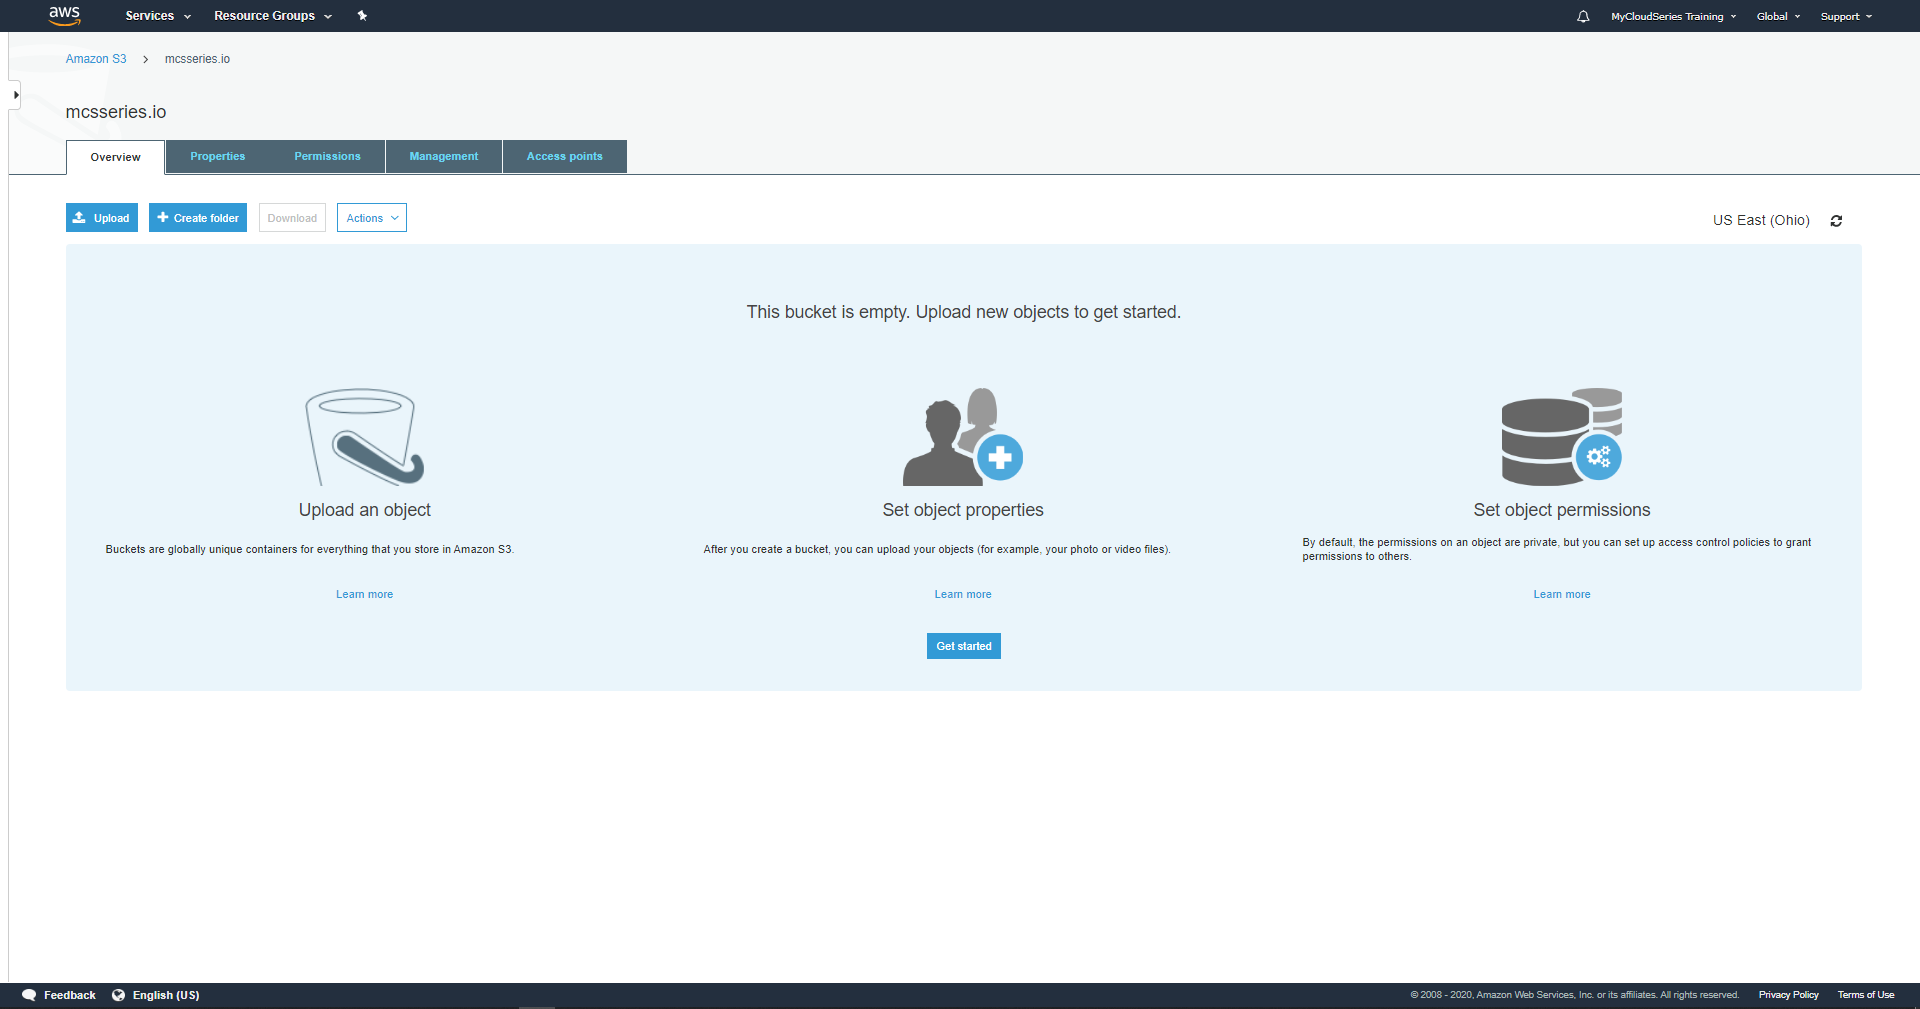
Configure the Bucket as a WebsiteNow that the bucket has been created successfully, the next stage is to make the bucket a website. An S3 bucket is primarily designed to store files/objects with unlimited storage. But we are using it for a website. So we need to go ahead and make the bucket a website which is what we are configuring it for. To do that, click on the bucket that was just created. This will take us to the Overview of the bucket and giving options to other tabs, such as the Properties, Permissions, Management, and Access Points.
将存储桶配置为网站既然已经成功创建了存储桶,下一步就是将存储桶设为网站。 S3存储桶主要用于存储无限存储的文件/对象。 但是我们正在将它用于网站。 因此,我们需要继续进行操作,并使存储桶成为我们正在为其配置的网站。 为此,请单击刚刚创建的存储桶。 这将带我们进入“存储桶概述 ”,并为其他选项卡提供选项,例如“ 属性”,“权限”,“管理”和“ 访问点”。
The focus here is on the Properties tab. This is where the bucket configurations are made to make the bucket become a website. Click on the Properties tab. The Properties tab is made up of different options.
此处的焦点位于“ 属性”选项卡上。 在此处进行存储桶配置以使存储桶成为网站。 单击属性选项卡。 “属性”选项卡由不同的选项组成。
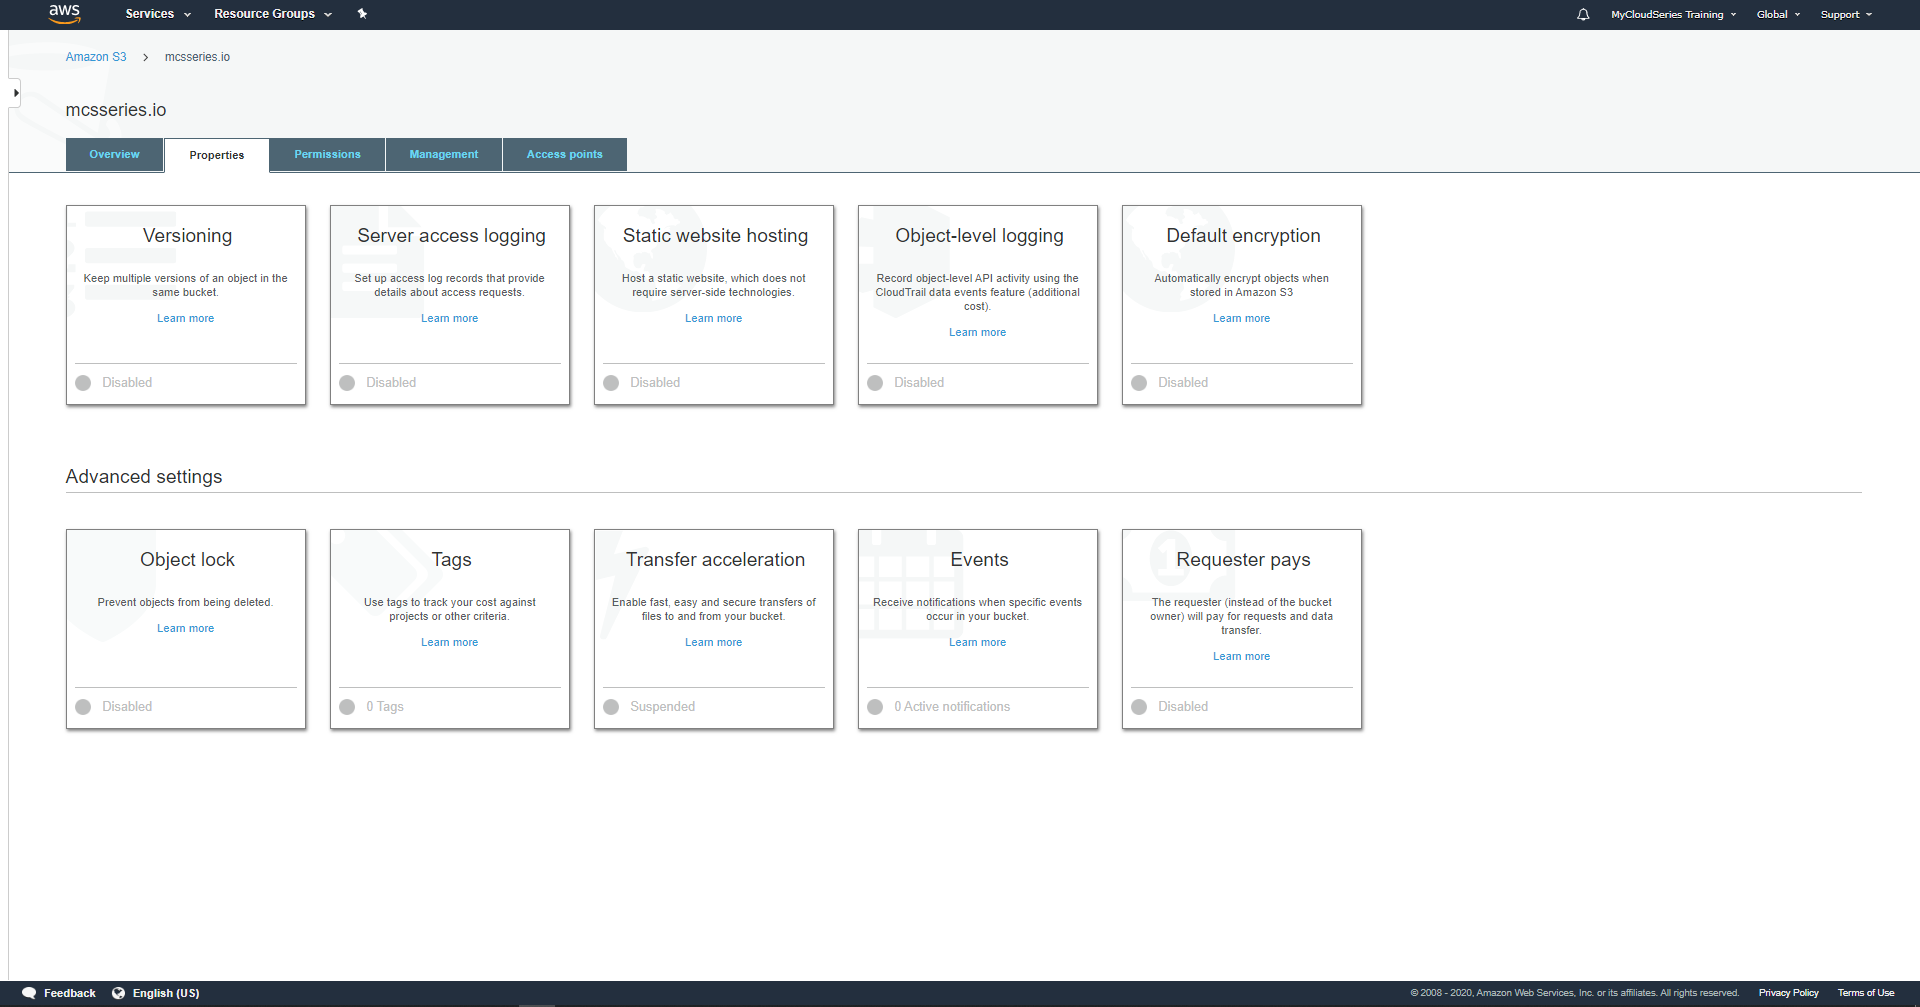
The option we need out of all is the Static website hosting. Click on the Static website hosting option to configure the website.
我们首先需要的选项是静态网站托管。 单击静态网站托管选项以配置网站。

Click on the option Use this bucket to host a website.
单击选项使用此存储桶托管网站。
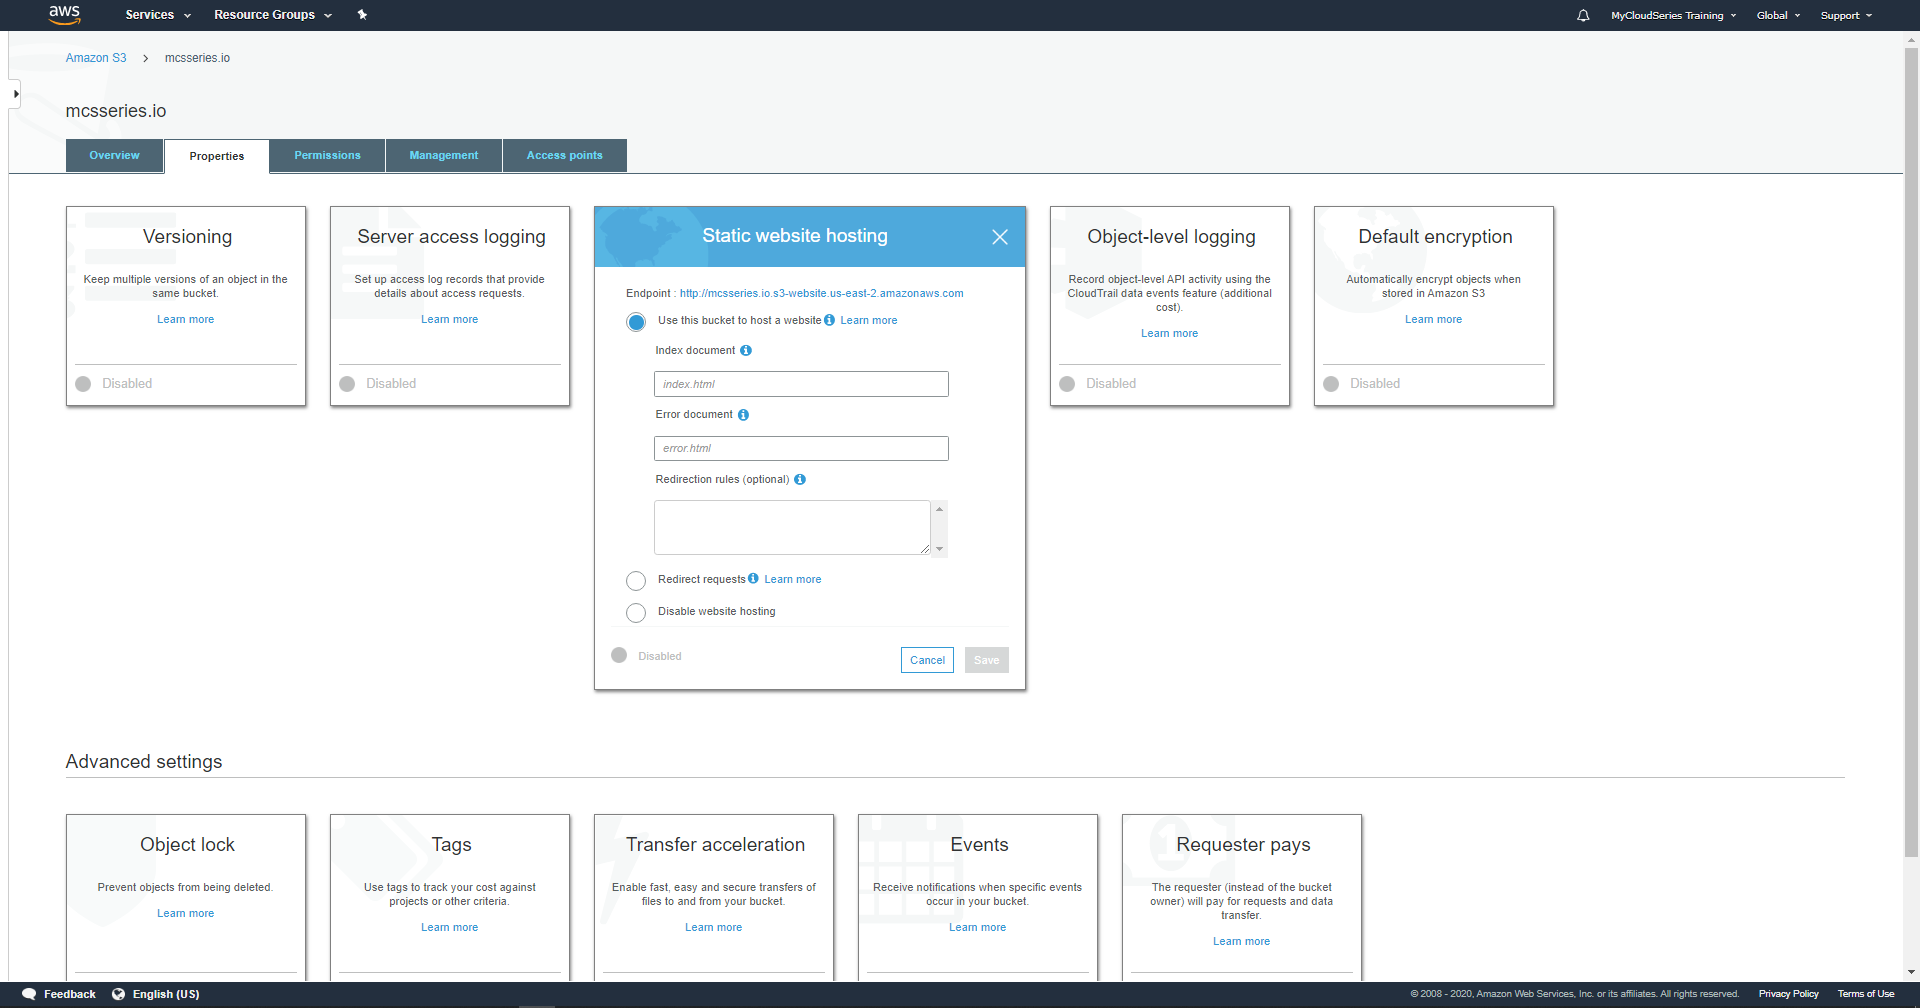
The first box is labeled, is Index document, which should specify the home page of the website, which is usually index.html by default. Simply input index.html. There is also the Error document, which is quite not compulsory, so it will be left blank. Click the Save button to save these changes. Take note of the URL of the bucket, that is the URL we will be using to visit our website when it has been uploaded/deployed. For this example, the URL is: http://mcsseries.io.s3-website.us-east-2.amazonaws.com
第一个框被标记为索引文档,该文档应指定网站的主页,默认情况下通常为index.html。 只需输入index.html。 还有一个Error文档 ,它不是强制性的,因此将留为空白。 单击保存按钮以保存这些更改。 记下存储桶的URL,即在上载/部署后将用于访问我们网站的URL。 对于此示例,URL为: http : //mcsseries.io.s3-website.us-east-2.amazonaws.com
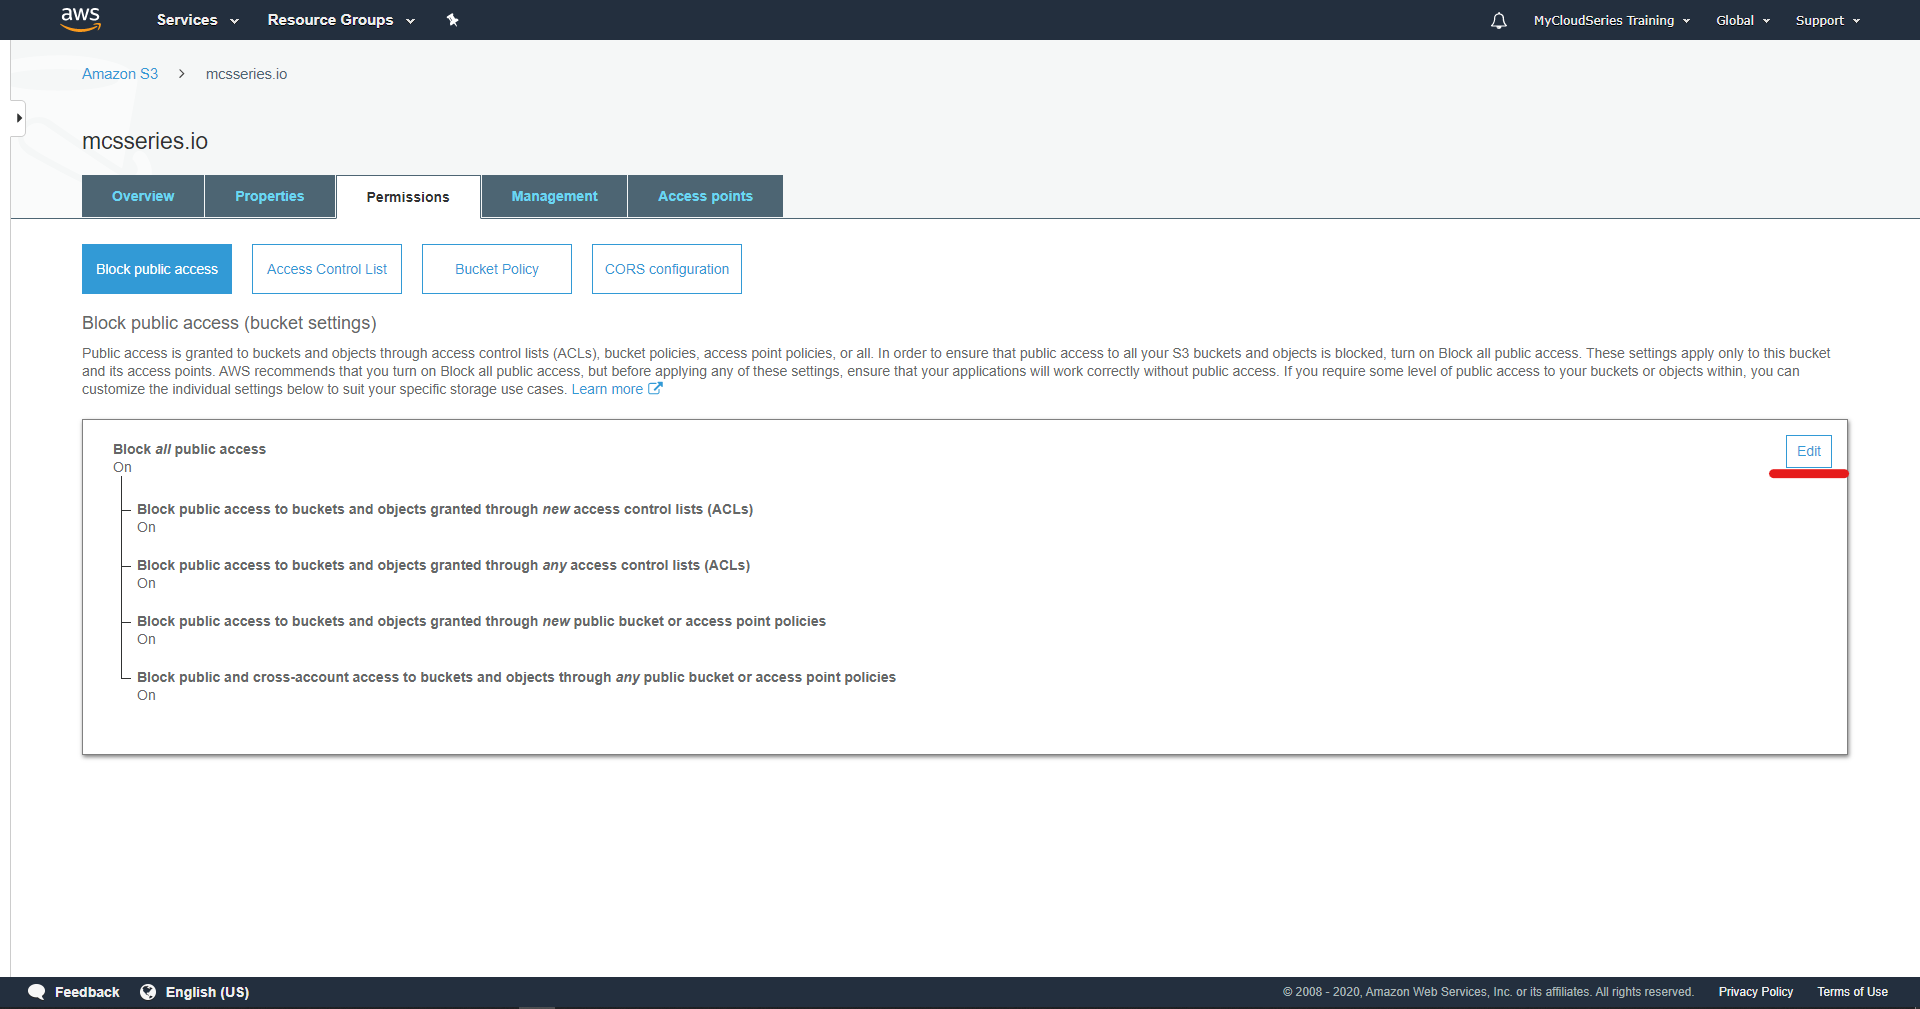
Making Bucket Public for Internet AccessDue to the fact that this is a website, hosted in S3 and need to be accessed over the internet, we have to make the bucket public and the objects in the bucket public. To do that, click on the Permissions tab. The default item selected is Block public access. On the screen, click on the Edit button.
将存储桶公开以供Internet访问由于这是一个托管在S3中的网站,需要通过Internet进行访问,因此我们必须将存储桶公开,并将存储桶中的对象公开。 为此,请单击“ 权限”选项卡。 选择的默认项是“ 阻止公共访问”。 在屏幕上,单击“ 编辑”按钮。
Uncheck the first item in the list with the label Block all public access. To give the bucket public access. Click the Save button to save the change. This will show the pop-up to confirm the changes that have been saved.
取消选中标签为禁止所有公共访问的列表中的第一项。 授予存储桶公共访问权限。 单击保存按钮以保存更改。 这将显示弹出窗口,以确认已保存的更改。
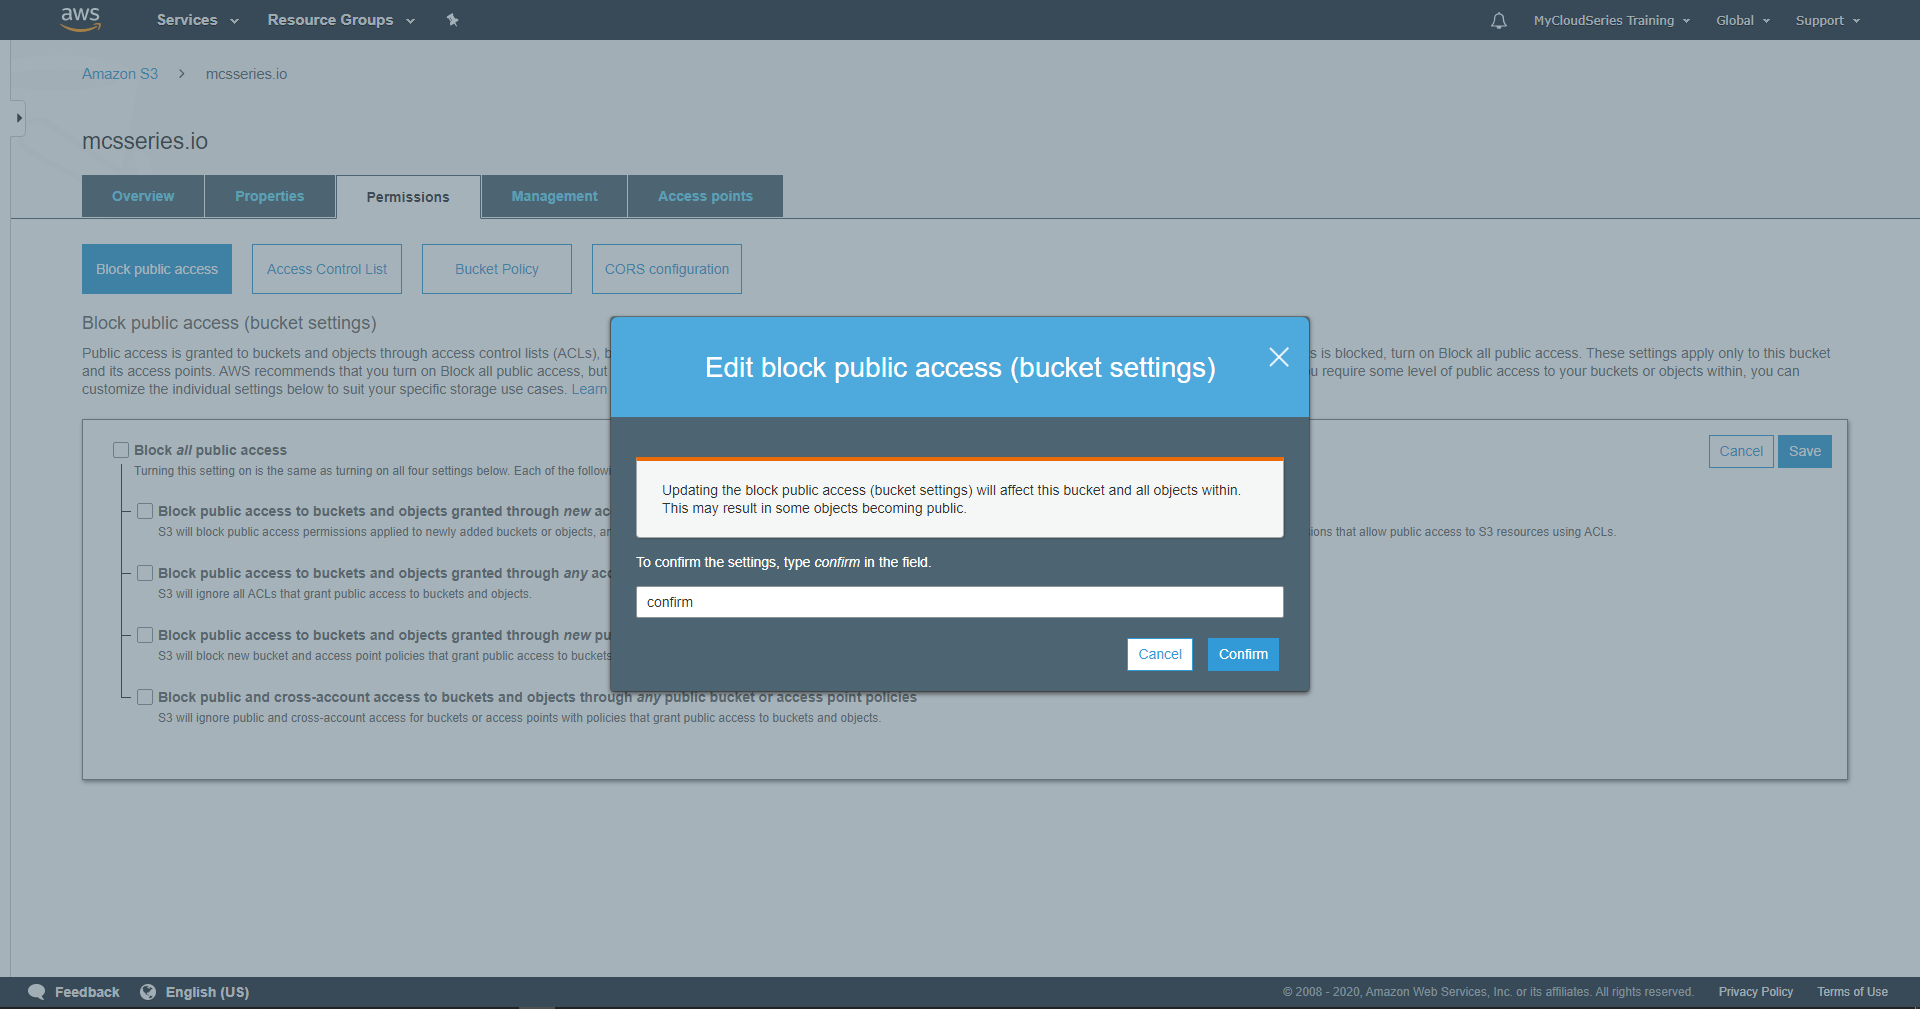
Type confirm in the box and click the Confirm button to confirm the changes that have been made.
在框中键入确认,然后单击确认按钮以确认所做的更改。
N.B. The only reason this bucket is made public is that it is a website. When you create an S3 bucket, for storing more sensitive objects, it is advisable to keep it private to avoid access over the public internet. See more here.
注意 :此存储桶公开的唯一原因是它是一个网站。 创建S3存储桶时,为了存储更多敏感对象,建议将其保密,以避免通过公共Internet进行访问。 在这里查看更多。
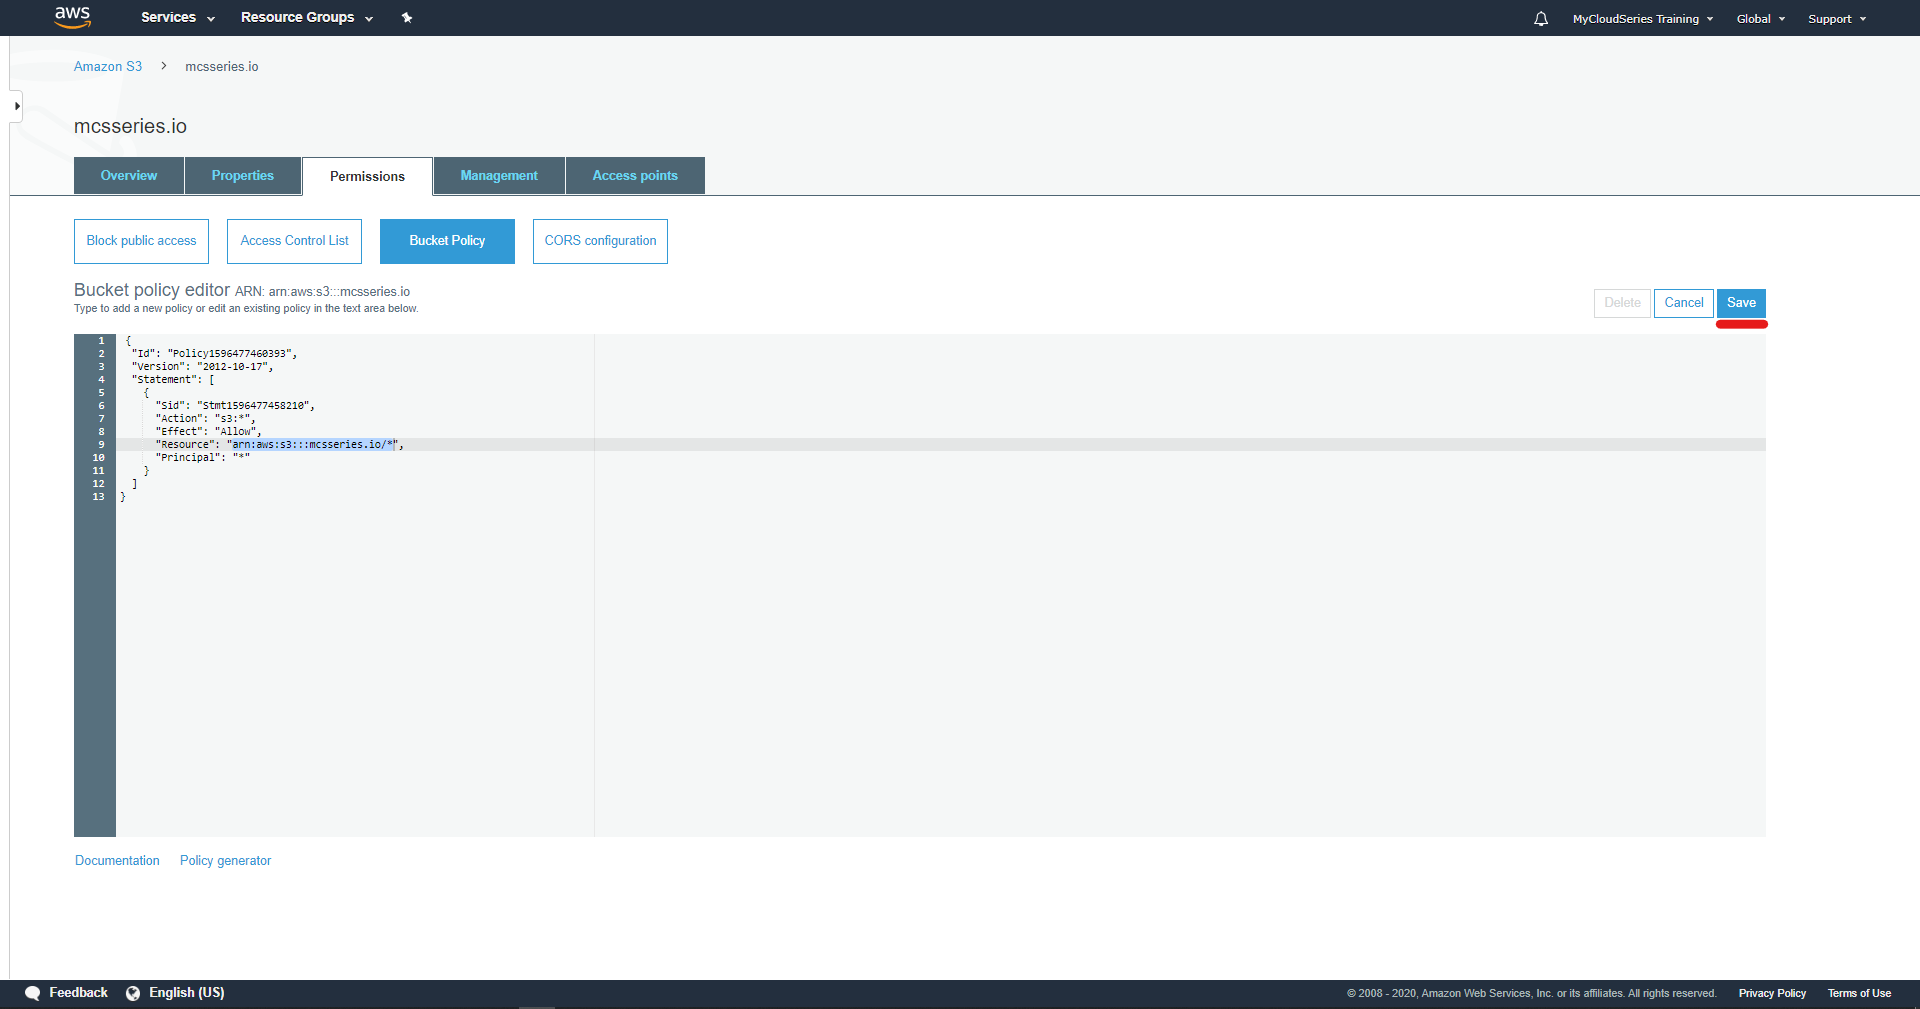
The other public access that needs to be configured is on the Bucket Policy. This policy is used for objects inside the bucket. The policy is generated using the Policy Generator link at the bottom of the page. We have generated a bucket policy and it looks like this.
需要配置的其他公共访问权限在存储桶策略中 。 此策略用于存储桶中的对象。 该策略是使用页面底部的“ 策略生成器”链接生成的。 我们已经生成了一个存储桶策略,它看起来像这样。
{"Id": "Policy1596477460393","Version": "2012-10-17","Statement": [{"Sid": "Stmt1596477458210","Action": "s3:*","Effect": "Allow","Resource": "arn:aws:s3:::mcsseries.io/*","Principal": "*"}]
}
The most important part of the policy is the Resource part, change the last values to your specific Resource. The item arn:aws:s3:::mcsseries.io/*. What changes is the bucket name, which in this example is mcsseries.io. Ensure to change for yours when doing your configuration. It has to always be the name of the bucket.
该策略最重要的部分是“ 资源”部分,将最后一个值更改为您的特定“资源”。 项arn:aws:s3 ::: mcsseries.io/*。 更改的是存储桶名称,在此示例中为mcsseries.io。 在进行配置时,请确保根据您的情况进行更改。 它必须始终是存储桶的名称。
Paste it in the Bucket policy editor and click the Save button.
将其粘贴到存储桶策略编辑器中 ,然后单击“ 保存”按钮。
This will make all the objects in the bucket to be publicly accessible.
这将使存储桶中的所有对象都可以公开访问。
Uploading/Deploying our WebsiteNow that the bucket is ready and has been configured to be a website, the next step is to upload our website. S3 for web hosting hosts HTML, CSS, and Javascript websites. Apps build with Angular, React and Vue can be hosted in S3. For this simple example, I will be using a very simple HTML file for demonstration.
上载/部署我们的网站既然存储桶已经准备好并将其配置为网站,下一步就是上载我们的网站。 用于Web托管的S3托管HTML,CSS和Javascript网站。 可以在S3中托管使用Angular,React和Vue构建的应用程序。 对于这个简单的示例,我将使用一个非常简单HTML文件进行演示。
<html><h1>Welcome to a static S3 website</h2>
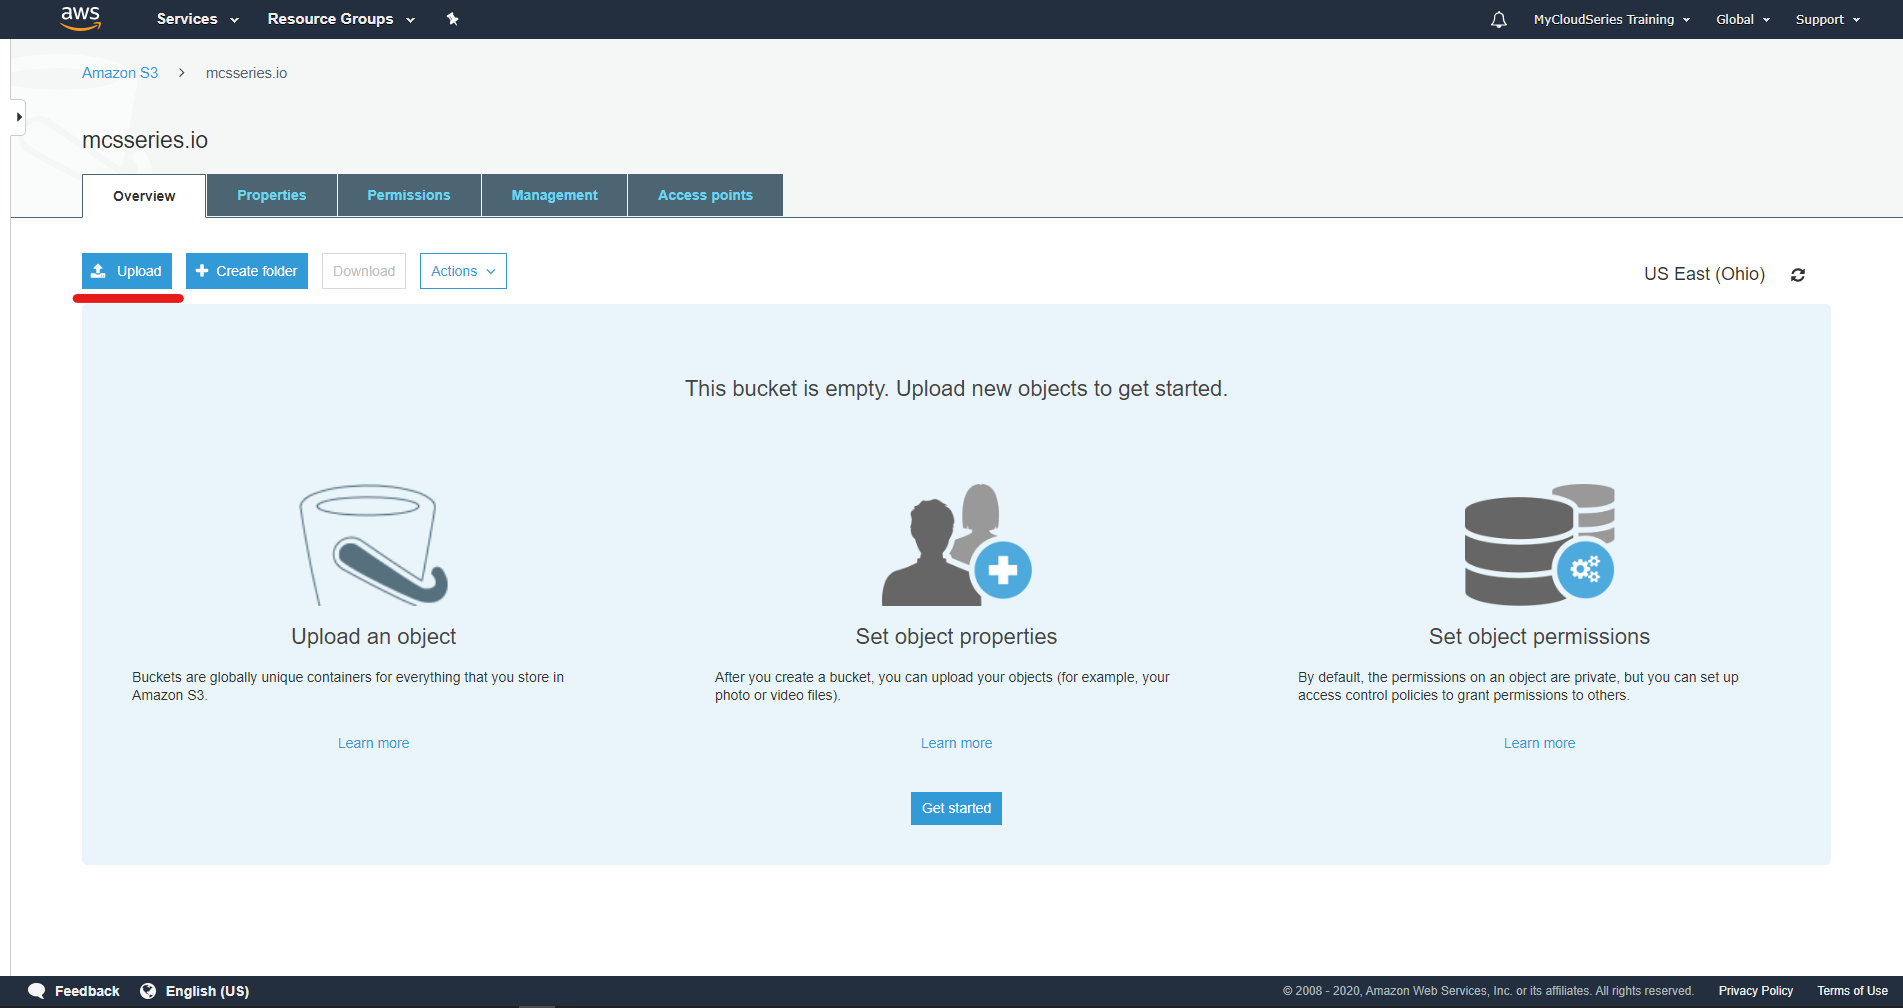
</html>This HTML file will be uploaded into the S3 bucket. To do that, click on the Overview tab which is the first tab we landed on initially. Click on the Upload button on the top menu bar, just below the Overview tab.
该HTML文件将被上传到S3存储桶中。 为此,请单击“ 概述”选项卡,这是我们最初登陆的第一个选项卡。 单击顶部菜单栏上“概述”选项卡正下方的“上载”按钮。
This will launch the pop-up to allow for uploading the HTML file
这将启动弹出窗口,以允许上传HTML文件
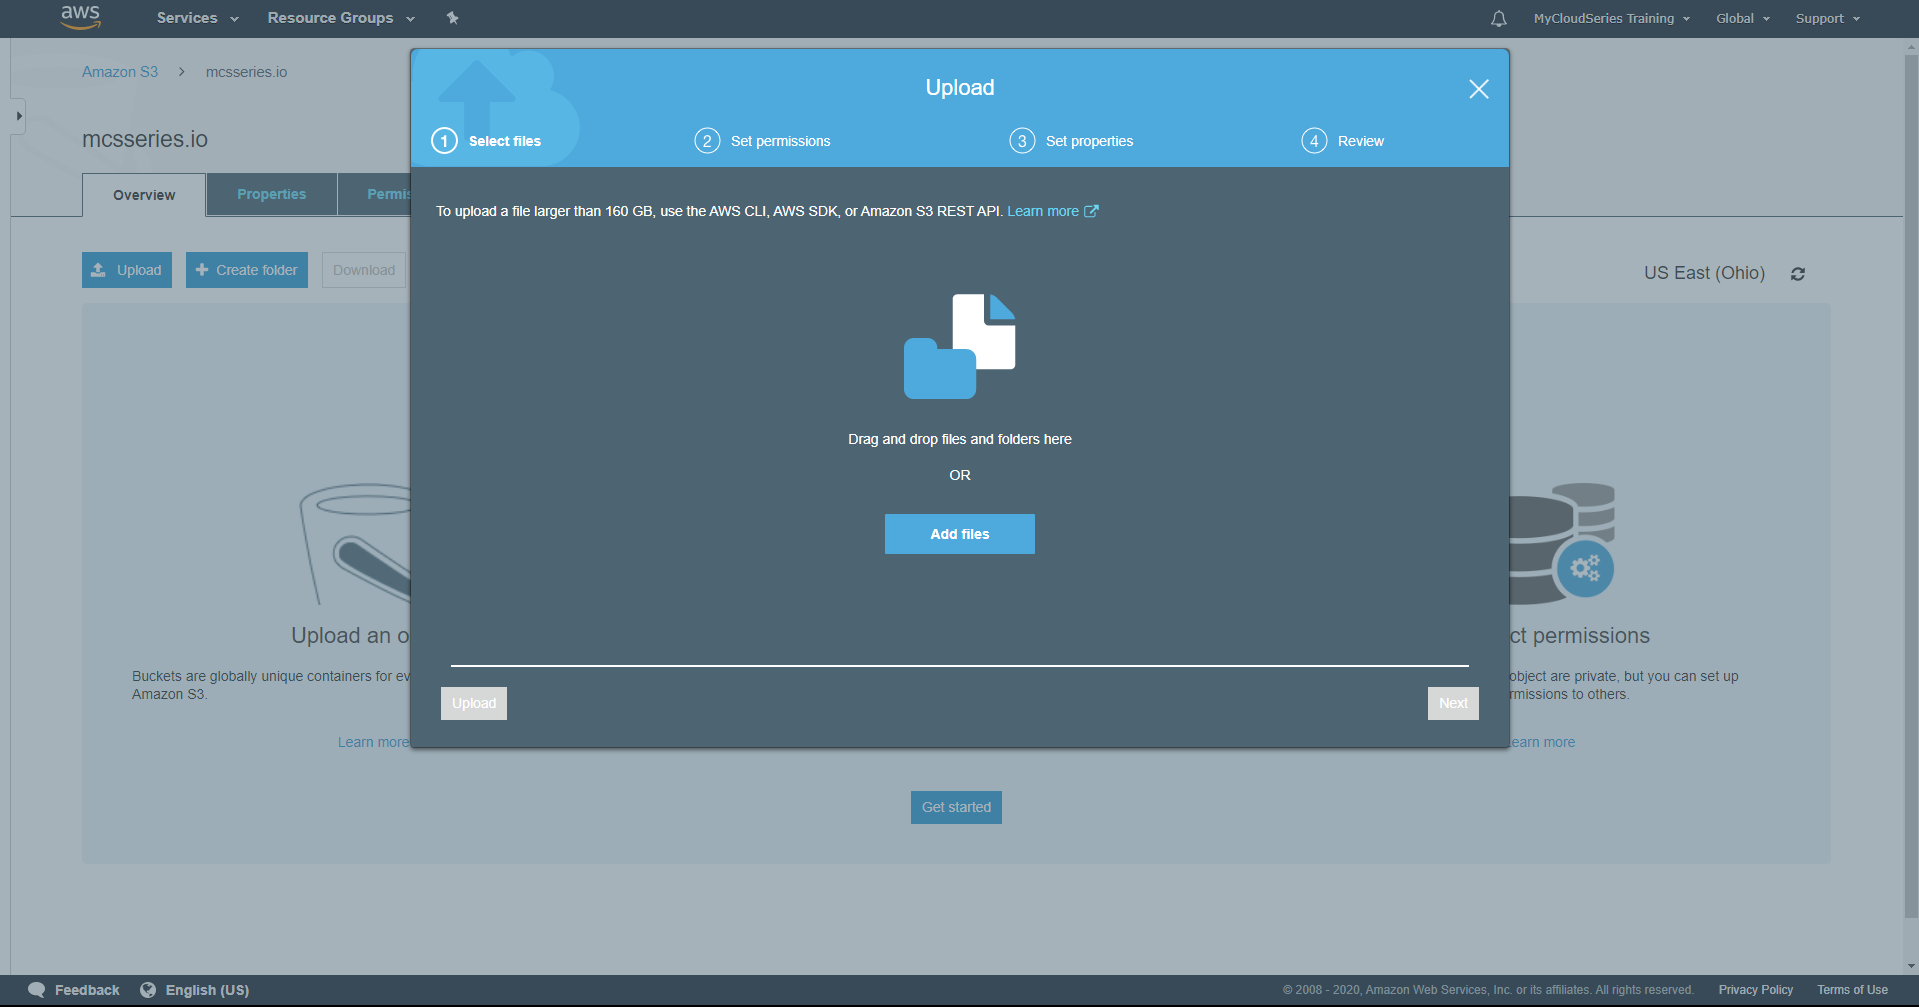
You can either drag the file from the directory it is saved, into the screen, or click the Add files, button to add the file to the list of what needs to be uploaded.
您可以将文件从保存目录拖到屏幕上,也可以单击添加文件按钮将文件添加到需要上传内容的列表中。
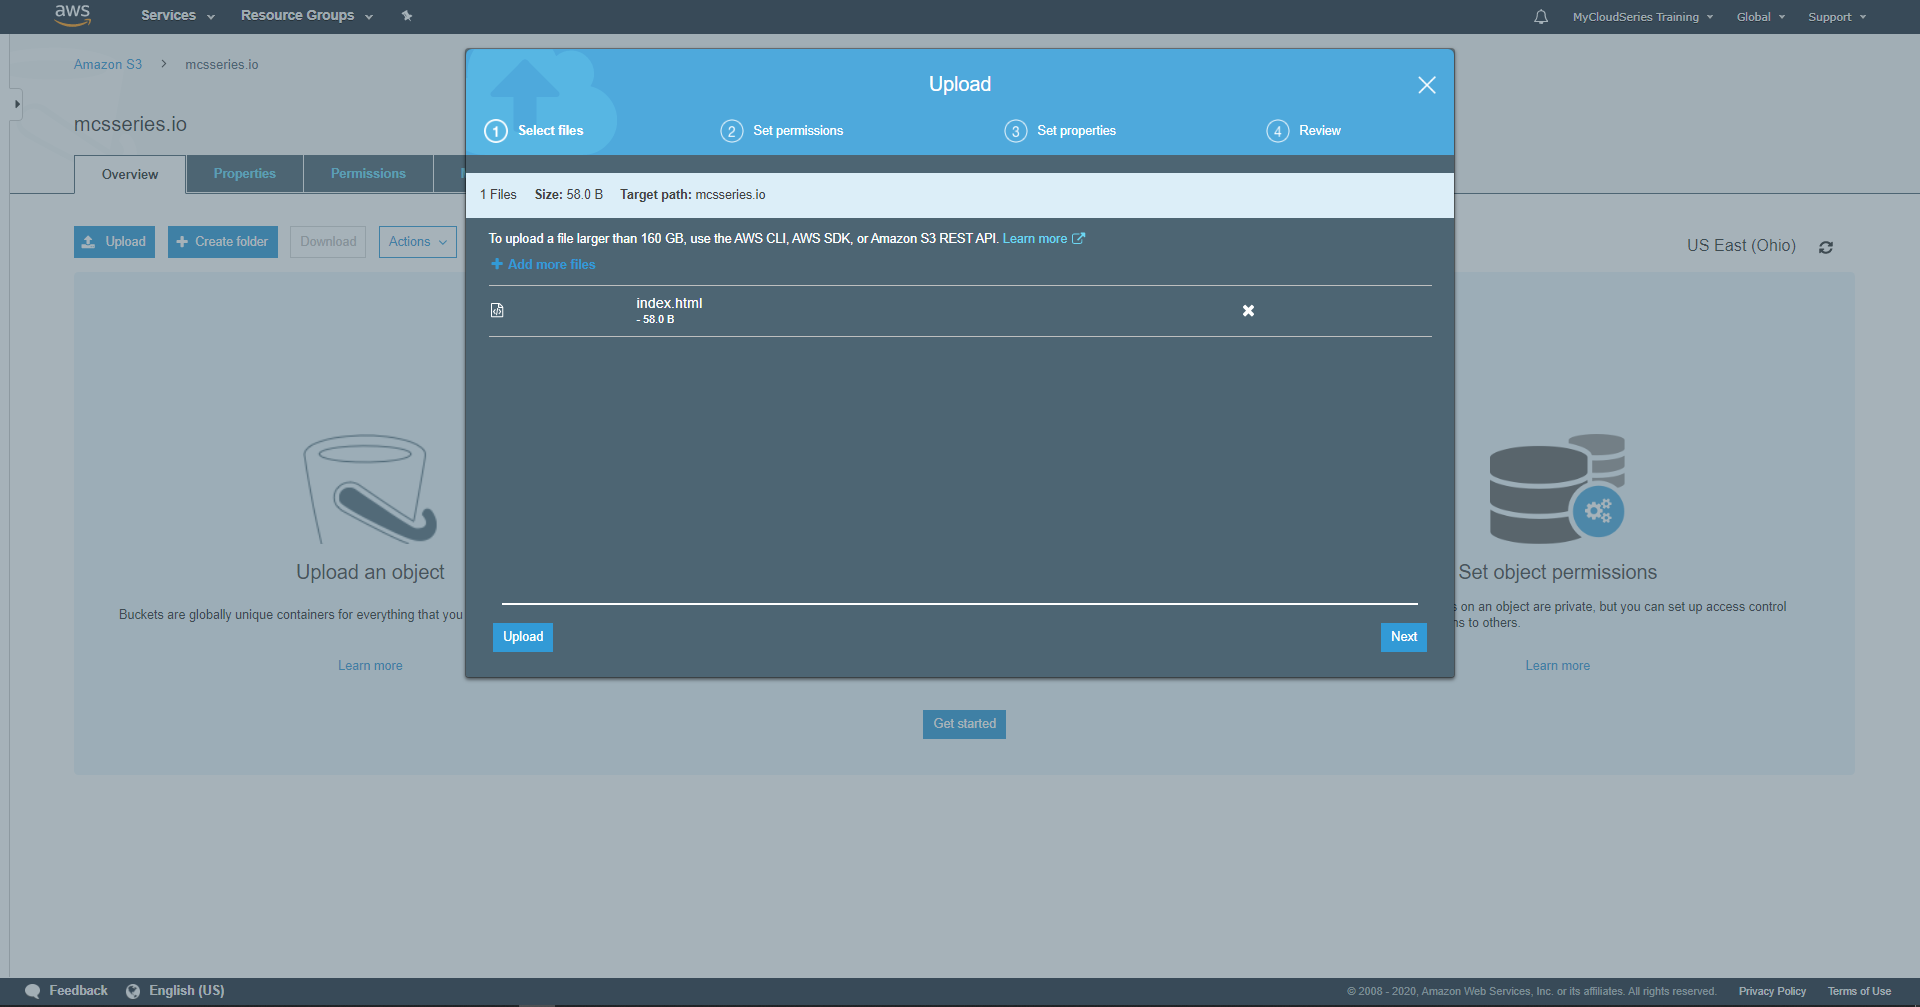
Click on the Upload button to upload the file.
单击上载按钮以上传文件。
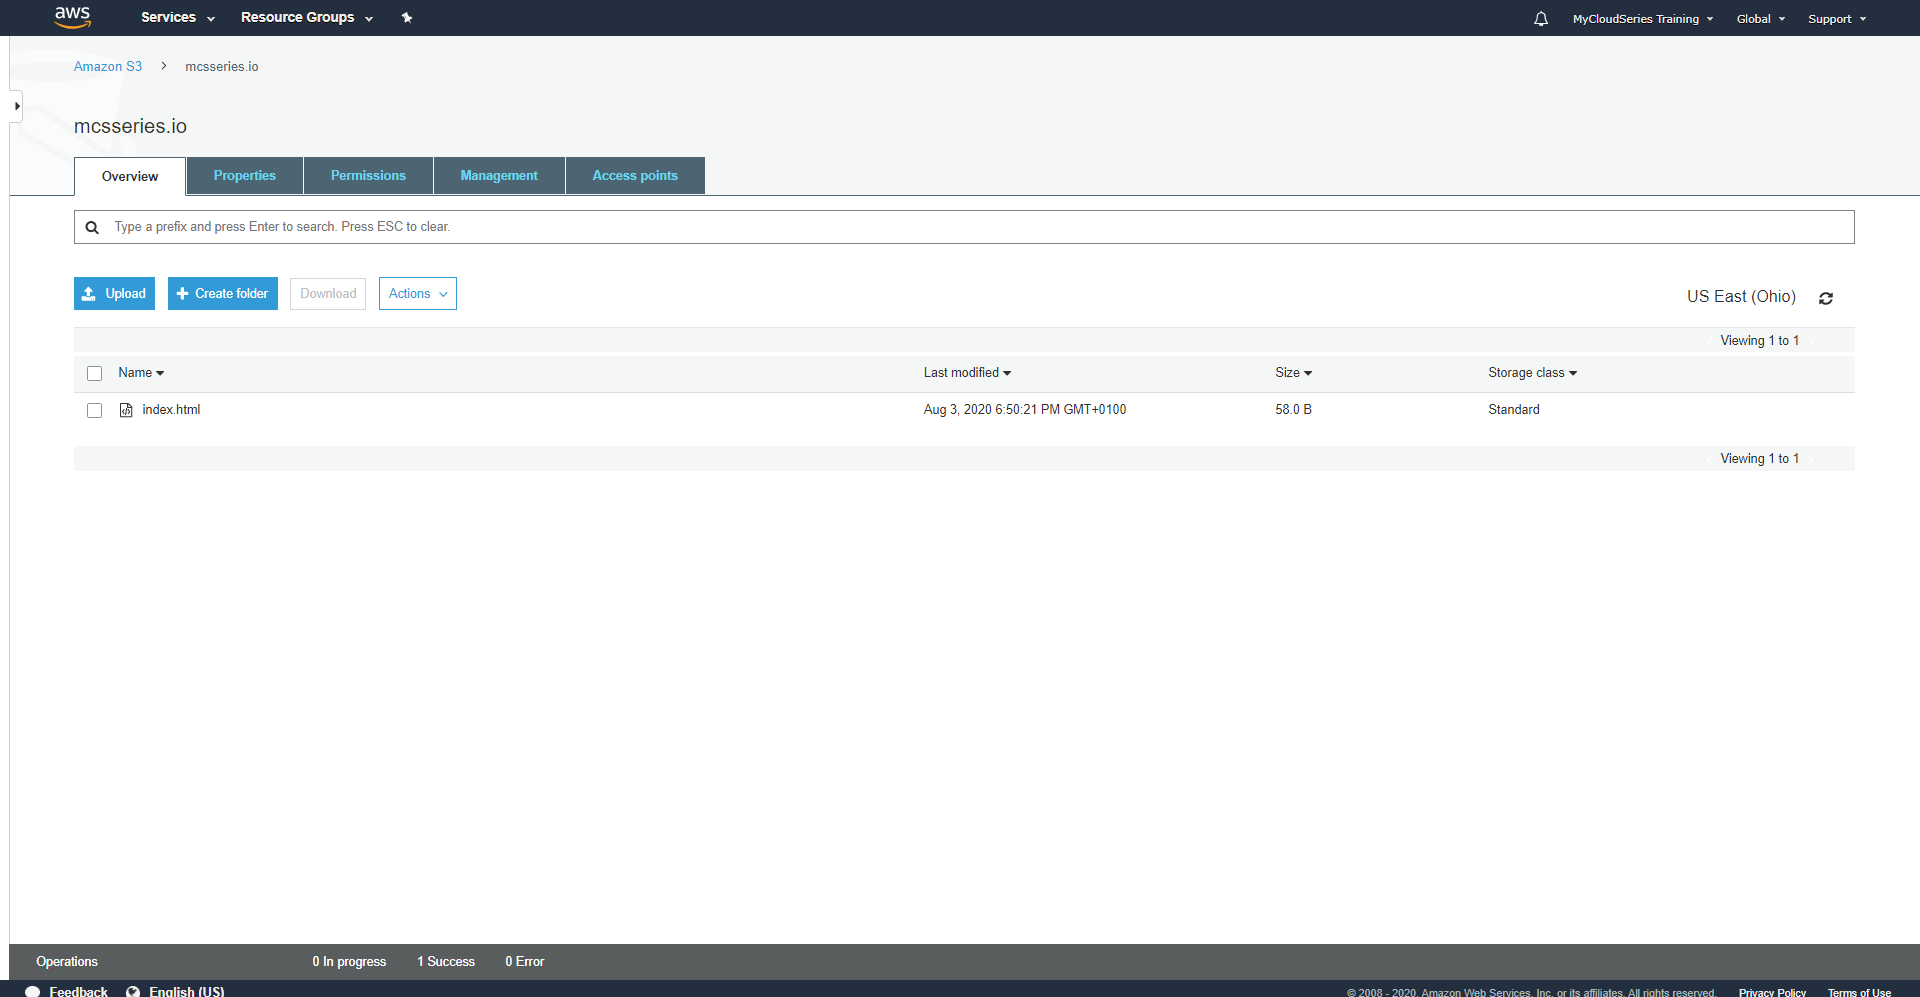
Click on the URL shared earlier to view the uploaded website: http://mcsseries.io.s3-website.us-east-2.amazonaws.com. This will reveal the website.
单击先前共享的URL,以查看上载的网站: http : //mcsseries.io.s3-website.us-east-2.amazonaws.com 。 这将显示该网站。
ConclusionThis is the first step in getting your website up. With this setup, there are no servers to manage and the website scales almost infinitely. You can always upload a more complex proper web page, as I used a simple web page to demonstrate this example. Next up is how to attach caching to this website and speed it up. Stay Tuned
结论这是建立您的网站的第一步。 使用此设置,无需管理服务器,并且网站几乎可以无限扩展。 您总是可以上传更复杂的适当网页,因为我使用一个简单的网页来演示此示例。 接下来是如何将缓存附加到该网站并加快速度。 敬请关注
MyCloudSeries is a training and consulting firm with expertise in Cloud Computing and DevOps. We assist organizations in their DevOps strategies, transformation, and implementation. We also provide Cloud Computing Support contact us at www.mycloudseries.com
MyCloudSeries是一家培训和咨询公司,在云计算和DevOps方面具有专业知识。 我们协助组织进行DevOps战略,转型和实施。 我们还提供云计算支持,请访问www.mycloudseries.com与我们联系。
翻译自: https://medium.com/mycloudseries/deploying-fast-and-secure-web-app-on-part-2b-website-setup-60de2effc683
如何在aws部署web网站
本文来自互联网用户投稿,该文观点仅代表作者本人,不代表本站立场。本站仅提供信息存储空间服务,不拥有所有权,不承担相关法律责任。如若转载,请注明出处:http://www.luyixian.cn/news_show_871813.aspx
如若内容造成侵权/违法违规/事实不符,请联系dt猫网进行投诉反馈email:809451989@qq.com,一经查实,立即删除!相关文章

网站会员整合ucenter 实现多站点同步登录方法
VS2012发布网站
通过避免下列 10 个常见 ASP.NET 缺陷使网站平稳运行
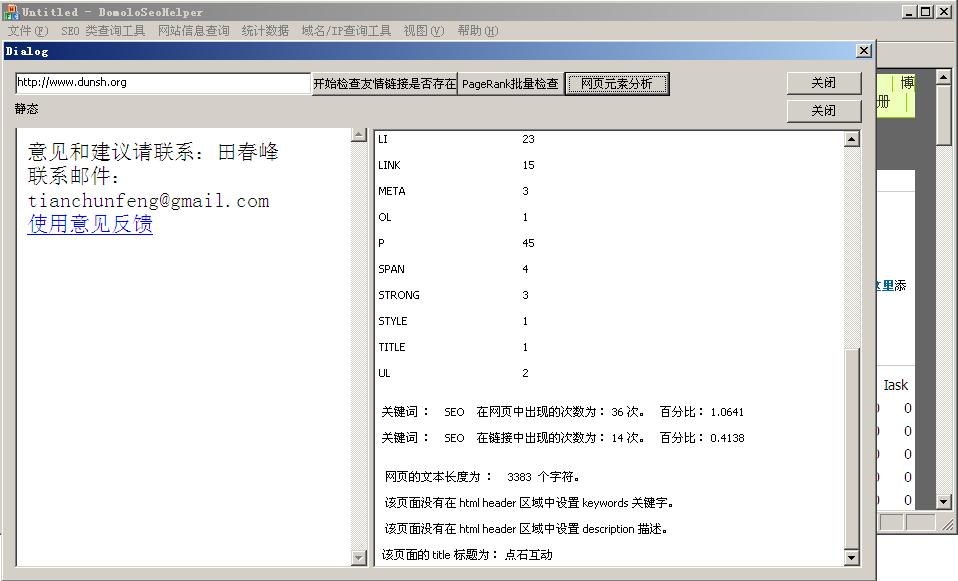
DomoloSEOHelper 多么乐SEO助手 预览版发布啦
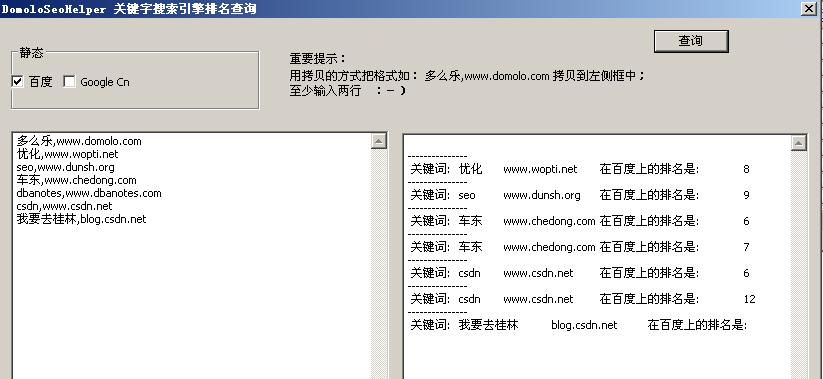
Domolo SEOHelper 多么乐SEO工具:璀璨登场

基于SEO的Log 日志分析软件应该提供那些功能?
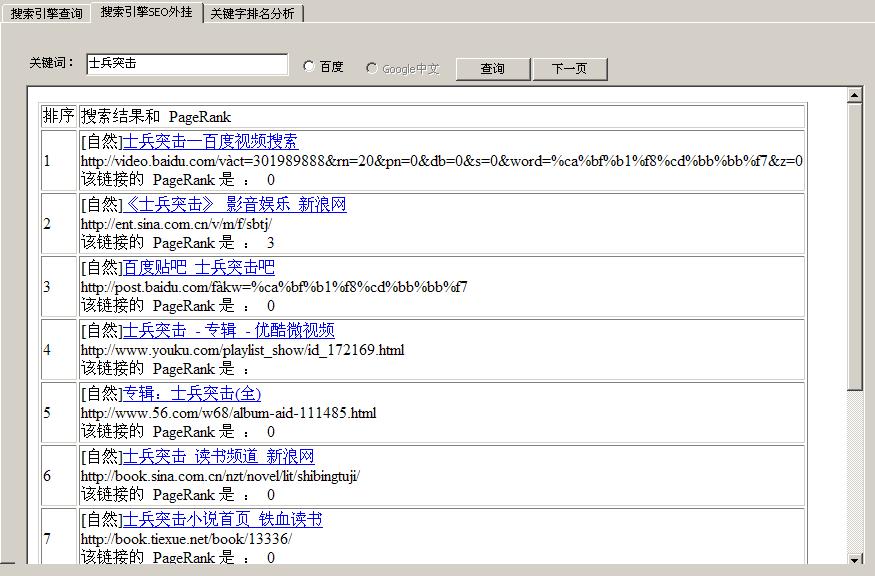
搜索引擎SEO外挂:一边搜索,一边看PageRank
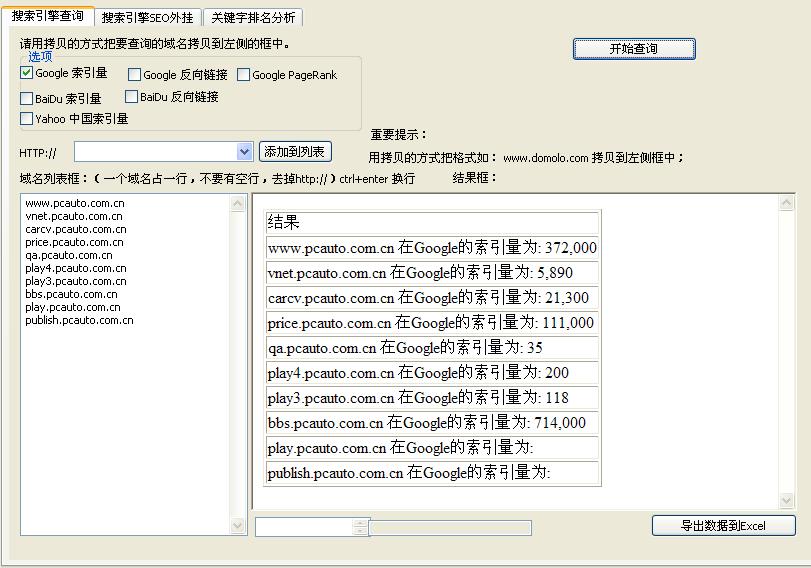
SEO 比比看: Che168.com VS pcauto.com.cn

seo优化:把百度放进数据库

PO模式+数据驱动(TPshop网站的登录模块进行单元测试以及区分正向逆向用例)
一篇文章学会独立在Windows server 2003虚拟机上搭建网站
*.github.io的个人博客网站无法连接的问题

Python多进程之刷小网站浏览量。
爬了招聘网站之后,总结Python学习的几点建议
点击链接自动定位到网页某个具体位置和网站右侧导航介绍
大型网站架构提速关键技术(页面静态化、memcached、Mysql优化)
问答网站Quora副总裁杨蕾博士:让知识改变世界
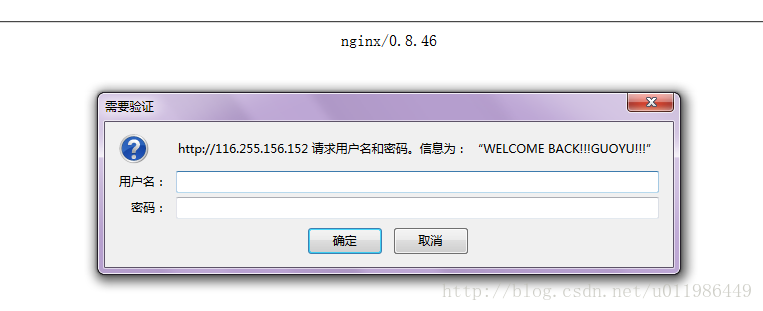
Nginx对某个目录或整个网站进行登录认证的方法