文章目录
- 一、项目总体要求
- 二、环境搭建
- 1、安装包准备
- 2、安装jdk
- (1)查询是否安装java
- (2)卸载jdk
- (3)安装jdk
- (4)配置jdk环境变量
- 3、配置ssh免密登录
- (1)进入到我的home目录
- (2)生成公钥和私钥
- (3)将公钥拷贝到要免密登录的目标机器上
- 4、部署Zookeeper
- (1)解压安装
- (2)创建目录
- (3)配置zoo.cfg文件
- (4)配置myid文件
- (5)拷贝zookeeper到另外两台机器
- (6)分别启动zookeeper
- 5、部署Hadoop
- (1)解压安装
- (2)配置core-site.xml
- (3)配置hadoop-env.sh
- (4)配置hdfs-site.xml
- (5)配置slaves(配置哪几台机器有datanode)
- (6)配置yarn-env.sh
- (7)配置yarn-site.xml
- (8)配置mapred-env.sh
- (9)配置mapred-site.xml
- (10)拷贝hadoop到另外两台机器
- (11)启动集群
- 6、部署Flume
- (1)解压安装
- (2)配置
- (3)启动flume
- 7、部署Spark
- (1)解压安装
- (2)配置spark-env.sh
- (3)配置slaves
- (4)拷贝到另外两台
- (5)启动测试
- 8、部署Kafka
- (1)解压安装
- (2)配置
- (3)启动
- 9、部署Hive
- (1)解压安装
- (2)重命名配置文件
- (3)配置hive-env.sh
- (4)安装Mysql
- (5)配置Mysql
- (6)配置hive-site.xml
- (7)配置hive-log4j.properties.template
- (8)拷贝数据库驱动包
- (9)修改权限
- (10)启动测试
- 10、部署Sqoop
- (1)解压安装
- (2)配置sqoop-env.sh
- (3)jdbc驱动
- (4)启动测试
- 三、爬取数据
- 1、创建scrapy爬虫项目
- 2、编辑items.py
- 3、编辑bigqcwy.py
- 4、编辑pipelines.py
- 5、编辑settings.py
- 6、启动爬虫项目
- 7、查看数据库
- 四、数据上传
- 1、上传文件
- (1)导出mongodb数据
- (2)数据上传
- 2、使用Flume传入HDFS
- (1)编写conf文件
- (2)上传
- 五、数据分析
- 1、启动Hive
- 2、导入数据
- (1)创建数据库
- (2)创建表
- (3)导入数据
- 3、查看数据
- 4、岗位薪资分析
- A. 数据分析岗位
- (1)模糊匹配提取
- (2)切分薪资字段存储
- (3)计算最大 、最小、平均
- B. 大数据开发工程师岗位
- (1)模糊匹配提取
- (2)切分薪资字段存储
- (3)计算最大 、最小、平均
- C. 数据采集岗位
- (1)模糊匹配提取
- (2)切分薪资字段存储
- (3)计算最大 、最小、平均
- D. 汇总
- (1)创建tab1表
- (2)插入数据
- E. 用Sqoop将数据导入Mysql
- (1)在mysql创建数据库数据表
- (2)导入数据
- 5、岗位数量分析
- (1)成都
- (2)北京
- (3)上海
- (4)广州
- (5)深圳
- (6)导入Mysql
- 6、岗位经验薪资分析
- A. 数据分析岗位
- (1)模糊匹配提取
- (2)切分薪资字段存储
- (3)计算最大 、最小、平均
- B. 大数据开发工程师岗位
- (1)模糊匹配提取
- (2)切分薪资字段存储
- (3)计算最大 、最小、平均
- C. 数据采集岗位
- (1)模糊匹配提取
- (2)切分薪资字段存储
- (3)计算最大 、最小、平均
- D. 汇总
- (1)创建tab3表
- (2)插入数据
- E. 用Sqoop将数据导入Mysql
- (1)在mysql创建数据库数据表
- (2)导入数据
- 六、可视化
- 1、岗位薪资分析
- 2、岗位数量分析
- 3、岗位经验薪资分析
一、项目总体要求
利用python编写爬虫程序,从招聘网站上爬取数据,将数据存入到MongoDB数据库中,将存入的数据作一定的数据清洗后做数据分析(spark),最后将分析的结果做数据可视化。
二、环境搭建
使用三台机器搭建完全分布式
1、安装包准备
- jdk-8u121-linux-x64.gz
- hadoop-2.5.0-cdh5.3.6.tar.gz
- zookeeper-3.4.14.tar.gz
- spark-2.4.4-bin-hadoop2.7.tgz
- apache-flume-1.6.0-bin.tar.gz
- kafka_2.12-2.5.0.tgz
- hive-0.13.1-cdh5.3.6.tar.gz
- sqoop-1.4.5-cdh5.3.6.tar.gz
- mysql-connector-java-5.1.47.jar
在/opt目录下创建software目录和module目录:mkdir 目录名

使用filezilla工具(没有的可以搜索下载,也可以使用其他上传工具)将安装包上传到第一台机器hadoop101的/opt/software/目录下


2、安装jdk
三台机器相同操作
(1)查询是否安装java
命令:rpm -qa|grep java
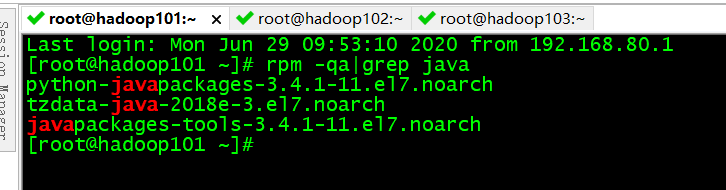
我是已经安装的1.8版本
(2)卸载jdk
如果版本低于1.7,卸载该jdk:rpm -e --nodeps 软件包名,如果大于等于1.8可以直接使用
(3)安装jdk
将jdk解压到/opt/module目录下:
tar -zxvf jdk-8u121-linux-x64.gz -C /opt/module/

(4)配置jdk环境变量
- 获取jdk路径

- 编辑/etc/profile文件:
vi /etc/profile

#JAVA_HOME
export JAVA_HOME=/opt/module/jdk1.8.0_121
export PATH=$PATH:$JAVA_HOME/bin
- 保存后退出:
:wq - 使修改文件生效:
source /etc/profile - 查看是否安装成功:
java -version

3、配置ssh免密登录
(1)进入到我的home目录
cd ~/.ssh
(2)生成公钥和私钥
ssh-keygen -t rsa
然后敲(三个回车),就会生成两个文件id_rsa(私钥)、id_rsa.pub(公钥)
(3)将公钥拷贝到要免密登录的目标机器上
拷贝到第二台
ssh-copy-id hadoop102
拷贝到第三台
ssh-copy-id hadoop103
4、部署Zookeeper
(1)解压安装
tar -zxvf zookeeper-3.4.14.tar.gz -C /opt/module/
(2)创建目录
在/opt/module/zookeeper-3.4.14/下创建data/zkData和data/zkLogData
mkdir -p data/zkData
mkdir -p data/zkLogData

(3)配置zoo.cfg文件
重命名/opt/module/zookeeper-3.4.10/conf这个目录下的zoo_sample.cfg为zoo.cfg
mv zoo_sample.cfg zoo.cfg
具体配置:

# 数据存储目录
dataDir = /opt/module/zookeeper-3.4.14/data/zkData
# 日志信息存储目录
dataLogDir = /opt/module/zookeeper-3.4.14/data/zkLogData
# server.1 数字表示第几台,作为标识
# 2888端口是master和slave之间的通信端口
# 3888端口是leader选举的端口
server.1=hadoop101:2888:3888
server.2=hadoop102:2888:3888
server.3=hadoop103:2888:3888
(4)配置myid文件
在/opt/module/zookeeper-3.4.10/data/zkData目录下创建一个myid的文件
touch myid
编辑myid文件:vi myid
在文件中添加与server对应的编号:1

(5)拷贝zookeeper到另外两台机器
scp -r zookeeper-3.4.14/ root@hadoop2:/opt/module/scp -r zookeeper-3.4.14/ root@hadoop3:/opt/module/
并分别修改myid文件中内容为2、3
(6)分别启动zookeeper
在每台机器的zookeeper-3.4.14目录下执行:bin/zkServer.sh start
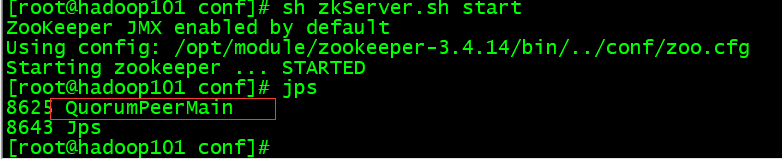
启动成功后三台机器都应该有该进程
5、部署Hadoop
(1)解压安装
tar -zxvf hadoop-2.5.0-cdh5.3.6.tar.gz -C /opt/module/
配置文件在/opt/module/hadoop-2.5.0-cdh5.3.6/etc/hadoop目录下
(2)配置core-site.xml
<configuration>
<!-- 指定HDFS中NameNode的地址 -->
<property><name>fs.defaultFS</name><value>hdfs://hadoop101:9000</value>
</property><!-- 指定hadoop运行时产生文件的存储目录 -->
<property><name>hadoop.tmp.dir</name><value>/opt/module/hadoop-2.5.0-cdh5.3.6/data/tmp</value>
</property><!--执行zookeeper地址-->
<property>
<name>ha.zookeeper.quorum</name>
<value>hadoop101:2181,hadoop102:2181,hadoop103:2181</value>
</property>
</configuration>
(3)配置hadoop-env.sh
export JAVA_HOME=/opt/module/jdk1.8.0_121
(4)配置hdfs-site.xml
<configuration><!-- 指定HDFS副本的数量 --><property><name>dfs.replication</name><value>3</value></property><property><name>dfs.namenode.secondary.http-address</name><value>hadoop103:50090</value></property>
</configuration>
(5)配置slaves(配置哪几台机器有datanode)
hadoop101
hadoop102
hadoop103
(6)配置yarn-env.sh
export JAVA_HOME=/opt/module/jdk1.8.0_121
(7)配置yarn-site.xml
<configuration><!-- Site specific YARN configuration properties --><!-- reducer获取数据的方式 --><property><name>yarn.nodemanager.aux-services</name><value>mapreduce_shuffle</value></property><!-- 指定YARN的ResourceManager的地址 --><property><name>yarn.resourcemanager.hostname</name><value>hadoop102</value></property><!-- 日志聚集功能使能 --><property><name>yarn.log-aggregation-enable</name><value>true</value></property><!-- 日志保留时间设置7天 --><property><name>yarn.log-aggregation.retain-seconds</name><value>604800</value></property><!-- 配置zookeeper的地址 --><property><name>yarn.resourcemanager.zk-address</name><value>hadoop101:2181,hadoop102:2181,hadoop103:2181</value><description>For multiple zk services, separate them with comma</description></property></configuration>
(8)配置mapred-env.sh
export JAVA_HOME=/opt/module/jdk1.8.0_121
(9)配置mapred-site.xml
<configuration><!-- 指定mr运行在yarn上 --><property><name>mapreduce.framework.name</name><value>yarn</value></property><!-- 历史服务启动查看 --><property><name>mapreduce.jobhistory.address</name><value>hadoop101:10020</value></property><property><name>mapreduce.jobhistory.webapp.address</name><value>hadoop101:19888</value></property>
</configuration>
(10)拷贝hadoop到另外两台机器
scp -r hadoop-2.5.0-cdh5.3.6/ root@hadoop2:/opt/module/scp -r hadoop-2.5.0-cdh5.3.6/ root@hadoop3:/opt/module/
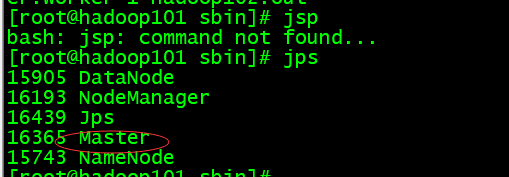
(11)启动集群
如果集群是第一次启动,需要格式化namenode
在第一台机器的hadoop-2.5.0-cdh5.3.6/目录下执行:bin/hdfs namenode -format
-
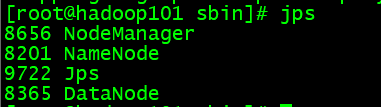
启动hdfs
在第一台机器的hadoop-2.5.0-cdh5.3.6/目录下执行:sbin/start-dfs.sh -
启动yarn
在第一台机器的hadoop-2.5.0-cdh5.3.6/目录下执行:sbin/start-yarn.sh
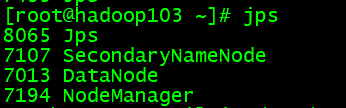
第一台:
第二台:

第三台:
6、部署Flume
(1)解压安装
tar -zxvf apache-flume-1.6.0-bin.tar.gz -C /opt/module/
(2)配置
编辑flume-env.sh
export JAVA_HOME=/opt/module/jdk1.8.0_121
在conf目录下,创建一个配置文件agent.conf

(3)启动flume
根据指定的配置文件,来启动flume
进入flume的bin目录 执行:./flume-ng agent -n a1 -c ../conf -f ../conf/agent.conf Dflume.root.logger=INFO,console
安装nc:yum -y install nc
7、部署Spark
(1)解压安装
tar -zxvf spark-2.4.4-bin-hadoop2.7.tgz -C /opt/module/
(2)配置spark-env.sh
export JAVA_HOME=/opt/module/jdk1.8.0_121
export HADOOP_HOME=/opt/module/hadoop-2.5.0-cdh5.3.6
export SPARK_MASTER_IP=hadoop101
export HADOOP_CONF_DIR=/opt/module/hadoop-2.5.0-cdh5.3.6/etc/hadoop
export SPARK_DIST_CLASSPATH=$(/opt/module/hadoop-2.5.0-cdh5.3.6/bin/hadoop classpath)

(3)配置slaves

(4)拷贝到另外两台
scp -r spark-2.4.4-bin-hadoop2.7/ root@hadoop2:/opt/module/
(5)启动测试
在sbin目录启动spark./start-all.sh
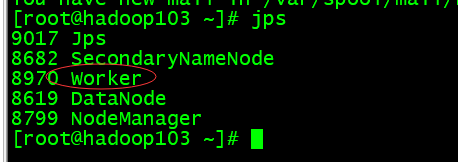
第一台:
第二台:

第三台:
8、部署Kafka
(1)解压安装
tar -zxvf kafka_2.12-2.5.0.tgz -C /opt/module/
(2)配置
在config目录下,修改server.properties,在文件中修改如下参数
broker.id=1
port=9092
listeners=PLAINTEXT://haoop101:9092
advertised.listeners=PLAINTEXT://hadoop101:9092
zookeeper.connect=hadoop101:2181,hadoop102:2181,hadoop103:2181
log.dirs=/opt/module/kafka_2.12-2.5.0/logData
创建对应的logData文件夹:mkdir logData

(3)启动
先启动Zookeeper在启动Kafka
- 启动Zookeeper
zkServer.sh start
- 启动Kafka
bin/kafka-server-start.sh config/server.properties
9、部署Hive
(1)解压安装
tar -zxf /opt/softwares/hive-0.13.1-cdh5.3.6.tar.gz -C /opt/module/
(2)重命名配置文件
mv hive-default.xml.template hive-site.xml
mv hive-env.sh.template hive-env.sh
(3)配置hive-env.sh
JAVA_HOME=/opt/modules/jdk1.8.0_121
HADOOP_HOME=/opt/modules/cdh/hadoop-2.5.0-cdh5.3.6/
//hive启动加载的配置文件目录
export HIVE_CONF_DIR=/opt/modules/cdh/hive-0.13.1-cdh5.3.6/conf

(4)安装Mysql
yum -y install mysql mysql-server mysql-devel
wget http://dev.mysql.com/get/mysql-community-release-el7-5.noarch.rpm
rpm -ivh mysql-community-release-el7-5.noarch.rpm
yum -y install mysql-community-server
(5)配置Mysql
- 开启服务:
service mysqld start - 设置root用户密码:
mysqladmin -u root password '1'
为其他节点机器授权(其他节点能访问该数据库):
- 进入MySQL:
mysql -u root -p - 执行:
grant all on *.* to root@'hadoop101' identified by '1'; grant all on *.* to root@'hadoop102' identified by '1'; grant all on *.* to root@'hadoop103' identified by '1'; - 刷新权限:
flush privileges
(6)配置hive-site.xml
<property><name>javax.jdo.option.ConnectionURL</name><value>jdbc:mysql://hadoop101:3306/metastore?createDatabaseIfNotExist=true</value><description>JDBC connect string for a JDBC metastore</description></property><property><name>javax.jdo.option.ConnectionDriverName</name><value>com.mysql.jdbc.Driver</value><description>Driver class name for a JDBC metastore</description></property><property><name>javax.jdo.option.ConnectionUserName</name><value>root</value><description>username to use against metastore database</description></property><property><name>javax.jdo.option.ConnectionPassword</name><value>1</value><description>password to use against metastore database</description></property><!-- 是否在当前客户端中显示查询出来的数据的字段名称 --><property><name>hive.cli.print.header</name><value>true</value><description>Whether to print the names of the columns in query output.</description></property><!-- 是否在当前客户端中显示当前所在数据库名称 --><property><name>hive.cli.print.current.db</name><value>true</value><description>Whether to include the current database in the Hive prompt.</description></property>
(7)配置hive-log4j.properties.template
hive.log.dir=/opt/module/hive-0.13.1-cdh5.3.6/logs
(8)拷贝数据库驱动包
拷贝数据库驱动包到Hive根目录下的lib文件夹
上传:rz
拷贝:cp -a mysql-connector-java-5.1.27-bin.jar /opt/modules/cdh/hive-0.13.1-cdh5.3.6/lib/
(9)修改权限
修改HDFS系统中关于Hive的一些目录权限
/opt/modules/cdh/hadoop-2.5.0-cdh5.3.6/bin/hadoop fs -chmod 777 /tmp/
/opt/modules/cdh/hadoop-2.5.0-cdh5.3.6/bin/hadoop fs -chmod 777 /user/hive/warehouse
(10)启动测试
bin/hive

10、部署Sqoop
开启Zookeeper、Hadoop
zkServer.sh start
start-dfs.sh
start-yarn.sh
(1)解压安装
tar -zxf /opt/softwares/sqoop-1.4.5-cdh5.3.6.tar.gz -C /opt/module/
(2)配置sqoop-env.sh
#Set path to where bin/hadoop is available
export HADOOP_COMMON_HOME=/opt/module/hadoop-2.5.0-cdh5.3.6#Set path to where hadoop-*-core.jar is available
export HADOOP_MAPRED_HOME=/opt/module/hadoop-2.5.0-cdh5.3.6#Set the path to where bin/hive is available
export HIVE_HOME=/opt/module/hive-0.13.1-cdh5.3.6#Set the path for where zookeper config dir is
export ZOOCFGDIR=/opt/module/zookeeper-3.4.14
export ZOOKEEPER_HOME=/opt/module/zookeeper-3.4.14

(3)jdbc驱动
拷贝jdbc驱动到sqoop的lib目录下
cp -a mysql-connector-java-5.1.27-bin.jar /opt/modules/cdh/sqoop-1.4.5-cdh5.3.6/lib/
(4)启动测试
测试Sqoop是否能够连接成功
bin/sqoop list-databases --connect jdbc:mysql://hadoop101:3306/metastore --username root --password 1

三、爬取数据
1、创建scrapy爬虫项目
scrapy startproject ScrapyDemo
cd ScrapyDemo
scrapy genspider bigqcwy msearch.51job.com
2、编辑items.py
# -*- coding: utf-8 -*-# Define here the models for your scraped items
#
# See documentation in:
# https://docs.scrapy.org/en/latest/topics/items.htmlimport scrapyclass ScrapydemoItem(scrapy.Item):# define the fields for your item here like:# name = scrapy.Field()# 职位名称name = scrapy.Field()# 薪资水平salary = scrapy.Field()# 招聘单位company = scrapy.Field()# 工作地点jobPlace = scrapy.Field()# 工作经验jobExperience = scrapy.Field()# 学历要求education = scrapy.Field()# 工作内容(岗位职责)# jobContent = scrapy.Field()# 任职要求(技能要求)jobRequirement = scrapy.Field()
3、编辑bigqcwy.py
# -*- coding: utf-8 -*-
import scrapy
import time
from ScrapyDemo.items import ScrapydemoItem
import reclass BigqcwySpider(scrapy.Spider):name = 'bigqcwy'allowed_domains = ['msearch.51job.com']custom_settings = {"DEFAULT_REQUEST_HEADERS": {'Cookie':'设置你的cookie',},"AUTOTHROTTLE_ENABLED": True,# "DOWNLOAD_DELAY": 1,# "ScrapyDemo.pipelines.ScrapydemoPipeline": 300,}start_urls = ['https://msearch.51job.com/']def start_requests(self):# 搜索关键词列表list = ['0100%2C7700%2C7200%2C7300%2C7800', '7400%2C2700%2C7900%2C7500%2C6600', '8000%2C6100%2C2600%2C2800%2C3300']for i in list:# 每个关键词有2000页for j in range(1, 2001):time.sleep(2)start_url = 'https://msearch.51job.com/job_list.php?funtype=' + str(i) +'&jobarea=000000&filttertype=loginmore&pageno=' + str(j)if start_url:yield scrapy.Request(url=start_url, callback=self.parse)def parse(self, response):# 保存详情页链接list_url = response.xpath('//*[@id="pageContent"]/div[3]/a')for list in list_url:time.sleep(1)url = list.xpath('@href').extract()[0]url = "https:" + url# print("爬取详情url:", url)if url:yield scrapy.Request(url=url, callback=self.parse_item)def parse_item(self, response):# time.sleep(2)item = ScrapydemoItem()# selector = Selector(response)# 职位名称item['name'] = response.xpath('//*[@id="pageContent"]/div[1]/div[1]/p/text()').extract_first()# 薪资水平try:sa = response.xpath('//*[@id="pageContent"]/div[1]/p/text()').extract_first()num = list(re.findall(r'([0-9]+(\.?[0-9]?)?)-([0-9]+(\.?[0-9]?)?)', sa)[0])if '万' in sa and '月' in sa:sa1 = float(num[0]) * 10sa2 = float(num[2]) * 10sa3 = str(sa1).replace('.0', '')sa4 = str(sa2).replace('.0', '')item['salary'] = sa3 + '-' + sa4 + '千/月'elif '万' in sa and '年' in sa:# 1、换算为万/月sa1 = float(num[0]) / 12sa2 = float(num[2]) / 12n1 = list(re.findall(r'([0-9]+(\.?[0-9]?)?)', str(sa1))[0])n2 = list(re.findall(r'([0-9]+(\.?[0-9]?)?)', str(sa2))[0])sa1 = str(n1[0]).replace('.0', '')sa2 = str(n2[0]).replace('.0', '')# 2、换算为千/月sa3 = float(sa1) * 10sa4 = float(sa2) * 10sa5 = str(sa3).replace('.0', '')sa6 = str(sa4).replace('.0', '')item['salary'] = sa5 + '-' + sa6 + '千/月'else:item['salary'] = saexcept:item['salary'] = '面议'# 招聘单位item['company'] = response.xpath('//*[@id="pageContent"]/div[2]/a[1]/p/text()').extract_first()# city地址try:dizhi = response.xpath('//*[@id="pageContent"]/div[2]/a[2]/span/text()').extract_first().replace('上班地址 : ', ':')except:dizhi = ''# 城市city = response.xpath('//*[@id="pageContent"]/div[1]/div[1]/em/text()').extract_first()# 工作地点try:item['jobPlace'] = city + dizhiexcept:item['jobPlace'] = city# 工作经验try:item['jobExperience'] = response.xpath('//*[@id="pageContent"]/div[1]/div[2]/span[2]/text()').extract_first()except:item['jobExperience'] = '数据缺失'# 学历要求try:item['education'] = response.xpath('//*[@id="pageContent"]/div[1]/div[2]/span[3]/text()').extract_first()except:item['education'] = '数据缺失'# 工作内容(岗位职责)# try:#     # item['jobContent'] = response.xpath('//*[@id="pageContent"]/div[3]/div[3]/article/br//text()').extract_first()#     item['jobContent'] = response.xpath('string(//*[@id="pageContent"]/div[3]/div[3]/article)').extract_first().split(':')[1].split(':')[0]# except:#     item['jobContent'] = '无数据'# 任职要求(技能要求)try:# item['jobRequirement'] = response.xpath('string(//*[@id="pageContent"]/div[3]/div[3]/article)').extract_first().split(':')[1].split(':')[1] //*[@id="pageContent"]/div[3]/div[2]/articlejobR = response.xpath('string(//*[@id="pageContent"]/div[3]/div[3]/article)').extract_first()if jobR != '':item['jobRequirement'] = jobRelse:item['jobRequirement'] = response.xpath('string(//*[@id="pageContent"]/div[3]/div[2]/article)').extract_first()except:item['jobRequirement'] = '数据缺失'# print("职位名称:", item['name'])# print("薪资水平:", item['salary'])# print("招聘单位:", item['company'])# print("工作地点:", item['jobPlace'])# print("工作经验:", item['jobExperience'])# print("学历要求:", item['education'])# print("任职要求(技能要求):", item['jobRequirement'])return item
4、编辑pipelines.py
采用Mongodb数据库存储数据
# -*- coding: utf-8 -*-# Define your item pipelines here
#
# Don't forget to add your pipeline to the ITEM_PIPELINES setting
# See: https://docs.scrapy.org/en/latest/topics/item-pipeline.htmlfrom pymongo import MongoClientclass ScrapydemoPipeline(object):def open_spider(self, spider):self.db = MongoClient('localhost', 27017).bigqcwy_dbself.collection = self.db.bigqcwy_collectiondef process_item(self, item, spider):self.collection.insert_one(dict(item))def close_spider(self, spider):self.collection.close()
5、编辑settings.py
加入或更改:
USER_AGENT = '设置user-agent'
ROBOTSTXT_OBEY = False
DOWNLOAD_DELAY = 1
COOKIES_ENABLED = False
ITEM_PIPELINES = {'ScrapyDemo.pipelines.ScrapydemoPipeline': 300,
}
6、启动爬虫项目
scrapy crawl bigqcwy

7、查看数据库

四、数据上传
启动Hadoop:1、start-dfs.sh 2、start-yarn.sh
1、上传文件
(1)导出mongodb数据
在mongodb的bin目录下执行:
mongoexport -h localhost -d bigqcwy_db -c bigqcwy_collection -o E:/qcwy.txt
(2)数据上传
使用rz命令上传:rz(不能使用命令请安装rz,可使用yum安装)

上传成功

2、使用Flume传入HDFS
(1)编写conf文件
在flume的conf目录下新建文件
vi template-qcwy.conf

(2)上传
在conf文件下执行:
../bin/flume-ng agent -c conf -f template-qcwy.conf -name a1 -Dflume.root.logger=DEBUG,console


五、数据分析
1、利用hive进行分析,2、将hive分析结果利用sqoop技术存储到mysql数据库中,并最后显示分析结果
1、启动Hive

2、导入数据
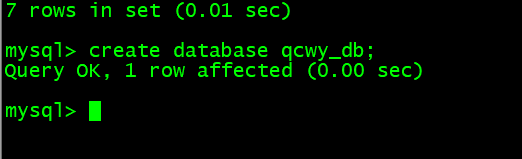
(1)创建数据库
create database qcwy_db;

(2)创建表
// 进入数据库
use qcwy_db;
// 创建表
create table qcwy(name string, salary string, company string, jobPlace string, jobExperience string, education string, jobRequirement string) row format delimited fields terminated by ',';

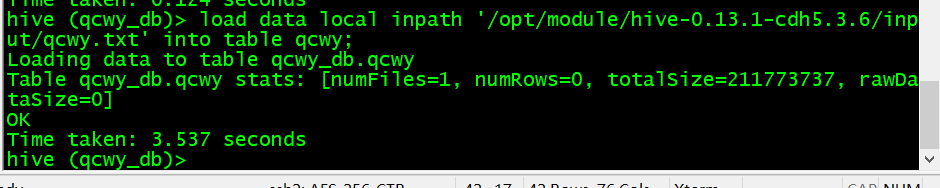
(3)导入数据
- 上传:
rz


- 导入hive
load data local inpath '/opt/module/hive-0.13.1-cdh5.3.6/input/qcwy.txt' into table qcwy;
3、查看数据
查看前十条:select * from qcwy limit 10;

4、岗位薪资分析
分析“数据分析”、“大数据开发工程师”、“数据采集”等岗位的平均工资、最高工资、最低工资,并作条形图将结果展示出来
A. 数据分析岗位
(1)模糊匹配提取
以模糊匹配提取出数据分析岗位的记录,存入表sjfx1(只存name和salary字段)
create table sjfx1 as select name, salary from qcwy where name like '%数据分析%' and salary like '%千/月%';

查看前十条数据:select * from sjfx1 limit 10;

(2)切分薪资字段存储
create table sjfx2 as select name, regexp_extract(salary,'([0-9]+)-',1) as s_min, regexp_extract(salary,'-([0-9]+)',1) as s_max, (regexp_extract(salary,'([0-9]+)-',1) + regexp_extract(salary,'-([0-9]+)',1))/2 as s_avg from sjfx1;
regexp_extract函数用法:
- 第一参数:要处理的字段
- 第二参数:需要匹配的正则表达式
- 第三个参数:
0是显示与之匹配的整个字符串
1 是显示第一个括号里面的
2 是显示第二个括号里面的字段
…

查看前十条数据:select * from sjfx2 limit 10;

(3)计算最大 、最小、平均
create table sjfx as select "数据分析" as name, min(int(s_min)) as s_min, max(int(s_max)) as s_max, regexp_extract(avg(s_avg),'([0-9]+.[0-9]?[0-9]?)',1) as s_avg from sjfx2;
平均值保存小数点后两位

查看数据:select * from sjfx;

B. 大数据开发工程师岗位
(1)模糊匹配提取
以模糊匹配提取出大数据开发工程师岗位的记录,存入表sjkf1(只存name和salary字段)

查看前十条数据:select * from sjkf1 limit 10;

(2)切分薪资字段存储
create table sjkf2 as select name, regexp_extract(salary,'([0-9]+)-',1) as s_min, regexp_extract(salary,'-([0-9]+)',1) as s_max, (int(regexp_extract(salary,'([0-9]+)-',1)) + int(regexp_extract(salary,'-([0-9]+)',1)))/2 as s_avg from sjkf1;

查看前十条数据:select * from sjkf2 limit 10;

(3)计算最大 、最小、平均
create table sjkf as select "大数据开发工程师" as name, min(int(s_min)) as s_min, max(int(s_max)) as s_max, regexp_extract(avg(s_avg),'([0-9]+.[0-9]?[0-9]?)',1) as s_avg from sjkf2;
查看数据:select * from sjkf;

C. 数据采集岗位
(1)模糊匹配提取
以模糊匹配提取出大数据开发工程师岗位的记录,存入表sjcj1(只存name和salary字段)
create table sjcj1 as select name, salary from qcwy where name like '%数据采集%' and salary like '%千/月%';

查看前十条数据:select * from sjcj1 limit 10;

(2)切分薪资字段存储
create table sjcj2 as select name, int(regexp_extract(salary,'([0-9]+)-',1)) as s_min, int(regexp_extract(salary,'-([0-9]+)',1)) as s_max, (int(regexp_extract(salary,'([0-9]+)-',1)) + int(regexp_extract(salary,'-([0-9]+)',1)))/2 as s_avg from sjcj1;

查看前十条数据:select * from sjcj2 limit 10;

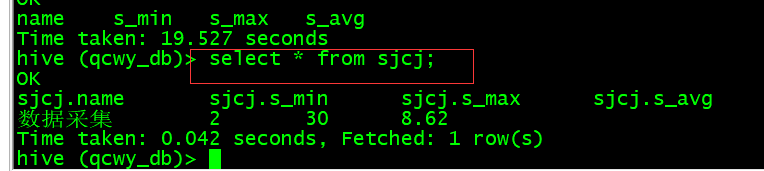
(3)计算最大 、最小、平均
create table sjcj as select "数据采集" as name, min(s_min) as s_min, max(s_max) as s_max, regexp_extract(avg(s_avg),'([0-9]+.[0-9]?[0-9]?)',1) as s_avg from sjcj2;

查看数据:select * from sjcj;
D. 汇总
将三个岗位的薪资分析数据汇总到tab1表中
(1)创建tab1表
create table tab1(t_name string, t_min int, t_max int, t_avg string);

(2)插入数据
insert into table tab1 select * from sjfx;insert into table tab1 select * from sjkf;insert into table tab1 select * from sjcj;


查看数据:select * from tab1;

E. 用Sqoop将数据导入Mysql
(1)在mysql创建数据库数据表
- 进入数据库:
mysql -u root -p

- 创建数据库:
create database qcwy_db;
- 创建表:
create table tab1(t_name varchar(20), t_min int, t_max int, t_avg varchar(10)) charset utf8 collate utf8_general_ci;

(2)导入数据
bin/sqoop export --connect jdbc:mysql://hadoop101:3306/qcwy_db --username root --password 1 --table tab1 --export-dir /user/hive/warehouse/qcwy_db.db/tab1 --input-null-string "\\\\N" --input-null-non-string "\\\\N" --input-fields-terminated-by "\001" --input-lines-terminated-by "\\n" -m 1
sqoop将hive数据导入到Mysql碰到hive表中列的值如果为null的情况,hive中为null的是以\N代替的,所以你在导入到Mysql时,需要加上两个参数:–input-null-string ‘\N’ --input-null-non-string ‘\N’

查看mysql表数据:select * from tab1;

5、岗位数量分析
分析“数据分析”、“大数据开发工程师”、“数据采集”等大数据相关岗位在成都、北京、上海、广州、深圳的岗位数,并做饼图将结果展示出来
(1)成都
创建chengdu表:create table chengdu(name string, num int);

- 数据分析
insert into table chengdu select '数据分析', count(*) from qcwy where name like '%数据分析%' and jobplace like '%成都%';

- 大数据开发工程师
insert into table chengdu select '大数据开发工程师', count(*) from qcwy where name like '%大数据开发工程师%' and jobplace like '%成都%';

- 数据采集
insert into table chengdu select '数据采集', count(*) from qcwy where name like '%数据采集%' and jobplace like '%成都%';

- 查看数据:
select * from chengdu;

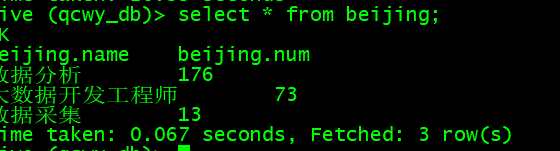
(2)北京
创建beijing表:create table beijing(name string, num int);

- 数据分析
insert into table beijing select '数据分析', count(*) from qcwy where name like '%数据分析%' and jobplace like '%北京%';

- 大数据开发工程师
insert into table beijing select '大数据开发工程师', count(*) from qcwy where name like '%大数据开发工程师%' and jobplace like '%北京%';

- 数据采集
insert into table beijing select '数据采集', count(*) from qcwy where name like '%数据采集%' and jobplace like '%北京%';

- 查看数据:
select * from beijing;
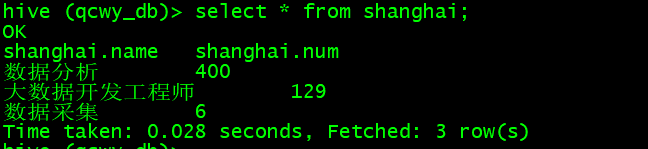
(3)上海
创建shanghai表:create table shanghai(name string, num int);

- 数据分析
insert into table shanghai select '数据分析', count(*) from qcwy where name like '%数据分析%' and jobplace like '%上海%';

- 大数据开发工程师
insert into table shanghai select '大数据开发工程师', count(*) from qcwy where name like '%大数据开发工程师%' and jobplace like '%上海%';

- 数据采集
insert into table shanghai select '数据采集', count(*) from qcwy where name like '%数据采集%' and jobplace like '%上海%';

- 查看数据:
select * from shanghai;
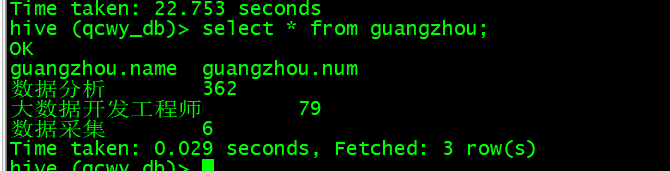
(4)广州
创建guangzhou表:create table guangzhou(name string, num int);

- 数据分析
insert into table guangzhou select '数据分析', count(*) from qcwy where name like '%数据分析%' and jobplace like '%广州%';

- 大数据开发工程师
insert into table guangzhou select '大数据开发工程师', count(*) from qcwy where name like '%大数据开发工程师%' and jobplace like '%广州%';

- 数据采集
insert into table guangzhou select '数据采集', count(*) from qcwy where name like '%数据采集%' and jobplace like '%广州%';

- 查看数据:
select * from guangzhou;
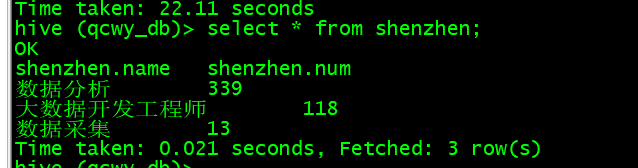
(5)深圳
创建shenzhen表:create table shenzhen(name string, num int);

- 数据分析
insert into table shenzhen select '数据分析', count(*) from qcwy where name like '%数据分析%' and jobplace like '%深圳%';

- 大数据开发工程师
insert into table shenzhen select '大数据开发工程师', count(*) from qcwy where name like '%大数据开发工程师%' and jobplace like '%深圳%';

- 数据采集
insert into table shenzhen select '数据采集', count(*) from qcwy where name like '%数据采集%' and jobplace like '%深圳%';

- 查看数据:
select * from shenzhen;
(6)导入Mysql
- 创建表
create table chengdu(name varchar(20), num int) charset utf8 collate utf8_general_ci;
create table beijing(name varchar(20), num int) charset utf8 collate utf8_general_ci;
create table shanghai(name varchar(20), num int) charset utf8 collate utf8_general_ci;
create table guangzhou(name varchar(20), num int) charset utf8 collate utf8_general_ci;
create table shenzhen(name varchar(20), num int) charset utf8 collate utf8_general_ci;

- 导入数据
成都
bin/sqoop export --connect jdbc:mysql://hadoop101:3306/qcwy_db --username root --password 1 --table chengdu --export-dir /user/hive/warehouse/qcwy_db.db/chengdu --input-null-string "\\\\N" --input-null-non-string "\\\\N" --input-fields-terminated-by "\001" --input-lines-terminated-by "\\n" -m 1

查看mysql表数据:select * from chengdu;

北京
bin/sqoop export --connect jdbc:mysql://hadoop101:3306/qcwy_db --username root --password 1 --table beijing --export-dir /user/hive/warehouse/qcwy_db.db/beijing --input-null-string "\\\\N" --input-null-non-string "\\\\N" --input-fields-terminated-by "\001" --input-lines-terminated-by "\\n" -m 1

查看mysql表数据:select * from beijing;

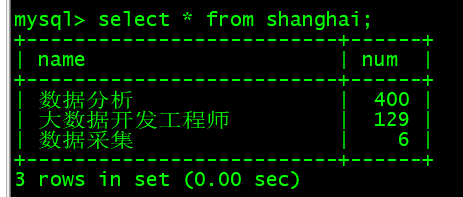
上海
bin/sqoop export --connect jdbc:mysql://hadoop101:3306/qcwy_db --username root --password 1 --table shanghai --export-dir /user/hive/warehouse/qcwy_db.db/shanghai --input-null-string "\\\\N" --input-null-non-string "\\\\N" --input-fields-terminated-by "\001" --input-lines-terminated-by "\\n" -m 1

查看mysql表数据:select * from shanghai;
广州
bin/sqoop export --connect jdbc:mysql://hadoop101:3306/qcwy_db --username root --password 1 --table guangzhou --export-dir /user/hive/warehouse/qcwy_db.db/guangzhou --input-null-string "\\\\N" --input-null-non-string "\\\\N" --input-fields-terminated-by "\001" --input-lines-terminated-by "\\n" -m 1

查看mysql表数据:select * from guangzhou;

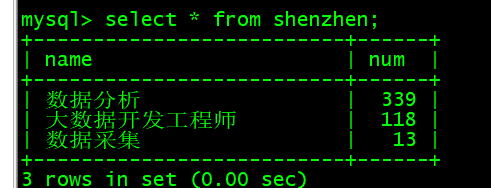
深圳
bin/sqoop export --connect jdbc:mysql://hadoop101:3306/qcwy_db --username root --password 1 --table shenzhen --export-dir /user/hive/warehouse/qcwy_db.db/shenzhen --input-null-string "\\\\N" --input-null-non-string "\\\\N" --input-fields-terminated-by "\001" --input-lines-terminated-by "\\n" -m 1

查看mysql表数据:select * from shenzhen;
6、岗位经验薪资分析
分析大数据相关岗位1-3年工作经验的薪资水平(平均工资、最高工资、最低工资),并做出条形图展示出来
A. 数据分析岗位
(1)模糊匹配提取
以模糊匹配提取出数据分析岗位1-3年经验的记录,存入表sjfx_experience(只存name、salary和jobexperience字段)
create table sjfx_experience1 as select name, salary, jobexperience from qcwy where name like '%数据分析%' and salary like '%千/月%' group by name, salary, jobexperience having jobexperience='1年经验' or jobexperience='2年经验' or jobexperience='3年经验';

查看前十条数据:select * from sjfx_experience1 limit 10;

(2)切分薪资字段存储
create table sjfx_experience2 as select name, int(regexp_extract(salary,'([0-9]+)-',1)) as s_min, int(regexp_extract(salary,'-([0-9]+)',1)) as s_max, (int(regexp_extract(salary,'([0-9]+)-',1)) + int(regexp_extract(salary,'-([0-9]+)',1)))/2 as s_avg from sjfx_experience1;

查看前十条数据:select * from sjfx_experience2 limit 10;

(3)计算最大 、最小、平均
create table sjfx_experience as select "数据分析" as name, min(s_min) as s_min, max(s_max) as s_max, regexp_extract(avg(s_avg),'([0-9]+.[0-9]?[0-9]?)',1) as s_avg from sjfx_experience2;

查看数据:select * from sjfx_experience;

B. 大数据开发工程师岗位
(1)模糊匹配提取
create table sjkf_experience1 as select name, salary, jobexperience from qcwy where name like '%大数据开发工程师%' and salary like '%千/月%' group by name, salary, jobexperience having jobexperience='1年经验' or jobexperience='2年经验' or jobexperience='3年经验';

查看前十条数据:select * from sjkf_experience1 limit 10;

(2)切分薪资字段存储
create table sjkf_experience2 as select name, int(regexp_extract(salary,'([0-9]+)-',1)) as s_min, int(regexp_extract(salary,'-([0-9]+)',1)) as s_max, (int(regexp_extract(salary,'([0-9]+)-',1)) + int(regexp_extract(salary,'-([0-9]+)',1)))/2 as s_avg from sjkf_experience1;

查看前十条数据:select * from sjkf_experience2 limit 10;

(3)计算最大 、最小、平均
create table sjkf_experience as select "大数据开发工程师" as name, min(s_min) as s_min, max(s_max) as s_max, regexp_extract(avg(s_avg),'([0-9]+.[0-9]?[0-9]?)',1) as s_avg from sjkf_experience2;

查看数据:select * from sjkf_experience;

C. 数据采集岗位
(1)模糊匹配提取
create table sjcj_experience1 as select name, salary, jobexperience from qcwy where name like '%数据采集%' and salary like '%千/月%' group by name, salary, jobexperience having jobexperience='1年经验' or jobexperience='2年经验' or jobexperience='3年经验';

查看前十条数据:select * from sjcj_experience1 limit 10;

(2)切分薪资字段存储
create table sjcj_experience2 as select name, int(regexp_extract(salary,'([0-9]+)-',1)) as s_min, int(regexp_extract(salary,'-([0-9]+)',1)) as s_max, (int(regexp_extract(salary,'([0-9]+)-',1)) + int(regexp_extract(salary,'-([0-9]+)',1)))/2 as s_avg from sjcj_experience1;

查看前十条数据:select * from sjcj_experience1 limit 10;

(3)计算最大 、最小、平均
create table sjcj_experience as select "数据采集" as name, min(s_min) as s_min, max(s_max) as s_max, regexp_extract(avg(s_avg),'([0-9]+.[0-9]?[0-9]?)',1) as s_avg from sjcj_experience2;

查看数据:select * from sjcj_experience;

D. 汇总
将三个岗位的薪资分析数据汇总到tab3表中
(1)创建tab3表
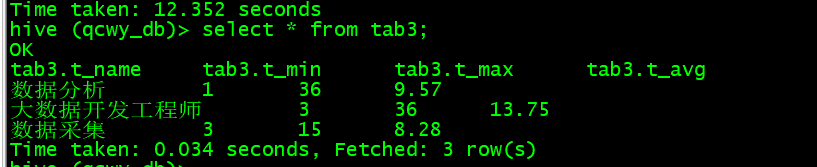
create table tab3(t_name string, t_min int, t_max int, t_avg string);

(2)插入数据
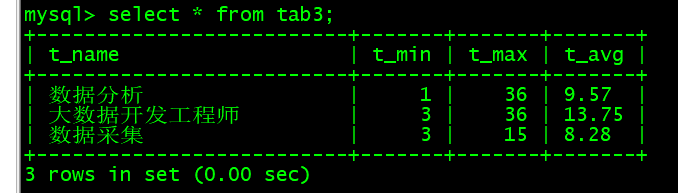
insert into table tab3 select * from sjfx_experience;insert into table tab3 select * from sjkf_experience;insert into table tab3 select * from sjcj_experience;


查看数据:select * from tab3;
E. 用Sqoop将数据导入Mysql
(1)在mysql创建数据库数据表
- 进入数据库:
mysql -u root -p

- 进入数据库:
use qcwy_db;

- 创建表:
create table tab3(t_name varchar(20), t_min int, t_max int, t_avg varchar(10)) charset utf8 collate utf8_general_ci;

(2)导入数据
bin/sqoop export --connect jdbc:mysql://hadoop101:3306/qcwy_db --username root --password 1 --table tab3 --export-dir /user/hive/warehouse/qcwy_db.db/tab3 --input-null-string "\\\\N" --input-null-non-string "\\\\N" --input-fields-terminated-by "\001" --input-lines-terminated-by "\\n" -m 1

查看mysql表数据:select * from tab3;
六、可视化
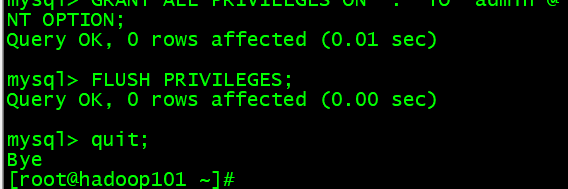
创建远程访问mysql数据库用户
GRANT ALL PRIVILEGES ON *.* TO 'admin'@'%' IDENTIFIED BY '1' WITH GRANT OPTION;

刷新权限:FLUSH PRIVILEGES;
1、岗位薪资分析
import pymysql
from pyecharts.charts import Bar
from pyecharts import options as opts"""
该文件用于分析“数据分析”、“大数据开发工程师”、“数据采集”等岗位的平均工资、最高工资、最低工资,并作条形图将结果展示出来
"""class PostSalary():def __init__(self):# 最低薪资self.min_all = []# 最高薪资self.max_all = []# 平均薪资self.avg_all = []# 连接数据库myClient = pymysql.connect(host="hadoop101",database='qcwy_db',user='admin',password='1')# 创建游标cur = myClient.cursor()# 数据提取处理(数据分析)def min_data_extraction_processing(self):# 执行语句self.cur.execute('select t_min from tab1;')# 获取所有结果result = self.cur.fetchall()# 元祖类型result转换成列表list_result = list(result)for i in list_result:self.min_all.append(i[0])# 关闭游标# self.cur.close()# 数据提取处理(大数据开发工程师)def max_data_extraction_processing(self):# 执行语句self.cur.execute('select t_max from tab1;')# 获取所有结果result = self.cur.fetchall()# 元祖类型result转换成列表list_result = list(result)for i in list_result:self.max_all.append(i[0])# 关闭游标# self.cur.close()# 数据提取处理(数据采集)def avg_data_extraction_processing(self):# 执行语句self.cur.execute('select t_avg from tab1;')# 获取所有结果result = self.cur.fetchall()# 元祖类型result转换成列表list_result = list(result)for i in list_result:self.avg_all.append(i[0])# 关闭游标self.cur.close()# 绘制图表def charting(self):bar = Bar(# init_opts=opts.InitOpts(width="1800px", height="800px"),)bar.set_global_opts(# 设置标题title_opts=opts.TitleOpts(title="岗位薪资水平", subtitle="单位  千/月"),# xaxis_opts=opts.AxisOpts(axislabel_opts={"rotate": 45}),)# 设置柱状图x轴显示字段bar.add_xaxis(['数据分析', '大数据开发工程师', '数据采集'])# 设置柱状图y轴显示数据bar.add_yaxis("最高薪资", self.max_all)bar.add_yaxis("最低薪资", self.min_all)bar.add_yaxis("平均薪资", self.avg_all)# 生成html文件bar.render("postSalary.html")if __name__ == '__main__':post = PostSalary()post.min_data_extraction_processing()post.max_data_extraction_processing()post.avg_data_extraction_processing()post.charting()
可视化结果:

2、岗位数量分析
import pymysql
from pyecharts.charts import Pie
from pyecharts import options as opts"""
该文件用于分析“数据分析”、“大数据开发工程师”、“数据采集”等大数据相关岗位在成都、北京、上海、广州、深圳的岗位数,并做饼图将结果展示出来
"""# 连接数据库
myClient = pymysql.connect(host="hadoop101",database='qcwy_db',user='admin',password='1'
)# 创建游标
cur = myClient.cursor()# 数据分析岗位分布
class DataAnalysisPostNum():# 记录数据分析在各个城市的岗位数量def __init__(self):self.num = []# 数据提取处理def data_extraction_processing(self):# 1、成都# 执行语句cur.execute('select num from chengdu where name = "数据分析";')# 获取所有结果result = cur.fetchall()# 元祖类型result转换成列表list_result = list(result)for i in list_result:self.num.append(i[0])# 2、北京# 执行语句cur.execute('select num from beijing where name = "数据分析";')# 获取所有结果result = cur.fetchall()# 元祖类型result转换成列表list_result = list(result)for i in list_result:self.num.append(i[0])# 3、上海# 执行语句cur.execute('select num from shanghai where name = "数据分析";')# 获取所有结果result = cur.fetchall()# 元祖类型result转换成列表list_result = list(result)for i in list_result:self.num.append(i[0])# 4、广州# 执行语句cur.execute('select num from guangzhou where name = "数据分析";')# 获取所有结果result = cur.fetchall()# 元祖类型result转换成列表list_result = list(result)for i in list_result:self.num.append(i[0])# 5、深圳# 执行语句cur.execute('select num from shenzhen where name = "数据分析";')# 获取所有结果result = cur.fetchall()# 元祖类型result转换成列表list_result = list(result)for i in list_result:self.num.append(i[0])# 绘制图表def charting(self):city = ['成都', '北京', '上海', '广州', '深圳']pie = Pie(# init_opts=opts.InitOpts(width="1600px", height="1000px"),)pie.set_global_opts(# 设置标题title_opts=opts.TitleOpts(title="数据分析岗位分布数"),# 数据项居右legend_opts=opts.LegendOpts(pos_left="right", orient="vertical"))pie.add('',# 添加数据(kv格式)  用一个列表里遍历数组方式[list(z) for z in zip(city, self.num)],# 内环大小和总体大小radius=[55, 105],# 环状饼图label_opts=opts.LabelOpts(is_show=False, position='center'))# formatter:{a}(系列名称),{b}(数据项名称),{c}(数值), {d}(百分比)pie.set_series_opts(label_opts=opts.LabelOpts(formatter="{b}:{c}"))pie.render("dataAnalysisPostNum.html")# 大数据开发工程师岗位分布
class DataDevelopmentPostNum():# 记录数据分析在各个城市的岗位数量def __init__(self):self.num = []# 数据提取处理def data_extraction_processing(self):# 1、成都# 执行语句cur.execute('select num from chengdu where name = "大数据开发工程师";')# 获取所有结果result = cur.fetchall()# 元祖类型result转换成列表list_result = list(result)for i in list_result:self.num.append(i[0])# 2、北京# 执行语句cur.execute('select num from beijing where name = "大数据开发工程师";')# 获取所有结果result = cur.fetchall()# 元祖类型result转换成列表list_result = list(result)for i in list_result:self.num.append(i[0])# 3、上海# 执行语句cur.execute('select num from shanghai where name = "大数据开发工程师";')# 获取所有结果result = cur.fetchall()# 元祖类型result转换成列表list_result = list(result)for i in list_result:self.num.append(i[0])# 4、广州# 执行语句cur.execute('select num from guangzhou where name = "大数据开发工程师";')# 获取所有结果result = cur.fetchall()# 元祖类型result转换成列表list_result = list(result)for i in list_result:self.num.append(i[0])# 5、深圳# 执行语句cur.execute('select num from shenzhen where name = "大数据开发工程师";')# 获取所有结果result = cur.fetchall()# 元祖类型result转换成列表list_result = list(result)for i in list_result:self.num.append(i[0])# 绘制图表def charting(self):city = ['成都', '北京', '上海', '广州', '深圳']pie = Pie(# init_opts=opts.InitOpts(width="1600px", height="1000px"),)# 设置标题pie.set_global_opts(title_opts=opts.TitleOpts(title="大数据开发工程师岗位分布数"))# 添加数据(kv格式)  用一个列表里遍历数组方式pie.add('', [list(z) for z in zip(city, self.num)])# formatter:{a}(系列名称),{b}(数据项名称),{c}(数值), {d}(百分比)pie.set_series_opts(label_opts=opts.LabelOpts(formatter="{b}:{c}"))pie.render("dataDevelopmentPostNum.html")# 数据采集岗位分布
class DataAcquisitionPostNum():# 记录数据分析在各个城市的岗位数量def __init__(self):self.num = []# 数据提取处理def data_extraction_processing(self):# 1、成都# 执行语句cur.execute('select num from chengdu where name = "数据采集";')# 获取所有结果result = cur.fetchall()# 元祖类型result转换成列表list_result = list(result)for i in list_result:self.num.append(i[0])# 2、北京# 执行语句cur.execute('select num from beijing where name = "数据采集";')# 获取所有结果result = cur.fetchall()# 元祖类型result转换成列表list_result = list(result)for i in list_result:self.num.append(i[0])# 3、上海# 执行语句cur.execute('select num from shanghai where name = "数据采集";')# 获取所有结果result = cur.fetchall()# 元祖类型result转换成列表list_result = list(result)for i in list_result:self.num.append(i[0])# 4、广州# 执行语句cur.execute('select num from guangzhou where name = "数据采集";')# 获取所有结果result = cur.fetchall()# 元祖类型result转换成列表list_result = list(result)for i in list_result:self.num.append(i[0])# 5、深圳# 执行语句cur.execute('select num from shenzhen where name = "数据采集";')# 获取所有结果result = cur.fetchall()# 元祖类型result转换成列表list_result = list(result)for i in list_result:self.num.append(i[0])# 关闭游标cur.close()# 绘制图表def charting(self):city = ['成都', '北京', '上海', '广州', '深圳']pie = Pie(# init_opts=opts.InitOpts(width="1600px", height="1000px"),)pie.set_global_opts(# 设置标题title_opts=opts.TitleOpts(title="数据采集岗位分布数"),# 数据项居右legend_opts=opts.LegendOpts(pos_left="right", orient="vertical"))pie.add('',# 添加数据(kv格式)  用一个列表里遍历数组方式[list(z) for z in zip(city, self.num)],# 内环大小和总体大小radius=['30%', '70%'],# 图像位置center=['65%', '50%'],rosetype="area",)# formatter:{a}(系列名称),{b}(数据项名称),{c}(数值), {d}(百分比)pie.set_series_opts(label_opts=opts.LabelOpts(formatter="{b}:{c}"))pie.render("dataAcquisitionPostNum.html")if __name__ == '__main__':# 数据分析post_fx = DataAnalysisPostNum()post_fx.data_extraction_processing()post_fx.charting()# 大数据开发工程师post_kf = DataDevelopmentPostNum()post_kf.data_extraction_processing()post_kf.charting()# 数据采集post_cj = DataAcquisitionPostNum()post_cj.data_extraction_processing()post_cj.charting()
可视化结果(数据分析):

可视化结果(大数据开发工程师):

可视化结果(数据采集):

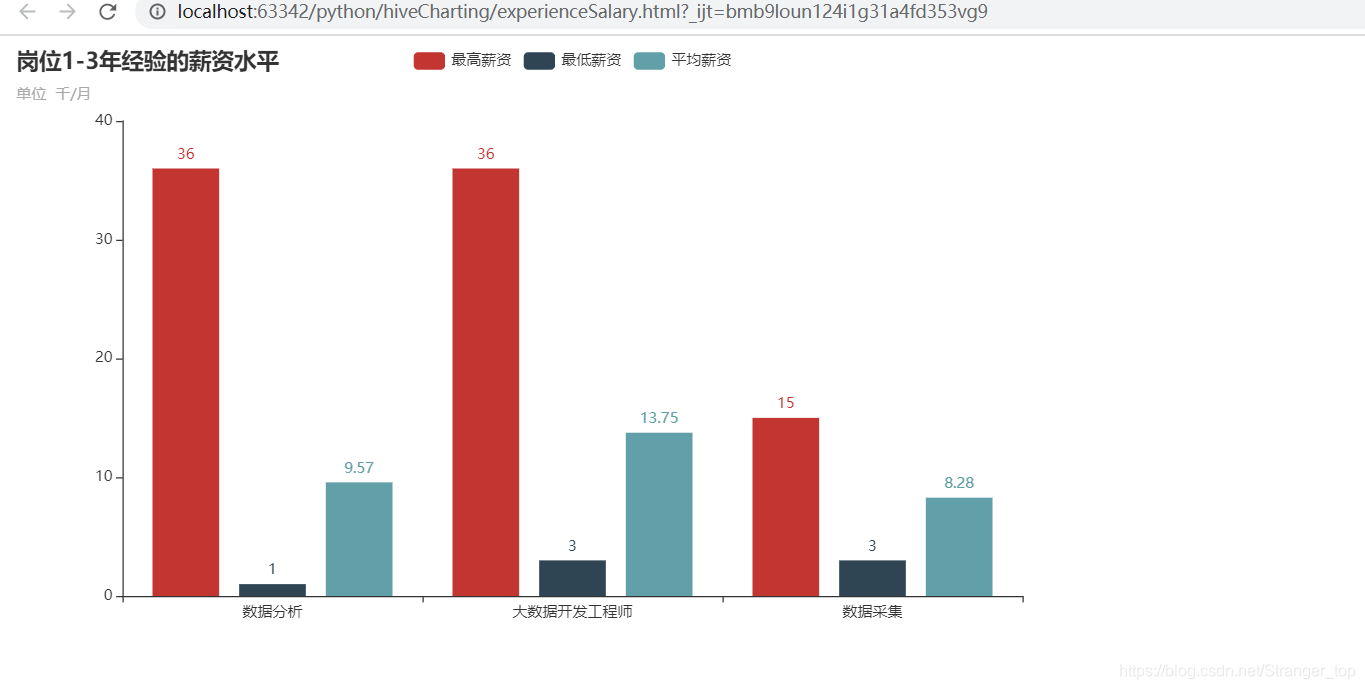
3、岗位经验薪资分析
import pymysql
from pyecharts.charts import Bar
from pyecharts import options as opts"""
该文件分析大数据相关岗位1、2、3年工作经验的薪资水平(平均工资、最高工资、最低工资),并做出条形图展示
"""
class ExperienceSalary():def __init__(self):# 最低薪资self.min_all = []# 最高薪资self.max_all = []# 平均薪资self.avg_all = []# 连接数据库myClient = pymysql.connect(host="hadoop101",database='qcwy_db',user='admin',password='1')# 创建游标cur = myClient.cursor()# 数据提取处理(数据分析)def min_data_extraction_processing(self):# 执行语句self.cur.execute('select t_min from tab3;')# 获取所有结果result = self.cur.fetchall()# 元祖类型result转换成列表list_result = list(result)for i in list_result:self.min_all.append(i[0])# 关闭游标# self.cur.close()# 数据提取处理(大数据开发工程师)def max_data_extraction_processing(self):# 执行语句self.cur.execute('select t_max from tab3;')# 获取所有结果result = self.cur.fetchall()# 元祖类型result转换成列表list_result = list(result)for i in list_result:self.max_all.append(i[0])# 关闭游标# self.cur.close()# 数据提取处理(数据采集)def avg_data_extraction_processing(self):# 执行语句self.cur.execute('select t_avg from tab3;')# 获取所有结果result = self.cur.fetchall()# 元祖类型result转换成列表list_result = list(result)for i in list_result:self.avg_all.append(i[0])# 关闭游标self.cur.close()# 绘制图表def charting(self):bar = Bar(# init_opts=opts.InitOpts(width="1800px", height="800px"),)bar.set_global_opts(# 设置标题title_opts=opts.TitleOpts(title="岗位1-3年经验的薪资水平", subtitle="单位  千/月"),# xaxis_opts=opts.AxisOpts(axislabel_opts={"rotate": 45}),)# 设置柱状图x轴显示字段bar.add_xaxis(['数据分析', '大数据开发工程师', '数据采集'])# 设置柱状图y轴显示数据bar.add_yaxis("最高薪资", self.max_all)bar.add_yaxis("最低薪资", self.min_all)bar.add_yaxis("平均薪资", self.avg_all)# 生成html文件bar.render("experienceSalary.html")if __name__ == '__main__':post = ExperienceSalary()post.min_data_extraction_processing()post.max_data_extraction_processing()post.avg_data_extraction_processing()post.charting()
可视化结果;