实现文章连接:强力推荐】基于Nvidia-Docker-Linux(Ubuntu18.04)平台:新版OpenCV5.x(C++)联合CUDA11.1(GPU)完美配置视觉算法开发环境
目录
- 1、关于有粉丝私信问我怎么调用的问题
- 2、opencv5.x(GPU)测试成功
- opencv-python==5.x测试代码
- OpenCV(c++)==5.x测试代码
- 参考
1、关于有粉丝私信问我怎么调用的问题
这里再说明一下,具体方法如下:
- 文中我已经说得清处了,如果你之前在环境中已安装opencv-python的其他版本,那么文中提到的/usr/lib/python3/dist-packages主要是当前正在使用的cv2.so动态库存在的地方;如果你没有安装这里则不会出现,我之前按装国,所以会有,因此选择软连接的方式可以成功导入opencv5.x的版本。
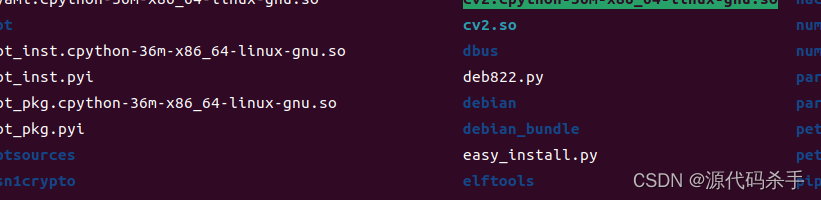
- 路径/usr/lib/python3.6/site-packages/cv2/python-3.6/cv2.cpython-36m-x86_64-linux-gnu.so主要是你编译opencv生成的动态库(这个路径主要三与你一开始制定的有关),因此可以从这里软连接或复制到刚刚1提到的路径下面就可以了。
cp /usr/lib/python3.6/site-packages/cv2/python-3.6/cv2.cpython-36m-x86_64-linux-gnu.so /usr/lib/python3/dist-packages
要么复制要么软连接,如果还是不行就使用这条命令全局搜索find / -name cv2*.so,其中cv2.cpython-36m-x86_64-linux-gnu.soo才是你生成的,用这个就行。
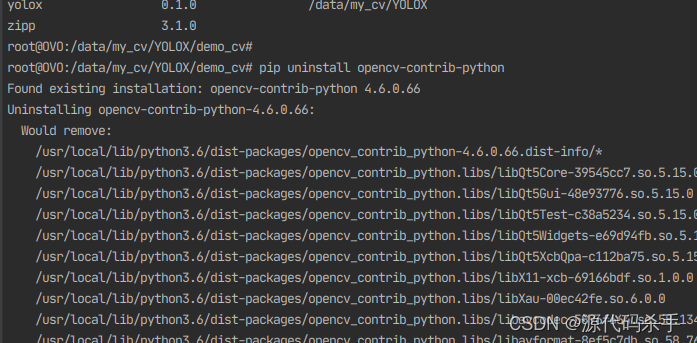
- 如果上述方法都试过了,解决的方法就是卸载已经安装的opencv版本,直接调用,例如,我的是这样的:
卸载:
pip uninstall opencv-contrib-python
pip unstall opencv-python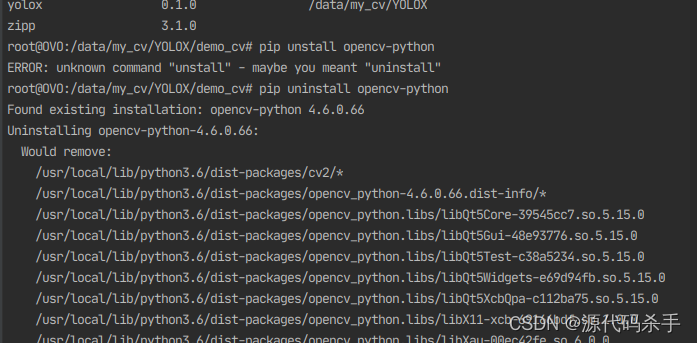
2、opencv5.x(GPU)测试成功
下面示例测试:
opencv-python==5.x测试代码
import sys
import time
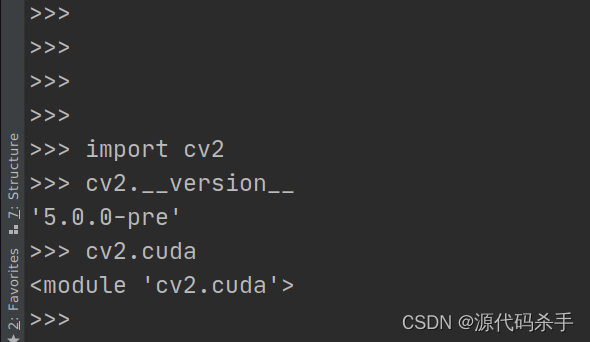
import cv2
print(cv2.__version__)### VALUES
NUM_REPEAT = 10000### Read source image
img_src = cv2.imread(
"../datasets/VOCdevkit/VOCmask2/JPEGImages/mask0011.jpg") # 输入你的图片
cv2.imshow('img_src', img_src)### Run with CPU
time_start = time.time()
for i in range (NUM_REPEAT):img_dst = cv2.resize(img_src, (300, 300))
time_end = time.time()
print ("CPU = {0}".format((time_end - time_start) * 1000 / NUM_REPEAT) + "[msec]")
cv2.imshow('CPU', img_dst)### Run with GPU
img_gpu_src = cv2.cuda_GpuMat() # Allocate device memory only once, as memory allocation seems to take time...
img_gpu_dst = cv2.cuda_GpuMat()
time_start = time.time()
for i in range (NUM_REPEAT):img_gpu_src.upload(img_src)img_gpu_dst = cv2.cuda.resize(img_gpu_src, (300, 300))img_dst = img_gpu_dst.download()
time_end = time.time()
print ("GPU = {0}".format((time_end - time_start) * 1000 / NUM_REPEAT) + "[msec]")
cv2.imshow('GPU', img_dst)key = cv2.waitKey(0)
cv2.destroyAllWindows()print(cv2.cuda.getCudaEnabledDeviceCount())输出结果:
5.0.0-pre
CPU = 0.37868216037750246[msec]
GPU = 0.28145129680633546[msec]

由于只是简单的操作一张图片,所以从运行速度上没有多大变化,当经过一些复杂像素计算就能体现GPU的优点了。
OpenCV(c++)==5.x测试代码
cv2cuda.cc:
#include <stdio.h>
#include <chrono>
#include <opencv2/opencv.hpp>
// #include <opencv2/gpu/gpu.hpp>
#include <opencv2/core/cuda.hpp>
#include <opencv2/cudawarping.hpp>#define NUM_REPEAT 10000int main()
{cv::Mat imgSrc = cv::imread("mask0026.jpg");cv::imshow("imgSrc", imgSrc);{cv::Mat imgDst;const auto& t0 = std::chrono::steady_clock::now();for (int i = 0; i < NUM_REPEAT; i++) cv::resize(imgSrc, imgDst, cv::Size(300, 300));const auto& t1 = std::chrono::steady_clock::now();std::chrono::duration<double> timeSpan = t1 - t0;printf("CPU = %.3lf [msec]\n", timeSpan.count() * 1000.0 / NUM_REPEAT);cv::imshow("CPU", imgDst);}{cv::cuda::GpuMat imgGpuSrc, imgGpuDst;cv::Mat imgDst;const auto& t0 = std::chrono::steady_clock::now();for (int i = 0; i < NUM_REPEAT; i++) {imgGpuSrc.upload(imgSrc);cv::cuda::resize(imgGpuSrc, imgGpuDst, cv::Size(300, 300));imgGpuDst.download(imgDst);}const auto& t1 = std::chrono::steady_clock::now();std::chrono::duration<double> timeSpan = t1 - t0;printf("GPU = %.3lf [msec]\n", timeSpan.count() * 1000.0 / NUM_REPEAT);cv::imshow("GPU", imgDst);}cv::waitKey(0);return 0;
}
CMakeLists.txt:
# cmake needs this line
cmake_minimum_required(VERSION 3.1)# Define project name
project(opencv_example_project)# Find OpenCV, you may need to set OpenCV_DIR variable
# to the absolute path to the directory containing OpenCVConfig.cmake file
# via the command line or GUI
find_package(OpenCV REQUIRED)# If the package has been found, several variables will
# be set, you can find the full list with descriptions
# in the OpenCVConfig.cmake file.
# Print some message showing some of them
message(STATUS "OpenCV library status:")
message(STATUS "    config: ${OpenCV_DIR}")
message(STATUS "    version: ${OpenCV_VERSION}")
message(STATUS "    libraries: ${OpenCV_LIBS}")
message(STATUS "    include path: ${OpenCV_INCLUDE_DIRS}")# Declare the executable target built from your sources
add_executable(cv2cuda cv2cuda.cc)# Link your application with OpenCV libraries
target_link_libraries(cv2cuda PRIVATE ${OpenCV_LIBS})
编译方法:
rm -rf build
mkdir build
cd build
cmake ..
make
./cv2cuda
输出结果:
bash run.sh
-- The C compiler identification is GNU 7.5.0
-- The CXX compiler identification is GNU 7.5.0
-- Detecting C compiler ABI info
-- Detecting C compiler ABI info - done
-- Check for working C compiler: /usr/bin/cc - skipped
-- Detecting C compile features
-- Detecting C compile features - done
-- Detecting CXX compiler ABI info
-- Detecting CXX compiler ABI info - done
-- Check for working CXX compiler: /usr/bin/c++ - skipped
-- Detecting CXX compile features
-- Detecting CXX compile features - done
-- Performing Test CMAKE_HAVE_LIBC_PTHREAD
-- Performing Test CMAKE_HAVE_LIBC_PTHREAD - Failed
-- Looking for pthread_create in pthreads
-- Looking for pthread_create in pthreads - not found
-- Looking for pthread_create in pthread
-- Looking for pthread_create in pthread - found
-- Found Threads: TRUE
-- Found CUDA: /usr/local/cuda (found suitable exact version "11.1")
-- Found OpenCV: /usr (found version "5.0.0")
-- OpenCV library status:
--     config: /usr/lib/x86_64-linux-gnu/cmake/opencv5
--     version: 5.0.0
--     libraries: opencv_3d;opencv_calib;opencv_core;opencv_dnn;opencv_features2d;opencv_flann;opencv_highgui;opencv_imgcodecs;opencv_imgproc;opencv_ml;opencv_objdetect;opencv_photo;opencv_stereo;opencv_stitching;opencv_video;opencv_videoio;opencv_alphamat;opencv_aruco;opencv_barcode;opencv_bgsegm;opencv_bioinspired;opencv_ccalib;opencv_cudaarithm;opencv_cudabgsegm;opencv_cudacodec;opencv_cudafeatures2d;opencv_cudafilters;opencv_cudaimgproc;opencv_cudalegacy;opencv_cudaobjdetect;opencv_cudaoptflow;opencv_cudastereo;opencv_cudawarping;opencv_cudev;opencv_datasets;opencv_dnn_objdetect;opencv_dnn_superres;opencv_dpm;opencv_face;opencv_freetype;opencv_fuzzy;opencv_hfs;opencv_img_hash;opencv_intensity_transform;opencv_line_descriptor;opencv_mcc;opencv_optflow;opencv_phase_unwrapping;opencv_plot;opencv_quality;opencv_rapid;opencv_reg;opencv_rgbd;opencv_saliency;opencv_shape;opencv_structured_light;opencv_superres;opencv_surface_matching;opencv_text;opencv_tracking;opencv_videostab;opencv_wechat_qrcode;opencv_xfeatures2d;opencv_ximgproc;opencv_xobjdetect;opencv_xphoto;opencv_xstereo
--     include path: /usr/include/opencv5
-- Configuring done
-- Generating done
-- Build files have been written to: /demo_cv/build
[ 50%] Building CXX object CMakeFiles/cv2cuda.dir/cv2cuda.cc.o
[100%] Linking CXX executable cv2cuda
[100%] Built target cv2cuda
CPU = 0.388 [msec]
GPU = 0.345 [msec]
参考
强力推荐】基于Nvidia-Docker-Linux(Ubuntu18.04)平台:新版OpenCV5.x(C++)联合CUDA11.1(GPU)完美配置视觉算法开发环境
AI模型C++部署:【配置OpenCV4++环境】与【三种在 C++ 中部署 TensorFlow 模型的方式】【准备阶段】

![[PostgreSQL的 SPI_接口函数]](https://img-blog.csdnimg.cn/img_convert/91e3297aeb032d05a7689742ab7d7eb2.png)