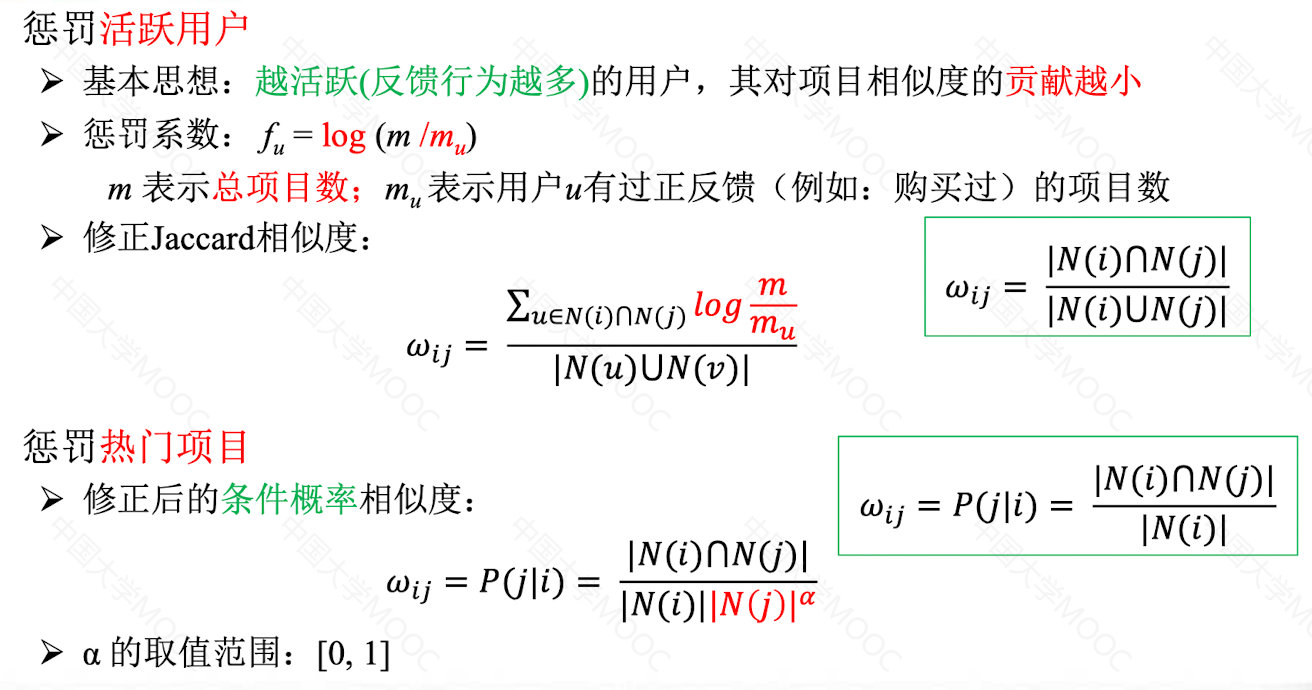
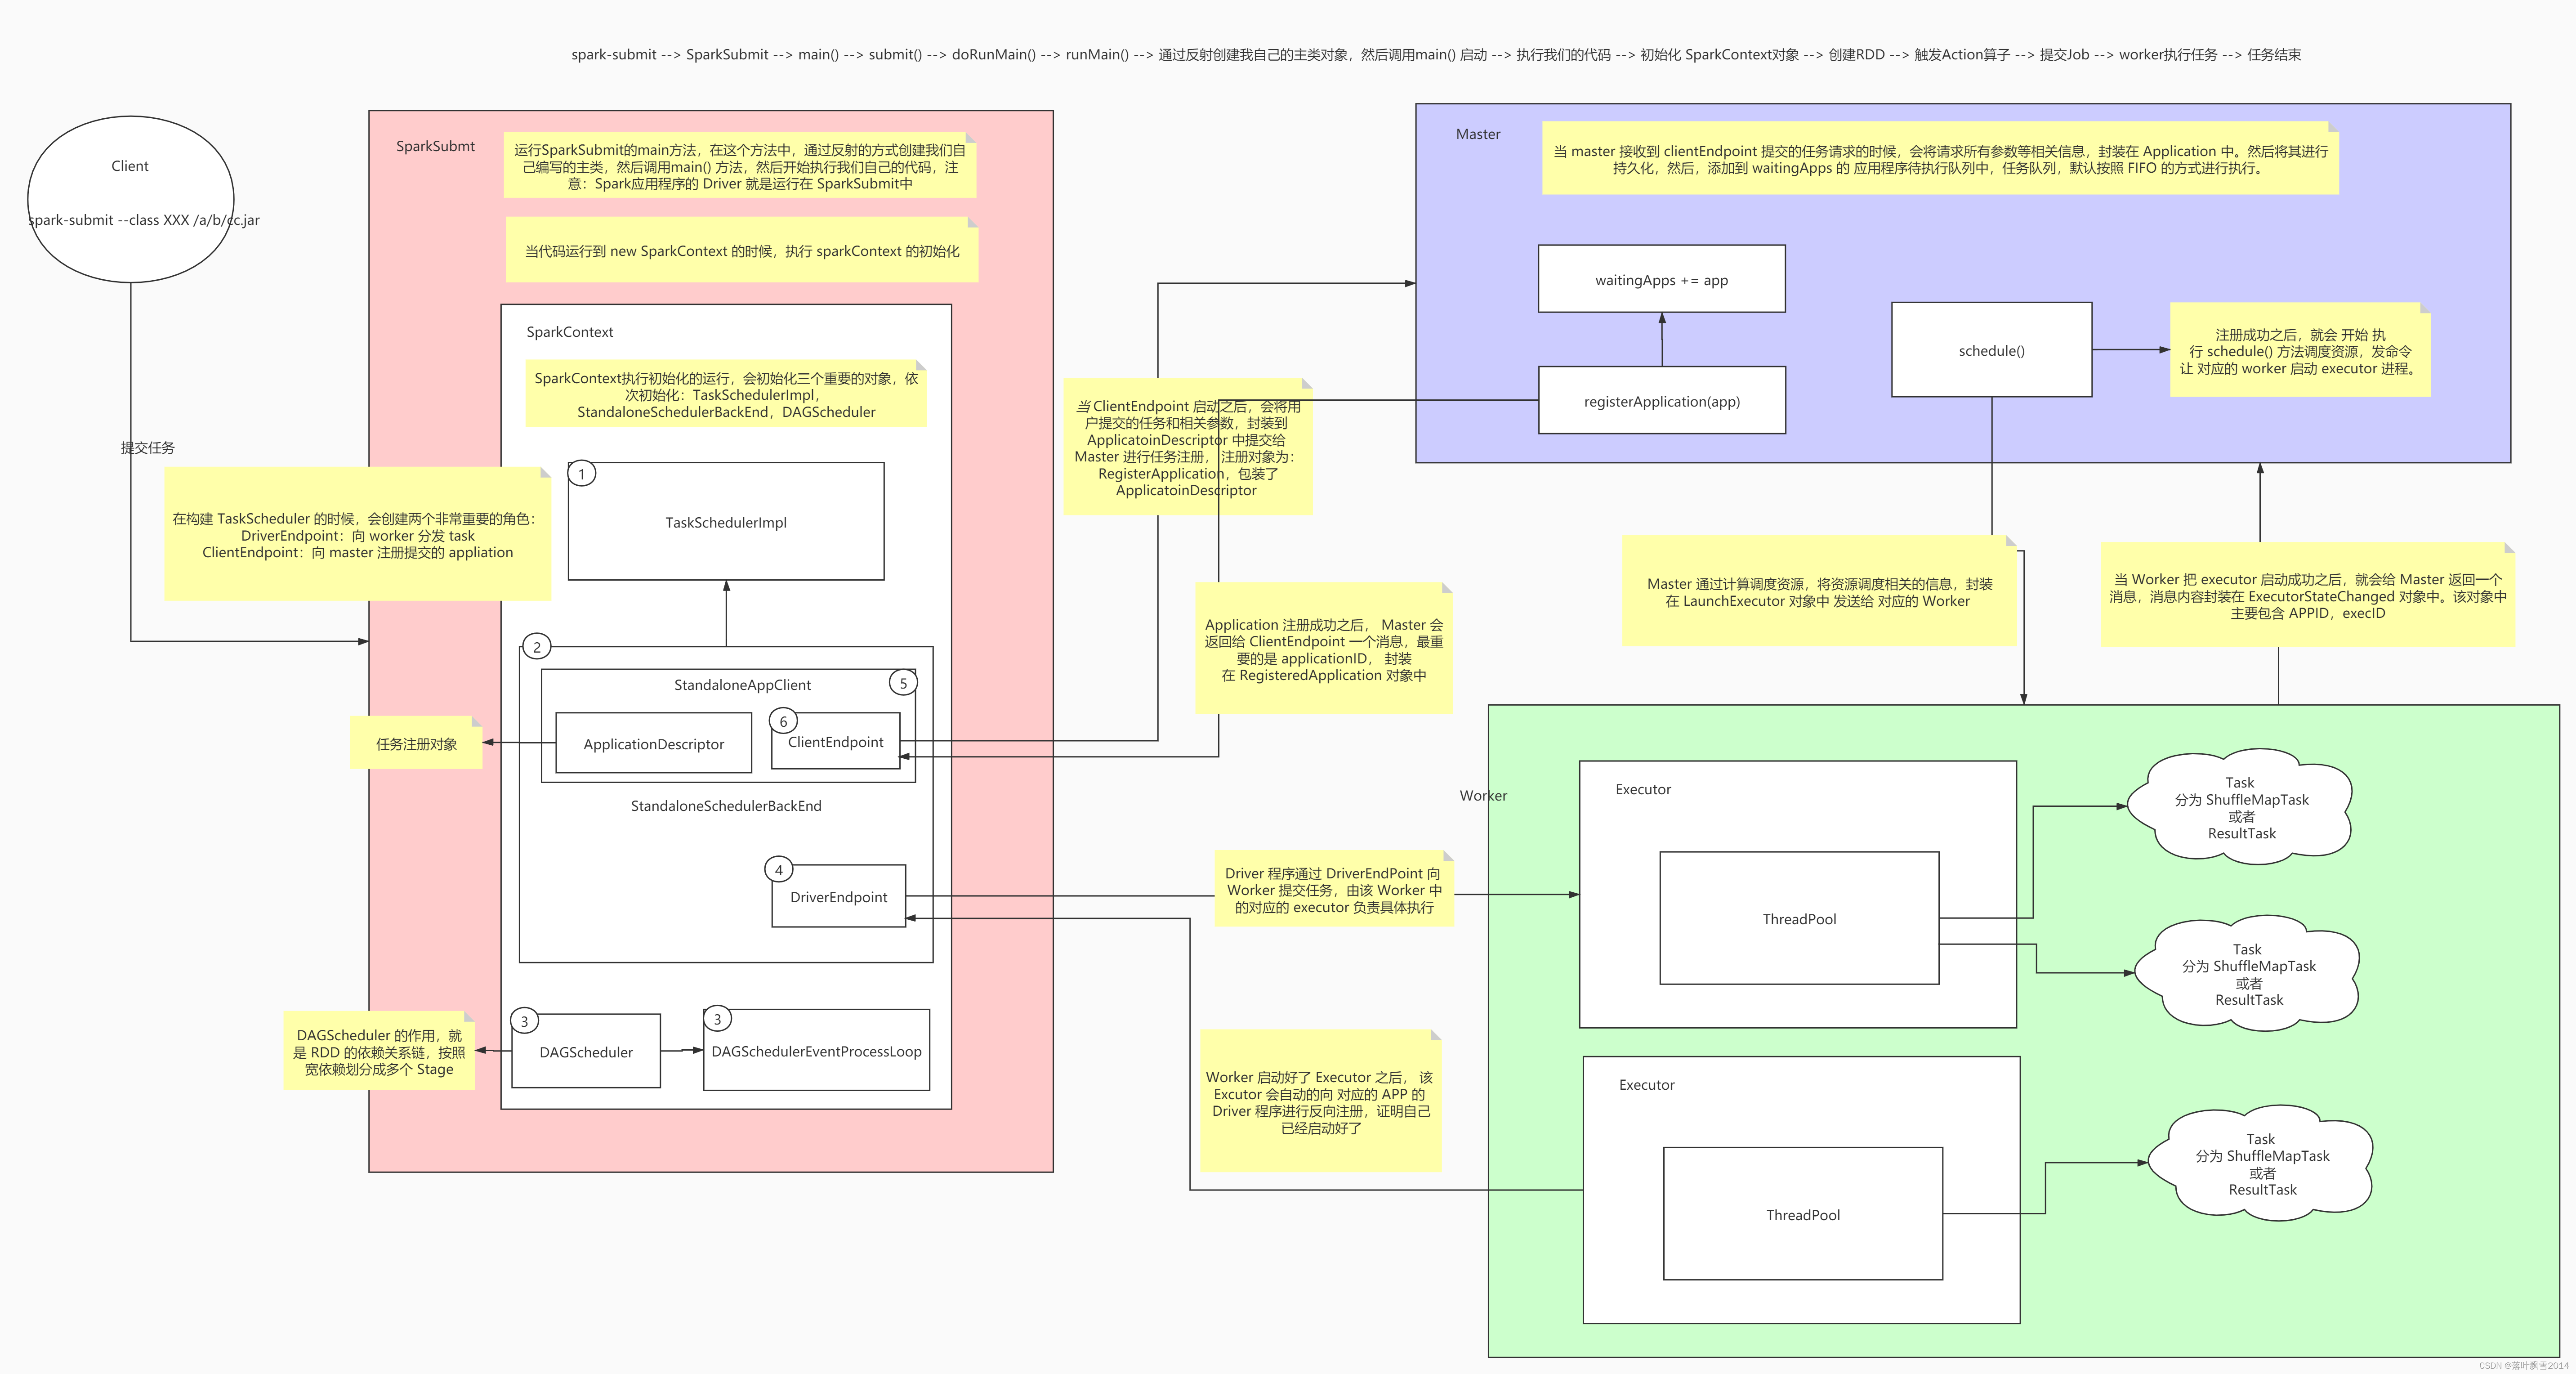
第一种:
给容器中的组件加上
@ConfigurationProperties注解即可
测试:
@Component
@ConfigurationProperties(prefix = "mycar")
public class Car {private String brand;private Integer price;private Integer seatNum;public Integer getSeatNum() {return seatNum;}public void setSeatNum(Integer seatNum) {this.seatNum = seatNum;}public String getBrand() {return brand;}public void setBrand(String brand) {this.brand = brand;}public Integer getPrice() {return price;}public void setPrice(Integer price) {this.price = price;}@Overridepublic String toString() {return "Car{" +"brand='" + brand + '\'' +", price=" + price +", seatNum=" + seatNum +'}';}public Car() {}
}
在application.properties中属性:
mycar.seatNum = 4
mycar.brand = BMW
mycar.price = 100000
即可给之后new 的Car 对象自动配置。
运行:
public class MainApplication {public static void main(String[] args) {//返回springboot中的ioc容器ConfigurableApplicationContext run = SpringApplication.run(MainApplication.class, args);Car car = run.getBean("car", Car.class);System.out.println(car);}
}
控制台结果:

第二种:
第一种的情况下是自己写的类作为组件,实现自动装配的过程;
但有时候使用第三方类的时候无法将其设置为自己的组件,所以就需要用
@EnableConfigurationProperties + @ConfigurationProperties
将Car类删除@Component注解,此时Car类已经不是组件了:

此时,假设Car是第三方提供的类:
对于第三方的类 想要其作为组件就需要@Bean注解,就和之前的SSM项目中配置的bean
标签一样:
SSM中的配置文件中:
<bean id="car" class="xxx.xxx.xxx.Car"><property name="brand" value=""/><property name="price" value=" "/><property name="seatNum" value=" "/></bean>就等同于SpringBoot中配置类下的:
@Beanpublic Car car(){Car car = new Car();return car;}其中属性的赋值就需要在Car类上增加
@ConfigurationProperties(prefix = "mycar")注解
最后在该配置类上使用
@EnableConfigurationProperties(Car.class)注解开启即可
@Configuration(proxyBeanMethods = false)
@EnableConfigurationProperties(Car.class)
public class CarAutoConfiguration {@Beanpublic Car car(){Car car = new Car();return car;}}
控制台显示结果一样:


![[附源码]计算机毕业设计springboot动物保护协会网站](https://img-blog.csdnimg.cn/b7554b4a21fc4ffcac849abfdeca9b94.png)