- 1. File
- 1. 创建
- 2. 操作
- 1. 获取文件信息
- 2. 目录创建/删除
- 2. IO流
- 1. FileInputStream
- 1. 简单使用
- 2. 读取中文
- 2. FileOutputStream
- 1. 简单使用
- 2. 追加写入
- 3. 文件拷贝
- 4. FileReader
- 1. 简单使用
- 2. 提高读取速度
- 5. FileWriter
- 1. 简单使用
- 6. 节点流和处理流简介
- 7. BufferedReader
- 1. 简单使用
- 8. BufferedWriter
- 1. 简单使用
- 9. Buffered字符流拷贝
- 10. Buffered字节流拷贝
- 11 对象流
- 1. 简单使用
- 2. 注意事项
- 12. 标准输入/输出流
- 13. 转换流
- 1. 乱码问题
- 2. InputStreamReader
- 3. OutputStreamWriter
- 14. 打印流
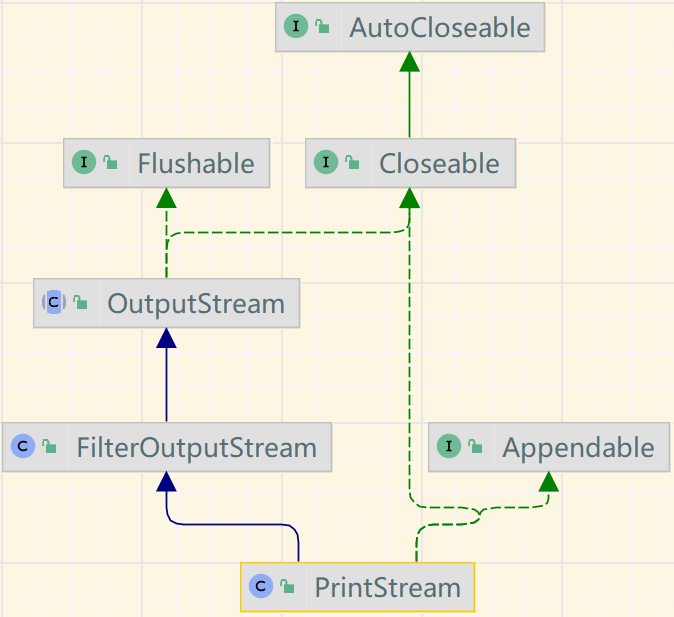
- 1. PrintStream
- 2. PrintWriter
- 15. 读写.properties 文件
1. File
文件: 保存数据的地方。
1. 创建

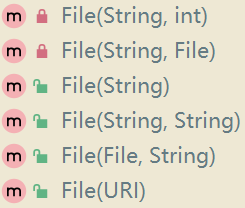
构造器:
new File
- (String pathName) // 根据路径构建一个 File对象
- (File parent, String child) // 根据父目录文件 + 子路径构建
- (String parent, String child) // 根据父目录 + 子路径构建
创建对象:
createNewFile
(String pathName) —— 目录必须存在,才能创建文件
如果 D:\Study\file_demo\ 路径不存在,会抛出异常:java.io.IOException: 系统找不到指定的路径 。
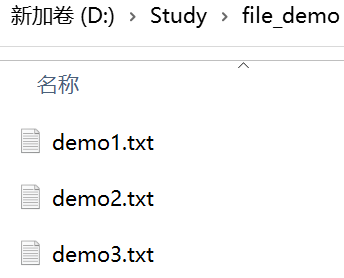
public static File create_01(String path) {File file = new File(path);try {file.createNewFile();} catch (IOException e) {e.printStackTrace();}return file;}public static void main(String[] args) {String path = "D:\\Study\\file_demo\\demo1.txt";File file = create_01(path);}
(File parent, String child)
如果 D:\Study\file_demo\ 路径不存在,会抛出异常:java.io.IOException: 系统找不到指定的路径 。
public static File create_02(File parent, String child) {File file = new File(parent, child);try {file.createNewFile();} catch (IOException e) {e.printStackTrace();}return file;}public static void main(String[] args) {File parent = new File("D:\\Study\\file_demo\\");String path = "demo2.txt";File file = create_02(parent, path);}
(String parent, String child)
如果 D:\Study\file_demo\ 路径不存在,会抛出异常:java.io.IOException: 系统找不到指定的路径 。
public static File create_03(String parent, String child) {File file = new File(parent, child);try {file.createNewFile();} catch (IOException e) {e.printStackTrace();}return file;}public static void main(String[] args) {String parent = "D:\\Study\\file_demo\\";String child = "demo3.txt";File file = create_03(parent, child);}
注意:
- new File 只是在内存中创建了一个对象
- createNewFile 才是在磁盘上创建了一个文件
2. 操作
1. 获取文件信息
方法:
- getName
- getAbsolutePath
- getParent
- length
- exists
- isFile
- isDirectory
public static Map<String, String> getFileInfo(File file) {Map<String, String> info = new HashMap<>();info.put("文件名", file.getName());info.put("文件绝对路径", file.getAbsolutePath());info.put("文件父级目录", file.getParent());info.put("文件大小(byte)", String.valueOf(file.length()));info.put("文件是否存在", file.exists() + "");info.put("是否是文件", file.isFile() + "");info.put("是否是目录", String.valueOf(file.isDirectory()));return info;}public static void main(String[] args) {File file = new File("D:\\Study\\file_demo\\demo1.txt");getFileInfo(file).forEach((k, v) -> {System.out.println(k + ":" + v);});}
2. 目录创建/删除
方法:
- mkdir
创建一级目录 - mkdirs
创建多级目录 - delete
删除空目录/文件
注意: Java中,目录也被当做文件。
public static void create_01(String path) {File file = new File(path);String flagE = null;String flagM = null;String flagMs = null;if (file.exists()) {flagE = file.delete() ? "文件删除成功" : "文件删除失败";} else {flagE = "文件不存在";}System.out.println(flagE);boolean isMk = file.mkdir();flagM = isMk ? "一级目录创建成功" : "一级目录创建失败";System.out.println(flagM);if (!isMk) {flagMs = file.mkdirs() ? "多级目录创建成功" : "多级目录创建失败";System.out.println(flagMs);}}public static void main(String[] args) {String path = "D:\\Study\\file_demo\\test";create_01(path);}
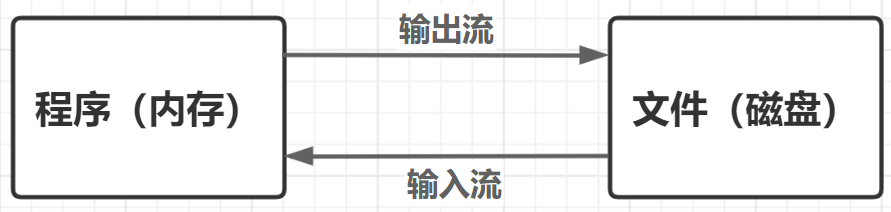
2. IO流
IO: Input/Output,处理数据传输的技术。
Stream: 流,Java中的数据的输入/输出都以流的方式进行。
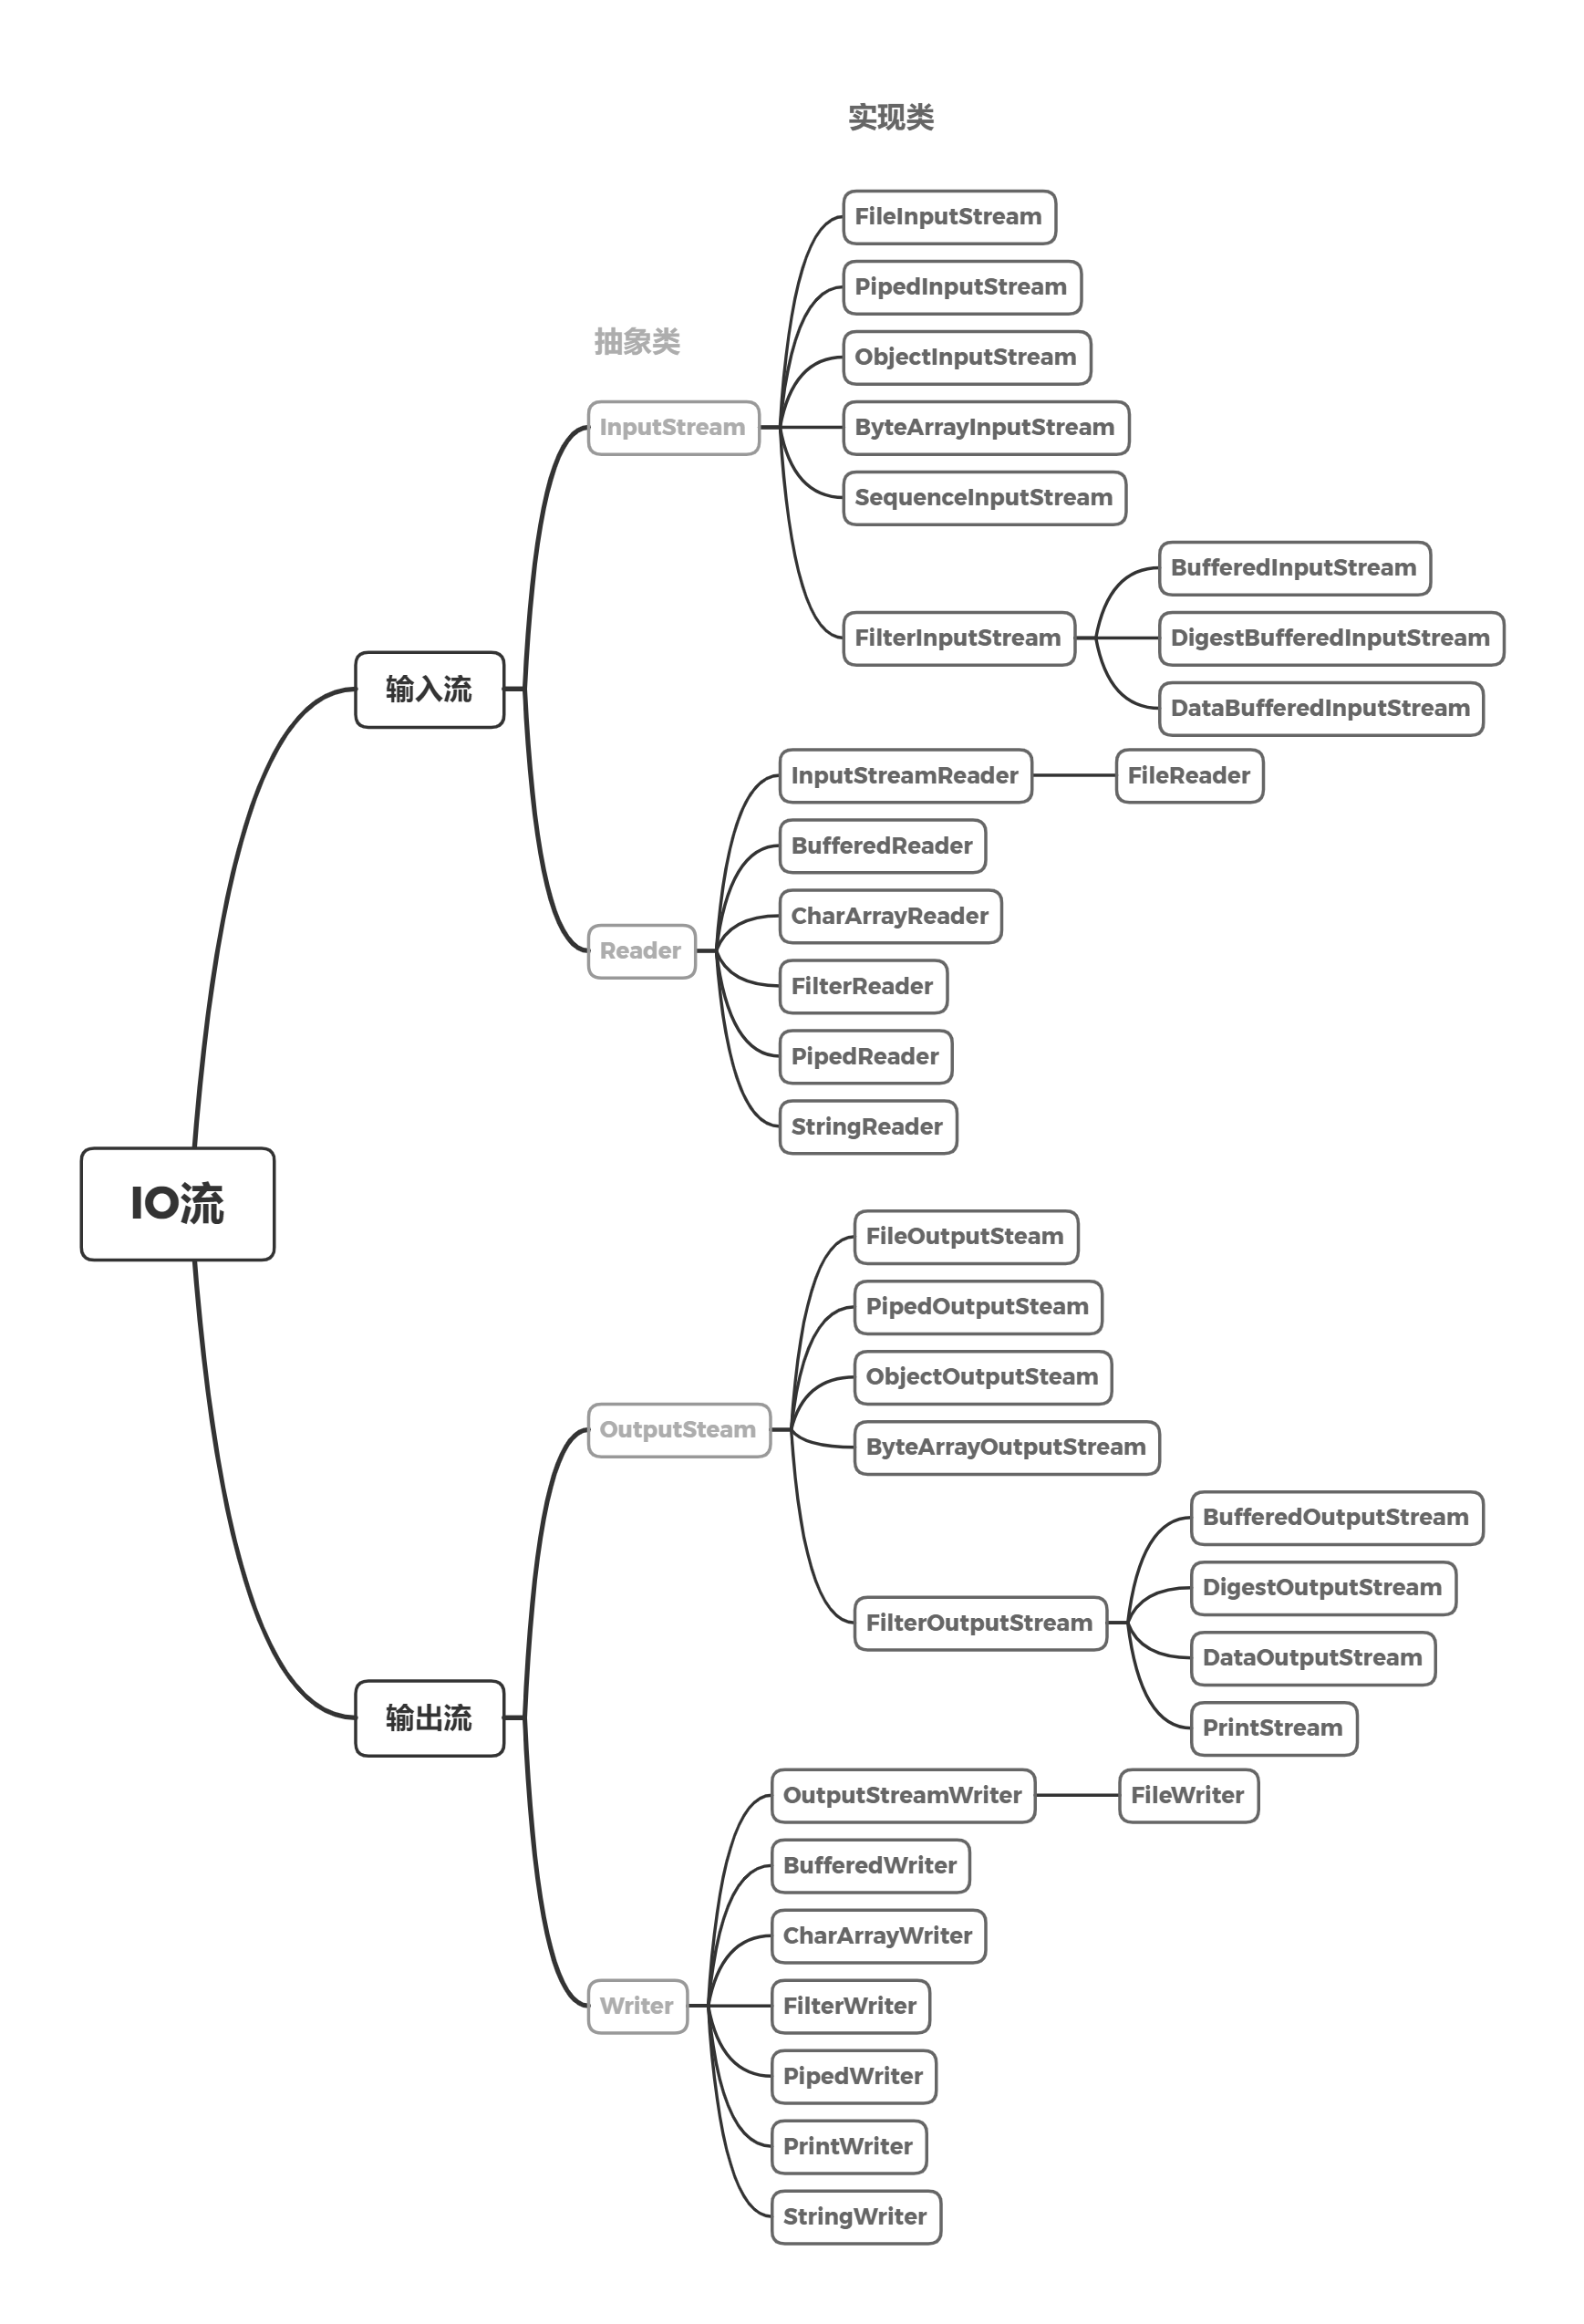
- 分类(数据单位)
- 字节流(1 byte)—— InputStream、OutputStream
- 字符流(1 字符)—— Reader、Writer
- 分类(流向)
- 输入流
- 输出流
- 分类(角色)
- 节点流
- 处理流/包装流
1. FileInputStream
1. 简单使用
public static String readFile_01(String path) {FileInputStream inputStream = null;StringBuilder sb = new StringBuilder();int curr = 0;try {inputStream = new FileInputStream(path);while ((curr = inputStream.read()) != -1) {// read ———— 每次读取 1byte, 读取完毕就返回 -1sb.append((char) curr + "");}} catch (IOException e) {e.printStackTrace();} finally {try {inputStream.close();} catch (IOException e) {e.printStackTrace();}}return sb.toString();}public static void main(String[] args) throws IOException {String path = "D:\\Study\\file_demo\\user.txt";System.out.println(readFile_01(path));}
注意:
- read 每次读取 1byte,读取完毕返回 -1
- 每次使用完流,都得使用 close 关闭流,避免资源浪费
- 使用 FileInputStream 读取中文可能会出现中文乱码问题
- 原因:
FileInputStream 每次读取大小为 1byte = 8bit,在 GBK 编码模式下,每个中文为 2bit,但在 UTF-8 编码 模式下,每个中文为 3bit,显然不能刚好装进一个 byte 数组。 - 解决方案:
- 使用 FileReader
- 使用 read(byte b[]),并将 byte 数组的容量设置足够大
这个方法就是自定义每次读取的字节数组的大小
- 原因:
2. 读取中文
思路: 声明一个容量足够大的 byte 数组(能一次性吧文件读完),然后使用 public int read(byte b[]) 读取文件(会将文件内容存入 b[],并返回 b.length)。


public static String readFile_01(String path) {FileInputStream inputStream = null;StringBuilder sb = new StringBuilder();// 用一个足够大的 byte 数组来装下内容byte [] bytes = new byte[83];int readLen = 0;try {inputStream = new FileInputStream(path);// 返回值是读取的字节长度while ((readLen = inputStream.read(bytes)) != -1) {// read ———— 每次读取 1byte, 读取完毕就返回 -1sb.append(new String(bytes, 0, readLen));}} catch (IOException e) {e.printStackTrace();} finally {try {inputStream.close();} catch (IOException e) {e.printStackTrace();}}return sb.toString();}public static void main(String[] args) throws IOException {String path = "D:\\Study\\file_demo\\user.txt";System.out.println(readFile_01(path));}

2. FileOutputStream
1. 简单使用
write
-
write(int b)
-
write(byte b[])
-
write(byte b[], int off, int len)
public static void write_01(String path, String words) {FileOutputStream outputStream = null;try {outputStream = new FileOutputStream(path);//outputStream.write(words.getBytes());} catch (IOException e) {e.printStackTrace();} finally {try {outputStream.close();} catch (IOException e) {e.printStackTrace();}}}public static void main(String[] args) {String words = "在龟友百货上班,规规矩矩地纳税。";String path = "D:\\Study\\file_demo\\user.txt";write_01(path, words);}
注意:
- 直接这样 write 会覆盖掉之前的内容
- 进行写操作的时候,文件可以不存在,但目录必须存在
2. 追加写入
在初始化 FileOutputStream 的时候,传入一个参数 true,表明——在文件末尾追加内容。
outputStream = new FileOutputStream(path, true);
3. 文件拷贝
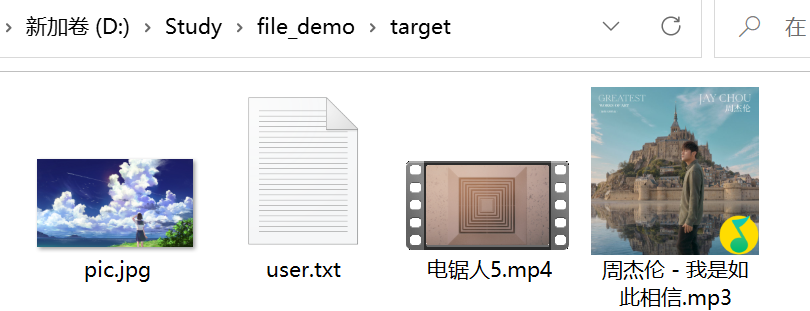
需求: 将如图所示的四种文件拷贝到另外一个文件夹:
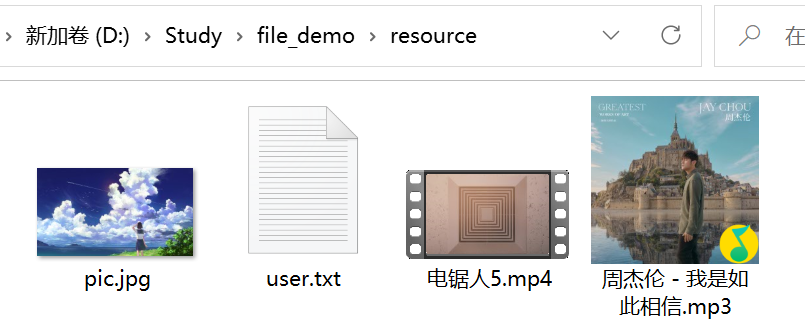

步骤: 输入流(读取到内存)→ 输出流(写入到磁盘)
读取部分数据,就写入磁盘,不能一次性读完再写(防止内存不够)。
public static void copy(String resPath, String tarPath) {FileInputStream inputStream = null;FileOutputStream outputStream = null;byte []bytes = new byte[1024 * 1024]; // 一次读 1MBint len = 0;try {inputStream = new FileInputStream(resPath);outputStream = new FileOutputStream(tarPath);while ((len = inputStream.read(bytes)) != -1) {outputStream.write(bytes, 0, len); // 这里必须使用此方法,防止文件读取时没装完}} catch (IOException e) {e.printStackTrace();} finally {try {if (inputStream != null) {inputStream.close();}if (outputStream != null) {outputStream.close();}} catch (IOException e) {e.printStackTrace();}}}public static void main(String[] args) {String res1 = "D:\\Study\\file_demo\\resource\\pic.jpg";String res2 = "D:\\Study\\file_demo\\resource\\user.txt";String res3 = "D:\\Study\\file_demo\\resource\\电锯人5.mp4";String res4 = "D:\\Study\\file_demo\\resource\\周杰伦 - 我是如此相信.mp3";String tar1 = "D:\\Study\\file_demo\\target\\pic.jpg";String tar2 = "D:\\Study\\file_demo\\target\\user.txt";String tar3 = "D:\\Study\\file_demo\\target\\电锯人5.mp4";String tar4 = "D:\\Study\\file_demo\\target\\周杰伦 - 我是如此相信.mp3";copy(res1, tar1);copy(res2, tar2);copy(res3, tar3);copy(res4, tar4);}
4. FileReader
1. 简单使用
public static String readFile_02(String path) {FileReader reader = null;StringBuilder sb = new StringBuilder();int curr = 0;try {reader = new FileReader(path);while (true) {if ((curr = reader.read()) == -1) break;sb.append((char) curr + "");}} catch (IOException e) {e.printStackTrace();} finally {if (reader != null) {try {reader.close();} catch (IOException e) {e.printStackTrace();}}}return sb.toString();}public static void main(String[] args) {String path = "D:\\Study\\file_demo\\target\\user.txt";System.out.println(readFile_02(path));}

注意: 因为 FileReader 是一个字符一个字符地读取的,所以不存在中文乱码问题。
2. 提高读取速度
按照上面的写法,每次只读取一个字符,效率太低,为了提高读取效率,可以使用这个方法:public int read(char cbuf[])
public static String readFile_02(String path) {FileReader reader = null;StringBuilder sb = new StringBuilder();char []chars = new char[8]; // 一次读取 8 个字符int len = 0;try {reader = new FileReader(path);while (true) {if ((len = reader.read(chars)) == -1) break;sb.append(new String(chars, 0, len));}} catch (IOException e) {e.printStackTrace();} finally {if (reader != null) {try {reader.close();} catch (IOException e) {e.printStackTrace();}}}return sb.toString();}public static void main(String[] args) {String path = "D:\\Study\\file_demo\\target\\user.txt";System.out.println(readFile_02(path));}
5. FileWriter
常用用法:
-
FileWriter(String fileName)
覆盖写入 -
FileWriter(String fileName, boolean append)
append 为 true => 追加写入 -
write(int c)
写入单个字符 -
write(char cbuf[])
写入指定数组 -
write(char cbuf[], int off, int len)
写入指定数组的指定部分 -
write(String str)
写入整个字符串 -
write(String str, int off, int len)
写入字符串的指定部分
注意: FileWriter 使用完后,必须关闭 close 或 flush 才能向文件写入内容。
1. 简单使用
public static void write_02(String path, String words, boolean flag) {FileWriter fileWriter = null;try {if (flag) {fileWriter = new FileWriter(path, true);} else {fileWriter = new FileWriter(path);}fileWriter.write(words);} catch (IOException e) {e.printStackTrace();} finally {try {// close = flush + 关闭流fileWriter.close();} catch (IOException e) {e.printStackTrace();}}}public static void main(String[] args) {String path = "D:\\Study\\file_demo\\user.txt";String words = "每晚八点回家却不会觉得累。";write_02(path, words, true);}
6. 节点流和处理流简介
节点流: 可以从一个特定的数据源 读写数据(FileReader、FileWriter、…)。
处理流/包装流: 基于已存在的流(节点流或处理流),为程序提供较为强大的读写功能(BufferedReader、BufferedWriter、…)。
处理流就是在节点流简单读写数据源的基础上,对读写功能进行扩展,比如说增加一个缓冲区。处理流的构造必须基于已存在的流。
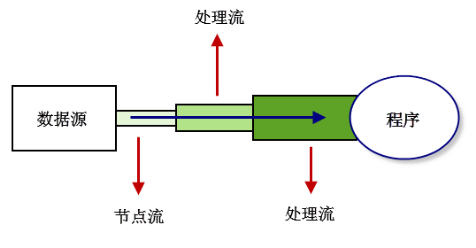
两者关联
- 节点流是 底层流/低级流,直接跟数据源连接
- 处理流 包装节点流,可以消除不同节点流的实现差异,也可以提供更方便的方法来完成输入输出
- 处理流 包装节点流,使用了 修饰器设计模式,不会直接与数据源相连
- 处理流的优势:
- 性能提高:主要以增加缓冲的方式来提高读写的效率
- 操作便捷:提供了一系列便捷的方法来一次输入输出大批量的数据,更加灵活轻便
7. BufferedReader
1. 简单使用
public static String read_03(String path) {StringBuilder sb = new StringBuilder();BufferedReader reader = null;String line;try {reader = new BufferedReader(new FileReader(path));while ((line = reader.readLine()) != null) {sb.append(line);}} catch (IOException e) {e.printStackTrace();} finally {try {reader.close();} catch (IOException e) {e.printStackTrace();}}return sb.toString();}public static void main(String[] args) {String path = "D:\\Study\\file_demo\\user.txt";System.out.println(read_03(path));}

注意: 关闭了处理流,其节点流也会自动关闭。
8. BufferedWriter
1. 简单使用
public static void write_03(String path, String words) {BufferedWriter writer = null;try {writer = new BufferedWriter(new FileWriter(path, true));writer.write("\n" + words);} catch (IOException e) {e.printStackTrace();} finally {try {writer.close();} catch (IOException e) {e.printStackTrace();}}}public static void main(String[] args) {String path = "D:\\Study\\file_demo\\user.txt";String words = "喝酒从来止于浅尝从不买醉。";write_03(path, words);}
9. Buffered字符流拷贝
public static void copy(String src, String target) {BufferedReader reader = null;BufferedWriter writer = null;BufferedWriter clear = null;String line;try {reader = new BufferedReader(new FileReader(src));writer = new BufferedWriter(new FileWriter(target, true));// 清空文件内容clear = new BufferedWriter(new FileWriter(target));clear.write("");while (true) {if ((line = reader.readLine()) != null) {// 每写一行writer.write(line);// 就换一行writer.newLine();continue;}break;}} catch (IOException e) {e.printStackTrace();} finally {try {clear.close();reader.close();writer.close();} catch (IOException e) {e.printStackTrace();}}}public static void main(String[] args) {String src = "D:\\sedemo\\src\\main\\java\\io\\file\\FileCreate.java";String target = "D:\\Study\\file_demo\\target\\FileCreate.java";copy(src, target);}
注意: BufferedReader 和 BufferedWriter 只用来处理文本文件,别用来处理二进制文件。
10. Buffered字节流拷贝
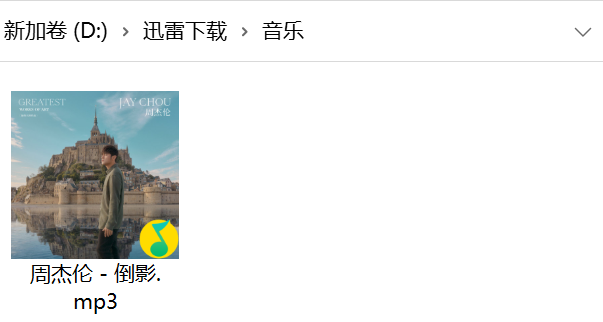
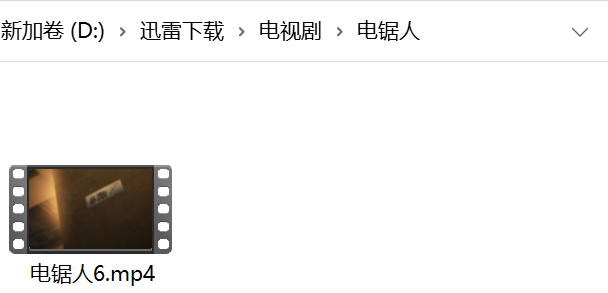
需求: 将下图中的 电锯人6 和 周杰伦 - 倒影.mp3 分别移动到指定文件夹

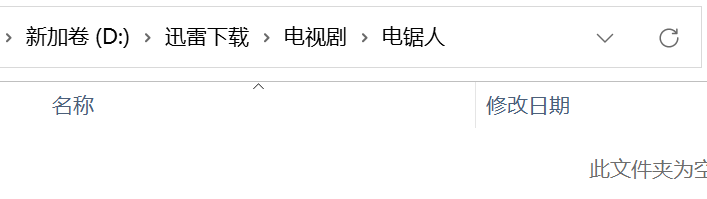
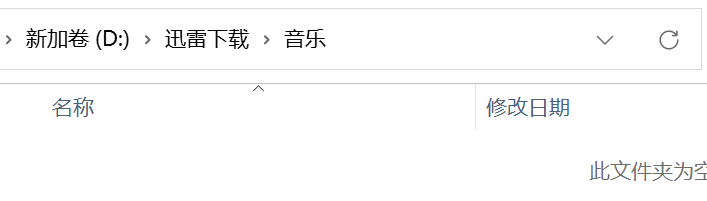
public static void copy(String src, String tar) {byte []bytes = new byte[1024*1024];int len = 0;try (BufferedInputStream inputStream = new BufferedInputStream(new FileInputStream(src));BufferedOutputStream outputStream = new BufferedOutputStream(new FileOutputStream(tar))) {while ((len = inputStream.read(bytes)) != -1) {outputStream.write(bytes, 0, len);}} catch (IOException e) {e.printStackTrace();}}public static void main(String[] args) {String mp4Src = "D:\\迅雷下载\\电锯人6.mp4";String mp3Src = "D:\\迅雷下载\\周杰伦 - 倒影.mp3";String mp4Tar = "D:\\迅雷下载\\电视剧\\电锯人\\电锯人6.mp4";String mp3Tar = "D:\\迅雷下载\\音乐\\周杰伦 - 倒影.mp3";copy(mp3Src, mp3Tar);copy(mp4Src, mp4Tar);}
11 对象流
对象流: 对Java对象进行序列化和反序列化操作,使对象便于持久化到本地,并从本地传到内存(ObjectInputStream、ObjectOutputStream)。
![]() Java序列化和反序列化
Java序列化和反序列化 ![]()
1. 简单使用
-
定义一个 User 对象
需要实现了 Serializable 接口的对象才能序列化
这个接口是一个标记接口,只表明该类可以序列化@Data @NoArgsConstructor @AllArgsConstructor public class User implements Serializable {private String name;private Integer age;private char gend; } -
写读
public static void writeObj(String path) {try (ObjectOutputStream oos = new ObjectOutputStream(new FileOutputStream(path))){// 序列化数据oos.writeInt(1); // 包装类都实现了 Serializable 接口, 可序列化oos.write(2);oos.writeBoolean(true);oos.writeObject(new User("吉良吉影", 33, '男'));} catch (IOException e) {e.printStackTrace();}
}public static void readObj(String path) {try (ObjectInputStream ois = new ObjectInputStream(new FileInputStream(path))){// 注意:读取顺序必须与保存顺序一致System.out.println(ois.readInt());System.out.println(ois.read());System.out.println(ois.readBoolean());User user = (User) ois.readObject();System.out.println(user);System.out.println(user.getName());} catch (IOException | ClassNotFoundException e) {e.printStackTrace();}
}public static void main(String[] args) {// 序列化后保存的格式不是纯文本,这里指定后缀没啥意义String path = "D:\\Study\\file_demo\\obj.hehe";writeObj(path);readObj(path);
}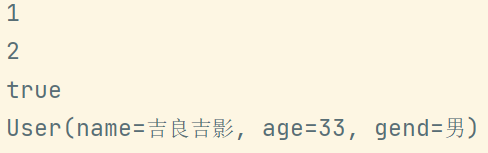
2. 注意事项
-
序列化写入是啥顺序,读取的时候就应该是啥顺序
-
可以被 ObjectOutputStream 序列化写入的对象,都必须实现 Serializable 接口
-
序列化的类中建议添加 serialVersionUID,提高版本的兼容性
private static final long serialVersionUID = 1L虚拟机是否允许反序列化,不仅取决于类路径和功能代码是否一致,一个非常重要的一点是两个类的序列化 ID 是否一致
-
序列化对象,默认将里面所有的属性都进行序列化(除了 static、transient 修饰的成员)
-
序列化对象,要求对象的所有属性的类型也要实现 Serializable 接口
-
序列化具备可继承性,父类可以序列化,那么其子类也可以进行序列化
12. 标准输入/输出流
System.in 标准输入——默认设备:键盘
-
编译类型:
public final static InputStream in = null; -
运行类型:java.io.BufferedInputStream

System.out 标准输出——默认设备:屏幕
-
编译类型:
public final static PrintStream out = null; -
运行类型:java.io.PrintStream
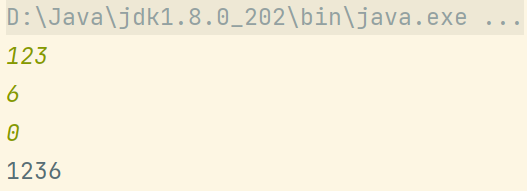
public static String sys_in() {Scanner scanner = new Scanner(System.in);StringBuilder sb = new StringBuilder();while (scanner.hasNextInt()) {int cur = scanner.nextInt();if (cur == 0) break;sb.append(cur + "");}return sb.toString();}public static void main(String[] args) {System.out.println(sys_in());}
13. 转换流
转换流: 将字节流转换为字符流,常用于解决中文乱码问题。
- InputStreamReader
- OutputStreamWriter
1. 乱码问题
我们已经分析过:直接使用字节流,如 FileInputStream 读取含有中文的文档,就会出现乱码问题,这是因为字节流默认一次读取 8bit。
其实,使用字符流读取中文文档的时候也会出现乱码问题:
public static void main(String[] args) throws IOException {FileReader reader = new FileReader("D:\\Study\\file_demo\\user1.txt");int curr = 0;while ((curr = reader.read()) != -1) {System.out.print((char) curr);}reader.close();}

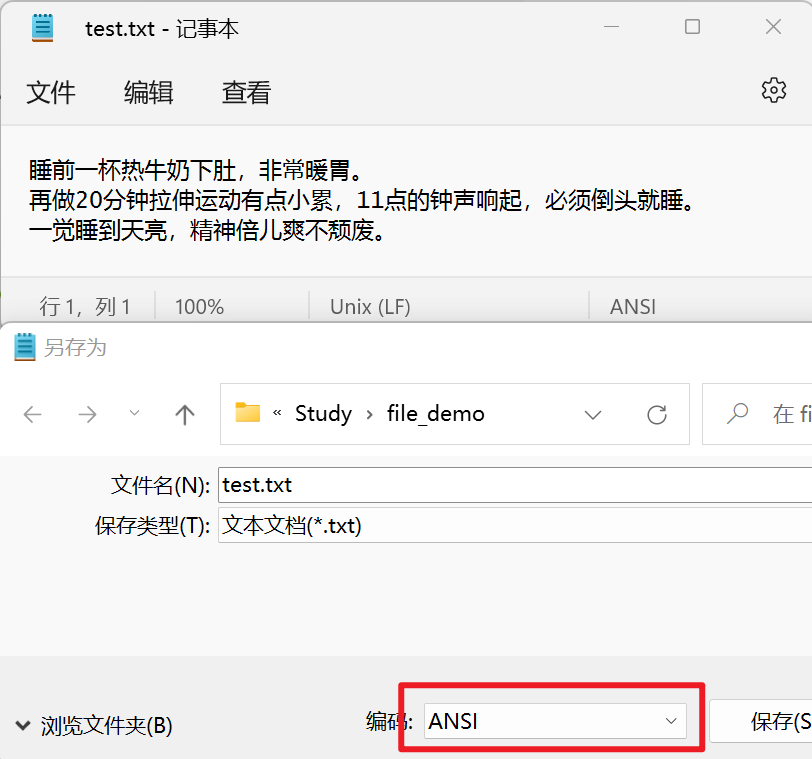
那为什么读取user.txt就不会出现此类问题呢?
因为编码问题:txt默认 UTF-8,编码,这时候使用字符流去读取不会出现乱码(读取的编码方式,默认也是 UTF-8),但是修改了编码,就会出现乱码:

可以使用转换流来解决中文乱码——指定读取文件的编码方式。
转换流:
- 可以将一个字节流转换成字符流
- 字节流可以指定编码读取方式
解决思路:
- 先指定字节流读取的编码方式
- 先后将字节流转换为字符流
2. InputStreamReader
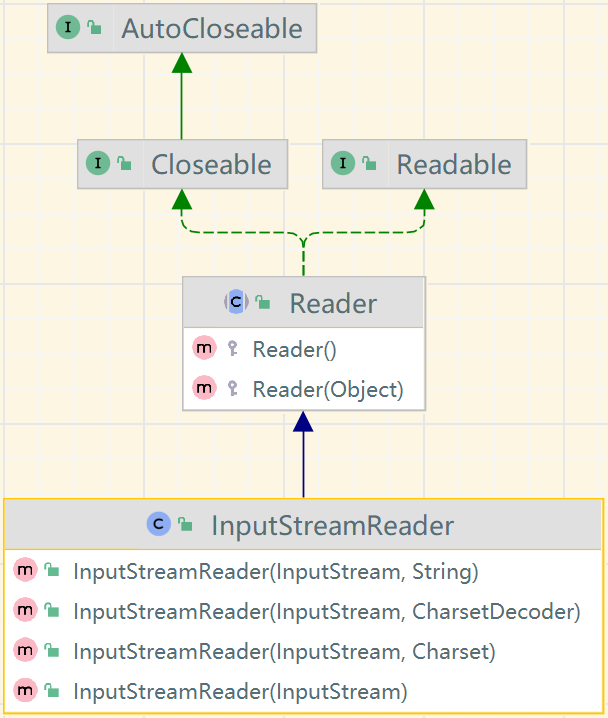
InputStreamReader(InputStream in, Charset cs)
当处理纯文本数据时,如果使用字符流效率更高,并且可以有效解决中文乱码问题,建议使用转换流将字节流转换为字符流。
public static void main(String[] args) throws IOException {InputStream inputStream = new FileInputStream("D:\\Study\\file_demo\\user1.txt");InputStreamReader streamReader = new InputStreamReader(inputStream, "gbk");int curr = 0;while ((curr = streamReader.read()) != -1) {System.out.print((char) curr);}streamReader.close();}
3. OutputStreamWriter
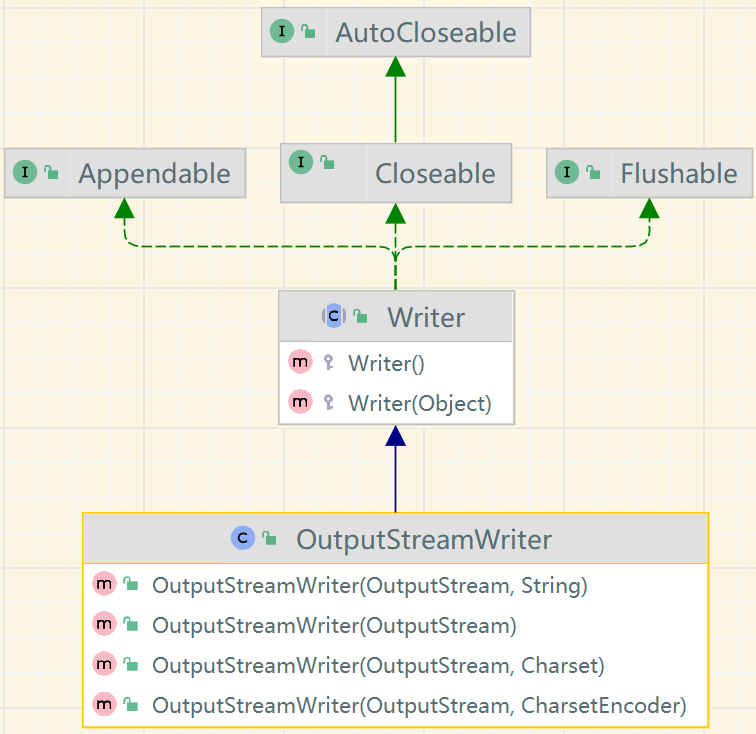
public static void main(String[] args) {String path = "D:\\Study\\file_demo\\test.txt";try (OutputStreamWriter osw = new OutputStreamWriter(new FileOutputStream(path), "gbk")) {osw.write("睡前一杯热牛奶下肚,非常暖胃。\n再做20分钟拉伸运动有点小累,11点的钟声响起,必须倒头就睡。\n一觉睡到天亮,精神倍儿爽不颓废。");} catch (IOException e) {e.printStackTrace();}}
14. 打印流
打印流: 字节打印流
- PrintStream
- PrintWriter 字符打印流
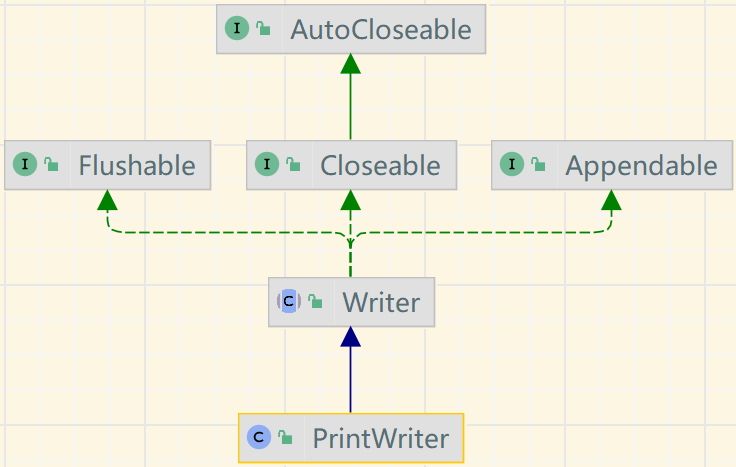
注意: 打印流只有输出流,没有输入流。
1. PrintStream
System.out 就是打印流。
public static void main(String[] args) {PrintStream out = System.out;out.print("The World !");out.close();}
因为 out.print 的底层就是 out.write
public void print(String s) {if (s == null) {s = "null";}write(s);}
所以,可以直接使用 out.write
out.write(("The World !").getBytes());
使用 PrintStream 写入本地文件:
public static void main(String[] args) throws IOException {System.setOut(new PrintStream("D:\\Study\\file_demo\\test.txt"));System.out.println("The World !");}
2. PrintWriter
public static void main(String[] args) {// PrintWriter writer = new PrintWriter(System.out);PrintWriter writer = null;try {writer = new PrintWriter(new FileWriter("D:\Study\file_demo\test.txt"));writer.print("The World !");} catch (IOException e) {e.printStackTrace();} finally {writer.close();}
}
注意: 因为是基于 PrintWriter 初始化的,所以必须要 close 才能将数据写入文件。
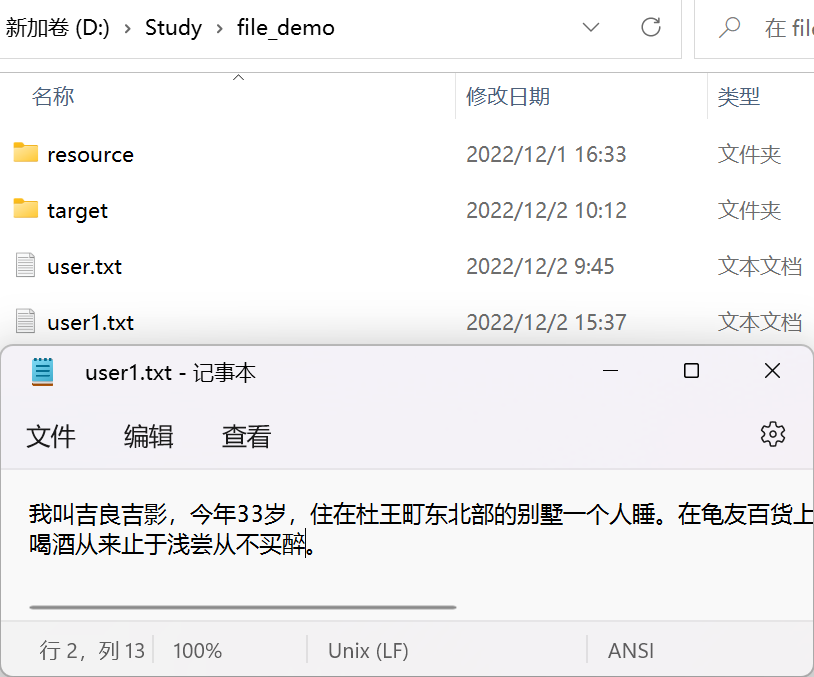
15. 读写.properties 文件
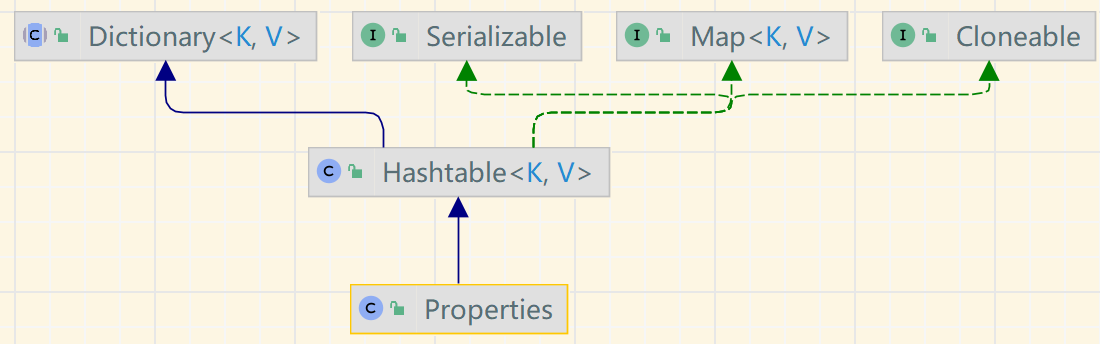
properties类: 对 .properties 配置文件进行读写操作。
常用方法:
- load
加载配置文件的键值对到 properties 对象 - list
将数据显示到指定设备 - getProperty(key)
根据键获取值 - setProperty(key, value)
设置键值对到 Properties 对象中 - store
将 .properties 中的键值对存储到配置文件(Idea中,保存信息到配置文件,如果包含中文,会存储为 Unicode 码)
data.properties
driverClass=com.mysql.cj.jdbc.Driver
url=jdbc:mysql://localhost:3306/mybatis_plus?serverTimezone=GMT&characterEncoding=utf-8&useSSL=false
username=root
password=admin
读取:
public static void main(String[] args) {Properties properties = new Properties();try {// 加载配置文件properties.load(new FileReader("D:\sedemo\io\src\main\resources\data.properties"));// 显示properties.list(System.out);properties.list(new PrintStream("D:\Study\file_demo\data.txt"));// 根据key,获取valueSystem.out.println(properties.getProperty("url"));} catch (IOException e) {e.printStackTrace();}
}
修改:
public static void main(String[] args) throws IOException {Properties properties = new Properties();// 该配置文件没有 对应的key,就是新增一对键值对,否则就是修改 valueproperties.setProperty("role.name", "张三");properties.setProperty("role.age", "17");properties.setProperty("role.gend", "男");properties.store(new FileOutputStream("D:\yinhai\gonghui\sedemo\clone\src\main\resources\role.properties"), "这是一段注释,可以为空");
}