去年做了一个使用RS485对PIC18F45K80系列单片机进行在线升级的程序,如果是小批量的出厂烧录程序和升级验证(出厂前肯定要测试单片机是否能正常读写Flash)是可以的,但是后来产品订单量很大,生产线的烧录及升级验证就很缓慢,主要是发送升级包这一步,主要原因如下:
1、升级数据包有20多K字节,而PIC18F45K80系列的内存只有3K多;
2、数据包先保存到PIC18F45K80的缓存中,然后再写入MX25L1606E;
3、根据客户软件协议要求,RS485通信需要将一个字节拆分成两个字节进行传输,例如:如果要发送0xAB,则会拆分成0x3A和0x3B两个字节,接收处理程序再将这两个字节合并成0xAB,这无疑使数据的传输时间加倍;
4、RS485通信的波特率被限制为9600,说是为了数据传输的稳定性;
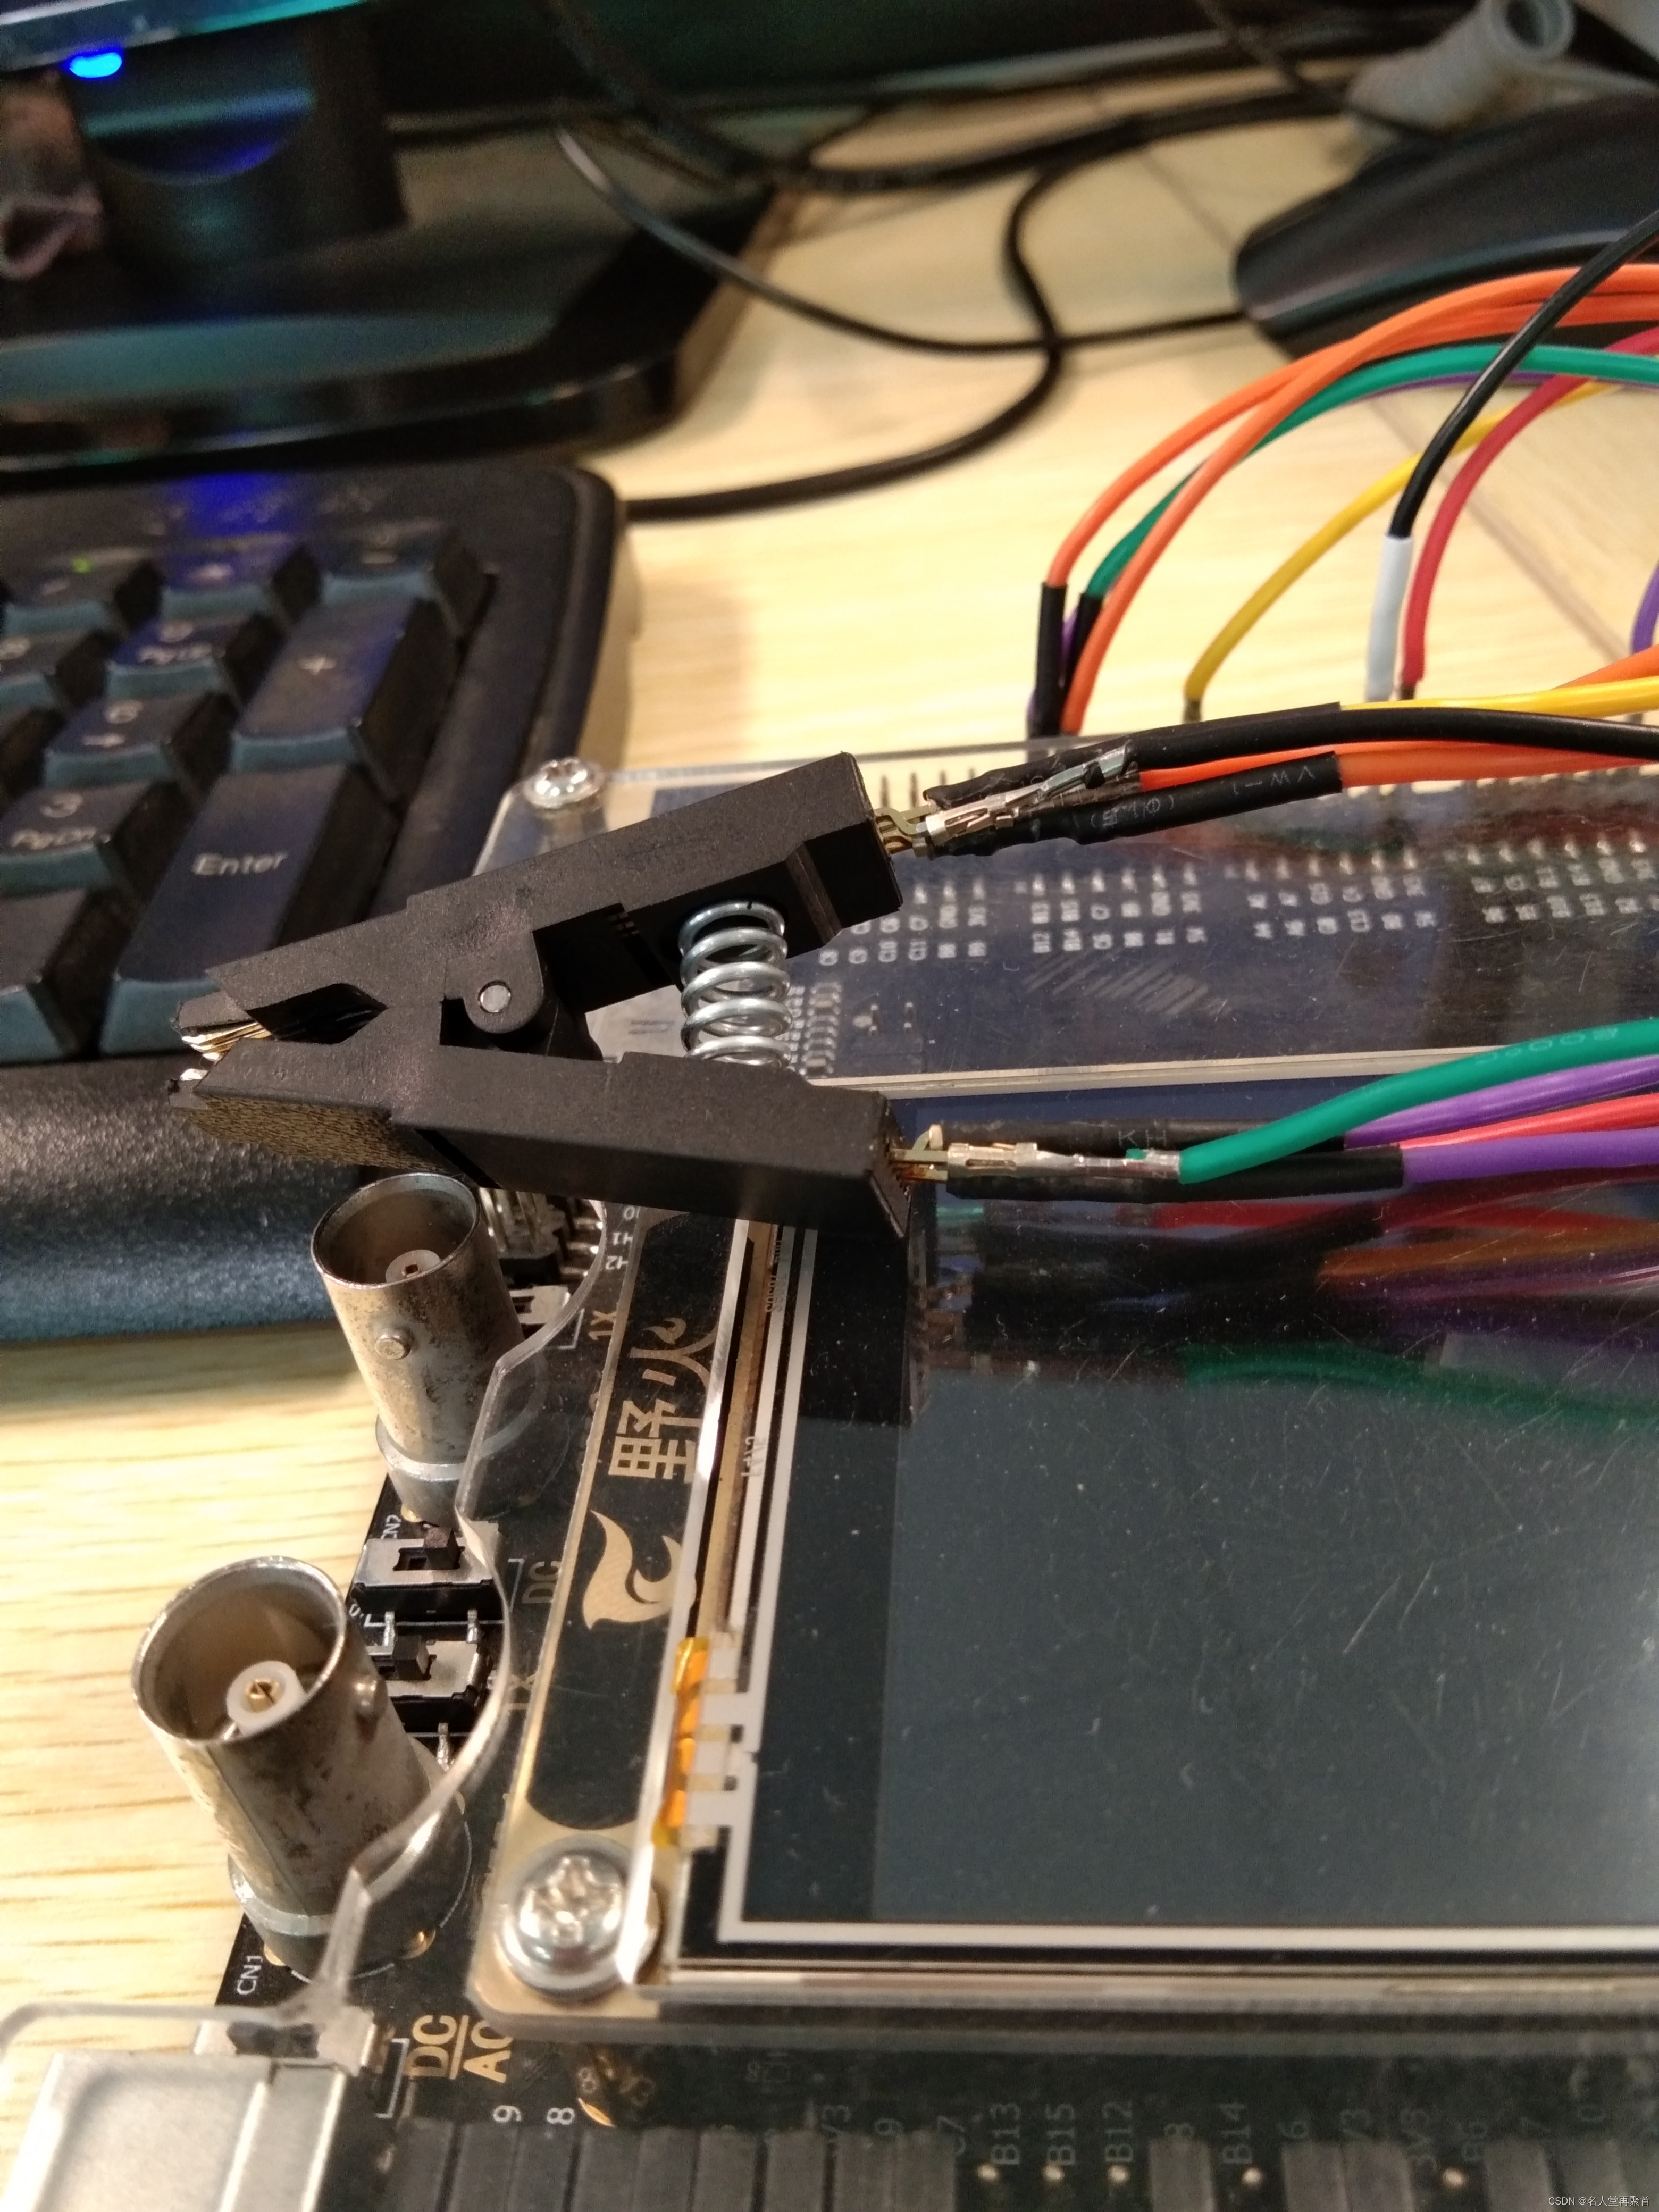
生产部门表达了不满,我本想给他们解释原因,但后来想与其和一些不懂技术的人瞎争论、浪费时间,还不如想点实际的办法。简单分析:整个IAP中最费时间的就是将升级包通过RS485写入到MX25L1606E,那如果有办法直接PIN对PIN通过SPI通信将升级包复制到MX25L1606E不就解决问题了吗?那速度是极快的。软件倒是好做,但问题是:MX25L1606E这个芯片太小了,不好设计工装或者治具,而且必须要先贴片,那说明彻底不能使用治具了。后来负责该项目的硬件工程师在网上找到了个IC夹子,针对各种PIN针的都有,于是用STM32F103VET6开发板写了个测试程序并在原来的PCB板上测试,只要IC夹子和PCB板上的MX25L1606E脚位对齐还真是可以复制!太开心了,赶紧拿来上电测试,果然可以正确执行升级程序!!!
以下是STM32的主程序,内容比较简单,主要就是使用了一个按键触发执行复制操作,最后使用显示屏简单提示操作结果。最主要是它内存资源充足,那20多KB的升级包轻松放入内存,当然也可使用内存资源少的单片机,只是多次读取升级文件,速度也不会慢多少。整个工程可以免费到以下链接下载:【免费】STM32快速复制MX25L1606E资源-CSDN文库,有需要的朋友可以试一下。
主程序如下,升级文件内容是16进制格式的,也就是firm_ware这个数组,内容我就省略了很多,因为太占篇幅了,大概有两万多个字节,这个不是重点:
/******************** (C) COPYRIGHT 2023 DS *************************** @File name  :main.c* @Description    :Fast flash clone* @Hardware platform:STM32F103VET6* @Library version :ST3.5.0 ** @Developer  :Power
**********************************************************************************//* Includes ------------------------------------------------------------------*/
#include "stm32f10x.h"
#include "spi.h"
#include "led.h"
#include "delay.h"
#include "sys_temp.h"
#include "tim.h"
#include "wwdg.h"
#include "usart1.h"
#include "key.h"
#include "bsp_ili9341_lcd.h"#define     FLASH_PAGE_SIZE                     256struct ALARM {unsigned    KEY_ERASE_PRESSED               : 1;unsigned    CLONE_DONE                      : 1;unsigned                                    : 1;unsigned                                    : 1;unsigned                                    : 1;unsigned                                    : 1;unsigned                                    : 1;unsigned                                    : 1;unsigned                                    : 1;unsigned                                    : 1;unsigned                                    : 1;unsigned                                    : 1;unsigned                                    : 1;unsigned                                    : 1;unsigned                                    : 1;unsigned                                    : 1;
};union ALARM_STATUS_UNION {struct ALARM    alarm;uint16_t    allbits;
};typedef union ALARM_STATUS_UNION ALARM_STATUS;uint16_t    led_cnt = 0;//LED test
volatile uint8_t Flag_1ms;      //1 milli-second overflow flag
volatile uint8_t cDelay_80ms;   //80 milli-seconds counter
ALARM_STATUS AlarmStatus;
uint32_t chk_sum = 0;
uint32_t chk_sum_flash = 0;
uint16_t i = 0;
uint16_t data_len = 0;
uint8_t version[8] = {0x00};
uint8_t buffer[FLASH_PAGE_SIZE] = {0x00}; //used to save the data read from MX25L1606E
uint8_t page_num = 0;
uint8_t single_data_num = 0;
uint32_t flash_addr = 0;
uint8_t key = 0xFF;/* the new firmware hex file */
uint8_t firm_ware[] =
{0x12,0x40,0x18,0x00,0x00,0x0F,0xD0,0x9E,0x90,0xFA,0x0E,0xCF,0x6E,0x9A,
};/**
*@name: Process_1MS
*@description: 1 milli-second overflow process
*@params: none
*@return: none
*/
static void Process_1MS(void)
{if (Flag_1ms == 0){return;}Flag_1ms = 0;if (led_cnt % 500 == 0) //LED Toggle Test{GPIO_WriteBit(GPIOB, GPIO_Pin_0, (BitAction)(1 - GPIO_ReadOutputDataBit(GPIOB, GPIO_Pin_0)));}led_cnt++;if (led_cnt >= 60000){led_cnt = 0;}//if(cDelay10ms != 0)   cDelay10ms--;//if(++cDelay10ms1 >= 100)  cDelay10ms1 = 100;//if(++cDelay10ms2 >= 100)  cDelay10ms1 = 100;//usTmr_ms++;
}/**
*@name: Copy_Data_Process
*@description: erase the designated area of the target MX25L1606E series flashand write it with the firmware
*@params: none
*@return: none
*/
static void Copy_Data_Process(void)
{if (AlarmStatus.alarm.KEY_ERASE_PRESSED == 1 && AlarmStatus.alarm.CLONE_DONE == 0){uint32_t id = 0;LCD9341_Clear(0xFFFF);/* STEP1: read the manufacture ID from the target */// Manufacture ID: 0x000000EF// Device ID: 0x00000016id = SPI_FLASH_ReadDeviceID();if (id == 0x0000) //invalid device ID{//LCD_Display_String("Reading device ID failed!", 0);//AlarmStatus.alarm.KEY_ERASE_PRESSED = 0;//AlarmStatus.alarm.CLONE_DONE = 1;//return;}/* STEP2: erase the target */SPI_FLASH_SectorErase(FLASH_Sector4);//used to store the version and check sum informationDelay_ms(100);SPI_FLASH_BlockErase(FLASH_Sector3);//one block is enough to store the firmware dataDelay_ms(100);/* STEP3: copy the version data as well as calculate the check sum */chk_sum = 0;chk_sum_flash = 0;data_len = sizeof(firm_ware) / sizeof(uint8_t) -1;//minus 1 here means that the first byte is version and should be excluded from the total data lengthfor (i = 0; i < data_len; i++){chk_sum += firm_ware[i + 1];}version[0] = 0x56; //ASCII code standing for letter 'V'version[1] = firm_ware[0]; //version, for example, 0x13 means V1.3version[2] = data_len >> 8;version[3] = data_len & 0xFF;version[4] = (chk_sum & 0xFF000000) >> 24;version[5] = (chk_sum & 0x00FF0000) >> 16;version[6] = (chk_sum & 0x0000FF00) >> 8;version[7] = chk_sum & 0x000000FF;for (i = 0; i < 8; i++)//the version information check sum{chk_sum += version[i];}SPI_FLASH_BufferWrite(version, FLASH_Sector4, sizeof(version) / sizeof(uint8_t));Delay_ms(100);/* STEP4: copy the firmware data */SPI_FLASH_BufferWrite(&firm_ware[1], FLASH_Sector3, data_len);Delay_ms(100);/* STEP5: check the data */for (i = 0; i < 8; i++){buffer[i] = 0x00;}SPI_FLASH_BufferRead(buffer, FLASH_Sector4, 8);//read the version informationfor (i = 0; i < 8; i++){chk_sum_flash += buffer[i];}page_num = data_len / FLASH_PAGE_SIZE; //page numbersingle_data_num = data_len % FLASH_PAGE_SIZE; //single data numberflash_addr = FLASH_Sector3;while (page_num--){SPI_FLASH_BufferRead(buffer, flash_addr, FLASH_PAGE_SIZE);for (i = 0; i < FLASH_PAGE_SIZE; i++){chk_sum_flash += buffer[i];}flash_addr += FLASH_PAGE_SIZE;}if (single_data_num > 0){SPI_FLASH_BufferRead(buffer, flash_addr, single_data_num);for (i = 0; i < single_data_num; i++){chk_sum_flash += buffer[i];}}if (chk_sum == chk_sum_flash && chk_sum != 0) //the data written to the flash is correct{LCD_Display_String("Clone Succeeded! Please change another MX25L1606E", 1);}else{LCD_Display_String("The Clone operation failed!", 0);}AlarmStatus.alarm.KEY_ERASE_PRESSED = 0;AlarmStatus.alarm.CLONE_DONE = 1;}
}/**
*@name: Process_80MS
*@description: 80 milli-seconds timeout process
*@params: none
*@return: none
*/
static void Process_80MS(void)
{if (cDelay_80ms >= 240){cDelay_80ms = 0;}
}static void Key_Process(void)
{key = KEY_Scan(1);if (key == KEY_CLONE && AlarmStatus.alarm.KEY_ERASE_PRESSED == 0){AlarmStatus.alarm.KEY_ERASE_PRESSED = 1;AlarmStatus.alarm.CLONE_DONE = 0;Copy_Data_Process();}
}/*main function*/
int main(void)
{/**************************************************************************************************/SysTick_Init();   //has already been called in the startup file, so here we don't need to call it explicitly.USART1_Config();//print the debug infoSource_MX25L1605E_Init();//source and target flash initializationLED_Init();KEY_Init();TIM_Configuration();bsp_InitLCD();LCD9341_Clear(0xFFFF);//WWDG_Init(0x7F, 0x5F, WWDG_Prescaler_2);while (1){/* STM32 software reset *///SystemReset();//wr=WWDG->CFR&0X7F; // 重新设置看门狗窗口值//tr=WWDG->CR&0X7F;  // 重新设置看门狗递减计数器值/* 注意tr和wr的比较,确定喂狗时间 *///if(tr<wr)//计数器值tr必须小于窗口值wr时才能喂狗,在之前喂狗则太早,会产生看门狗复位//{//WWDG_SetCounter(WWDG_CNT);//更新计数器//printf("Feeding dog now......\r\n");//}Process_1MS();Process_80MS();Key_Process();}
}
复制MX25L1606E的步骤如下:
1、先读取它的ID相关信息,如果读取正确则证明SPI通信正常;
2、擦除MX25L1606E上的相关块和扇区,比如:本程序一个扇区用于保存事先计算好的校验和及总的升级包长度,一个块用于存储实际的新的升级固件,一个块用于保存旧的在ROM中运行的程序。在执行IAP时会对比事先计算好的校验和及长度是否和实际读取的校验和及长度相同,如果相同证明数据完整无误,否则数据无效不能升级;
3、计算新固件的校验和及长度并写入到第2步擦除的扇区中,同时写入新固件到第2步指定的块;
4、验证MX25L1606E中写入的数据是否和新的固件完全一致并通过显示屏提示操作结果。
使用这个IC夹子后生产效率极大提升,之前光发送升级固件这一个步骤就需要约两分种,现在只要熟悉这个IC夹子和MX25L1606E对应PIN针的位置,基本不到10秒就可完成一个!
附IC夹子示意图,我是使用野火的STM32开发板通过SPI接口连接MX25L1606E