文章目录
- 一、Nginx概述
- 1、概述
- 2、Nginx 优点
- 二、Nginx安装操作步骤
- 1、首要任务
- 2、Nginx配置文件
- 3、添加本地映射
- 4、访问状态统计
- 5、访问控制
- 6、基于客户端访问控制
- 7、虚拟主机
- 8、基于端口的虚拟机
- 9、基于不同IP访问
一、Nginx概述
1、概述
- Nginx(engine x)是一个高性能的HTTP和反向代理Web服务器,同时也提供了IMAP/POP3/SMTP服务。
- 其将源代码以类BSD许可证的形式发布,具有稳定性、丰富的功能集、简单的配置文件和低系统资源的消耗。
- Nginx是一款轻量级的Web服务器反向代理服务器及电子邮件代理服务器,在BSD-like协议下发行。其特点是占有内存少,并发能力强,事实上nginx的并发能力在同类型的网页服务器中表现较好,中国大陆使用nginx网站用户有:百度、京东、新浪、网易、腾讯、淘宝等。
2、Nginx 优点
- 可以高并发连接
- 内存消耗少
- 成本低廉
- 配置文件非常简单
- 支持Rewrite重写
- 内置的健康检查功能
- 节省带宽
- 稳定性高
- 支持热部署
二、Nginx安装操作步骤
1、首要任务
- 第一步肯定要先安装Nginx所需要的依赖包,所以通过yum软件将依赖包下载
[root@localhost ~]# yum -y install gcc gcc-c++ pcre-devel  zlib-devel make
已加载插件:fastestmirror, langpacks
Loading mirror speeds from cached hostfile* base: mirrors.cn99.com* extras: mirrors.cn99.com* updates: mirrors.cn99.com
正在解决依赖关系
--> 正在检查事务- 解压
[root@localhost ~]# cd /opt
[root@localhost opt]# rz -E
rz waiting to receive.
[root@localhost opt]# ls
nginx-1.12.2.tar.gz  rh
[root@localhost opt]# tar zxvf nginx-1.12.2.tar.gz- 解压完成切换 cd nginx-1.12.2/,在进行安装其他需要软件包并编译
[root@localhost opt]# cd nginx-1.12.2/
[root@localhost nginx-1.12.2]# ./configure --prefix=/usr/local/nginx --user=nginx --group=nginx  --with-http_stub_status_module
[root@localhost nginx-1.12.2]# make && make install- 这一步将创建一个软连接,再创建新的用户来管理账号
[root@localhost nginx-1.12.2]# ln -s /usr/local/nginx/sbin/* /usr/local/sbin/
[root@localhost nginx-1.12.2]# useradd -M -s /sbin/nologin  nginx
[root@localhost nginx-1.12.2]# nginx -t
nginx: the configuration file /usr/local/nginx/conf/nginx.conf syntax is ok
nginx: configuration file /usr/local/nginx/conf/nginx.conf test is successful
[root@localhost nginx-1.12.2]# nginx
[root@localhost nginx-1.12.2]# netstat -anpt | grep 80
tcp        0      0 0.0.0.0:80              0.0.0.0:*               LISTEN      70774/nginx: master
- 添加Nginx系统服务
- 方式一:
[root@localhost nginx-1.12.2]# vim /etc/init.d/nginx
#!/bin/bash
#chkconfig: - 99 20
#description: Nginx Service Control Script
COM="/usr/local/nginx/sbin/nginx"
PID="/usr/local/nginx/logs/nginx.pid"
case "$1" in
start)$COM;;
stop)kill -s  QUIT $(cat $PID);;
restart)$0 stop$0 start;;
reload)kill -s HUP $(cat $PID);;
*)echo  "Usage: $0 {start|stop|restart|reload}"exit 1
esac
exit 0
--->wq
结束配置完成后
[root@localhost nginx-1.12.2]# chmod +x /etc/init.d/nginx #赋予权限
[root@localhost nginx-1.12.2]# chkconfig --add nginx   #加入管理系统
[root@localhost nginx-1.12.2]# systemctl stop nginx
[root@localhost nginx-1.12.2]# systemctl start nginx #开启nginx- 方式二:
[root@localhost nginx-1.12.2]# vim /usr/lib/systemd/system/nginx.service
[Unit]
Description=nginx
After=network.target
[Service]
Type=forking
PIDFile=/usr/local/nginx/logs/nginx.pid
ExecStart=/usr/local/nginx/sbin/nginx
ExecReload=/bin/kill -s  QUIT $MAINPID
PrivateTmp=ture
[Install]
WantedBy=multi-user.targe--->wq
结束配置完成后
chmod 754 /lib/systemd/system/nginx.service
systemctl enable nginx.service
systemctl  start nginx.service
2、Nginx配置文件
- 备份、并编辑主配置文件
[root@localhost nginx-1.12.2]# cp /usr/local/nginx/conf/nginx.conf  /usr/local/nginx/conf/nginx.conf.bak
[root@localhost nginx-1.12.2]# vim /usr/local/nginx/conf/nginx.conf
35     server {36         listen       80;37         server_name  www.lwj.com;站点域名,修改为www.lwj.com53         charset UTF-8;
大概在53左右将改为中文 UTF-8
3、添加本地映射
[root@localhost ~]# vim /etc/hosts
127.0.0.1   localhost localhost.localdomain localhost4 localhost4.localdomain4
::1         localhost localhost.localdomain localhost6 localhost6.localdomain6
192.168.159.190 www.lwj.com- 在虚拟机面进行访问

4、访问状态统计
- 查看已安装的nginx是否包含 HTTP_STUB_STATUS 模块
[root@localhost ~]# /usr/local/nginx/sbin/nginx -V
nginx version: nginx/1.12.2
built by gcc 4.8.5 20150623 (Red Hat 4.8.5-44) (GCC)
configure arguments: --prefix=/usr/local/nginx --user=nginx --group=nginx --with-http_stub_status_module
[root@localhost ~]# systemctl restart nginx  #重启服务
- 通过浏览器访问192.168.159.190/status 或 www.lwj.com/status


5、访问控制
- 设置加密密码
- 下载生成用户密码认证文件
[root@localhost conf]# yum -y install httpd-tools
[root@localhost conf]# htpasswd -c /usr/local/nginx/passwd.db  zhangsan  #创建zhangsan用户来管理页面
New password:  #设置的密码
Re-type new password:  #再次确认密码
Adding password for user zhangsan
[root@localhost conf]# chown nginx /usr/local/nginx/passwd.db
[root@localhost conf]# chmod 400 /usr/local/nginx/passwd.db #给予400权限- 修改主配置文件相对应目录,添加认证配置项
[root@localhost conf]# vim /usr/local/nginx/conf/nginx.conf55         location / {auth_basic "secret";suth_basic_user_file /usr/local/nginx/passwd.db;56             root  html;57             index  index.html index.htm;
[root@localhost conf]# nginx -t  #检查语法有没有错误
nginx: the configuration file /usr/local/nginx/conf/nginx.conf syntax is ok
nginx: configuration file /usr/local/nginx/conf/nginx.conf test is successful
[root@localhost conf]# systemctl restart nginx
- 浏览器访问 www.lwj.com


6、基于客户端访问控制
- 进入主配置文件
[root@localhost conf]# vim /usr/local/nginx/conf/nginx.conf
55         location / {56             root  html;57             index  index.html index.htm;deny 192.168.159.186;  #添加拒绝访问的客户端的ipallow all;    #添加允许其他IP客户端访问[root@localhost conf]# systemctl restart nginx
- 访问本机浏览器

- 访问别的IP网址访问

7、虚拟主机
- 添加域名解析
[root@localhost conf]# vim /etc/hosts
127.0.0.1   localhost localhost.localdomain localhost4 localhost4.localdomain4
::1         localhost localhost.localdomain localhost6 localhost6.localdomain6
192.168.159.190 www.lwj.com
192.168.159.190 www.accp.com  www.benet.com
- 创建虚拟站点网页文档
[root@localhost conf]# mkdir -p  /var/www/html/accp
[root@localhost conf]# mkdir -p  /var/www/html/benet
[root@localhost conf]# cd /var/www/html
[root@localhost html]# ls
accp  benet
[root@localhost html]# cd accp/
[root@localhost accp]# vim index.html
[root@localhost accp]# cat index.html
<h1>www.accp.com</h1>
[root@localhost accp]# cd ..
[root@localhost html]# cd benet/
[root@localhost benet]# vim index.html
[root@localhost benet]# cat index.html
<h1>www.benet.com</h1>
- 修改主配置文件
[root@localhost accp]# vim /usr/local/nginx/conf/nginx.confserver {36         listen       80;37         server_name  www.accp.com;38         charset UTF-8;39         access_log  logs/accp.access.log;40         location / {41             root  /var/www/html/accp;42             index  index.html index.htm;43         }44         error_page   500 502 503 504  /50x.html;45         location = /50x.html {46             root   html;47         }48     }49 50     server {51         listen       80;52         server_name  www.benet.com;53         charset UTF-8;54         access_log  logs/benet.access.log;55         location / {56             root  /var/www/html/benet/;57             index  index.html index.htm;58         }59         error_page   500 502 503 504  /50x.html;60         location = /50x.html {61             root   html;62         }63     }[root@localhost accp]# nginx -t
nginx: the configuration file /usr/local/nginx/conf/nginx.conf syntax is ok
nginx: configuration file /usr/local/nginx/conf/nginx.conf test is successful
[root@localhost accp]# systemctl restart nginx
- 进入浏览器访问


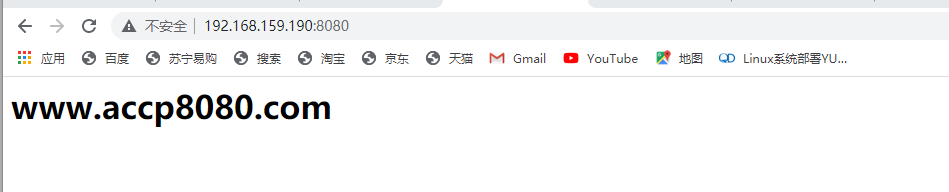
8、基于端口的虚拟机
- 先创建accp8080目录
[root@localhost ~]# mkdir -p  /var/www/html/accp8080
[root@localhost ~]# cd /var/www/html
[root@localhost html]# ls
accp  accp8080  benet
[root@localhost html]# cd accp8080
[root@localhost accp8080]# vim index.html
[root@localhost accp8080]# cat index.html
<h1>www.accp8080.com</h1>
- 进入主配置文件,进行编辑
server {36 listen 192.168.159.186:80;37 server_name www.accp.com;38 charset UTF-8;39 access_log logs/accp.access.log;40 location / {41 root /var/www/html/accp;42 index index.html index.htm;43 }44 error_page 500 502 503 504 /50x.html;45 location = /50x.html {46 root html;47 }48 }49 50 server {51 listen 192.168.159.186:8080;52 server_name www.accp.com;53 charset UTF-8;54 access_log logs/accp8080.access.log;55 location / {56 root /var/www/html/accp8080/;57 index index.html index.htm;58 }59 error_page 500 502 503 504 /50x.html;60 location = /50x.html {61 root html;62 }63 }
- 检查语法,看看有没有错误。并重新启动nginx

- 进入浏览器访问

9、基于不同IP访问
- 添加一个新的域名解析
[root@localhost accp8080]# vim /etc/hosts
127.0.0.1   localhost localhost.localdomain localhost4 localhost4.localdomain4
::1         localhost localhost.localdomain localhost6 localhost6.localdomain6
192.168.159.190 www.accp.com
192.168.159.100 www.benet.com- 创建网站根目录
[root@localhost html]# mkdir benet100
[root@localhost html]# ls
accp  accp8080  benet  benet100
[root@localhost html]# cd benet100/
[root@localhost benet100]# vim index.html
<h1>www.benet100.com</h1>
- 这在整一个虚拟的临时网卡

- 进入nginx主配置文件,将网卡的改写为192.168.159.100
[root@localhost benet100]# vim /usr/local/nginx/conf/nginx.confserver {36         listen       192.168.159.100:80;37         server_name  www.benet.com;38         charset UTF-8;39         access_log  logs/benet.access.log;40         location / {41             root  /var/www/html/benet;42             index  index.html index.htm;43         }44         error_page   500 502 503 504  /50x.html;45         location = /50x.html {46             root   html;47         }48     }
root@localhost benet100]# nginx -t
nginx: the configuration file /usr/local/nginx/conf/nginx.conf syntax is ok
nginx: configuration file /usr/local/nginx/conf/nginx.conf test is successful
[root@localhost benet100]# systemctl restart nginx- 进入浏览器访问