文章目录
- 1:环境准备
- 2:gateway服务设置
- 1:导包
- 2:yml配置
- 3:添加配置类,从网关服务中获取服务列表
- 4:重写并覆盖/swagger-resources接口
- 3:其他业务逻辑服务设置
- 1:其他服务导包
- 2:其他服务配置yml
- 3:其他服务设置swagger配置类
- 4:优化:将swagger配置作为一个微服务
- 1:创建code-swagger服务
- 2:导包
- 3:写配置文件
- 配置1:swagger的实体类,这个是对应在配置文件中写的
- 配置二:swagger的配置类
- 4:在 META-INF 添加spring配置
- 5:其他服务引用这个swagger微服务
- 6:各模块的配置参数
当我们使用Knife4j来对服务的接口文档进行管理时是非常美观和舒服的;但是当系统中的微服务越来越多的时候,我们需要访问十几个端口,这是非常痛苦的;
有没有一种办法可以将所有微服务的接口文档在同一个可视化页面进行展示,这样我们就可以统一管理了;为此我们可以通过SpringCloudGateway网关+注册中心nacos+Knige4j对所有微服务的接口文档进行统一管理
1:环境准备
本文章的前置基础是默认大家已经会了Gateway网关,Nacos注册中心,swagger和Knife4j配置,如果不太清楚,环境阅读这些文章:
Gateway-02-gateway路由规则和过滤器
Nacos-02-Nacos的配置中心和服务发现
swagger-springboot详解
swagger-优美的Knife4j文档
2:gateway服务设置
1:导包
<dependency><groupId>com.github.xiaoymin</groupId><artifactId>knife4j-spring-boot-starter</artifactId><!--在引用时请在maven中央仓库搜索3.X最新版本号--><version>3.0.2</version></dependency>
2:yml配置
server:port: 18080spring:application:name: code-gatewaycloud:nacos:discovery:server-addr: ip:8848namespace: 61f8c730-8be2-4caf-967f-9950107f8e66config:server-addr: ip:8848namespace: 61f8c730-8be2-4caf-967f-9950107f8e66name: dev.ymlfile-extension: ymlgateway:discovery:locator:# enabled:默认为false,设置为true表明spring cloud gateway开启服务发现和路由的功能,网关自动根据注册中心的服务名为每个服务创建一个router,将以服务名开头的请求路径转发到对应的服务enabled: true# lowerCaseServiceId:启动 locator.enabled=true 自动路由时,路由的路径默认会使用大写ID,若想要使用小写ID,可将lowerCaseServiceId设置为truelower-case-service-id: trueroutes:- id: code-orderuri: lb://code-orderpredicates:- Path=/code-order/**filters:- StripPrefix=1- id: code-useruri: lb://code-userpredicates:- Path=/code-user/**filters:- StripPrefix=1
3:添加配置类,从网关服务中获取服务列表
在使用 SpringBoot 等单体架构集成 swagger 时,我们是基于包路径进行业务分组,然后在前端进行不同模块的展示,而在微服务架构下,一个服务就类似于原来我们写的一个业务组。springfox-swagger 提供的分组接口是 swagger-resource,返回的是分组接口名称、地址等信息,而在Spring Cloud微服务架构下,我们需要重写该接口,改由通过网关的注册中心动态发现所有的微服务文档,

package com.wkl.codegateway.config;import org.springframework.beans.factory.annotation.Autowired;
import org.springframework.beans.factory.annotation.Value;
import org.springframework.cloud.gateway.route.RouteLocator;
import org.springframework.context.annotation.Configuration;
import org.springframework.context.annotation.Primary;
import springfox.documentation.swagger.web.SwaggerResource;
import springfox.documentation.swagger.web.SwaggerResourcesProvider;import java.util.ArrayList;
import java.util.HashSet;
import java.util.List;
import java.util.Set;/*** 使用Spring Boot单体架构集成swagger时,是通过包路径进行业务分组,然后在前端进行不同模块的展示,而在微服务架构下,单个服务类似于原来业务组;* springfox-swagger提供的分组接口是swagger-resource,返回的是分组接口名称、地址等信息;* 在Spring Cloud微服务架构下,需要swagger-resource重写接口,由网关的注册中心动态发现所有的微服务文档*/
@Primary
@Configuration
public class SwaggerResourceConfig implements SwaggerResourcesProvider
{/*** swagger2默认的url后缀*/private static final String SWAGGER2_URL = "/v2/api-docs";/*** 路由定位器*/@Autowiredprivate RouteLocator routeLocator;/*** 网关应用名称*/@Value("${spring.application.name}")private String gatewayName;/*** 获取 Swagger 资源*/@Overridepublic List<SwaggerResource> get() {//接口资源列表List<SwaggerResource> resources = new ArrayList<>();//服务名称列表List<String> routeHosts = new ArrayList<>();// 1. 获取路由Uri 中的Host=> 服务注册则为服务名=》app-service001routeLocator.getRoutes().filter(route -> route.getUri().getHost() != null).filter(route -> !gatewayName.equals(route.getUri().getHost())).subscribe(route -> routeHosts.add(route.getUri().getHost()));// 2. 创建自定义资源Set<String> existsServer = new HashSet<>();     // 去重,多负载服务只添加一次for (String routeHost : routeHosts) {String serviceUrl = "/" + routeHost + SWAGGER2_URL; // 后台访问添加服务名前缀if(!existsServer.contains(serviceUrl)){existsServer.add(serviceUrl); //加过的放在set中SwaggerResource swaggerResource = new SwaggerResource(); // 创建Swagger 资源swaggerResource.setUrl(serviceUrl); // 设置访问地址swaggerResource.setName(routeHost); // 设置名称swaggerResource.setSwaggerVersion("2.0");resources.add(swaggerResource);}}return resources;}
}
4:重写并覆盖/swagger-resources接口
- 使用Spring Boot单体架构集成swagger时,是通过包路径进行业务分组,然后在前端进行不同模块的展示,而在微服务架构下,单个服务类似于原来业务组;
- springfox-swagger提供的分组接口是swagger-resource,返回的是分组接口名称、地址等信息;
- 在Spring Cloud微服务架构下,需要swagger-resource重写接口,由网关的注册中心动态发现所有的微服务文档
package com.wkl.codegateway.handle;import org.springframework.beans.factory.annotation.Autowired;
import org.springframework.http.HttpStatus;
import org.springframework.http.ResponseEntity;
import org.springframework.web.bind.annotation.GetMapping;
import org.springframework.web.bind.annotation.RequestMapping;
import org.springframework.web.bind.annotation.RestController;
import reactor.core.publisher.Mono;
import springfox.documentation.swagger.web.*;import java.util.Optional;/*** 获取api接口信息*/
@RestController
@RequestMapping ("/swagger-resources")
public class SwaggerHandler
{@Autowired(required = false)private SecurityConfiguration securityConfiguration;@Autowired(required = false)private UiConfiguration uiConfiguration;private final SwaggerResourcesProvider swaggerResources;@Autowiredpublic SwaggerHandler(SwaggerResourcesProvider swaggerResources) {this.swaggerResources = swaggerResources;}@GetMapping("/configuration/security")public Mono<ResponseEntity<SecurityConfiguration>> securityConfiguration(){return Mono.just(new ResponseEntity<>(Optional.ofNullable(securityConfiguration).orElse(SecurityConfigurationBuilder.builder().build()), HttpStatus.OK));}@GetMapping ("/configuration/ui")public Mono<ResponseEntity<UiConfiguration>> uiConfiguration(){return Mono.just(new ResponseEntity<>(Optional.ofNullable(uiConfiguration).orElse(UiConfigurationBuilder.builder().build()), HttpStatus.OK));}@GetMapping("")public Mono<ResponseEntity> swaggerResources(){return Mono.just((new ResponseEntity<>(swaggerResources.get(), HttpStatus.OK)));}
}
至此gateway服务方面的配置结束
3:其他业务逻辑服务设置
当我们设置好gateway服务后,其他配置服务无非就是配置一下Knige4j原本的信息,比如我有两个服务一个是user(人员)模块,一个是order(订单)模块
1:其他服务导包
<dependency><groupId>com.github.xiaoymin</groupId><artifactId>knife4j-spring-boot-starter</artifactId><!--在引用时请在maven中央仓库搜索3.X最新版本号--><version>3.0.2</version></dependency>
2:其他服务配置yml
其他服务的yml配置跟gateway无关,只需要配置正常的nacos注册中心即可;保证服务注册到nacos,可以被网关gateway读取到。
server:port: 18081
spring:application:name: code-ordercloud:nacos:#注册中心discovery:server-addr: ip:8848namespace: 61f8c730-8be2-4caf-967f-9950107f8e66config:server-addr: ip:8848namespace: 61f8c730-8be2-4caf-967f-9950107f8e66name: dev.ymlfile-extension: yml
3:其他服务设置swagger配置类
package com.example.codeorder.config;import org.springframework.beans.factory.annotation.Value;
import org.springframework.context.annotation.Bean;
import org.springframework.context.annotation.Configuration;
import springfox.documentation.builders.PathSelectors;
import springfox.documentation.builders.RequestHandlerSelectors;
import springfox.documentation.service.ApiInfo;
import springfox.documentation.service.Contact;
import springfox.documentation.service.VendorExtension;
import springfox.documentation.spi.DocumentationType;
import springfox.documentation.spring.web.plugins.Docket;
import springfox.documentation.swagger2.annotations.EnableSwagger2;
import springfox.documentation.swagger2.annotations.EnableSwagger2WebMvc;import java.util.ArrayList;/*** @author Boss* ip:port/doc.html*/
@Configuration
@EnableSwagger2
public class SwaggerConfig {@Value("${spring.application.name}")private String serviceName;//配置swagger的Docket的bean实例@Beanpublic Docket docket() {return new Docket(DocumentationType.SWAGGER_2).apiInfo(apiInfo()).select()//注意basePackage改成自己每个项目的路径.apis(RequestHandlerSelectors.basePackage("com.example.codeorder.controller")).paths(PathSelectors.any()).build();}//配置swagger信息private ApiInfo apiInfo() {Contact contact = new Contact("作者姓名", "", "");return new ApiInfo(serviceName+"接口文档","Api Documentation","1.0","urn:tos",contact,"Apache 2.0","http://www.apache.org/licenses/LICENSE-2.0",new ArrayList<VendorExtension>());}
}
4:优化:将swagger配置作为一个微服务
按照上述的方法,我需要每个微服务都创建一个swaggerconfig类,那么当微服务特别多的时候,这样就不合适了;
我们可以将swagger这个配置,抽取成一个微服务,其他服务引入他即可
1:创建code-swagger服务
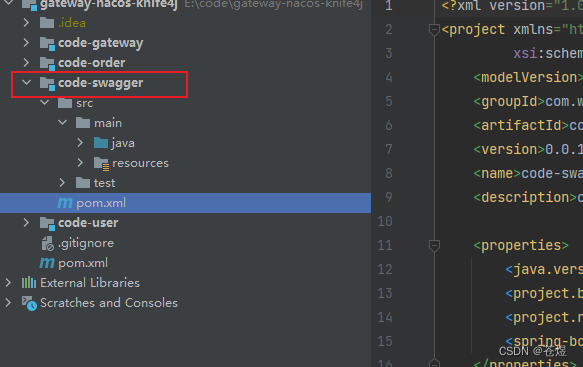
2:导包
<?xml version="1.0" encoding="UTF-8"?>
<project xmlns="http://maven.apache.org/POM/4.0.0" xmlns:xsi="http://www.w3.org/2001/XMLSchema-instance"xsi:schemaLocation="http://maven.apache.org/POM/4.0.0 https://maven.apache.org/xsd/maven-4.0.0.xsd"><modelVersion>4.0.0</modelVersion><parent><groupId>org.wkl</groupId><artifactId>gateway-nacos-knife4j</artifactId><version>1.0-SNAPSHOT</version></parent><groupId>com.wkl</groupId><artifactId>code-swagger</artifactId><version>0.0.1-SNAPSHOT</version><name>code-swagger</name><description>code-swagger</description><properties><java.version>1.8</java.version></properties><dependencies><dependency><groupId>org.springframework.boot</groupId><artifactId>spring-boot-starter-web</artifactId></dependency><dependency><groupId>com.github.xiaoymin</groupId><artifactId>knife4j-spring-boot-starter</artifactId><!--在引用时请在maven中央仓库搜索3.X最新版本号--><version>3.0.2</version></dependency></dependencies></project>
3:写配置文件
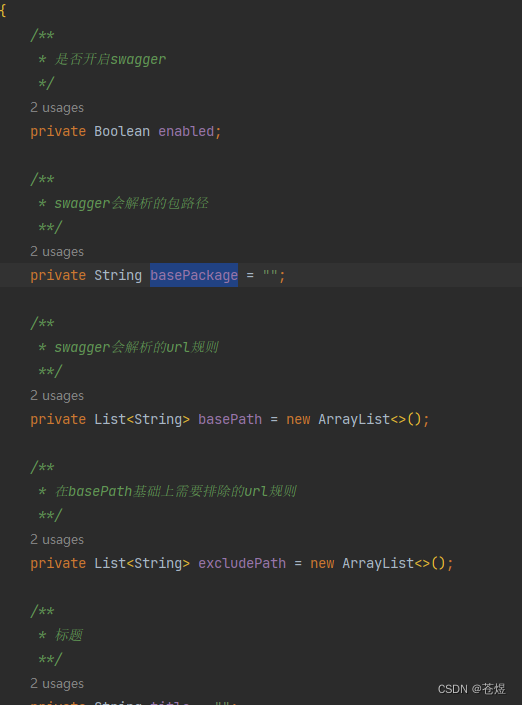
配置1:swagger的实体类,这个是对应在配置文件中写的
package com.wkl.codeswagger.config;import com.github.xiaoymin.knife4j.spring.annotations.EnableKnife4j;
import org.springframework.boot.autoconfigure.EnableAutoConfiguration;
import org.springframework.boot.autoconfigure.condition.ConditionalOnMissingBean;
import org.springframework.boot.autoconfigure.condition.ConditionalOnProperty;
import org.springframework.context.annotation.Bean;
import org.springframework.context.annotation.Configuration;
import springfox.documentation.builders.ApiInfoBuilder;
import springfox.documentation.builders.PathSelectors;
import springfox.documentation.builders.RequestHandlerSelectors;
import springfox.documentation.service.ApiInfo;
import springfox.documentation.service.Contact;
import springfox.documentation.spi.DocumentationType;
import springfox.documentation.spring.web.plugins.ApiSelectorBuilder;
import springfox.documentation.spring.web.plugins.Docket;
import springfox.documentation.swagger2.annotations.EnableSwagger2;import java.util.ArrayList;
import java.util.Arrays;
import java.util.List;
import java.util.function.Predicate;/*** @author Boss* ip:port/doc.html*/
//@Configuration
@Configuration
//@EnableSwagger2
@EnableKnife4j
@ConditionalOnProperty(name = "swagger.enabled", matchIfMissing = true)
public class SwaggerConfig {/*** 默认的排除路径,排除Spring Boot默认的错误处理路径和端点*/private static final List<String> DEFAULT_EXCLUDE_PATH = Arrays.asList("/error", "/actuator/**");private static final String BASE_PATH = "/**";@Bean@ConditionalOnMissingBeanpublic SwaggerProperties swaggerProperties() {return new SwaggerProperties();}//配置swagger的Docket的bean实例@Beanpublic Docket docket(SwaggerProperties swaggerProperties) {// base-path处理if (swaggerProperties.getBasePath().isEmpty()) {swaggerProperties.getBasePath().add(BASE_PATH);}// noinspection uncheckedList<Predicate<String>> basePath = new ArrayList<Predicate<String>>();swaggerProperties.getBasePath().forEach(path -> basePath.add(PathSelectors.ant(path)));// exclude-path处理if (swaggerProperties.getExcludePath().isEmpty()) {swaggerProperties.getExcludePath().addAll(DEFAULT_EXCLUDE_PATH);}List<Predicate<String>> excludePath = new ArrayList<>();swaggerProperties.getExcludePath().forEach(path -> excludePath.add(PathSelectors.ant(path)));ApiSelectorBuilder builder = new Docket(DocumentationType.SWAGGER_2).apiInfo(apiInfo(swaggerProperties)).select().apis(RequestHandlerSelectors.basePackage(swaggerProperties.getBasePackage())).paths(PathSelectors.any());swaggerProperties.getBasePath().forEach(p -> builder.paths(PathSelectors.ant(p)));swaggerProperties.getExcludePath().forEach(p -> builder.paths(PathSelectors.ant(p).negate()));return builder.build();}private ApiInfo apiInfo(SwaggerProperties swaggerProperties) {return new ApiInfoBuilder().title(swaggerProperties.getTitle()).description(swaggerProperties.getDescription()).license(swaggerProperties.getLicense()).licenseUrl(swaggerProperties.getLicenseUrl()).termsOfServiceUrl(swaggerProperties.getTermsOfServiceUrl()).contact(new Contact(swaggerProperties.getContact().getName(), swaggerProperties.getContact().getUrl(), swaggerProperties.getContact().getEmail())).version(swaggerProperties.getVersion()).build();}
}
配置二:swagger的配置类
package com.wkl.codeswagger.config;import com.github.xiaoymin.knife4j.spring.annotations.EnableKnife4j;
import org.springframework.boot.autoconfigure.EnableAutoConfiguration;
import org.springframework.boot.autoconfigure.condition.ConditionalOnMissingBean;
import org.springframework.boot.autoconfigure.condition.ConditionalOnProperty;
import org.springframework.context.annotation.Bean;
import org.springframework.context.annotation.Configuration;
import springfox.documentation.builders.ApiInfoBuilder;
import springfox.documentation.builders.PathSelectors;
import springfox.documentation.builders.RequestHandlerSelectors;
import springfox.documentation.service.ApiInfo;
import springfox.documentation.service.Contact;
import springfox.documentation.spi.DocumentationType;
import springfox.documentation.spring.web.plugins.ApiSelectorBuilder;
import springfox.documentation.spring.web.plugins.Docket;
import springfox.documentation.swagger2.annotations.EnableSwagger2;import java.util.ArrayList;
import java.util.Arrays;
import java.util.List;
import java.util.function.Predicate;/*** @author Boss* ip:port/doc.html*/
//@Configuration
@Configuration
//@EnableSwagger2
@EnableKnife4j
@ConditionalOnProperty(name = "swagger.enabled", matchIfMissing = true)
public class SwaggerConfig {/*** 默认的排除路径,排除Spring Boot默认的错误处理路径和端点*/private static final List<String> DEFAULT_EXCLUDE_PATH = Arrays.asList("/error", "/actuator/**");private static final String BASE_PATH = "/**";@Bean@ConditionalOnMissingBeanpublic SwaggerProperties swaggerProperties() {return new SwaggerProperties();}//配置swagger的Docket的bean实例@Beanpublic Docket docket(SwaggerProperties swaggerProperties) {// base-path处理if (swaggerProperties.getBasePath().isEmpty()) {swaggerProperties.getBasePath().add(BASE_PATH);}// noinspection uncheckedList<Predicate<String>> basePath = new ArrayList<Predicate<String>>();swaggerProperties.getBasePath().forEach(path -> basePath.add(PathSelectors.ant(path)));// exclude-path处理if (swaggerProperties.getExcludePath().isEmpty()) {swaggerProperties.getExcludePath().addAll(DEFAULT_EXCLUDE_PATH);}List<Predicate<String>> excludePath = new ArrayList<>();swaggerProperties.getExcludePath().forEach(path -> excludePath.add(PathSelectors.ant(path)));ApiSelectorBuilder builder = new Docket(DocumentationType.SWAGGER_2).apiInfo(apiInfo(swaggerProperties)).select().apis(RequestHandlerSelectors.basePackage(swaggerProperties.getBasePackage())).paths(PathSelectors.any());swaggerProperties.getBasePath().forEach(p -> builder.paths(PathSelectors.ant(p)));swaggerProperties.getExcludePath().forEach(p -> builder.paths(PathSelectors.ant(p).negate()));return builder.build();}private ApiInfo apiInfo(SwaggerProperties swaggerProperties) {return new ApiInfoBuilder().title(swaggerProperties.getTitle()).description(swaggerProperties.getDescription()).license(swaggerProperties.getLicense()).licenseUrl(swaggerProperties.getLicenseUrl()).termsOfServiceUrl(swaggerProperties.getTermsOfServiceUrl()).contact(new Contact(swaggerProperties.getContact().getName(), swaggerProperties.getContact().getUrl(), swaggerProperties.getContact().getEmail())).version(swaggerProperties.getVersion()).build();}
}
4:在 META-INF 添加spring配置
因为code-swagger模块时一个公共模块,并且不是一个web工程,想要让模块内的配置类生效并且加入ioc容器中,必须在resources目录下先建文件夹 META-INF,文件夹下创建 spring.factories 文件 ,内容如下
org.springframework.boot.autoconfigure.EnableAutoConfiguration=\com.wkl.codeswagger.config.SwaggerConfig5:其他服务引用这个swagger微服务
其他服务模块在pom中将swagger服务当做一个微服务进行引用即可
<!--引入swagger模块配置代码--><dependency><groupId>com.wkl</groupId><artifactId>code-swagger</artifactId><version>0.0.1-SNAPSHOT</version></dependency>
6:各模块的配置参数
因为其他业务模块已经引入了swagger模块的配置类,所以只需要在yml文件中进行配置即可,或者直接在nacos中进行配置,这样后续也方便维护和修改
# swagger配置
swagger:enabled: truetitle: user模块接口文档license: Powered By ruoyilicenseUrl: https://ruoyi.vipbasePackage: com.wkl.codeuser.controller
注:其他配置参数可以参考4.3中配置一的实体类中的参数进行配置,只需要保证参数名和实体类的名称一样即可;