安装环境:
win7 64bit
python2.7.11 64bit
django: 1.9.6
django-oscar:
---
Metadata-Version: 1.1
Name: django-oscar
Version: 1.3.dev0
Summary: A domain-driven e-commerce framework for Django
Home-page: https://github.com/django-oscar/django-oscar
Author: David Winterbottom
Author-email: david.winterbottom@gmail.com
License: BSD
Location: c:\python27\lib\site-packages
Requires: django, pillow, django-extra-views, django-haystack, django-treebeard, sorl-thumbnail, Babel, Unidecode, purl, phonenumbers, mock, factory-boy, django-tables2, django-widget-tweaks
Classifiers:
Development Status :: 5 - Production/Stable
Environment :: Web Environment
Framework :: Django
Framework :: Django :: 1.8
Framework :: Django :: 1.9
Intended Audience :: Developers
License :: OSI Approved :: BSD License
Operating System :: Unix
Programming Language :: Python
Programming Language :: Python :: 2
Programming Language :: Python :: 2.7
Programming Language :: Python :: 3
Programming Language :: Python :: 3.3
Programming Language :: Python :: 3.4
Programming Language :: Python :: 3.5
Topic :: Software Development :: Libraries :: Application Frameworks
django-oscar依赖的挺多的,如下:
django, pillow, django-extra-views, django-haystack, django-treebeard, sorl-thumbnail, Babel,
Unidecode, purl, phonenumbers, mock, factory-boy, django-tables2, django-widget-tweaks
安装过程:
python和django的安装我就跳过了,直接安装的python2.7.11,自带pip工具,使用pip 工具安装django和oscar即可
pip install django=1.9.6
pip install django-oscar
因为我这边使用pip的python资源网速很慢,所以我直接从git上下载了最新的版本,地址如下:
https://github.com/django-oscar/django-oscar
我直接下载的zip包,然后使用pip进行安装的,安装命令如下:
pip install d:\downloads\django-oscar.zip
安装的过程中会自动根据django-oscar的依赖关系来下载相应的python包,所以等等吧,因为依赖的特别的多
配置django-oscar的环境:
1.首先使用django-admin新建一个django的空项目,然后将django-oscar的应用集成过来即可,具体可以打开django-oscar的官方文档,然后照着做就OK了,官方文档地址:
http://django-oscar.readthedocs.io/en/latest/internals/getting_started.html
2.如果懒得读官方文档,可以直接用我配置好了的配置文件,修改的地方,我使用了注释进行标注。
settings.py
"""
Django settings for frobshop project.Generated by 'django-admin startproject' using Django 1.9.6.For more information on this file, see
https://docs.djangoproject.com/en/1.9/topics/settings/For the full list of settings and their values, see
https://docs.djangoproject.com/en/1.9/ref/settings/
"""import os#Oscar defaults
from oscar.defaults import *
from oscar import get_core_apps# Build paths inside the project like this: os.path.join(BASE_DIR, ...)
BASE_DIR = os.path.dirname(os.path.dirname(os.path.abspath(__file__)))# Quick-start development settings - unsuitable for production
# See https://docs.djangoproject.com/en/1.9/howto/deployment/checklist/# SECURITY WARNING: keep the secret key used in production secret!
SECRET_KEY = '^kg+$_3x@(p%u9cd(11=q1k&73(pc^ly3%#v==@-p_y@$diov7'# SECURITY WARNING: don't run with debug turned on in production!
DEBUG = TrueALLOWED_HOSTS = []# Application definitionINSTALLED_APPS = ['django.contrib.admin','django.contrib.auth','django.contrib.contenttypes','django.contrib.sessions',#Add 4 oscar'django.contrib.sites','django.contrib.messages','django.contrib.staticfiles',#Add 4 oscar'django.contrib.flatpages',#Add 4 oscar'widget_tweaks',#Add get_core_apps 4 oscar
] + get_core_apps()#Add SITE_ID 4 oscar
SITE_ID = 1MIDDLEWARE_CLASSES = ['django.middleware.security.SecurityMiddleware','django.contrib.sessions.middleware.SessionMiddleware','django.middleware.common.CommonMiddleware','django.middleware.csrf.CsrfViewMiddleware','django.contrib.auth.middleware.AuthenticationMiddleware','django.contrib.auth.middleware.SessionAuthenticationMiddleware','django.contrib.messages.middleware.MessageMiddleware','django.middleware.clickjacking.XFrameOptionsMiddleware',#Add 4 support oscar'oscar.apps.basket.middleware.BasketMiddleware','django.contrib.flatpages.middleware.FlatpageFallbackMiddleware',
]ROOT_URLCONF = 'frobshop.urls'#Oscar template dirs
from oscar import OSCAR_MAIN_TEMPLATE_DIRTEMPLATES = [{'BACKEND': 'django.template.backends.django.DjangoTemplates',#'DIRS': [],#Replace DIRS 4 support oscar'DIRS': [os.path.join(BASE_DIR, 'templates'),OSCAR_MAIN_TEMPLATE_DIR],'APP_DIRS': True,'OPTIONS': {'context_processors': ['django.template.context_processors.debug','django.template.context_processors.request','django.contrib.auth.context_processors.auth','django.contrib.messages.context_processors.messages',],},},
]#Add 4 support oscar
AUTHENTICATION_BACKENDS = ('oscar.apps.customer.auth_backends.EmailBackend','django.contrib.auth.backends.ModelBackend',
)WSGI_APPLICATION = 'frobshop.wsgi.application'# Database
# https://docs.djangoproject.com/en/1.9/ref/settings/#databasesDATABASES = {'default': {'ENGINE': 'django.db.backends.sqlite3','NAME': os.path.join(BASE_DIR, 'db.sqlite3'),'USER': '','PASSWORD': '','HOST': '','PORT': '',#Add ATOMIC_REQUESTS 4 support oscar'ATOMIC_REQUESTS': True,}
}# Password validation
# https://docs.djangoproject.com/en/1.9/ref/settings/#auth-password-validatorsAUTH_PASSWORD_VALIDATORS = [{'NAME': 'django.contrib.auth.password_validation.UserAttributeSimilarityValidator',},{'NAME': 'django.contrib.auth.password_validation.MinimumLengthValidator',},{'NAME': 'django.contrib.auth.password_validation.CommonPasswordValidator',},{'NAME': 'django.contrib.auth.password_validation.NumericPasswordValidator',},
]# Internationalization
# https://docs.djangoproject.com/en/1.9/topics/i18n/LANGUAGE_CODE = 'zh-hans'TIME_ZONE = 'UTC'USE_I18N = TrueUSE_L10N = TrueUSE_TZ = True# Static files (CSS, JavaScript, Images)
# https://docs.djangoproject.com/en/1.9/howto/static-files/STATIC_URL = '/static/'#Add 4 support oscar
HAYSTACK_CONNECTIONS = {'default': {'ENGINE': 'haystack.backends.simple_backend.SimpleEngine',},
}'''
HAYSTACK_CONNECTIONS = {'default': {'ENGINE': 'haystack.backends.solr_backend.SolrEngine','URL': 'http://127.0.0.1:8983/solr','INCLUDE_SPELLING': True,},
}
'''
urls.py文件:
"""frobshop URL ConfigurationThe `urlpatterns` list routes URLs to views. For more information please see:https://docs.djangoproject.com/en/1.9/topics/http/urls/
Examples:
Function views1. Add an import:  from my_app import views2. Add a URL to urlpatterns:  url(r'^$', views.home, name='home')
Class-based views1. Add an import:  from other_app.views import Home2. Add a URL to urlpatterns:  url(r'^$', Home.as_view(), name='home')
Including another URLconf1. Import the include() function: from django.conf.urls import url, include2. Add a URL to urlpatterns:  url(r'^blog/', include('blog.urls'))
"""
from django.conf.urls import *
from django.contrib import admin
from oscar.app import application'''
urlpatterns = [url(r'^admin/', admin.site.urls),
]
'''#Replace it 4 support oscar
urlpatterns = [url(r'^i18n/', include('django.conf.urls.i18n')),# The Django admin is not officially supported; expect breakage.# Nonetheless, it's often useful for debugging.url(r'^admin/', include(admin.site.urls)),url(r'', include(application.urls)),
]
3.完成之后,首先生成数据库表,进行同步,然后启动服务器即可
python manager migrate
python manager runserver 6666
4.问题总结
在整个环节中我碰到了三个问题,第一个是没有找到promotion/home.html的模版文件,然后我看了一下,模版部分我们没有配置正确,第二个是search backend部分的
配置我配置了,但是没起作用,(不太明白刚刚使用),所以我把这个部分注释掉了HAYSTACK_CONNECTIONS = {...},然后就是执行服务器的时候报1003端口占用的
问题,我切换端口就没问题了。
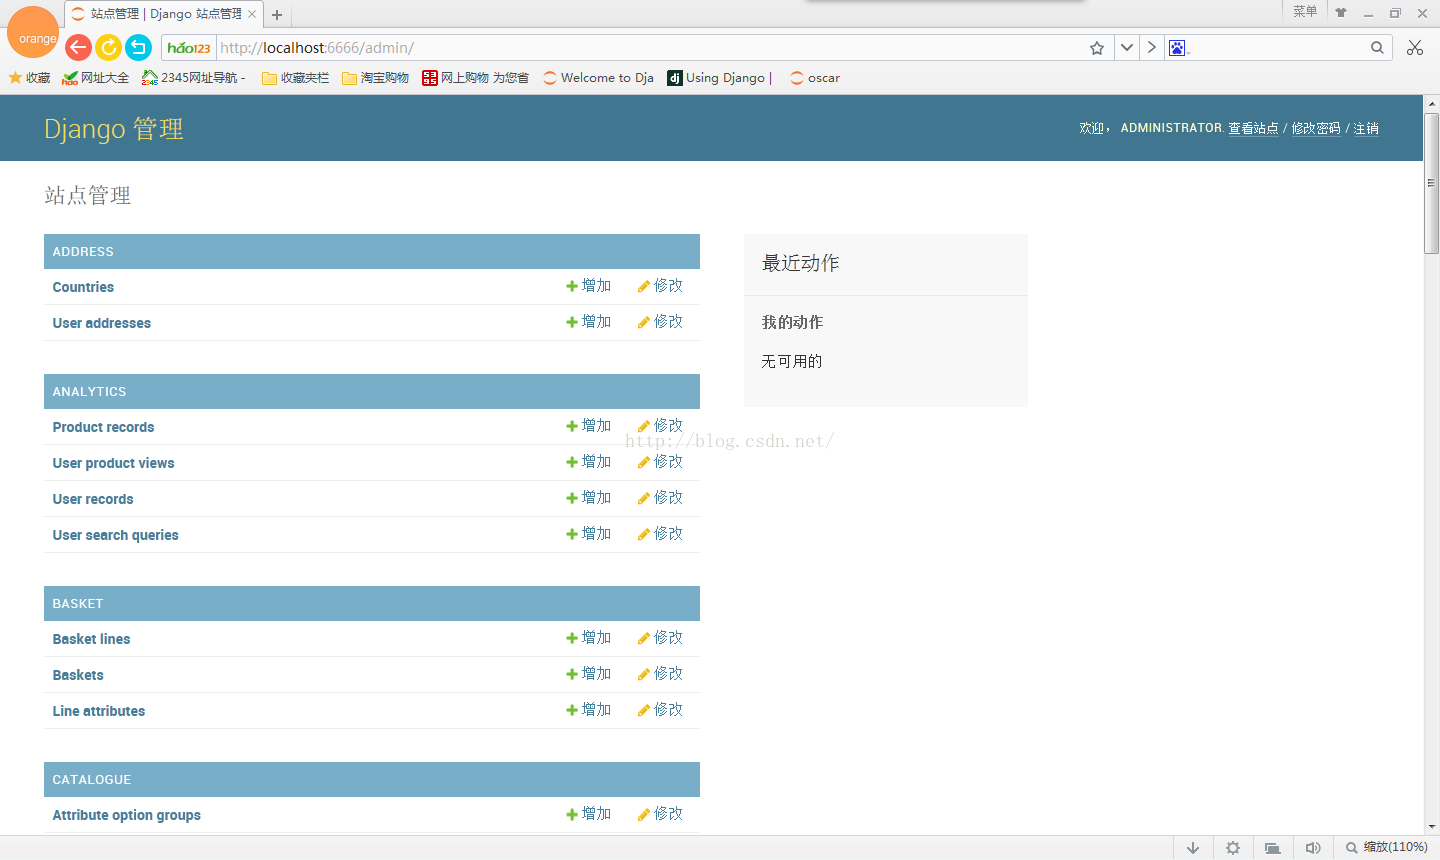
5.运行效果图:

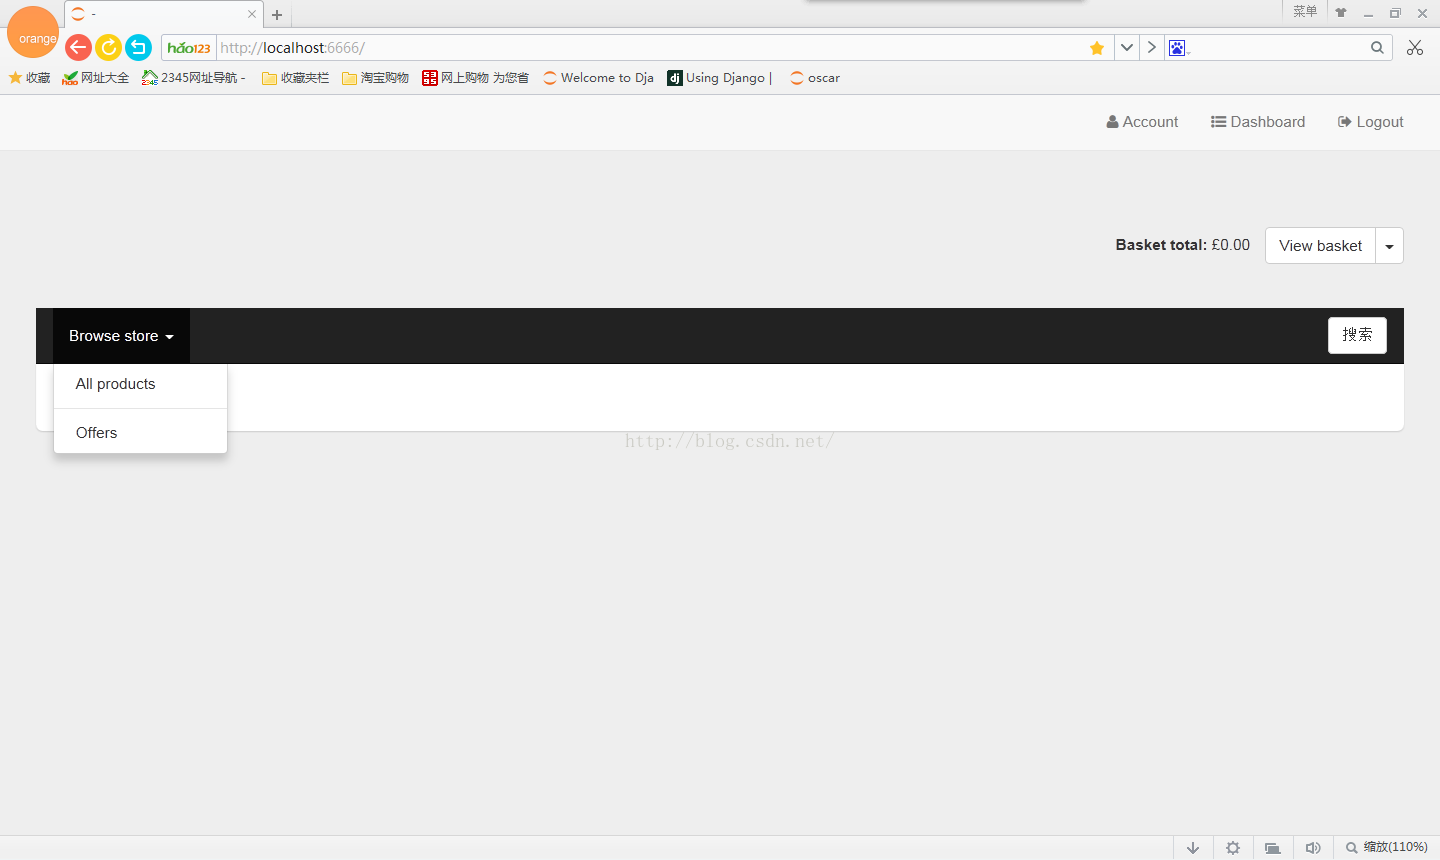
6.可以考虑自己做一个小的应用商城了,嘿嘿。