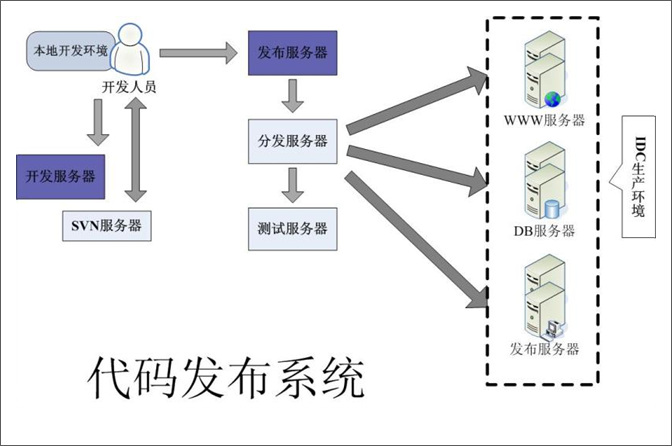
先来说下我的网站架构吧
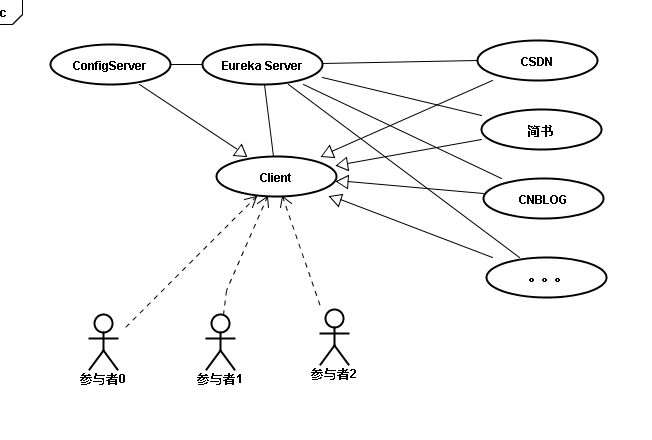
前面大家也看到了 既然叫博客搜 自然是搜索 博客的 我把每个网站会抽象成一个Client (为了更好的学习cloud)
上面只是展示了主要部分 像Hystrix Ribbon Zuul等等就不画上去了
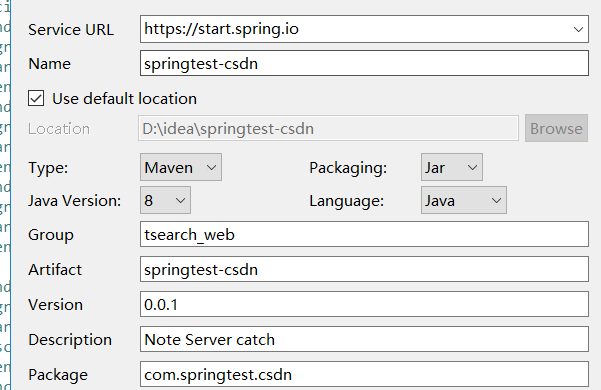
下面我们再建一个Client 选Eureka Server就可以了
修改下Application
@EnableEurekaClient
@SpringBootApplication
public class SpringtestCsdnApplication {public static void main(String[] args) {SpringApplication.run(SpringtestCsdnApplication.class, args);}
}
修改下Application.properties
eureka.client.serviceUrl.defaultZone=http://localhost:8761/eureka/
spring.application.name=csdn
server.port=8981
新建一个Controller
@RestController
public class CsdnController {@RequestMapping(value ="/search")public String search(@RequestParam("key") String key,@RequestParam("page") String page) {return "hello";}
}

测试下
下面是爬取CSDN搜索的接口 ,比较简单 没做什么处理
这里我们引入了 谷歌的GSON 包 方便处理数据
打开pom.xml 在里面加如GSON 引用
<dependency><groupId>com.google.code.gson</groupId><artifactId>gson</artifactId></dependency>


public class SearchUtil {public static Gson gson = new Gson();public static ArrayList<HashMap<String, String>> search(String key,String type,String page) throws Exception {StringBuffer url =new StringBuffer("https://so.csdn.net/so/search/wap.do?callback=&q=");url.append(key);url.append("&t=");url.append(type);url.append("&p=");url.append(page);url.append("&o=&s=&l=&_=");url.append(System.currentTimeMillis());URL serverUrl = new URL(url.toString());System.out.println(url.toString());HttpURLConnection conn = (HttpURLConnection) serverUrl.openConnection();conn.setConnectTimeout(5000);InputStream in = conn.getInputStream();BufferedReader br = new BufferedReader(new InputStreamReader(in, "UTF-8"));StringBuffer sb = new StringBuffer();String line;while ((line = br.readLine()) != null) {sb.append(line);}Map<String, Object> map = gson.fromJson(sb.toString(), new TypeToken<HashMap<String, Object>>() {}.getType());ArrayList<HashMap<String, String>> list = new ArrayList<HashMap<String, String>>();ArrayList<LinkedTreeMap<String, String>> mlist = (ArrayList<LinkedTreeMap<String, String>>) map.get("lresult");HashMap<String, String> m;for (LinkedTreeMap<String, String> o : mlist) {m = new HashMap<String, String>();m.put("title", convertString(o.get("title"),key));m.put("content", convertString(o.get("digest"),key));m.put("link", o.get("url"));list.add(m);}return list;}public static String convertString(String str,String key) {
//        if(key.contains("+")) {
//             String[] s = key.split("[+]");
//            for (int i = 0; i < s.length; i++) {
//                key = s[i];
                if (str != null) {str = str.replaceAll("<em>", "").replaceAll("</em>", "").replaceAll("amp;", "");}
//                str = str.replaceAll("(?i)" + key, "<em>" + key + "</em>");
//            }
//
//        }
//        else {
//            if (str != null) {
//                str = str.replaceAll("<em>", "").replaceAll("</em>", "").replaceAll("amp;", "");
//            }
//            str =str.replaceAll("(?i)"+key, "<em>"+key+"</em>");
//        }return str;}
}
修改下Controller
@RestController
public class CsdnController {Gson gson = new Gson();@RequestMapping(value = "/search")public String search(@RequestParam("key") String key, @RequestParam("page") String page) {System.out.println("search");ArrayList<HashMap<String, String>> result;try {result = SearchUtil.search(key, "blog", page);return gson.toJson(result);} catch (Exception e) {// TODO Auto-generated catch blocke.printStackTrace();}return null;}
}
View Code
重新测试下接口

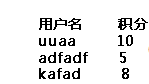
数据已经有了
我们的CSDN端是不直接访问的 , 需要通过Client来访问 下面可以结合下前面做的搜索框了
回到Client项目 我们先新建一个service 用来处理 连接 CSDN
@Service
public class ClientService {@Autowired RestTemplate restTemplate;public String  search(String key,String page) {HashMap<String, String> map = new HashMap<>();map.put("key", key);map.put("page", page);String str= restTemplate.getForObject("http://localhost:8981/search?key={key}&page={page}",String.class,map);return str;}@BeanRestTemplate restTemplate() {return new RestTemplate();}
}
修改下Client 下面的Controller
@RestController
public class ClientController {@AutowiredClientService cs;@RequestMapping(value ="/search")public String search(@RequestParam("key") String key,@RequestParam("page") String page) {return cs.search(key, page);}
}
修改下我们的index.ftl 就是前面的页面
<!DOCTYPE html>
<html><head><meta charset="UTF-8"><title></title><style>.searchBtn{background-color:#38f;color:#fff;font-size: 16px;padding-top: 0px;width: 80px;height: 34px;vertical-align: middle;padding: 0;border: 0;}.searchBtn:hover {background-color: #3171f3;}.searchBtn:active {background-color: #2964bb;}.searchSpan{padding-left: 10px;padding-right: 10px;margin-top: 0px;margin-bottom: 0px;border-color: #b8b8b8;width: 40%;vertical-align: middle;display: inline-block;height: 34px;border: 1px solid #b6b6b6;}.searchText{font-size: 16px;width: 100%;margin-top: 5px;outline: 0;border: 0;}dt{margin: 0px;padding: 0px;font-size: 16px;color: #303030;line-height: 24px;margin-top: 20px;}dd{margin: 0px;padding: 0px;font-size: 14px;line-height: 22px;color: #999999;}a{text-decoration: none;}.contentDiv{width: 800px;text-align: left;padding-bottom: 30px;}.contentDiv em{color: #CA0C16;font-style:normal;}.nextdiv{width: 50px;height: 50px;position: relative;}.next a:visited {text-decoration: none;color: #9B8878;
}</style><script src="http://ajax.aspnetcdn.com/ajax/jQuery/jquery-1.8.0.js"></script>
<script >
String.prototype.replaceAll = function(s1,s2){ return this.replace(new RegExp(s1,"gm"),s2);
}
$(document).ready(function(){var width =$(window).width();if(width<900){$(".searchSpan").css("width","50%")$(".searchBtn").css("width","20%")$("#contentDiv").css("width","80%")}else{$(".searchSpan").css("width","600px")$("#contentDiv").css("width","800px")$(".searchBtn").css("width","80px")$(".searchSpan").css("margin-left","-85px")}$('.searchText').bind('keydown',function(event){if(event.keyCode == "13") {openSearch(0);}});
});function openSearch(state){if(state!=null){$("#contentDiv").html("");}isLoad = true;$.ajax({type: "GET",url: "search",data: {"key":$("#searchText").val(),"page":1},dataType: "text",success: function(data){$("contentDiv").html(data);}});}</script></head><body ><div align="center" style="margin-top: 30px;font-size: 24px;margin-left: -50px;"  >博客搜</div><div align="center" style="margin-top: 20px;"  ><span class="searchSpan"><input type="text" id="searchText"value="spring"class="searchText" /></span><input type="submit" value="Search" id="su" class="searchBtn"onclick="openSearch(0)"></input></div><div align="center"><div id="contentDiv" class="contentDiv" ></div></div></body>
</html>
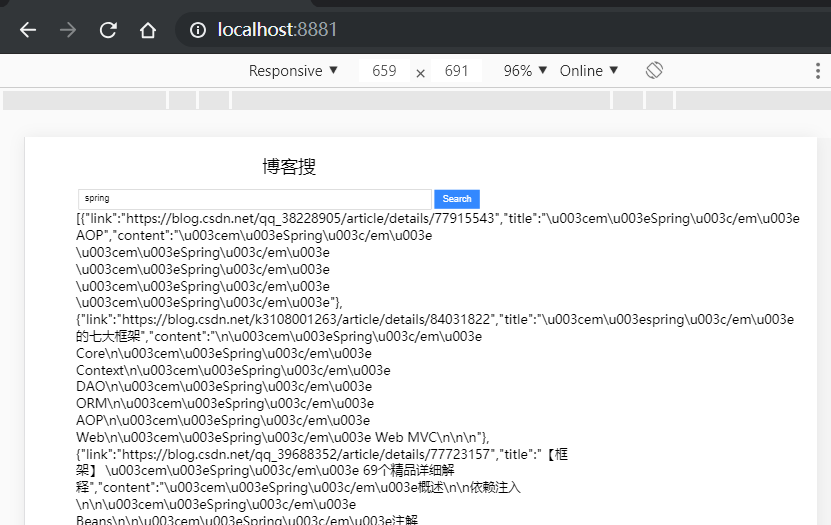
访问下 好的 一个丑陋的网站就做好了
回到ClientService
我们这边是用 String str= restTemplate.getForObject("http://localhost:8981/search?key={key}&page={page}",String.class,map);
restTemplate直接访问真实地址的 这样比较low, 通过Eureka Server上注册的Application Name我们可以来直接访问Client
修改下ClientService
@Service
public class ClientService {@Autowired RestTemplate restTemplate;@Autowiredprivate EurekaClient discoveryClient;public String  search(String key,String page) {HashMap<String, String> map = new HashMap<>();map.put("key", key);map.put("page", page);String str= restTemplate.getForObject(serviceUrl("CSDN")+"/search?key={key}&page={page}",String.class,map);return str;}@BeanRestTemplate restTemplate() {return new RestTemplate();}public String serviceUrl(String serviceId) {InstanceInfo instance = discoveryClient.getNextServerFromEureka(serviceId, false);return instance.getHomePageUrl();}
}
这里需要说明下 用了rabbit 如果直接访问真实地址会找不到 ,默认是通过serviceID解析
继续测试下 没问题
我们把CSDN 写死在代码里 看着很不舒服 下面就是将服务名通过ConfigServer获取
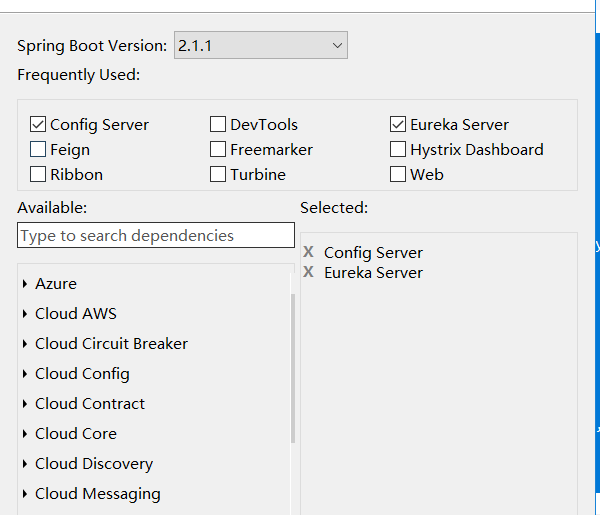
新建个 工程
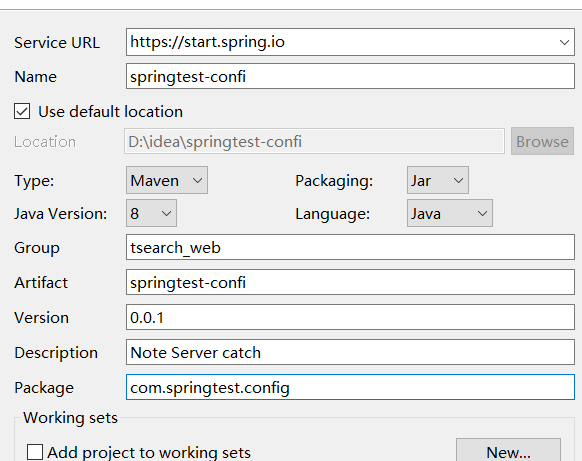
application.properties
eureka.client.serviceUrl.defaultZone=http://localhost:8761/eureka/
spring.application.name=config
server.port=8782
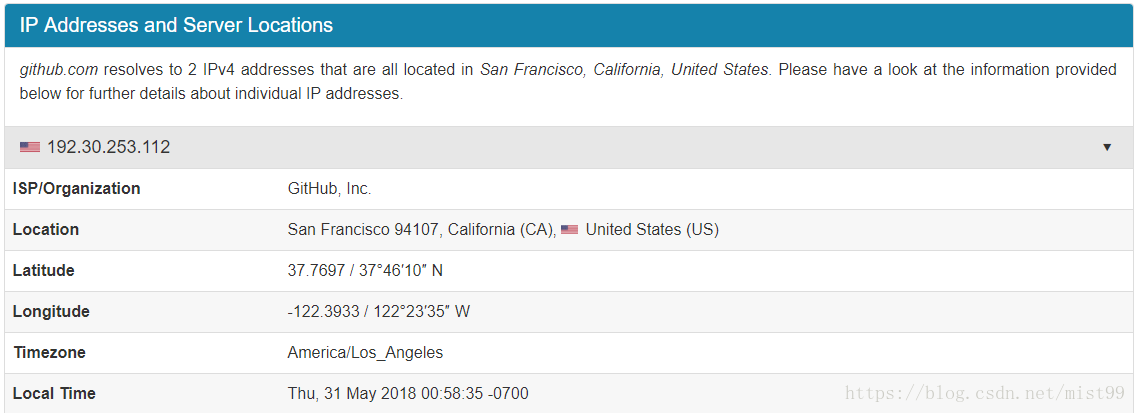
spring.cloud.config.server.git.uri=https://github.com/dikeboy/myeureka_config.git
spring.cloud.config.server.git.search-paths=config
我 这里是通过Github仓库获取的 uri是GIT仓库名 paths代表要搜索的路径 ,当然也可以配置在本地

Application
@EnableEurekaClient
@EnableConfigServer
@SpringBootApplication
public class SpringtestConfiApplication {public static void main(String[] args) {SpringApplication.run(SpringtestConfiApplication.class, args);}
}
访问下成功 说明已配置成功

下面回到Client项目 在resource 下新建一个bootstrap.xml或者properties bootstrap.xml优先级高于application.xml
spring.application.name=client
server.port=8881
spring.cloud.config.label=master
spring.cloud.config.profile=dev
spring.cloud.config.uri=http://localhost:8782/
Github上的名字client-dev.properties , client是我们当前服务的名称 dev对应 uri是我们config server的地址
Pom加入
<dependency><groupId>org.springframework.cloud</groupId><artifactId>spring-cloud-starter-config</artifactId></dependency>
修改Client Service
package com.springtest.client;import java.util.HashMap;import org.springframework.beans.factory.annotation.Autowired;
import org.springframework.beans.factory.annotation.Value;
import org.springframework.context.annotation.Bean;
import org.springframework.stereotype.Service;
import org.springframework.web.client.RestTemplate;import com.netflix.appinfo.InstanceInfo;
import com.netflix.discovery.EurekaClient;@Service
public class ClientService {@Autowired RestTemplate restTemplate;@Autowiredprivate EurekaClient discoveryClient;@Value("${serviceId}")public String serviceId;public String  search(String key,String page) {HashMap<String, String> map = new HashMap<>();map.put("key", key);map.put("page", page);String str= restTemplate.getForObject(serviceUrl(serviceId)+"/search?key={key}&page={page}",String.class,map);return str;}@BeanRestTemplate restTemplate() {return new RestTemplate();}public String serviceUrl(String serviceId) {InstanceInfo instance = discoveryClient.getNextServerFromEureka(serviceId, false);return instance.getHomePageUrl();}
}
这里需要注意几点 使用@value注入 一定要保证Config Server正常启动的状态 配置文件不能出错 不然可能启动不了项目
再次访问下地址测试下