12月21日 因为时间关系写的并不是特别详细,后续会补充
前期准备
1、首先你需要有一台云服务器
腾讯云服务器购买
【腾讯云】云产品限时秒杀,爆款1核2G云服务器,首年99元
其实我个人比较推广下面这款(性价比高):
【腾讯云】轻量应用服务器Lighthouse,1核1G3M低至128元/年,高带宽首选!
如果你是学生党的话建议选择这个:
腾讯云活动推荐
在选择操作系统的时候建议选择centos8.2
2、注册一个属于自己的域名并备案(也可以直接使用服务器IP访问)
域名注册:
域名注册_域名购买、申请-腾讯云dnspod.cloud.tencent.com
备案:
腾讯云活动推荐curl.qcloud.com完成上面的准备工作后我们就可以开始啦~
1、安装登录服务器所需要的软件,个人推荐Xshell
xshell下载www.netsarang.com2、更新系统,在登陆服务器后首先更新一下
yum -y update
3、安装宝塔面板管理器
宝塔Linux面板安装教程 - 2020年12月2日更新 - 7.4.6正式版www.bt.cn
在安装完成登陆面板后仅需安装nginx,具体请参考教程
宝塔linux面板安装使用教程汇总贴 - Linux面板 - 宝塔面板论坛www.bt.cn4、首先我们要备份已经安装的nginx
ps -elf | grep nginx
5、安装依赖
yum install git
6、下载Nginx fancyindex模块
git clone https://github.com/aperezdc/ngx-fancyindex
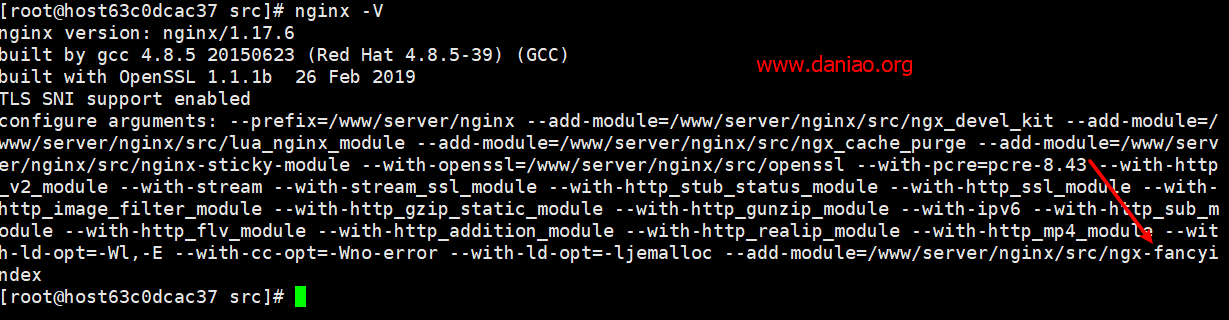
7、nginx -V
我们需要知道目前nginx编译了哪些模块,具体如下:
cd /www/server/nginx/src
nginx -V
注意:这里的‘V’是大写,我们看到目前的的模块,然后全部复制到一个记事本中备用。然后在最后面添加:--add-module=/www/server/nginx/src/ngx-fancyindex
8、开始编译
具体的编译代码如下,nginx版本是1.19.6,是宝塔面板的可以完全复制过去了。注意需要进入到:/www/server/nginx/src编译
./configure --prefix=/www/server/nginx --add-module=/www/server/nginx/src/ngx_devel_kit --add-module=/www/server/nginx/src/lua_nginx_module --add-module=/www/server/nginx/src/ngx_cache_purge --add-module=/www/server/nginx/src/nginx-sticky-module --with-openssl=/www/server/nginx/src/openssl --with-pcre=pcre-8.43 --with-http_v2_module --with-stream --with-stream_ssl_module --with-stream_ssl_preread_module --with-http_stub_status_module --with-http_ssl_module --with-http_image_filter_module --with-http_gzip_static_module --with-http_gunzip_module --with-ipv6 --with-http_sub_module --with-http_flv_module --with-http_addition_module --with-http_realip_module --with-http_mp4_module --with-ld-opt=-Wl,-E --with-cc-opt=-Wno-error --with-ld-opt=-ljemalloc --with-http_dav_module --add-module=/www/server/nginx/src/nginx-dav-ext-module --add-module=/www/server/nginx/src/ngx-fancyindex
再回车之后输入代码
make
9、nginx文件替换
make完成后将系统中原有的nginx用重新编译生成的nginx文件替换,替换后重启nginx使新编译nginx生效,具体命令如下:
rm -rf /www/server/nginx/sbin/nginx
cp objs/nginx /www/server/nginx/sbin/
service nginx restart
执行命令nginx -V我们可以看到fancy-index模块已经编译成功,如图:

10、新建网站
在网站管理中新建网站,这里不在过多赘述,具体请参考
宝塔linux面板安装使用教程汇总贴 - Linux面板 - 宝塔面板论坛www.bt.cn11、在完成模块编译后我们还需要下载一个主题
下载链接github.com12、下载完成后将Nginx-Fancyindex-Theme-light目录上传到网站根目录
个人比较喜欢Nginx-Fancyindex-Theme-light这个主题,当然你也可以试一下Nginx-Fancyindex-Theme-dark这个主题
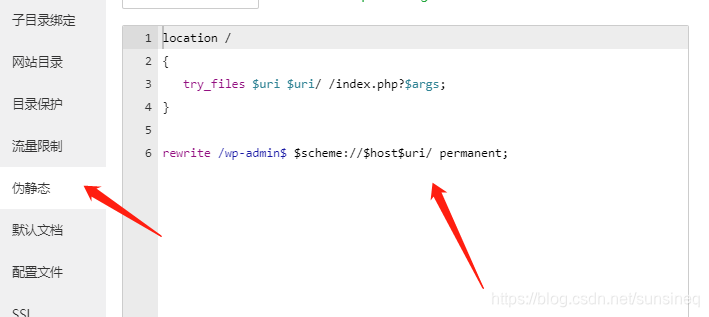
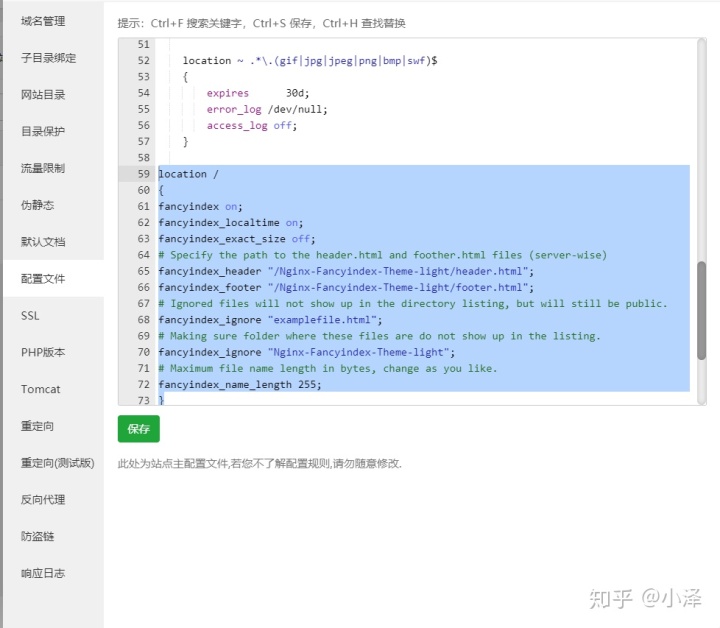
13、修改网站配置文件(复制粘贴就好)
location /
{
fancyindex on;
fancyindex_localtime on;
fancyindex_exact_size off;
# Specify the path to the header.html and foother.html files (server-wise)
fancyindex_header "/Nginx-Fancyindex-Theme-light/header.html";
fancyindex_footer "/Nginx-Fancyindex-Theme-light/footer.html";
# Ignored files will not show up in the directory listing, but will still be public.
fancyindex_ignore "examplefile.html";
# Making sure folder where these files are do not show up in the listing.
fancyindex_ignore "Nginx-Fancyindex-Theme-light";
# Maximum file name length in bytes, change as you like.
fancyindex_name_length 255;
}
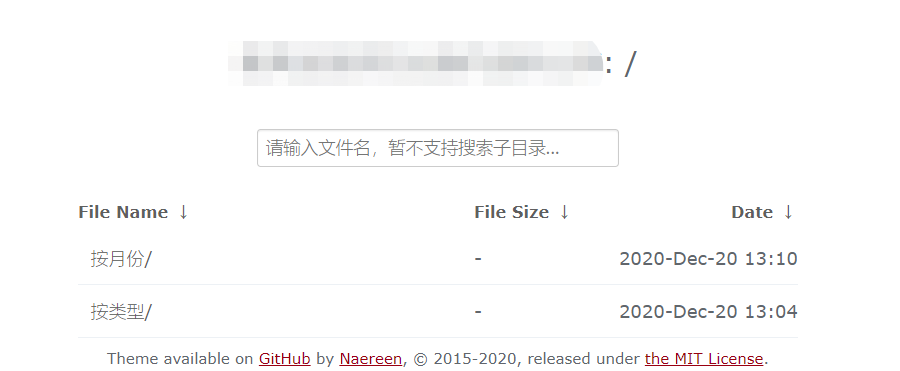
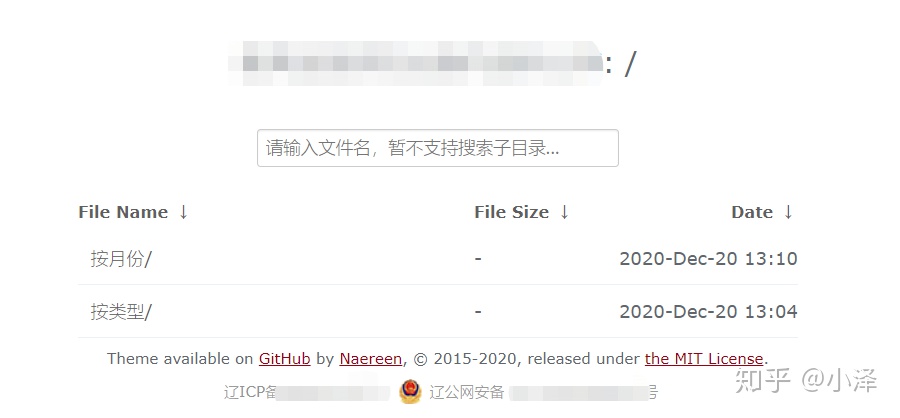
给大家看一下最后的效果:
14、自定义样式
如果你想自定义样式只需要修改Nginx-Fancyindex-Theme-light目录下的header和footer就好。
15、因为服务器带宽有限,所以大家可以用腾讯云cdn或者使用腾讯云COS进行加速,这里就不再过多介绍
腾讯云CDN:
腾讯云活动推荐curl.qcloud.com腾讯云COS:
腾讯云活动推荐curl.qcloud.com参考链接:
宝塔面板Nginx编译fancy-index模块 – 实现漂亮的索引目录www.daniao.org