github 地址 https://github.com/wangxiaoxi...
webpakc+vue的搭建
1.新建项目文件夹(see-films);
2.npm init //初始化项目
3.搭建webpack的基本框架
const path = require("path");
const webpack = require("webpack");
module.exports = {entry:{entry:"./src/entry.js"},output:{path:path.resolve( __dirname,"dist" ),filename:"[name].js"},module:{},plugins:[],devServer:{    }
};
同时安装依赖
npm i -D webpack(版本号4.14.0)
npm i -D webpack-cli
4.webpack的热更新
npm i -D webpack-dev-server
devServer:{    contentBase:path.resolve( __dirname,"dist" ),host:"127.0.0.1",compress:true,port:9001}
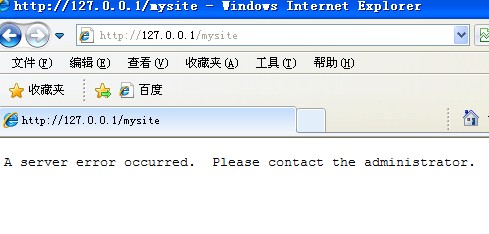
创建一个src文件夹,创建一个entry.js文件测试能否打包,发现报错 缺少mode
在webpacl.config.js文件里面的入口entry上面加上mode:"development",现在先是在本地跑起来,如果是生产环境的话mode:"production",此时再进行打包----打包成功。第一步完成。
5.安装模板文件依赖
npm i -D html-webpack-plugin
在webpack.config.js文件中的plugins中
plugins:[
    new htmlPlugin({minify:{removeAttributeQuotes:true},hash:true,template:"./src/index.html"})
]
在src文件夹下面创建index.html
然后webpack测试能否打包成功
此时的目录结构是这样子的!
图片描述
6.vue的搭建!!!
根目录新建文件夹client
创建文件 main.js和App.vue
在根目录创建index.html
然后修改webpack.config.js文件中的入口和plugin插件的模板
并安装依赖
npm i -S vue
npm i -D vue-template-complier
npm i -D extract-text-webpack-plugin
npm i -D vue-loader vue-style-loader css-loader
此时的webpack.config.js是这样的
const path = require("path");
const webpack = require("webpack");
const htmlPlugin = require("html-webpack-plugin");
const ExtractTextPlugin = require('extract-text-webpack-plugin');
const VueLoaderPlugin = require('vue-loader/lib/plugin');
module.exports = {mode:"development",resolve: {extensions: ['.js', '.vue', '.json'],alias: {'vue$': 'vue/dist/vue.esm.js'}},entry:{entry:"./client/main.js",vue:"vue"},output:{path:path.resolve( __dirname,"dist" ),filename:"[name].js"},module:{rules:[{test: /\.vue$/,loader: 'vue-loader',options: {loaders: {css: ExtractTextPlugin.extract({use: {loader: 'css-loader'},fallback: 'vue-style-loader'})}}}]},plugins:[new htmlPlugin({minify:{removeAttributeQuotes:true},hash:true,template:"./index.html"}),new VueLoaderPlugin(),new ExtractTextPlugin("css/index.css")],devServer:{    contentBase:path.resolve( __dirname,"dist" ),host:"127.0.0.1",compress:true,port:9001}
};
到此处就是一个最基础的vue架构;
此时的目录结构如下
图片描述
看到这里,相信你也测试过,然后发现有个问题,就是在.vue文件里面的style中对样式进行修改会报错,原因是webpack4.x版本得使用mini-css-extract-plugin代替原来的extract-text-webpack-plugin,修改之后如下
const path = require("path");
const webpack = require("webpack");
const htmlPlugin = require("html-webpack-plugin");
const VueLoaderPlugin = require('vue-loader/lib/plugin');
const MiniCssExtractPlugin = require("mini-css-extract-plugin");module.exports = {devtool:"cheap-module-eval-source-map",mode:"development",resolve: {extensions: ['.js', '.vue', '.json'],alias: {'vue$': 'vue/dist/vue.esm.js'}},entry:{entry:"./client/main.js",vue:"vue"},output:{path:path.resolve( __dirname,"dist" ),filename:"[name].js",publicPath:"http://127.0.0.1:9001/"},module:{rules:[{test: /\.js$/,use: 'babel-loader',exclude: /node_modules/},{test: /\.css$/,use:[MiniCssExtractPlugin.loader,{loader: 'css-loader?modules=false',options: {importLoaders: 1,minimize: true}}]},{test: /\.vue$/,loader: 'vue-loader'}]},plugins:[new htmlPlugin({minify:{removeAttributeQuotes:true},hash:true,template:"./index.html"}),new VueLoaderPlugin(),new MiniCssExtractPlugin({filename: "[name].css",chunkFilename: "[id].css"})],devServer:{    contentBase:path.resolve( __dirname,"dist" ),host:"127.0.0.1",compress:true,port:9001}
};
7.VUE热更新
只需要安装vue-hot-reload-api依赖 配合就能够轻松实现。
8.VUE路由
安装vue-router 然后修改main.js如下,并在同层目录生成router.config.js,此时的就能根据你的喜好去建立路由了。
import Vue from 'vue';
import App from './App';import VueRouter from 'vue-router';
Vue.use(VueRouter);
import routes from './router.config.js';
const router = new VueRouter({routes: routes
});new Vue({el: '#app',router,components: { App },template: '<App/>'
})
9.KOA的引入和基础测试
const Koa = require('koa');
const Rrouter = require('koa-router');
const cors = require('koa2-cors');( async () => {const app = new Koa();app.use( cors() );const router = new Rrouter();router.get('/getFirstMessage',async ctx=>{ctx.body = {message:"get"} });app.use(router.routes()).use(router.allowedMethods());app.listen(9001 ,async ()=>{console.log("CONNECTED")});
} )()
http://127.0.0.1:9001/getFirstMessage
此时就能够通过接口拿到数据
10.改装路由---使用装饰器
在server文件夹下建立如上文件夹和文件

npm i -S babel-core babel-plugin-transform-decorators-legacy babel-polyfill ramda lodash babel-preset-stage-0
/*装饰器注册*/
require('babel-core/register')();
require('babel-polyfill');const Koa = require('koa');/*该方法用来批量引入中间件*/
const useMiddlewares = require('./lib/useMiddlewares');( async () => {const app = new Koa();await useMiddlewares(app);app.listen(9001 ,async ()=>{console.log("CONNECTED")});
} )()