LAMP即Linux+Apache+MySQL+PHP,是网上最受欢迎的站点架设解决方案。本文以一个实例介绍其基本的应用过程。
8.4.1 企业需求
公司要为自己网站搭建了自己的网站,内网采用的IP地址为192.168.16.80,要求管理员可在网上方便进行用户管理。
8.4.2 软件包安装及基本测试
1、安装Apache
[root@Lsv2 ~]# rpm -qa | grep httpd //查询已安装包
httpd-2.2.3-11.el5
httpd-manual-2.2.3-11.el5
system-config-httpd-1.3.3.1-1.el5
httpd-2.2.3-11.el5
httpd-manual-2.2.3-11.el5
system-config-httpd-1.3.3.1-1.el5
[root@Lsv2 ~]# mount /dev/cdrom /mnt/cdrom //光驱挂载
mount: block device /dev/cdrom is write-protected, mounting read-only
mount: block device /dev/cdrom is write-protected, mounting read-only
[root@Lsv2 ~]# cd /mnt/cdrom/Server/
[root@Lsv2 Server]# rpm -ivh httpd-devel-2.2.3-11.el5.i386.rpm
warning: httpd-devel-2.2.3-11.el5.i386.rpm: Header V3 DSA signature: NOKEY, key ID 37017186
error: Failed dependencies: //提示需要先安装其它相关联程序
apr-devel is needed by httpd-devel-2.2.3-11.el5.i386
apr-util-devel is needed by httpd-devel-2.2.3-11.el5.i386
[root@Lsv2 Server]# rpm -ivh apr-devel-1.2.7-11.i386.rpm
warning: apr-devel-1.2.7-11.i386.rpm: Header V3 DSA signature: NOKEY, key ID 37017186
Preparing... ########################################### [100%]
1:apr-devel ########################################### [100%]
[root@Lsv2 Server]# rpm -ivh apr-util-devel-1.2.7-6.i386.rpm
warning: apr-util-devel-1.2.7-6.i386.rpm: Header V3 DSA signature: NOKEY, key ID 37017186
Preparing... ########################################### [100%]
1:apr-util-devel ########################################### [100%]
[root@Lsv2 Server]# rpm -ivh httpd-devel-2.2.3-11.el5.i386.rpm
warning: httpd-devel-2.2.3-11.el5.i386.rpm: Header V3 DSA signature: NOKEY, key ID 37017186
Preparing... ########################################### [100%]
1:httpd-devel ########################################### [100%]
2、安装MYSQL
[root@Lsv2 Server]# rpm -ivh perl-DBI-1.52-1.fc6.i386.rpm
warning: perl-DBI-1.52-1.fc6.i386.rpm: Header V3 DSA signature: NOKEY, key ID 37017186
Preparing... ########################################### [100%]
package perl-DBI-1.52-1.fc6 is already installed
[root@Lsv2 Server]# rpm -ivh mysql-5.0.22-2.1.0.1.i386.rpm
warning: mysql-5.0.22-2.1.0.1.i386.rpm: Header V3 DSA signature: NOKEY, key ID 37017186
Preparing... ########################################### [100%]
package mysql-5.0.22-2.1.0.1 is already installed
[root@Lsv2 Server]# rpm -ivh perl-DBD-MySQL-3.0007-1.fc6.i386.rpm
warning: perl-DBD-MySQL-3.0007-1.fc6.i386.rpm: Header V3 DSA signature: NOKEY, key ID 37017186
Preparing... ########################################### [100%]
1:perl-DBD-MySQL ########################################### [100%]
[root@Lsv2 Server]# rpm -ivh mysql-server-5.0.22-2.1.0.1.i386.rpm
warning: mysql-server-5.0.22-2.1.0.1.i386.rpm: Header V3 DSA signature: NOKEY, key ID 37017186
Preparing... ########################################### [100%]
1:mysql-server ########################################### [100%]
3、安装PHP
[root@Lsv2 Server]# rpm -ivh php-common-5.1.6-15.el5.i386.rpm
warning: php-common-5.1.6-15.el5.i386.rpm: Header V3 DSA signature: NOKEY, key ID 37017186
Preparing... ########################################### [100%]
package php-common-5.1.6-15.el5 is already installed
[root@Lsv2 Server]# rpm -ivh php-cli-5.1.6-15.el5.i386.rpm
warning: php-cli-5.1.6-15.el5.i386.rpm: Header V3 DSA signature: NOKEY, key ID 37017186
Preparing... ########################################### [100%]
package php-cli-5.1.6-15.el5 is already installed
[root@Lsv2 Server]# rpm -ivh php-5.1.6-15.el5.i386.rpm
warning: php-5.1.6-15.el5.i386.rpm: Header V3 DSA signature: NOKEY, key ID 37017186
Preparing... ########################################### [100%]
package php-5.1.6-15.el5 is already installed
[root@Lsv2 Server]# rpm -ivh php-pdo-5.1.6-15.el5.i386.rpm
warning: php-pdo-5.1.6-15.el5.i386.rpm: Header V3 DSA signature: NOKEY, key ID 37017186
Preparing... ########################################### [100%]
package php-pdo-5.1.6-15.el5 is already installed
[root@Lsv2 Server]# rpm -ivh php-mysql-5.1.6-15.el5.i386.rpm
warning: php-mysql-5.1.6-15.el5.i386.rpm: Header V3 DSA signature: NOKEY, key ID 37017186
Preparing... ########################################### [100%]
package php-mysql-5.1.6-15.el5 is already installed
[root@Lsv2 Server]#
======================================================================================= 4、mysql测试
[root@Lsv2 Server]# service mysqld start //启动服务
初始化 MySQL 数据库: WARNING: The host 'Lsv2.as5.com' could not be looked up with resolveip.
This probably means that your libc libraries are not 100 % compatible
with this binary MySQL version. The MySQL daemon, mysqld, should work
normally with the exception that host name resolving will not work.
This means that you should use IP addresses instead of hostnames
when specifying MySQL privileges !
Installing all prepared tables
Fill help tables
To start mysqld at boot time you have to copy support-files/mysql.server
to the right place for your system
to the right place for your system
PLEASE REMEMBER TO SET A PASSWORD FOR THE MySQL root USER !
To do so, start the server, then issue the following commands:
/usr/bin/mysqladmin -u root password 'new-password'
/usr/bin/mysqladmin -u root -h Lsv2.as5.com password 'new-password'
See the manual for more instructions.
To do so, start the server, then issue the following commands:
/usr/bin/mysqladmin -u root password 'new-password'
/usr/bin/mysqladmin -u root -h Lsv2.as5.com password 'new-password'
See the manual for more instructions.
You can start the MySQL daemon with:
cd /usr ; /usr/bin/mysqld_safe &
cd /usr ; /usr/bin/mysqld_safe &
You can test the MySQL daemon with the benchmarks in the 'sql-bench' directory:
cd sql-bench ; perl run-all-tests
cd sql-bench ; perl run-all-tests
Please report any problems with the /usr/bin/mysqlbug script!
The latest information about MySQL is available on the web at
http://www.mysql.com
Support MySQL by buying support/licenses at http://shop.mysql.com
[确定]
启动 MySQL: [确定] //启动服务成功
http://www.mysql.com
Support MySQL by buying support/licenses at http://shop.mysql.com
[确定]
启动 MySQL: [确定] //启动服务成功
[root@Lsv2 Server]# mysqladmin -u root password 123456 //设置MySql的root管理口令
[root@Lsv2 Server]# mysql -u root -p //用root用户登录
Enter password:
Welcome to the MySQL monitor. Commands end with ; or \g.
Your MySQL connection id is 3 to server version: 5.0.22
Type 'help;' or '\h' for help. Type '\c' to clear the buffer.
mysql>show databases; //查看现有数据库
+--------------------+
| Database |
+--------------------+
| information_schema |
| mysql |
| test |
+--------------------+
3 rows in set (0.01 sec)
+--------------------+
| Database |
+--------------------+
| information_schema |
| mysql |
| test |
+--------------------+
3 rows in set (0.01 sec)
mysql>use mysql //进入mysql数据库
Reading table information for completion of table and column names
You can turn off this feature to get a quicker startup with -A
Reading table information for completion of table and column names
You can turn off this feature to get a quicker startup with -A
Database changed
mysql>show tables; //显示库中的表
+---------------------------+
| Tables_in_mysql |
+---------------------------+
| columns_priv |
| db |
| func |
| help_category |
| help_keyword |
| help_relation |
| help_topic |
| host |
| proc |
| procs_priv |
| tables_priv |
| time_zone |
| time_zone_leap_second |
| time_zone_name |
| time_zone_transition |
| time_zone_transition_type |
| user |
+---------------------------+
17 rows in set (0.01 sec)
mysql> quit //退出
Bye
[root@Lsv2 Server]#
--------------------------------------------------------------
5、测试php
Bye
[root@Lsv2 Server]#
--------------------------------------------------------------
5、测试php
[root@Lsv2 Server]# cd /var/www/html
[root@Lsv2 html]# ls
[root@Lsv2 html]# vim index.php //建立页面
[root@Lsv2 html]# ls
[root@Lsv2 html]# vim index.php //建立页面
<html>
<head>
<title>My First PHP Test Page</title>
</head>
<body bgcolor="red">
<? echo "Hello World";?>
<? phpinfo()?>
</body>
</html>
~
[root@Lsv2 html]# vim /etc/httpd/conf/httpd.conf //编辑httpd.conf文件
<head>
<title>My First PHP Test Page</title>
</head>
<body bgcolor="red">
<? echo "Hello World";?>
<? phpinfo()?>
</body>
</html>
~
[root@Lsv2 html]# vim /etc/httpd/conf/httpd.conf //编辑httpd.conf文件
……未设置部分略过
DirectoryIndex index.html index.html.var index.php //只需在此行添加index.php即可
DirectoryIndex index.html index.html.var index.php //只需在此行添加index.php即可
……未设置部分略过
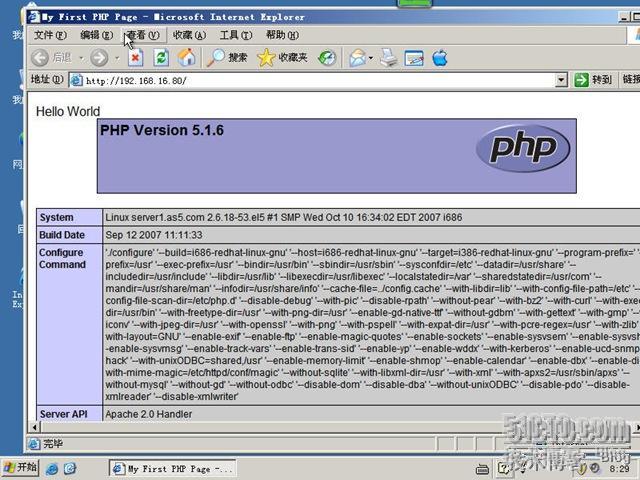
[root@Lsv2 html]# service httpd restart
停止 httpd:[失败]
启动 httpd:[确定]
停止 httpd:[失败]
启动 httpd:[确定]
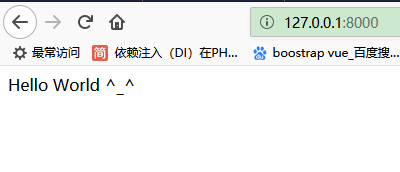
XP客户端访问测试:http://192.168.16.80/
8.4.3 编辑Apache配置文件以满足需求
[root@Lsv2 Server]# vim /etc/httpd/conf/httpd.conf
…… //未设置部分略过
251 ServerAdmin root@as5.com //管理员邮箱,注意前面为行号,以下相同
265 ServerName 192.168.16.80:80
391 DirectoryIndex index.html index.html.var index.php
849 Alias /user/ "/var/www/netsky/user/" //建立别名
747 AddDefaultCharset UTF-8
1005 <VirtualHost 192.168.16.80:80> //以下建立基于域名的虚拟主机
1006 ServerAdmin root@as5.com
1007 DocumentRoot /var/www/netsky/
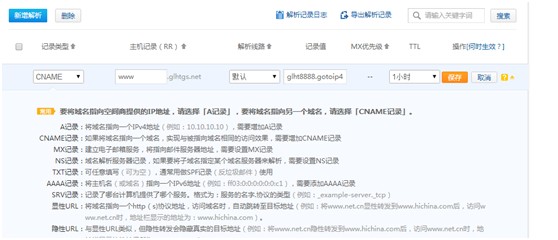
1008 ServerName www.netsky.com //域名需要在DNS中已建立A记录
1009 </VirtualHost>
[root@Lsv2 Server]# mkdir /var/www/netsky/user
[root@Lsv2 Server]# service httpd restart
[root@Lsv2 Server]# service named restart
注:DNS配置请参考http://lgzeng2360.blog.51cto.com/275998/71625
8.4.4 Mysql和PHP设置并测试
主要实现php读取mysql中的数据,从而实现交互式动态HTML页面,并对数据资源进行高效的存取。
1、创建数据库
下面开始创建基于Web的数据库。先建立数据库,并输入一些数据。
[root@Lsv2 named]# mysql -p
Enter password: //输入root口令
Welcome to the MySQL monitor. Commands end with ; or \g.
Your MySQL connection id is 7 to server version: 5.0.22
mysql>create database db1; //创建数据库DB1
Query OK, 1 row affected (0.03 sec)
mysql> use db1;
Database changed
mysql> create table usertable( //在DB1中创建一张表,取名为usertable
>name char(30),
>email char(60),
> phone char(20)
>);
Query OK, 0 rows affected (0.02 sec)
mysql> INSERT INTO usertable VALUES("zhangshan","zs006@126.com","028-87720012");
Query OK, 1 row affected (0.01 sec) //向表中输入数据成功
mysql>INSERT INTO usertable VALUES("lishi","lishi@163.net","028-87720066");
Query OK, 1 row affected (0.00 sec)
mysql> INSERT INTO usertable VALUES("wangwu","wangw007@263.net","028-87720077");
Query OK, 1 row affected (0.01 sec)
mysql> INSERT INTO usertable VALUES("tom","tom@263.net","028-87720078");
Query OK, 1 row affected (0.01 sec)
mysql> INSERT INTO usertable VALUES("Rafi","rf@126.com","028-8997756");
Query OK, 1 row affected (0.01 sec)
mysql>select * from usertable; //查看表的信息
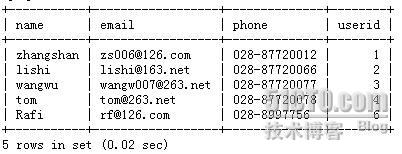
mysql> exit
Bye
You have new mail in /var/spool/mail/root
2、新建PHP脚本
建立数据库后,可以使用PHP程序取出DB1库中的数据并以HTML格式输出。
下面我们针对www.netsky.com进行操作。
[root@Lsv2 named]# cd /var/www/netsky/user
[root@Lsv2 user]# vim index.php
<html>
<head><title>站点用户数据库</title>
</head>
<body bgcolor="#e0c100" text="#000000" link="#0000cc" vlink="#ff0033">
<h1><font color=blue size=5 face="宋体">当前用户信息</font></h1>
<hr/>
<?php
$db=mysql_connect("localhost","root","123456"); //设置root连接到mysqal
mysql_select_db("db1",$db); //设置访问的数据库
$result = mysql_query("SELECT * FROM usertable",$db); //设置访问的表
while ( $row=mysql_fetch_array($result)) { //循环设置
echo "Name: ".$row[name]." ";
echo "E-Mail: ".$row[email]." ";
echo "Phone: ".$row[phone]."<br> ";
}
?>
<p><a href="add.php">添加新用户</a>
</body>
</html>
3、重启服务
[root@Lsv2 Server]# service httpd restart
[root@Lsv2 Server]# service mysqld restart
4、客户端访问测试
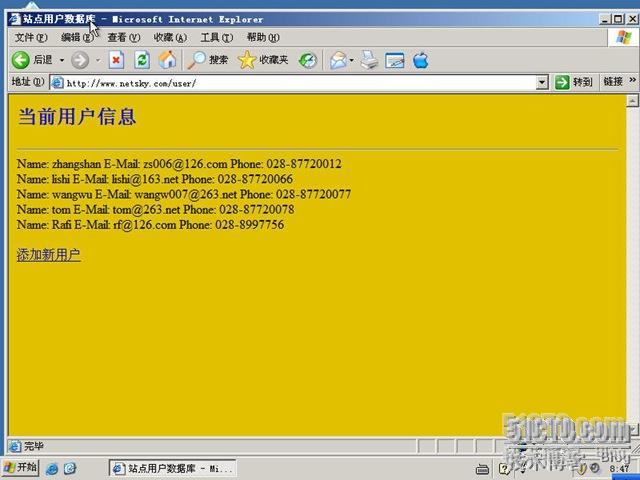
可见通过php成功读取了mysql数据库中的信息。而管理员在网上访问用户管理网址即可实现对新用户的添加和现有用户属性的修改。
本文出自 “lgzeng” 博客,请务必保留此出处http://lgzeng2360.blog.51cto.com/275998/162488
本文出自 51CTO.COM技术博客转载于:https://blog.51cto.com/mcshell/172581