😊如果写的可以帮到你,可以点个赞吗,你的支持就是我写下去的动力。😊
本文阅读大概 10 分钟, 自己写加思考大概 1 ~ 2 小时。建议:代码可以手抄, 但不要复制。
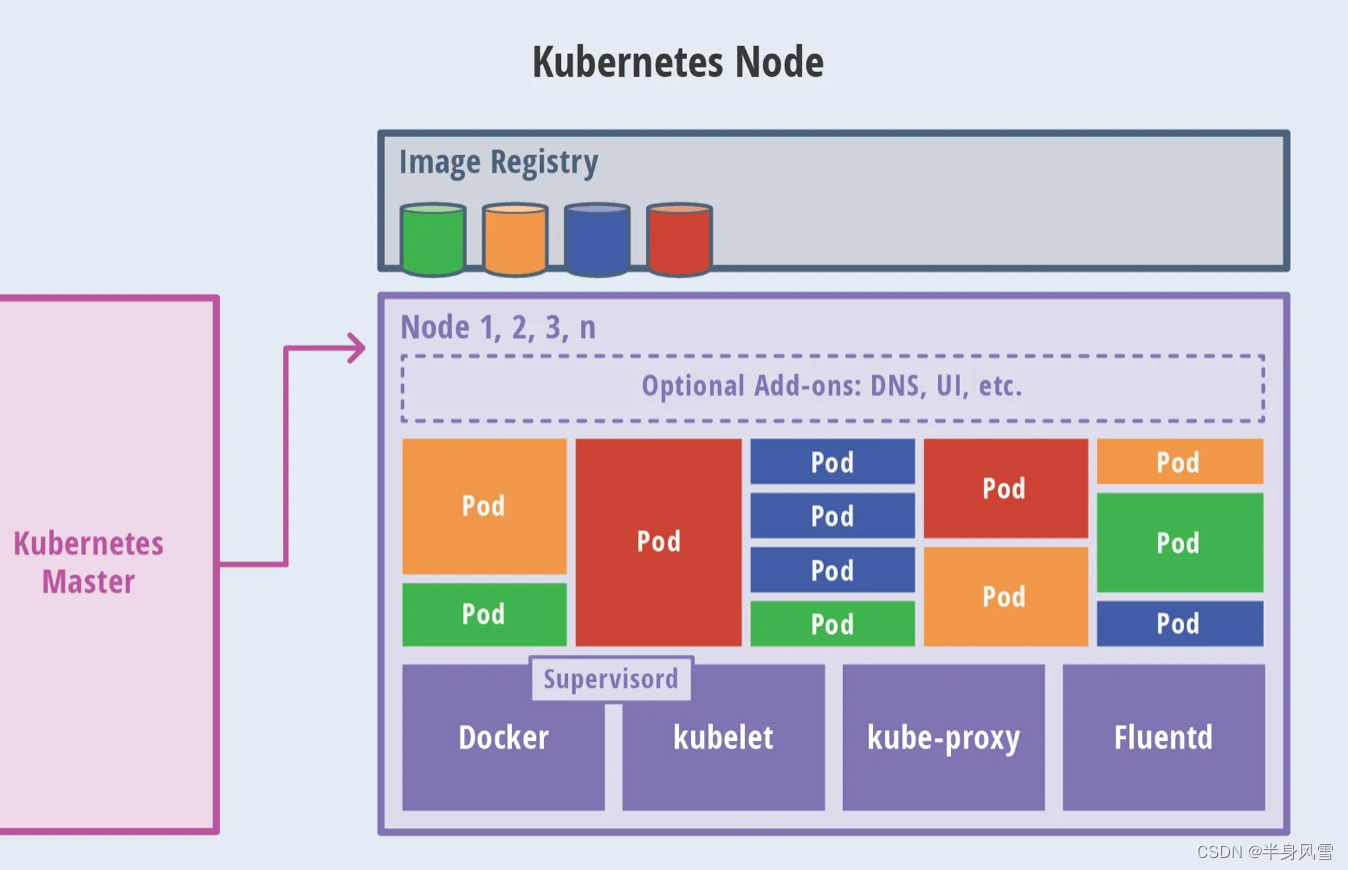
1. 整体框架
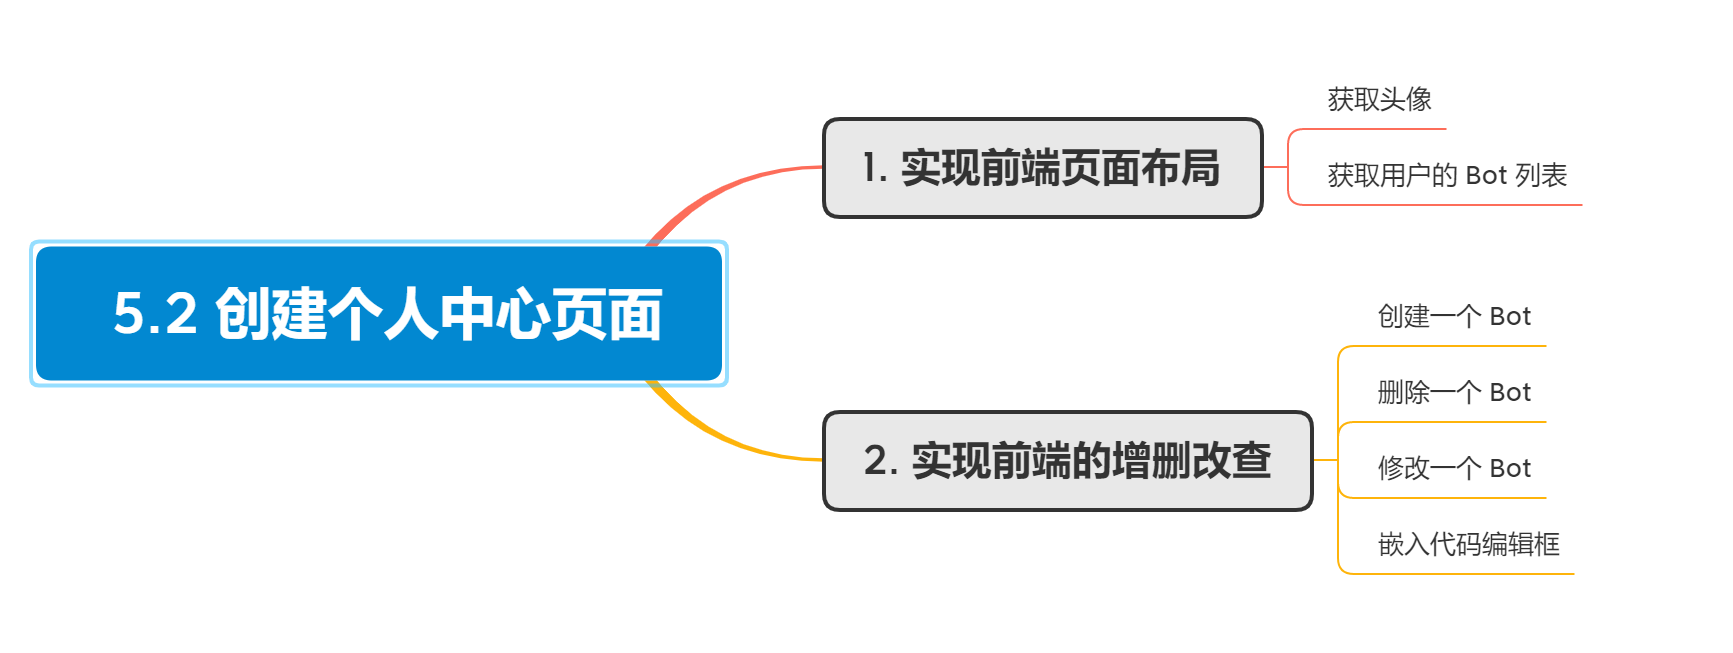
2. 前端页面布局
使用 bootstrap 的 grids system 进行布局。页面规划如下:
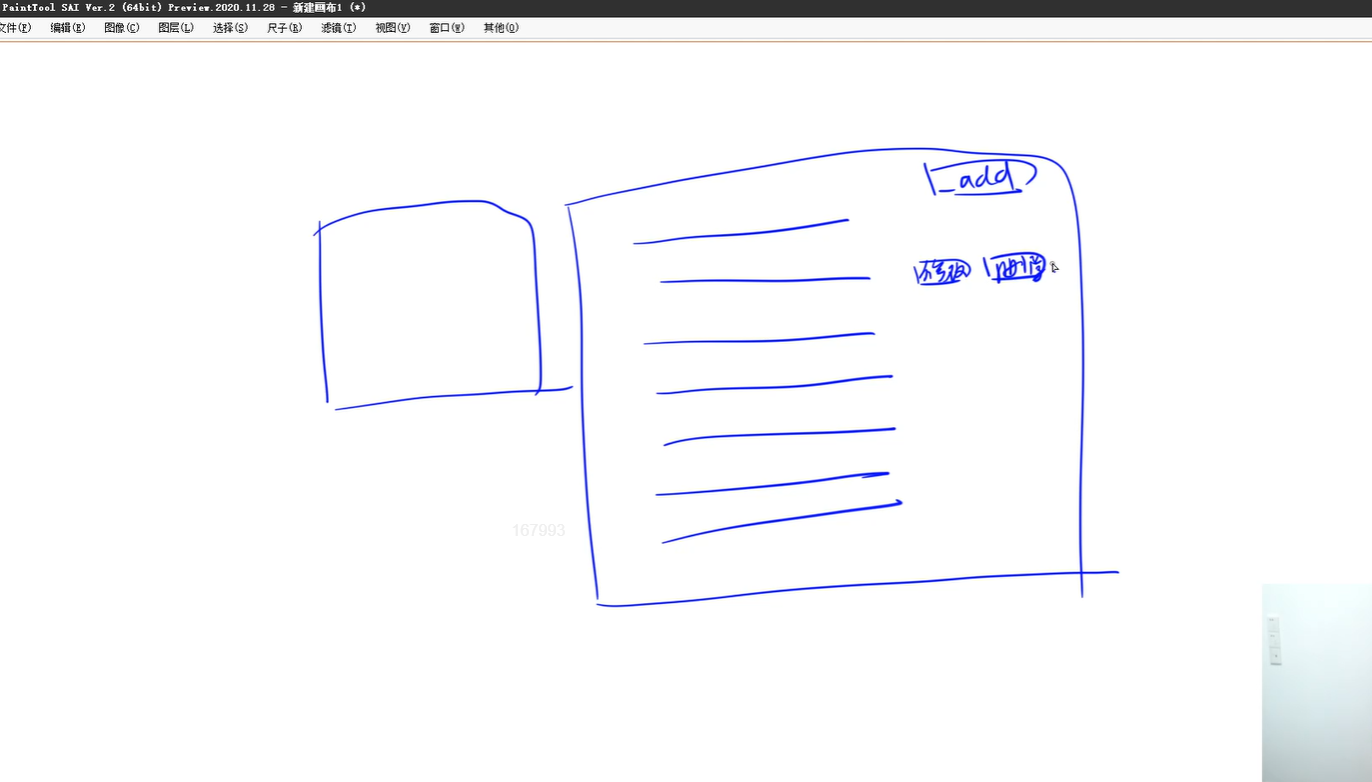
在 bootstrap 的网址搜索 grids system。
一行分为12份,左边3份,为头像;右边9份,白色区域 cards,加上按钮创建 bot,获取 Bot 列表
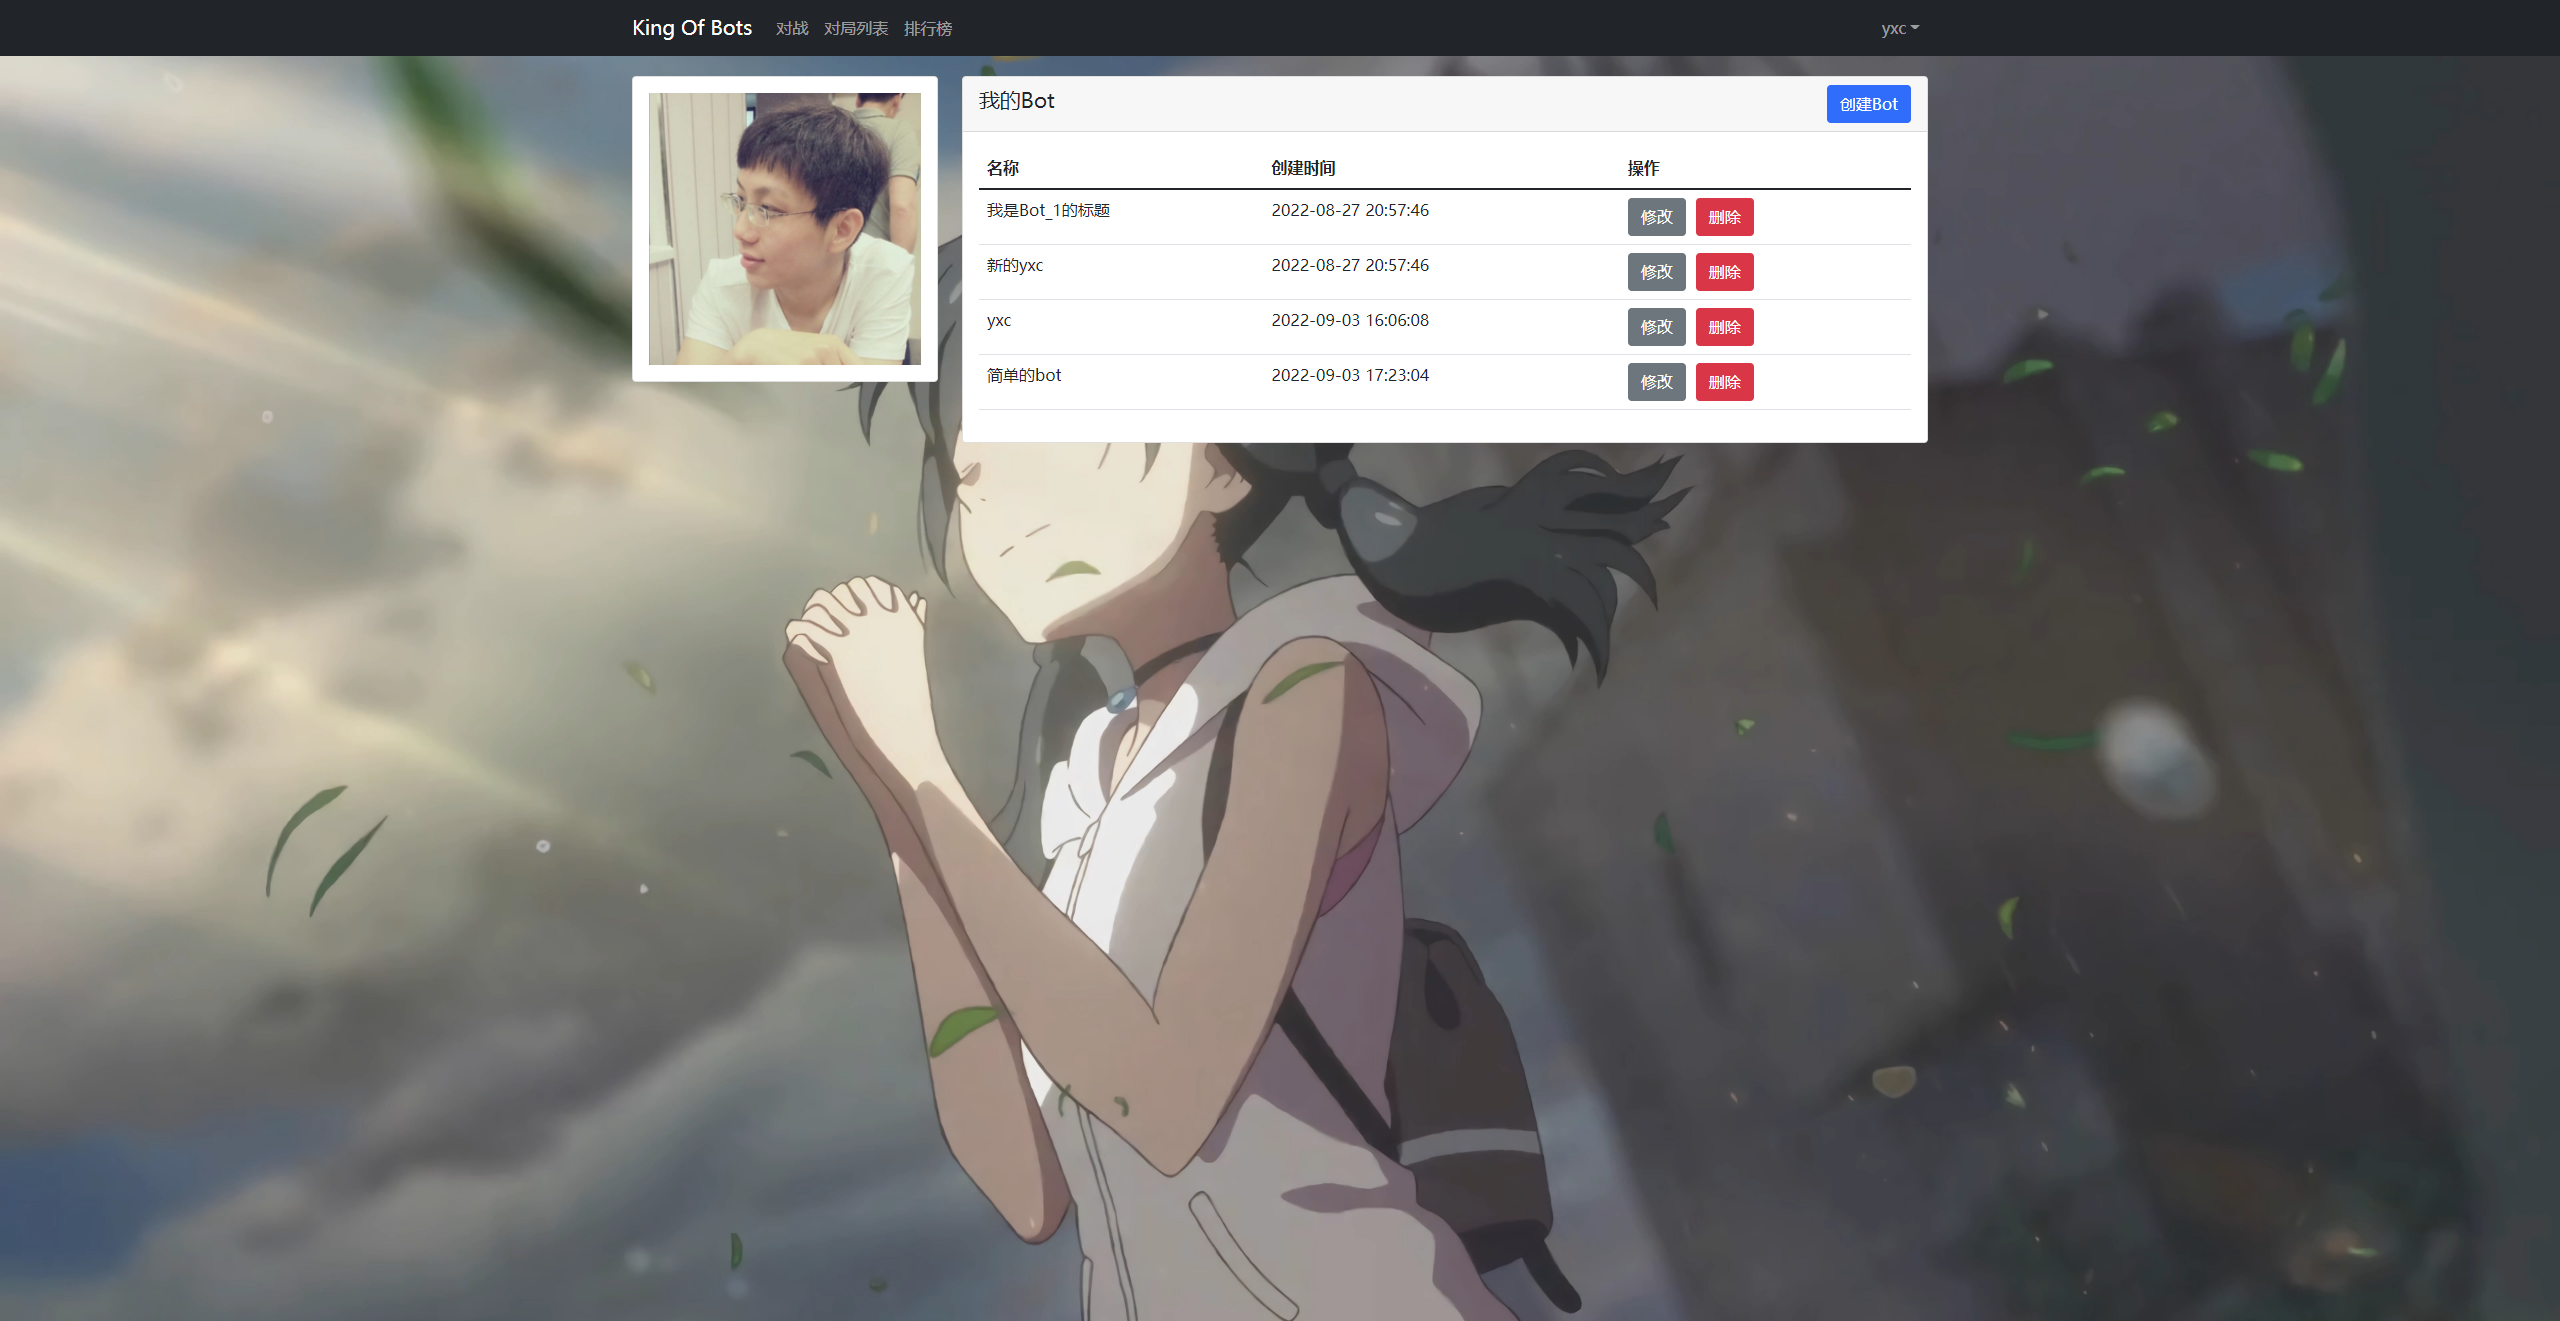
在 views.user.bot.UserBotIndexView.vue 下修改,实现基本的个人 bot 信息展示。
<template><div class="container"><div class="row"><div class="col-3"><div class="card" style="margin-top: 20px;"><div class="card-body"><img :src="$store.state.user.photo" alt="" style="width: 100%;"></div></div></div><div class="col-9"><div class="card" style="margin-top: 20px;"><div class="card-header"><span style="font-size: 130%;">我的Bot</span><button type="button" class="btn btn-primary float-end">创建Bot</button></div><div class="card-body"><thead><tr><th>名称</th><th>创建时间</th><th>操作</th></tr><tbody><tr><td>{{ bot.title }}</td><td>{{ bot.createtime }}</td><td><button type="button" class="btn btn-secondary" style="margin-right: 10px;">修改</button><button type="button" class="btn btn-danger">删除</button></td></tr></tbody></thead></div></div></div></div></div></template>
实现 refresh_bot,获取上节课的 API: /user/bot/getlist/ 查询 bot 列表,通过获取后端信息把数据展示在前端上。
<script>
import { ref, reactive } from 'vue'
import $ from 'jquery'
import { useStore } from 'vuex'export default {const store = useStore();const refresh_bots = () => {$.ajax({url: "http://127.0.0.1:8080/user/bot/getlist/",type: "get",headers: {Authorization: "Bearer " + store.state.user.token,},success(resp) {bots.value = resp;}})}refresh_bots();}
}
</script>
获取用户信息成功:
3. 前端页面创建、修改、删除 Bot
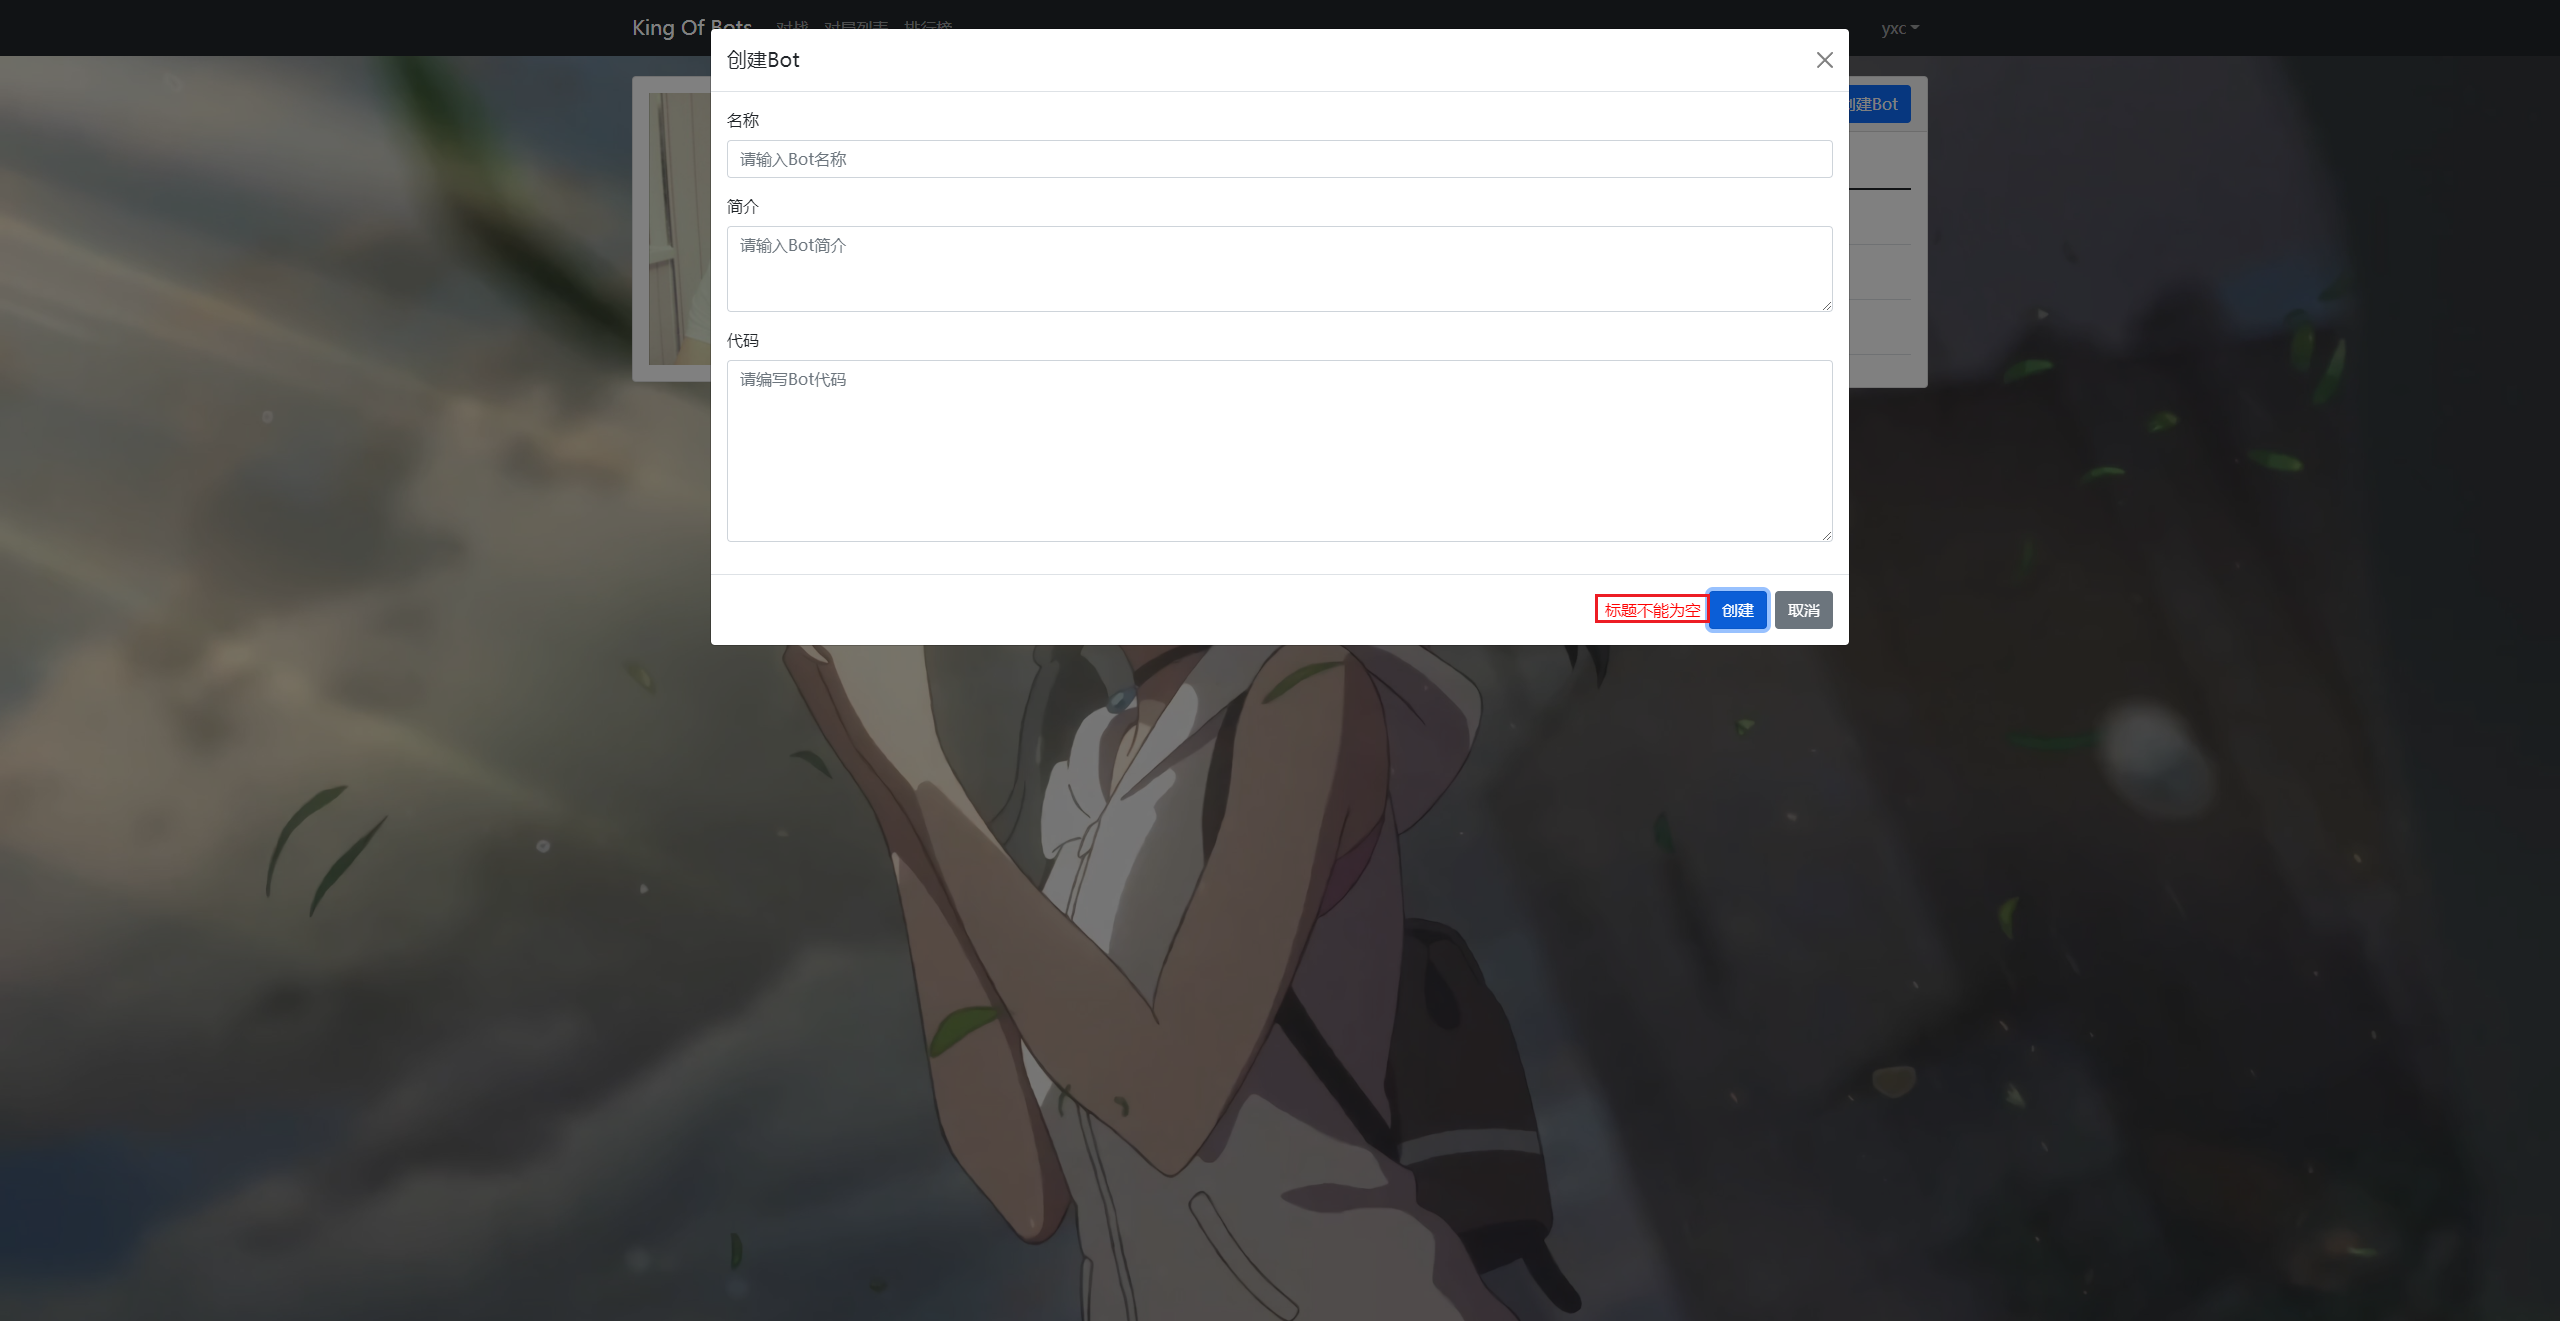
3.1 创建一个 Bot
在点击 创建Bot 按钮的时候需要一个弹窗。在 bootstrap 中寻找一个 modals :
在 views.user.bot.UserBotIndexView.vue 下修改,增加一个模态框,然后丰富模态框的内容。
<template><div class="container"><div class="row"><div class="col-3"><div class="card" style="margin-top: 20px;"><div class="card-body"><img :src="$store.state.user.photo" alt="" style="width: 100%;"></div></div></div><div class="col-9"><div class="card" style="margin-top: 20px;"><div class="card-header"><span style="font-size: 130%;">我的Bot</span><button type="button" class="btn btn-primary float-end">创建Bot</button>//增加一个模态框<div class="modal fade" id="add-bot-btn" tabindex="-1"><div class="modal-dialog modal-xl"><div class="modal-content"><div class="modal-header"><h5 class="modal-title" id="exampleModalLabel">创建Bot</h5><button type="button" class="btn-close" data-bs-dismiss="modal" aria-label="Close"></button></div><div class="modal-body"><div class="mb-3"><label for="add-bot-title" class="form-label">名称</label><input v-model="botadd.title" type="text" class="form-control" id="add-bot-title" placeholder="请输入Bot名称"></div><div class="mb-3"><label for="add-bot-description" class="form-label">简介</label><textarea v-model="botadd.sescription" class="form-control" id="add-bot-description" rows="3" placeholder="请输入Bot简介"></textarea></div><div class="mb-3"><label for="add-bot-code" class="form-label">代码</label><textarea v-model="botadd.content" class="form-control" id="add-bot-content" rows="3" placeholder="请输入Bot代码"></textarea></div></div><div class="modal-footer">//增加报错信息<div class="error-message">{{ botadd.error_message }}</div><button type="button" class="btn btn-primary" @click="add_bot">创建</button><button type="button" class="btn btn-secondary" data-bs-dismiss="modal">取消</button></div></div></div></div></div><div class="card-body"><thead><tr><th>名称</th><th>创建时间</th><th>操作</th></tr><tbody><tr><td>{{ bot.title }}</td><td>{{ bot.createtime }}</td><td><button type="button" class="btn btn-secondary" style="margin-right: 10px;">修改</button><button type="button" class="btn btn-danger">删除</button></td></tr></tbody></thead></div></div></div></div></div></template>
增加一个 add_bot 函数:
<script>
import { ref, reactive } from 'vue'
import $ from 'jquery'
import { useStore } from 'vuex'export default {const store = useStore();const botadd = reactive({title: "",description: "",content: "",error_message: "",});const refresh_bots = () => {$.ajax({url: "http://127.0.0.1:8080/user/bot/getlist/",type: "get",headers: {Authorization: "Bearer " + store.state.user.token,},success(resp) {bots.value = resp;}})}refresh_bots();//创建一个 botconst add_bot = () => {botadd.error_message = "";$.ajax({url: "http://127.0.0.1:8080/user/bot/add/",type: "post",data: {title: botadd.title,description: botadd.description,content: botadd.content,},headers: {Authorization: "Bearer " + store.state.user.token,},success(resp) {if (resp.error_message === "success") {botadd.title = "";botadd.description = "";botadd.content = "";Modal.getInstance("#add-bot-btn").hide();refresh_bots();} else {botadd.error_message = resp.error_message;}}})}return {bots,botadd,add_bot,}}
}
</script>
创建完成后需要绑定前端的信息。在前面的地方加上 v-model,同时增加一个 触发事件。
<div class="modal-body"><div class="mb-3"><label for="add-bot-title" class="form-label">名称</label><input v-model="botadd.title" type="text" class="form-control" id="add-bot-title" placeholder="请输入Bot名称"></div><div class="mb-3"><label for="add-bot-description" class="form-label">简介</label><textarea v-model="botadd.sescription" class="form-control" id="add-bot-description" rows="3" placeholder="请输入Bot简介"></textarea></div><div class="mb-3"><label for="add-bot-code" class="form-label">代码</label><textarea v-model="botadd.content" class="form-control" id="add-bot-content" rows="3" placeholder="请输入Bot代码"></textarea></div></div><div class="modal-footer">//增加报错信息<div class="error-message">{{ botadd.error_message }}</div><button type="button" class="btn btn-primary" @click="add_bot">创建</button><button type="button" class="btn btn-secondary" data-bs-dismiss="modal">取消</button></div>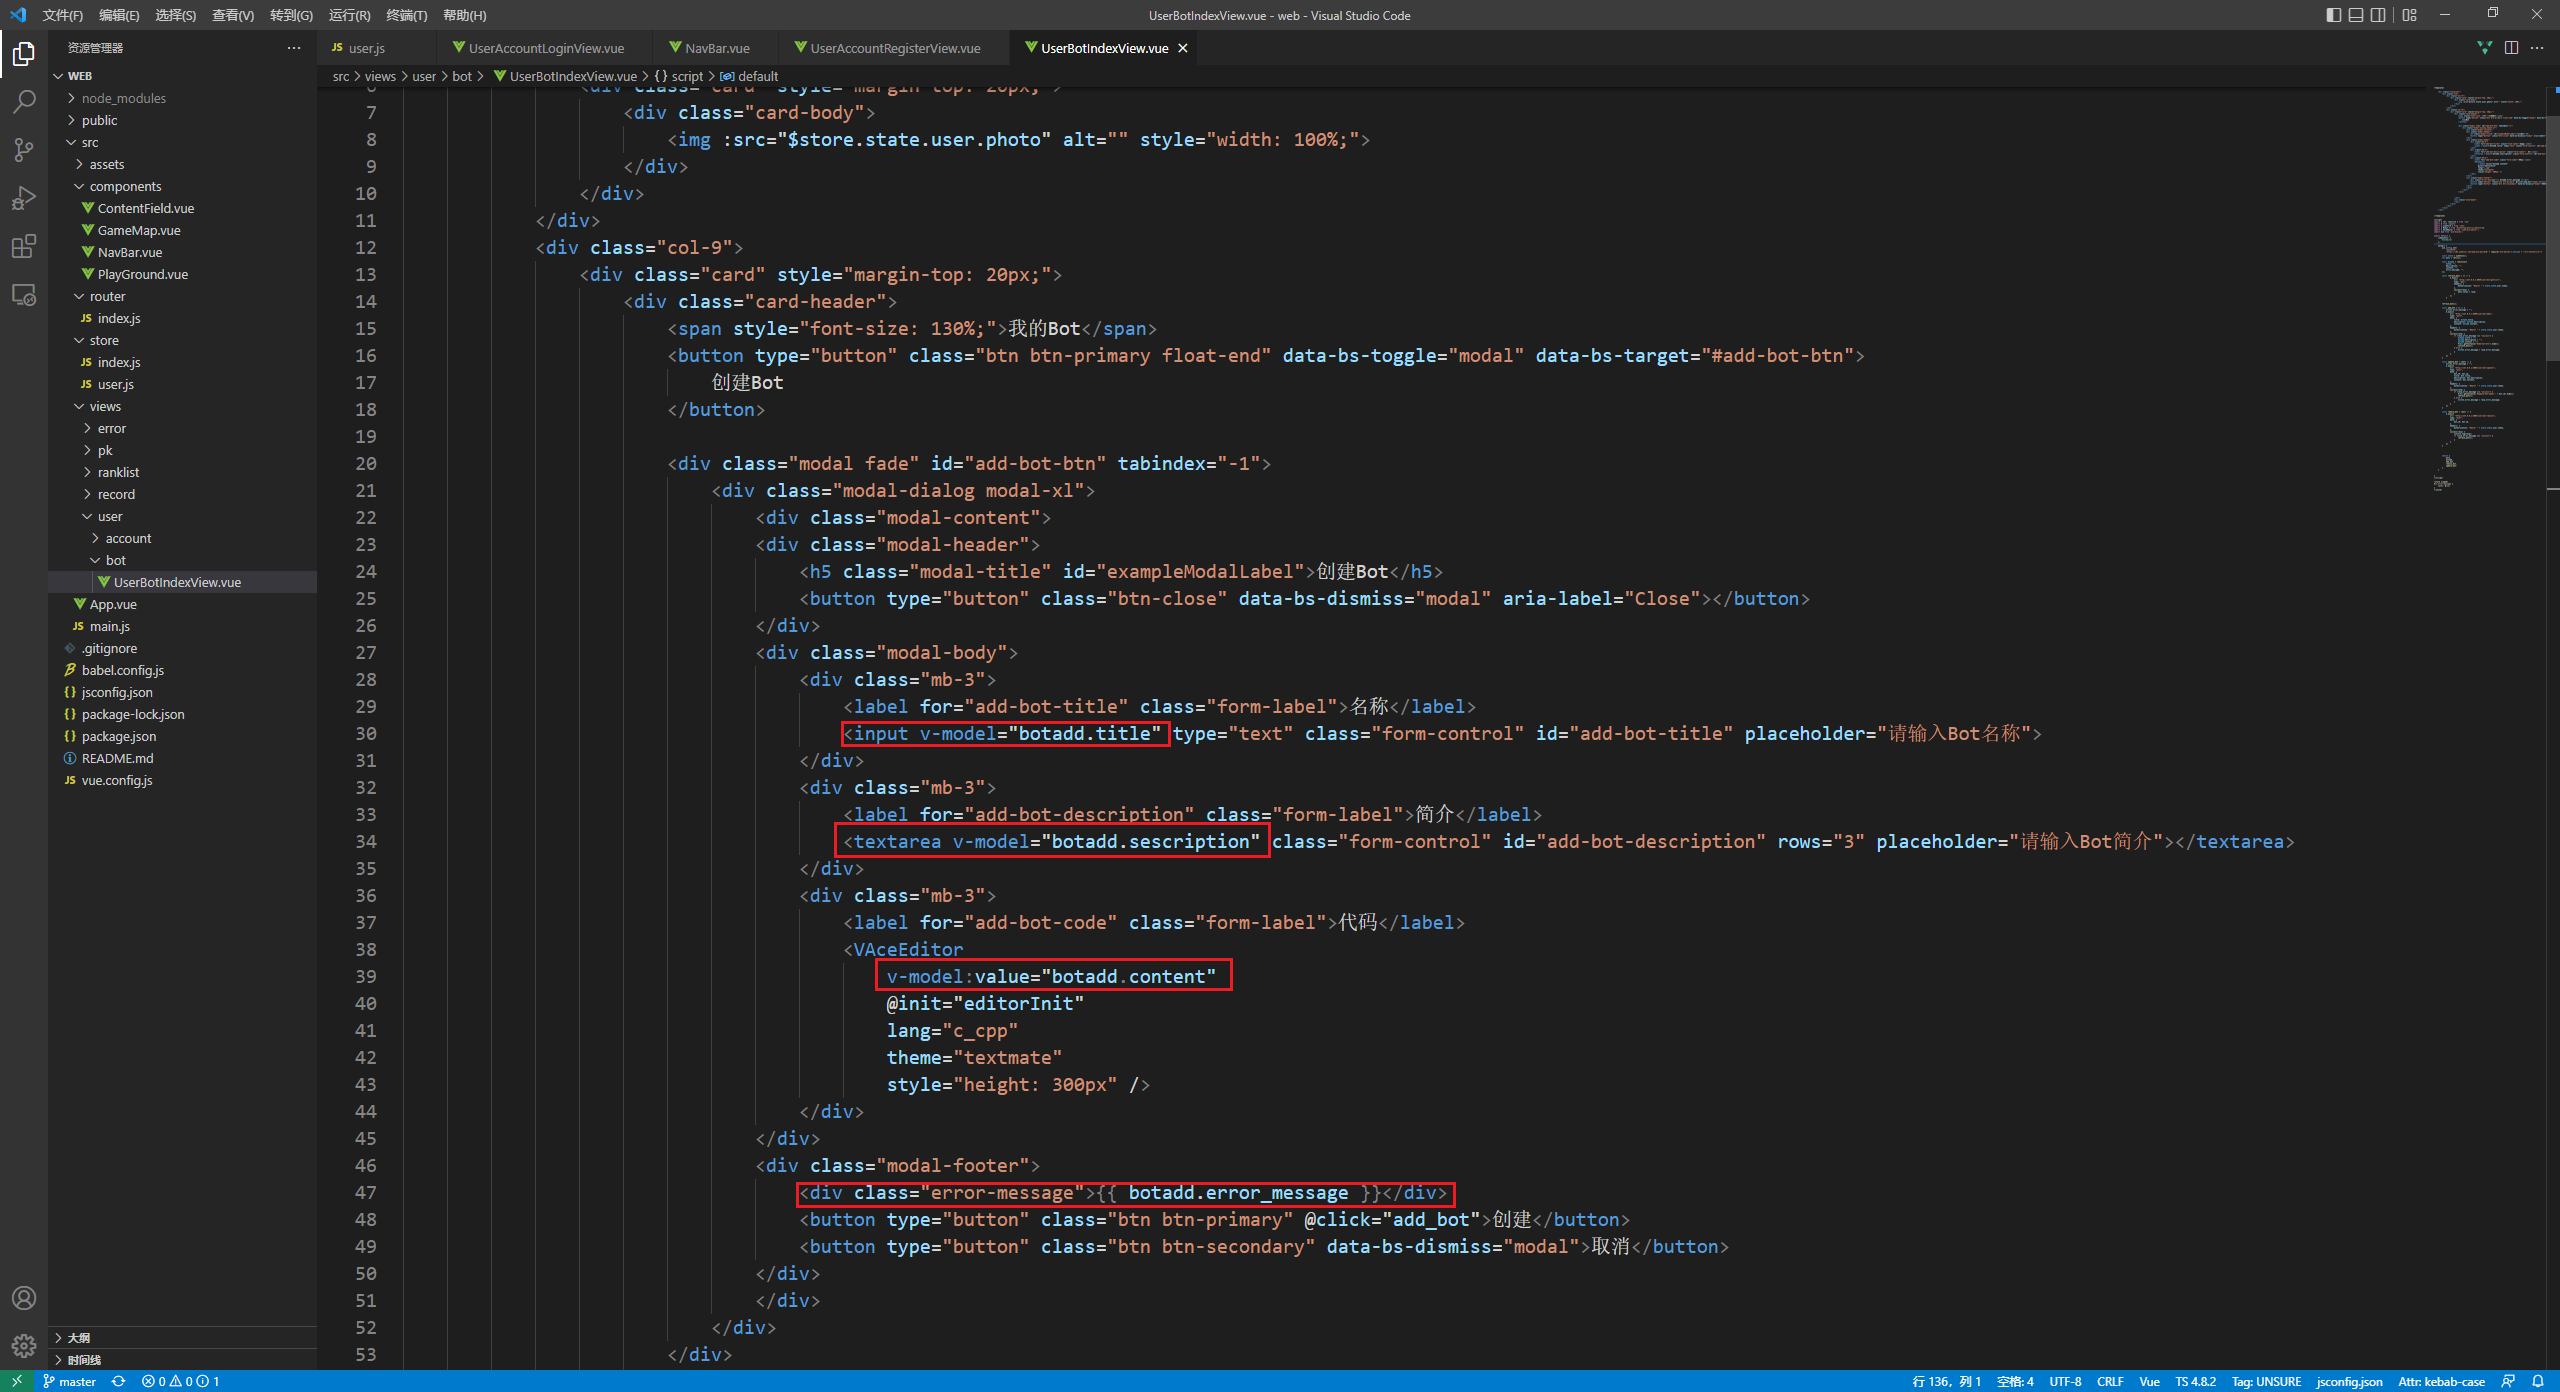
如果创建 Bot 的时候时间出现问题:在后端的 pojo 里修改,加上时区:
package com.kob.backend.pojo;import com.baomidou.mybatisplus.annotation.IdType;
import com.baomidou.mybatisplus.annotation.TableId;
import com.fasterxml.jackson.annotation.JsonFormat;
import lombok.AllArgsConstructor;
import lombok.Data;
import lombok.NoArgsConstructor;import java.util.Date;@Data
@NoArgsConstructor
@AllArgsConstructorpublic class Bot {@TableId(type = IdType.AUTO)private Integer id; //在pojo里最好用Integer,否则会报警告private Integer userId; //pojo里要用驼峰命名法和数据库的下划线对应private String title;private String description;private String Content;private Integer rating;@JsonFormat(pattern = "yyyy-MM-dd HH:mm:ss", timezone = "Asia/Shanghai")private Date createtime;@JsonFormat(pattern = "yyyy-MM-dd HH:mm:ss", timezone = "Asia/Shanghai")private Date modifytime;
}
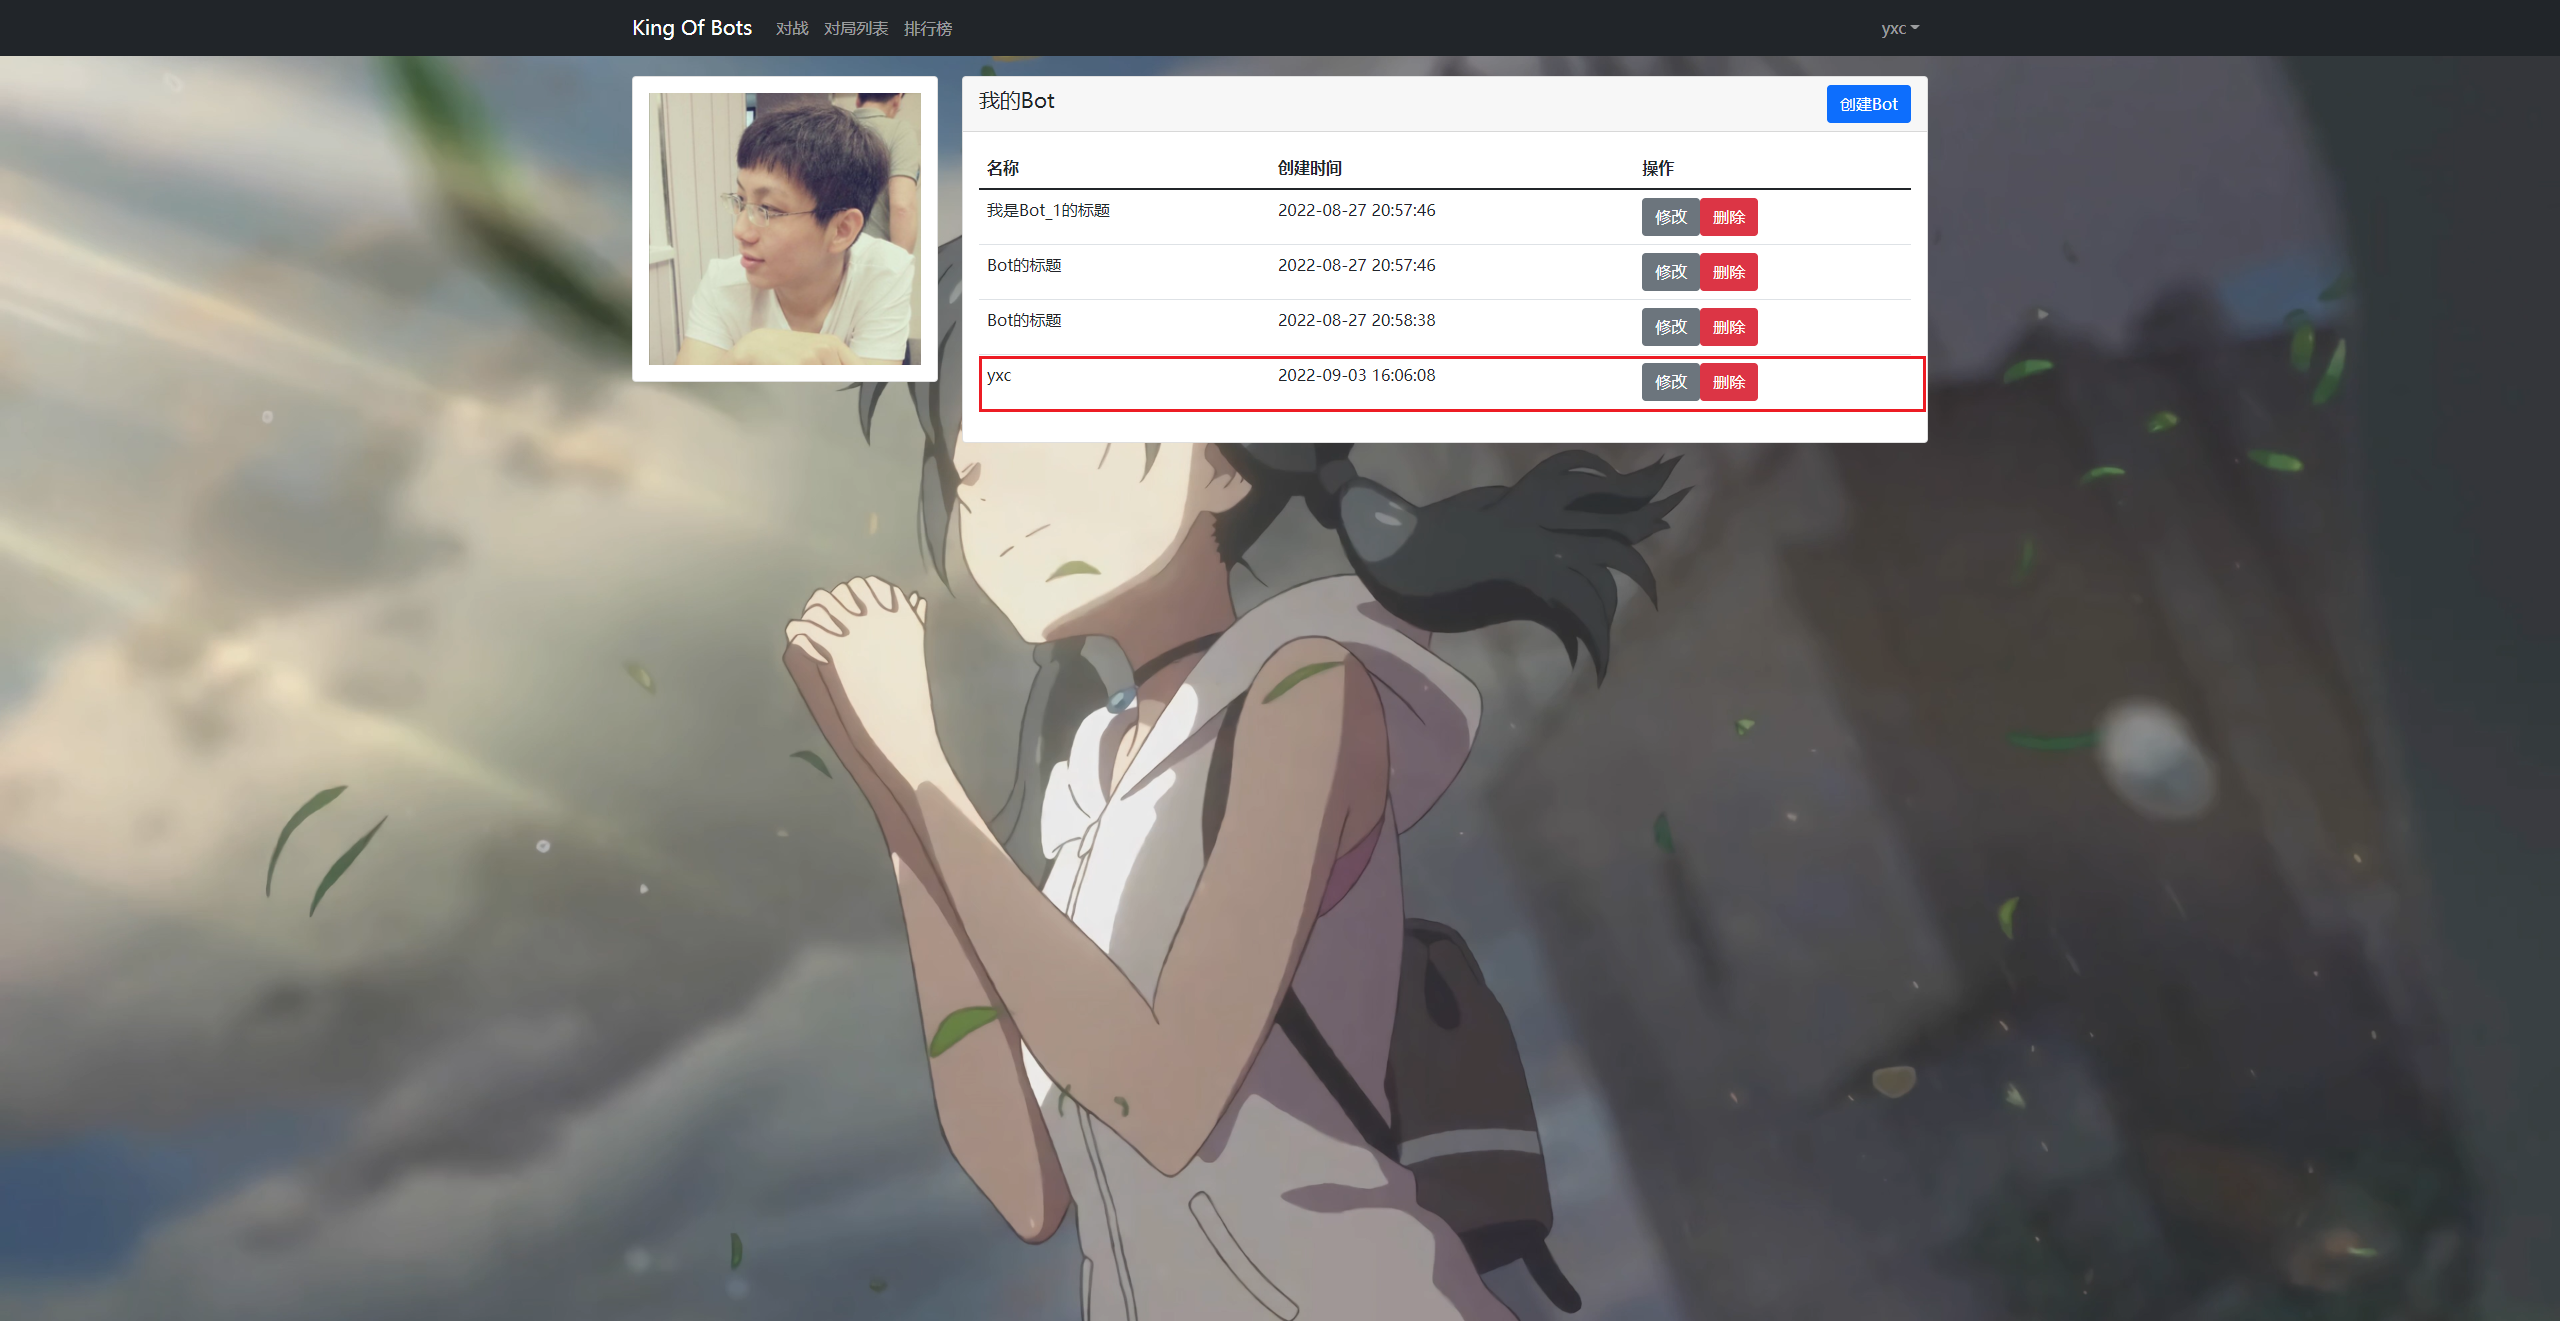
成功效果如下:

3.2 删除一个 Bot
增加一个 删除 bot 的函数:
<script>
import { ref, reactive } from 'vue'
import $ from 'jquery'
import { useStore } from 'vuex'export default {const store = useStore();const botadd = reactive({title: "",description: "",content: "",error_message: "",});const refresh_bots = () => {$.ajax({url: "http://127.0.0.1:8080/user/bot/getlist/",type: "get",headers: {Authorization: "Bearer " + store.state.user.token,},success(resp) {bots.value = resp;}})}refresh_bots();//创建一个 botconst add_bot = () => {botadd.error_message = "";$.ajax({url: "http://127.0.0.1:8080/user/bot/add/",type: "post",data: {title: botadd.title,description: botadd.description,content: botadd.content,},headers: {Authorization: "Bearer " + store.state.user.token,},success(resp) {if (resp.error_message === "success") {botadd.title = "";botadd.description = "";botadd.content = "";Modal.getInstance("#add-bot-btn").hide();refresh_bots();} else {botadd.error_message = resp.error_message;}}})}//删除一个 botconst remove_bot = (bot) => {$.ajax({url: "http://127.0.0.1:8080/user/bot/remove/",type: "post",data: {bot_id: bot.id,},headers: {Authorization: "Bearer " + store.state.user.token,},success(resp) {console.log(resp);if (resp.error_message === "success") {refresh_bots();}}})}return {bots,botadd,add_bot,remove_bot,}}
}
</script>
同时需要在上文绑定 删除 按钮。
<div class="card-body"><thead><tr><th>名称</th><th>创建时间</th><th>操作</th></tr><tbody><tr><td>{{ bot.title }}</td><td>{{ bot.createtime }}</td><td><button type="button" class="btn btn-secondary" style="margin-right: 10px;">修改</button><button type="button" class="btn btn-danger" @click="remove_bot(bot)">删除</button></td></tr></tbody></thead></div>
如果删除的时候提示没有权限,可能是因为后端的 RemoveServiceImpl.java 文件出错,在里面修改即可。
成功效果:


3.3 修改一个 Bot
在 views.user.bot.UserBotIndexView.vue 下修改。
<script>
import { ref, reactive } from 'vue'
import $ from 'jquery'
import { useStore } from 'vuex'export default {const store = useStore();const botadd = reactive({title: "",description: "",content: "",error_message: "",});const refresh_bots = () => {$.ajax({url: "http://127.0.0.1:8080/user/bot/getlist/",type: "get",headers: {Authorization: "Bearer " + store.state.user.token,},success(resp) {bots.value = resp;}})}refresh_bots();//创建一个 botconst add_bot = () => {botadd.error_message = "";$.ajax({url: "http://127.0.0.1:8080/user/bot/add/",type: "post",data: {title: botadd.title,description: botadd.description,content: botadd.content,},headers: {Authorization: "Bearer " + store.state.user.token,},success(resp) {if (resp.error_message === "success") {botadd.title = "";botadd.description = "";botadd.content = "";Modal.getInstance("#add-bot-btn").hide();refresh_bots();} else {botadd.error_message = resp.error_message;}}})}//删除一个 botconst remove_bot = (bot) => {$.ajax({url: "http://127.0.0.1:8080/user/bot/remove/",type: "post",data: {bot_id: bot.id,},headers: {Authorization: "Bearer " + store.state.user.token,},success(resp) {console.log(resp);if (resp.error_message === "success") {refresh_bots();}}})}const update_bot = (bot) => {botadd.error_message = "";$.ajax({url: "http://127.0.0.1:8080/user/bot/update/",type: "post",data: {bot_id: bot.id,title: bot.title,description: bot.description,content: bot.content,},headers: {Authorization: "Bearer " + store.state.user.token,},success(resp) {if (resp.error_message === "success") {Modal.getInstance('#update-bot-modal-' + bot.id).hide();refresh_bots();} else {botadd.error_message = resp.error_message;}}})}return {bots,botadd,add_bot,remove_bot,update_bot,}}
}
</script>
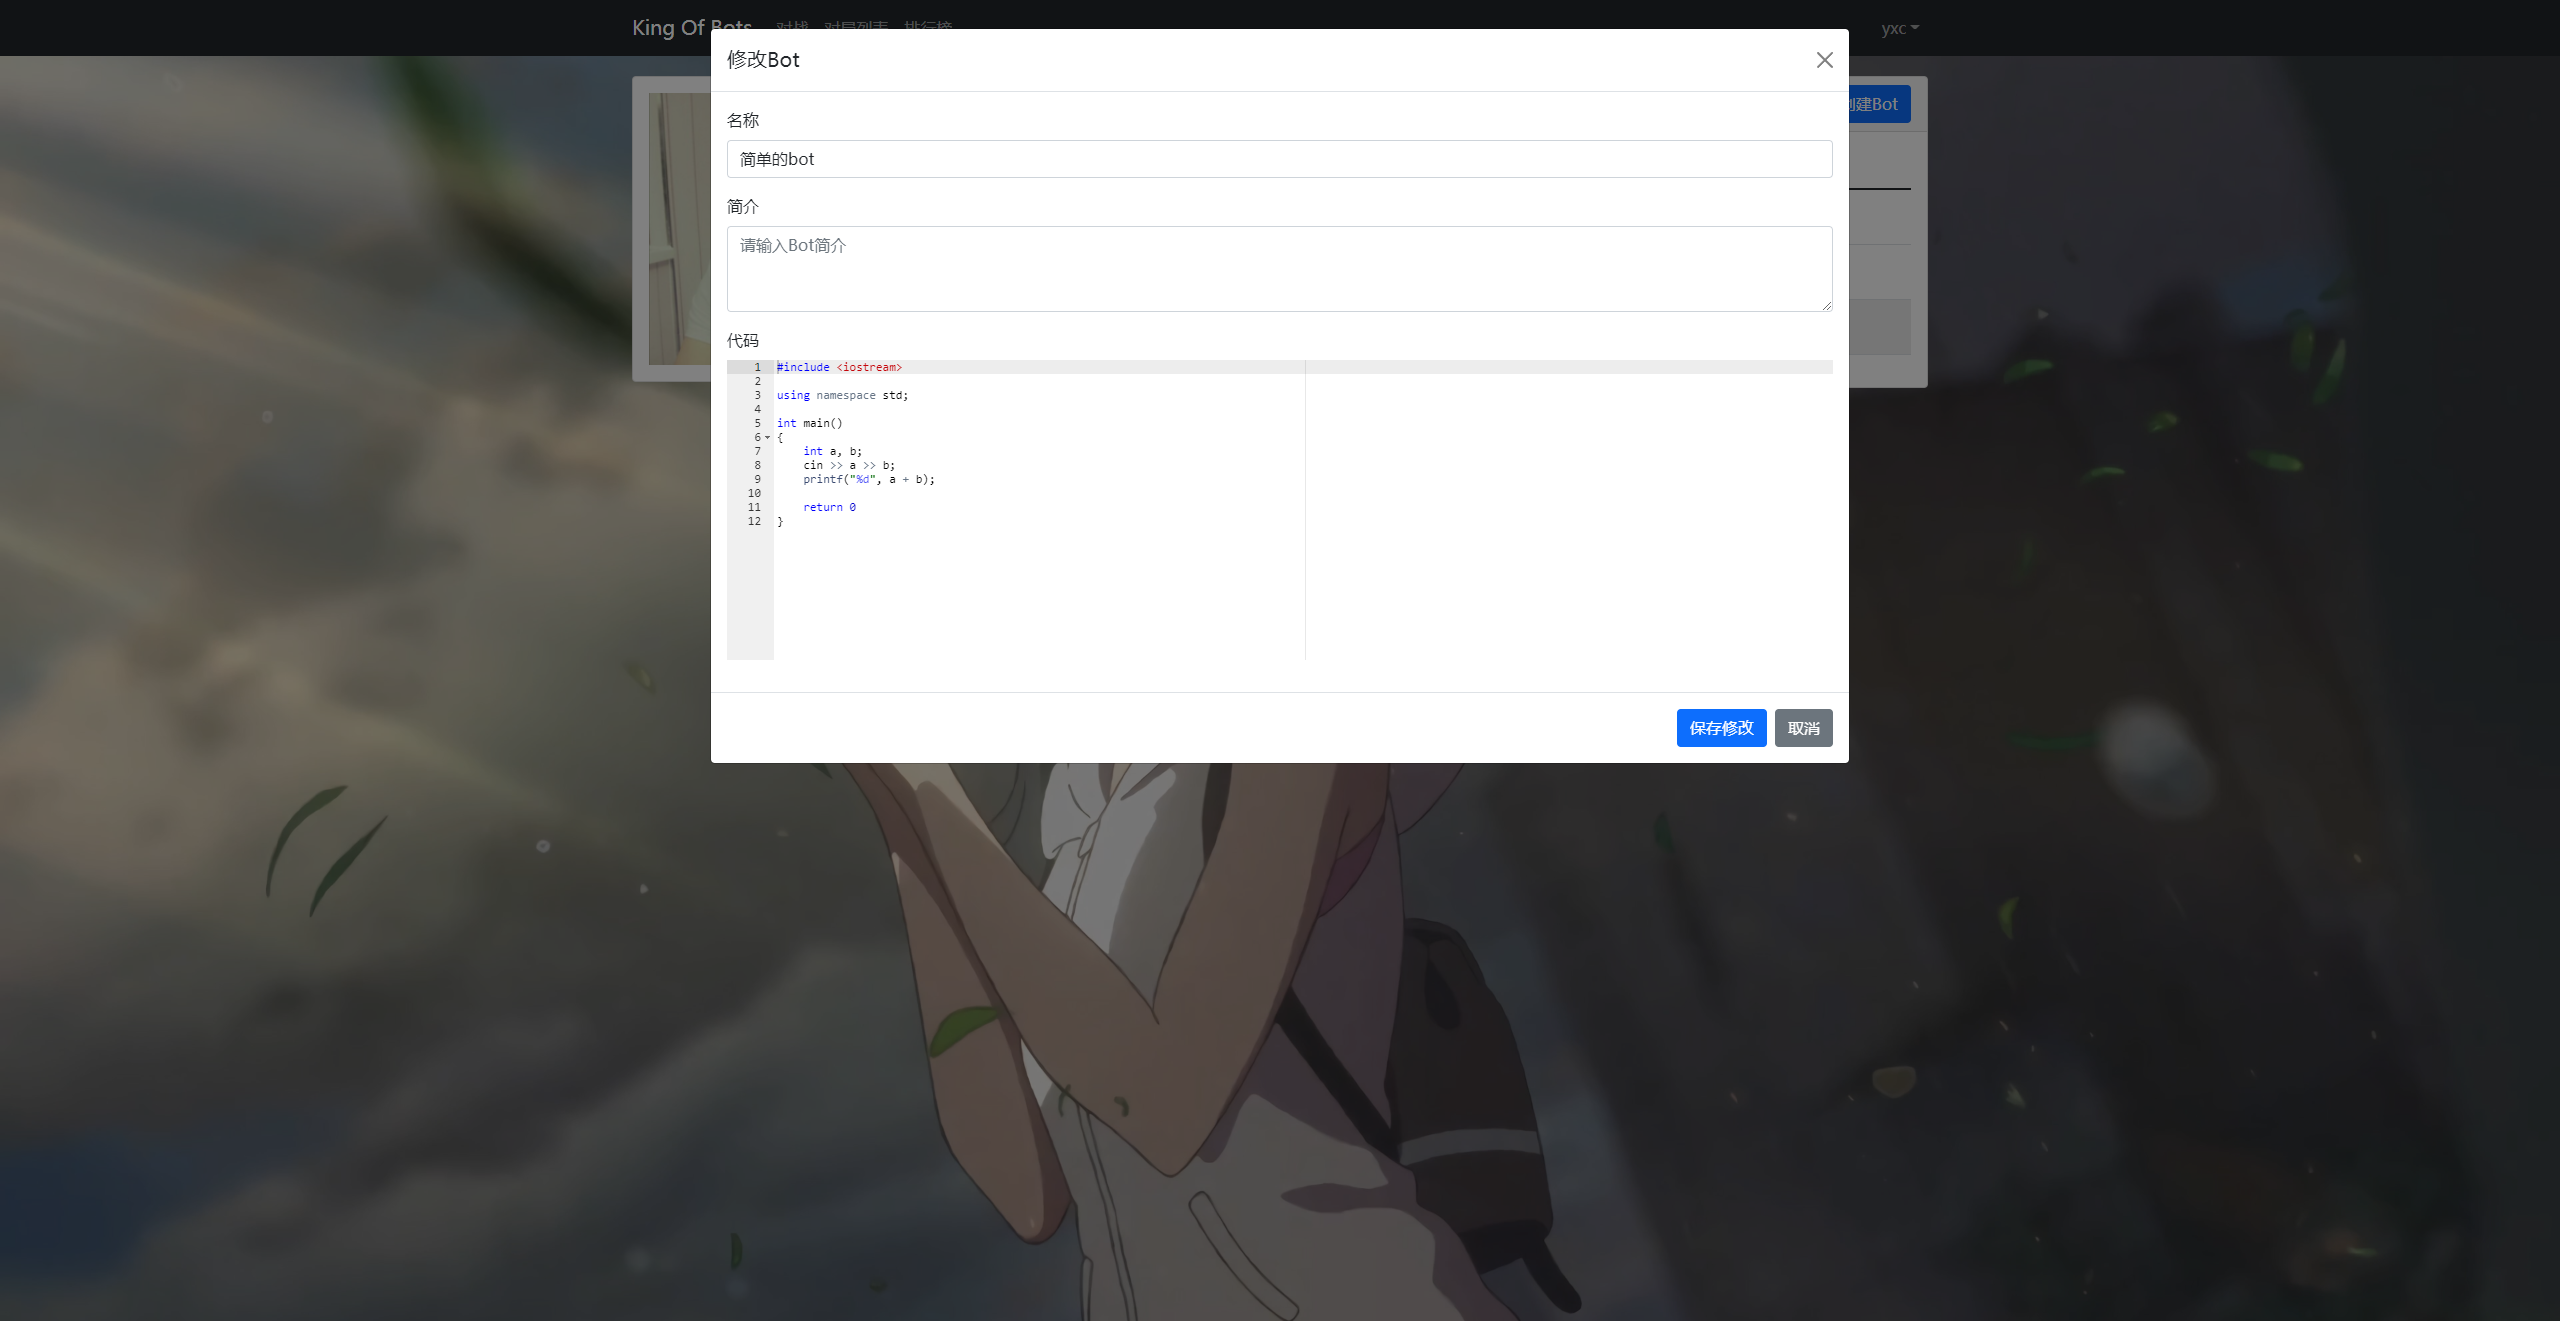
修改每一个 bot 的时候需要有对应单独的一个模态框。
<template><div class="container"><div class="row"><div class="col-3"><div class="card" style="margin-top: 20px;"><div class="card-body"><img :src="$store.state.user.photo" alt="" style="width: 100%;"></div></div></div><div class="col-9"><div class="card" style="margin-top: 20px;"><div class="card-header"><span style="font-size: 130%;">我的Bot</span><button type="button" class="btn btn-primary float-end" data-bs-toggle="modal" data-bs-target="#add-bot-btn">创建Bot</button><div class="modal fade" id="add-bot-btn" tabindex="-1"><div class="modal-dialog modal-xl"><div class="modal-content"><div class="modal-header"><h5 class="modal-title" id="exampleModalLabel">创建Bot</h5><button type="button" class="btn-close" data-bs-dismiss="modal" aria-label="Close"></button></div><div class="modal-body"><div class="mb-3"><label for="add-bot-title" class="form-label">名称</label><input v-model="botadd.title" type="text" class="form-control" id="add-bot-title" placeholder="请输入Bot名称"></div><div class="mb-3"><label for="add-bot-description" class="form-label">简介</label><textarea v-model="botadd.sescription" class="form-control" id="add-bot-description" rows="3" placeholder="请输入Bot简介"></textarea></div><div class="mb-3"><label for="add-bot-code" class="form-label">代码</label><VAceEditor</div></div><div class="modal-footer"><div class="error-message">{{ botadd.error_message }}</div><button type="button" class="btn btn-primary" @click="add_bot">创建</button><button type="button" class="btn btn-secondary" data-bs-dismiss="modal">取消</button></div></div></div></div></div><div class="card-body"><table class="table table-hover"><thead><tr><th>名称</th><th>创建时间</th><th>操作</th></tr></thead><tbody><tr v-for="bot in bots" :key="bot.id"><td>{{ bot.title }}</td><td>{{ bot.createtime }}</td><td><button type="button" class="btn btn-secondary" style="margin-right: 10px;" data-bs-toggle="modal" :data-bs-target="'#update-bot-modal-' + bot.id">修改</button><button type="button" class="btn btn-danger" @click="remove_bot(bot)">删除</button><div class="modal fade" :id="'update-bot-modal-' + bot.id" tabindex="-1"><div class="modal-dialog modal-xl"><div class="modal-content"><div class="modal-header"><h5 class="modal-title" id="exampleModalLabel">修改Bot</h5><button type="button" class="btn-close" data-bs-dismiss="modal" aria-label="Close"></button></div><div class="modal-body"><div class="mb-3"><label for="add-bot-title" class="form-label">名称</label><input v-model="bot.title" type="text" class="form-control" id="add-bot-title" placeholder="请输入Bot名称"></div><div class="mb-3"><label for="add-bot-description" class="form-label">简介</label><textarea v-model="bot.sescription" class="form-control" id="add-bot-description" rows="3" placeholder="请输入Bot简介"></textarea></div><div class="mb-3"><label for="add-bot-code" class="form-label">代码</label></div></div><div class="modal-footer"><div class="error-message">{{ bot.error_message }}</div><button type="button" class="btn btn-primary" @click="update_bot(bot)">保存修改</button><button type="button" class="btn btn-secondary" data-bs-dismiss="modal">取消</button></div></div></div></div></td></tr></tbody></table></div></div></div></div></div></template>
成功效果如下:
3.4 实现代码框
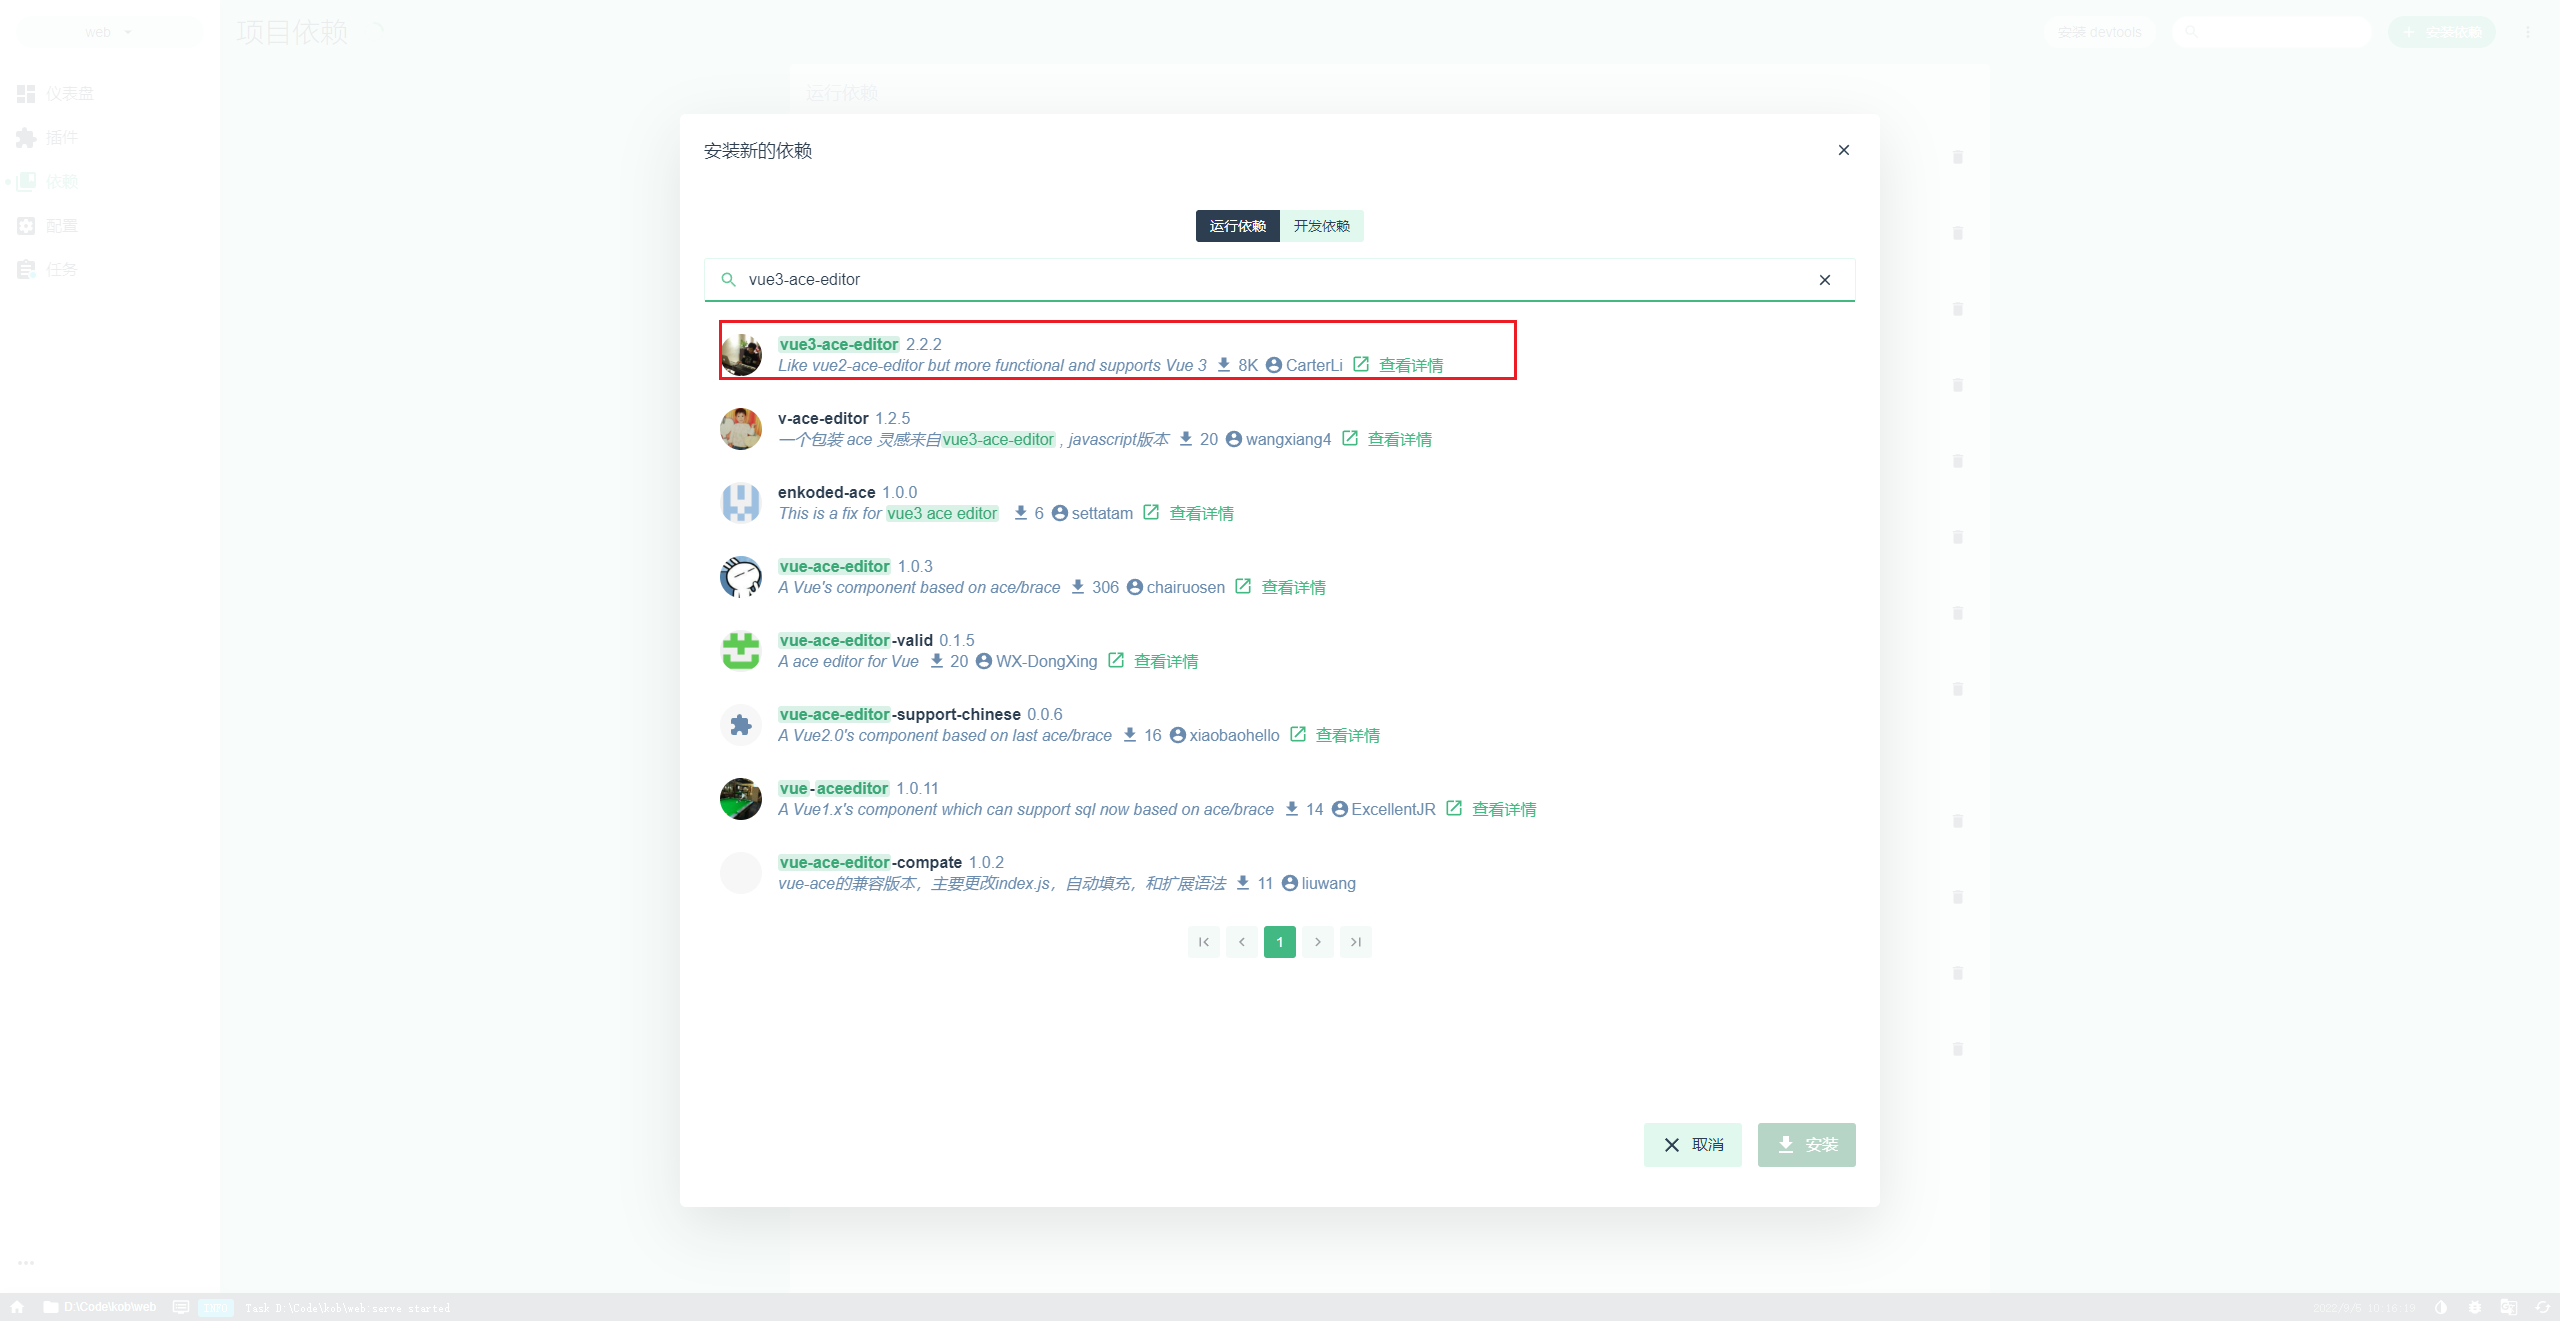
- 在 vue 界面添加依赖
vue3-ace-editor - 添加组件
import { VAceEditor } from 'vue3-ace-editor';
import ace from 'ace-builds';
ace.config.set("basePath", "https://cdn.jsdelivr.net/npm/ace-builds@" + require('ace-builds').version + "/src-noconflict/")
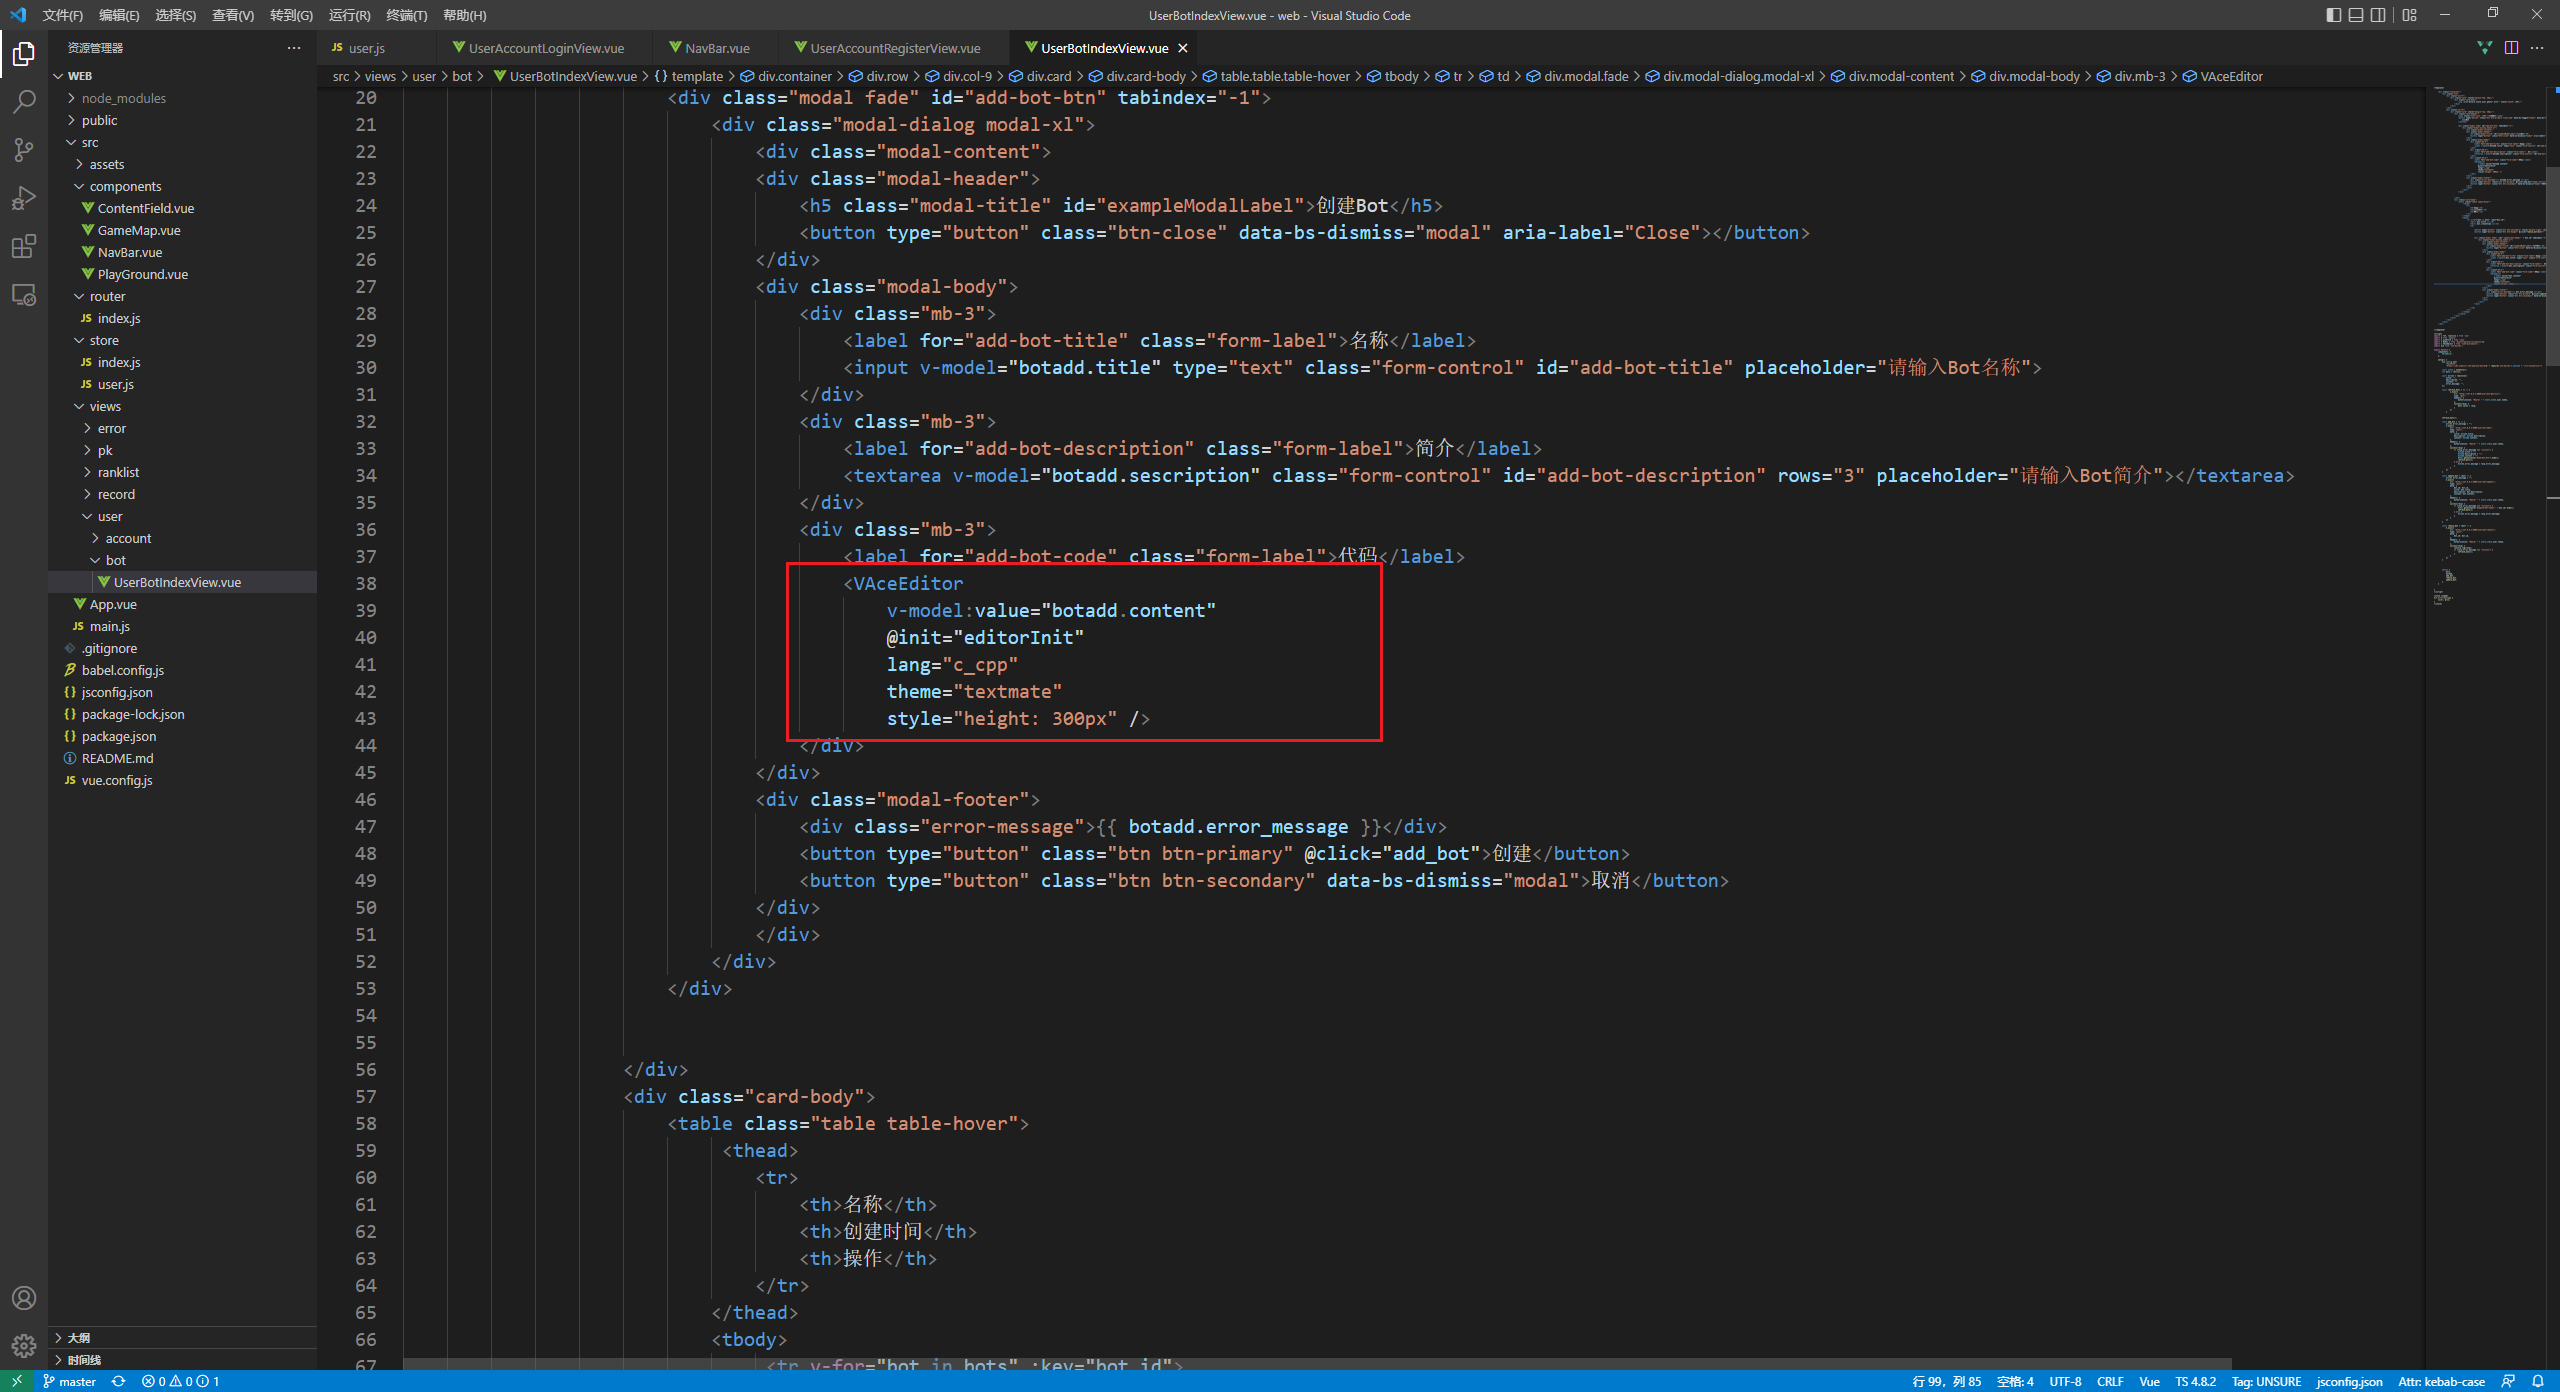
<VAceEditorv-model:value="botadd.content"@init="editorInit"lang="c_cpp"theme="textmate"style="height: 300px" />


代码地址
King of Bots


![[第二章 web进阶]XSS闯关-1](https://pic.xiahunao.cn/getimgs/?img=https://img2022.cnblogs.com/blog/2834847/202209/2834847-20220906132330688-171959268.png)