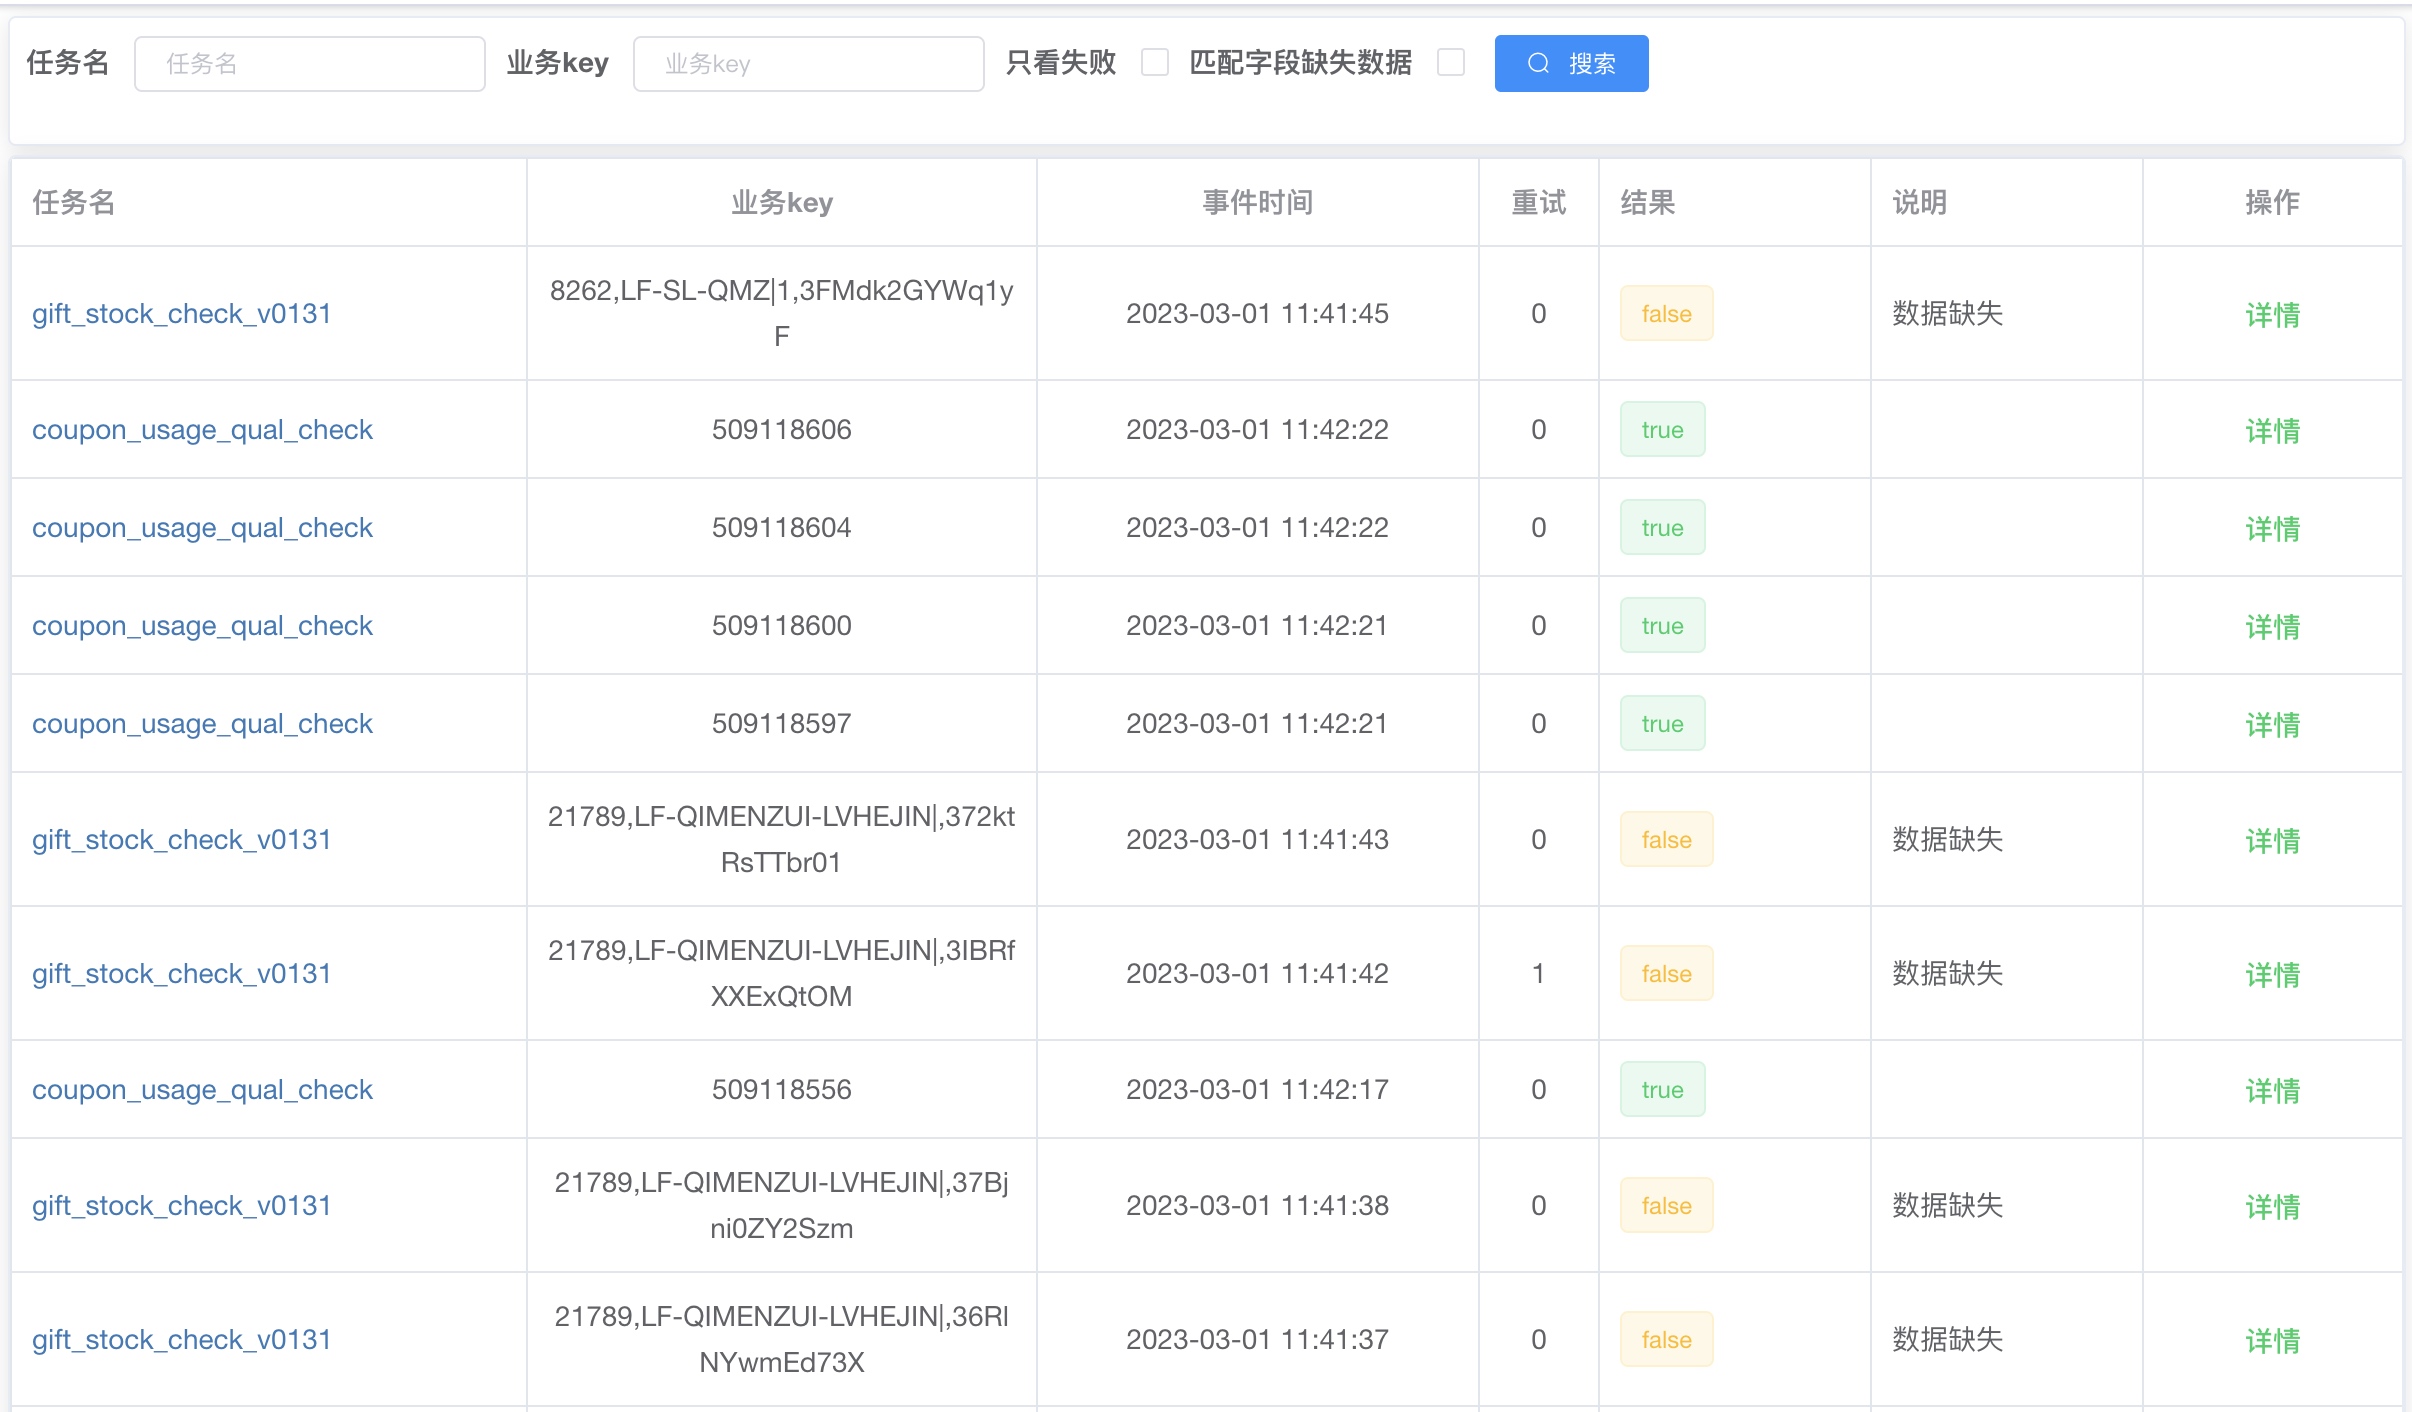
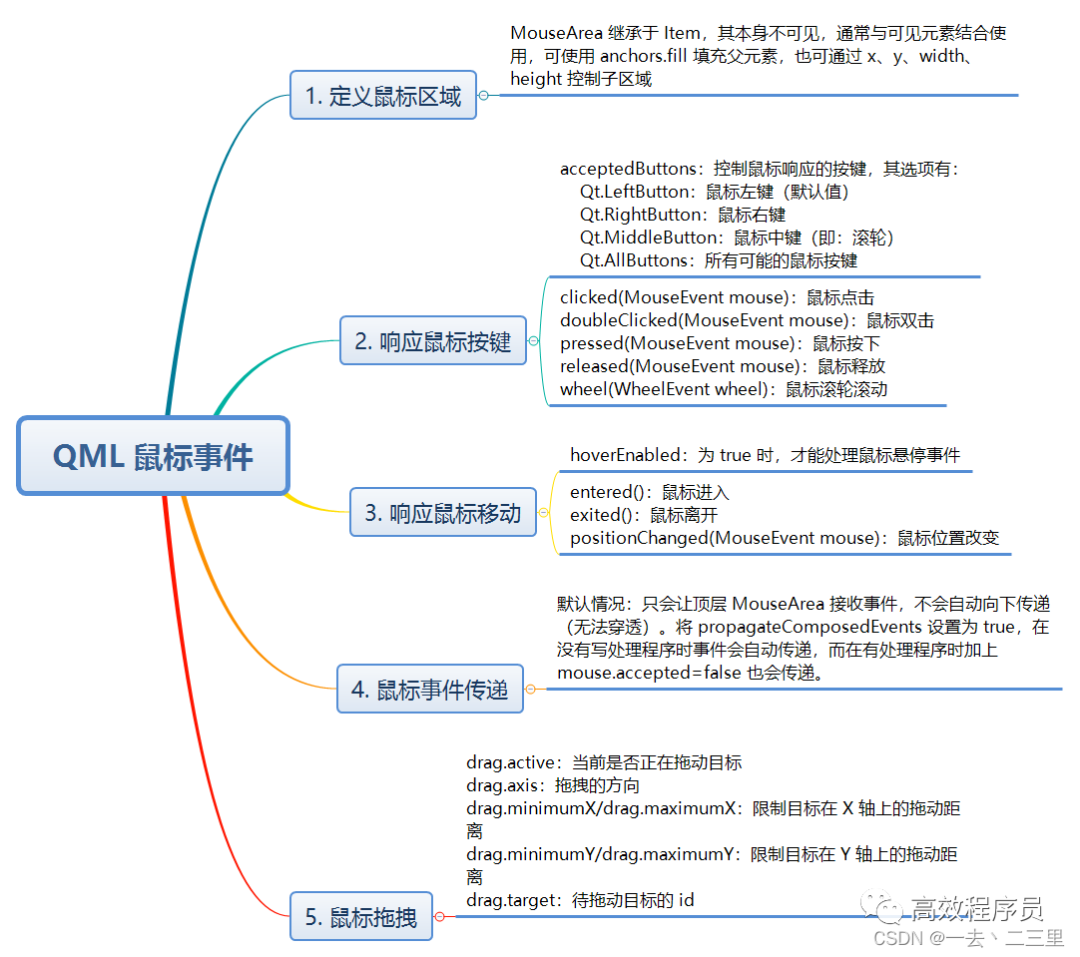
1. 综述
Selenium IDE是火狐浏览器的一个插件,它会记录你在网页中进行的操作,如登陆、点击等。更为强大的是它还能将记录导出,例如导出成junit测试用例,非常强大,接下里将会看见。
在火狐的插件管理里,搜索这个插件,安装。
2. 使用Selenium IDE
单击浏览器上Selenium IDE图标,打开之;
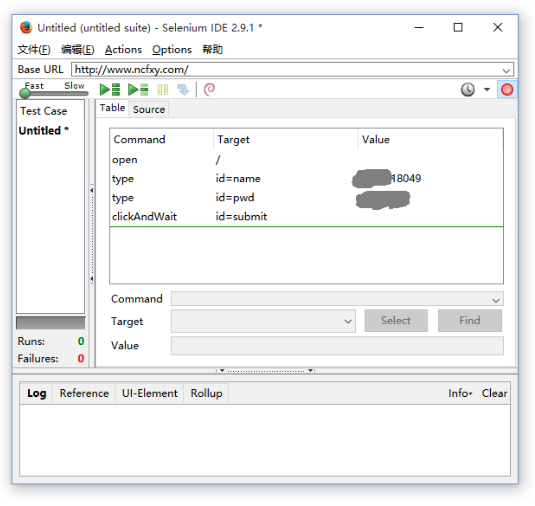
随后即可在网页上进行操作,Selenium IDE会自动记录操作,下图是我打开http://www.ncfxy.com/,输入账号密码并登录的记录;
3、导出为Java / JUnit 4 / WebDriver
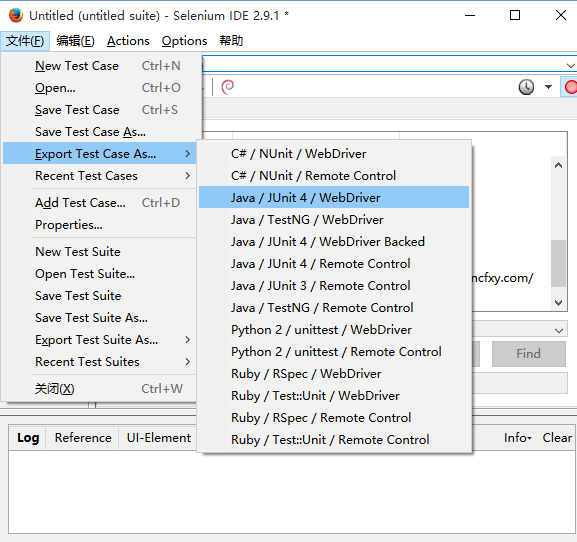
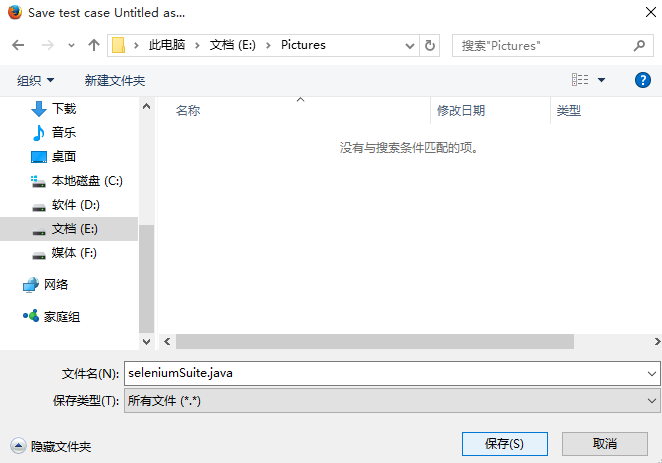
保存导出内容,导出内容为文本,seleniumSuite.java是我自己的命名;
在文件夹里找到seleniumSuite.java,其内容如下,稍加修改就可作为JUnit测试类。修改后的代码https://github.com/yongheng20/SeleniumJavaWebDriver
package com.example.tests;
import java.util.regex.Pattern;
import java.util.concurrent.TimeUnit;
import org.junit.;
import static org.junit.Assert.;
import static org.hamcrest.CoreMatchers.;
import org.openqa.selenium.;
import org.openqa.selenium.firefox.FirefoxDriver;
import org.openqa.selenium.support.ui.Select;
public class SeleniumSuite {
private WebDriver driver;
private String baseUrl;
private boolean acceptNextAlert = true;
private StringBuffer verificationErrors = new StringBuffer();
@Before
public void setUp() throws Exception {
driver = new FirefoxDriver();
baseUrl = “http://www.ncfxy.com/”;
driver.manage().timeouts().implicitlyWait(30, TimeUnit.SECONDS);
}
@Test
public void testSeleniumSuite() throws Exception {
driver.get(baseUrl + “/”);
driver.findElement(By.id(“name”)).clear();
driver.findElement(By.id(“name”)).sendKeys(“0123456789”);
driver.findElement(By.id(“pwd”)).clear();
driver.findElement(By.id(“pwd”)).sendKeys(“000000”);
driver.findElement(By.id(“submit”)).click();
}
@After
public void tearDown() throws Exception {
driver.quit();
String verificationErrorString = verificationErrors.toString();
if (!“”.equals(verificationErrorString)) {
fail(verificationErrorString);
}
}
private boolean isElementPresent(By by) {
try {
driver.findElement(by);
return true;
} catch (NoSuchElementException e) {
return false;
}
}
private boolean isAlertPresent() {
try {
driver.switchTo().alert();
return true;
} catch (NoAlertPresentException e) {
return false;
}
}
private String closeAlertAndGetItsText() {
try {
Alert alert = driver.switchTo().alert();
String alertText = alert.getText();
if (acceptNextAlert) {
alert.accept();
} else {
alert.dismiss();
}
return alertText;
} finally {
acceptNextAlert = true;
}
}
}
最后:下方这份完整的自动化测试视频学习教程已经整理上传完成,朋友们如果需要可以自行免费领取 【保证100%免费】


![“速通“ 老生常谈的HashMap [实现原理源码解读]](https://img-blog.csdnimg.cn/198fd6850c4f490b8ecd0ee15cf11c24.gif)