Three.js中的灯光API使用
1.环境光(AmbientLight)2.平行光(directionalLight)3.PointLight(点光源) 4.聚光灯(SpotLight)5.材质平面(PlaneGeometry)用于接收(平行光和聚光灯的光源)
首页在上一篇 Three.js加载外部glb,fbx,gltf,obj 模型文件 的文章基础上新加入一个创建 灯光的函数 createLight 方法
// 创建光源createLight() {// 创建环境光this.ambientLight = new THREE.AmbientLight('#fff', .8)this.scene.add(this.ambientLight)// 创建平行光this.directionalLight = new THREE.DirectionalLight('#1E90FF', 1)this.directionalLight.position.set(-1.44, 2.2, 1)this.directionalLight.castShadow = truethis.directionalLight.visible = falsethis.scene.add(this.directionalLight)// 创建平行光辅助线this.directionalLightHelper = new THREE.DirectionalLightHelper(this.directionalLight, .5)this.directionalLightHelper.visible = falsethis.scene.add(this.directionalLightHelper)// 创建点光源this.pointLight = new THREE.PointLight(0xff0000, 1, 100)this.pointLight.visible = falsethis.scene.add(this.pointLight)// 创建点光源辅助线this.pointLightHelper = new THREE.PointLightHelper(this.pointLight, .5)this.pointLightHelper.visible = falsethis.scene.add(this.pointLightHelper)// 创建聚光灯this.spotLight = new THREE.SpotLight('#323636', 440);this.spotLight.visible = falsethis.spotLight.map = new THREE.TextureLoader().load(require('@/assets/image/model-bg-1.jpg'));this.spotLight.decay = 2;this.spotLight.shadow.mapSize.width = 1920;this.spotLight.shadow.mapSize.height = 1080;this.spotLight.shadow.camera.near = 1;this.spotLight.shadow.camera.far = 10;this.scene.add(this.spotLight);//创建聚光灯辅助线this.spotLightHelper = new THREE.SpotLightHelper(this.spotLight);this.spotLightHelper.visible = falsethis.scene.add(this.spotLightHelper)// 模型平面const geometry = new THREE.PlaneGeometry(4, 4);var groundMaterial = new THREE.MeshStandardMaterial({ color: '#939393' });this.planeGeometry = new THREE.Mesh(geometry, groundMaterial);this.planeGeometry.rotation.x = -Math.PI / 2this.planeGeometry.position.set(0, -.59, 0)// 让地面接收阴影this.planeGeometry.receiveShadow = true;this.planeGeometry.visible = falsethis.scene.add(this.planeGeometry);}
完整的代码
import * as THREE from 'three' //导入整个 three.js核心库
import { GLTFLoader } from 'three/examples/jsm/loaders/GLTFLoader'
import { DRACOLoader } from 'three/examples/jsm/loaders/DRACOLoader'
import { OBJLoader } from 'three/examples/jsm/loaders/OBJLoader'
import { FBXLoader } from 'three/examples/jsm/loaders/FBXLoader'
// 定义一个 class类
class renderModel {constructor(selector) {this.container = document.querySelector(selector)// 相机this.camera// 场景this.scene//渲染器this.renderer// 控制器this.controls// 模型this.model    //文件加载器类型this.fileLoaderMap = {'glb': new GLTFLoader(),'fbx': new FBXLoader(),'gltf': new GLTFLoader(),'obj': new OBJLoader(),}// 环境光this.ambientLight//平行光this.directionalLight// 平行光辅助线this.directionalLightHelper// 点光源this.pointLight//点光源辅助线this.pointLightHelper//聚光灯this.spotLight//聚光灯辅助线this.spotLightHelper//模型平面this.planeGeometry}// 初始化加载模型方法init(){return new Promise(async (reslove, reject) => {//初始化场景this.initScene()//初始化相机this.initCamera()//初始化渲染器this.initRender()// 创建灯光this.createLight()// 添加物体模型 TODO:初始化时需要默认一个  filePath:'threeFile/glb/glb-3.glb' 放在 vue项目中的public/threeFile文件下const load = await this.setModel({ filePath: 'threeFile/glb/glb-3.glb', fileType: 'glb',scale:0.5})//监听场景大小改变,跳转渲染尺寸window.addEventListener("resize", this.onWindowResize.bind(this))//场景渲染this.sceneAnimation()reslove(load)})}//创建场景initScene() {this.scene = new THREE.Scene()//创建一个球体 用于映射全景图const sphereBufferGeometry = new THREE.SphereGeometry(40, 32, 16);sphereBufferGeometry.scale(-1, -1, -1);const material = new THREE.MeshBasicMaterial({map: new THREE.TextureLoader().load(require('@/assets/image/view-1.png'))});//设置场景全景图this.viewMesh = new THREE.Mesh(sphereBufferGeometry, material);//添加场景this.scene.add(this.viewMesh);}// 创建相机initCamera() {const { clientHeight, clientWidth } = this.containerthis.camera = new THREE.PerspectiveCamera(45, clientWidth / clientHeight, 0.25, 100)}// 创建渲染器initRender() {this.renderer = new THREE.WebGLRenderer({ antialias: true, alpha: true }) //设置抗锯齿//设置屏幕像素比this.renderer.setPixelRatio(window.devicePixelRatio)//渲染的尺寸大小const { clientHeight, clientWidth } = this.containerthis.renderer.setSize(clientWidth, clientHeight)//色调映射this.renderer.toneMapping = THREE.ACESFilmicToneMapping//曝光this.renderer.toneMappingExposure = 3this.renderer.shadowMap.enabled = truethis.renderer.shadowMap.type = THREE.PCFSoftShadowMapthis.container.appendChild(this.renderer.domElement)}// 使用动画器不断更新场景sceneAnimation() {this.renderer.setAnimationLoop(this.render.bind(this))}//渲染场景render(){this.renderer.render(this.scene, this.camera)}//加载模型setModel({ filePath, fileType, scale,  position }) {return new Promise((resolve, reject) => {const loader = this.fileLoaderMap[fileType]loader.load(filePath, (result) => {//加载不同类型的文件switch (fileType) {case 'glb':this.model = result.scene		break;case 'fbx':this.model = resultbreak;case 'gltf':this.model = result.scenebreak;case 'obj':this.model = resultbreak;default:break;}// 设置模型大小if (scale) {this.model.scale.set(scale, scale, scale);}// 设置模型位置 if (position) {const { x, y, z } = positionthis.model.position.set(x, y, z)}// 设置相机位置this.camera.position.set(0, 2, 6)// 设置相机坐标系this.camera.lookAt(0, 0, 0)// 将模型添加到场景中去   this.scene.add(this.model)resolve(true)}, () => {}, (err) => {console.log(err)reject()})})}// 创建光源createLight() {// 创建环境光this.ambientLight = new THREE.AmbientLight('#fff', .8)this.scene.add(this.ambientLight)// 创建平行光this.directionalLight = new THREE.DirectionalLight('#1E90FF', 1)this.directionalLight.position.set(-1.44, 2.2, 1)this.directionalLight.castShadow = truethis.directionalLight.visible = falsethis.scene.add(this.directionalLight)// 创建平行光辅助线this.directionalLightHelper = new THREE.DirectionalLightHelper(this.directionalLight, .5)this.directionalLightHelper.visible = falsethis.scene.add(this.directionalLightHelper)// 创建点光源this.pointLight = new THREE.PointLight(0xff0000, 1, 100)this.pointLight.visible = falsethis.scene.add(this.pointLight)// 创建点光源辅助线this.pointLightHelper = new THREE.PointLightHelper(this.pointLight, .5)this.pointLightHelper.visible = falsethis.scene.add(this.pointLightHelper)//  创建聚光灯this.spotLight = new THREE.SpotLight('#323636', 440);this.spotLight.visible = falsethis.spotLight.map = new THREE.TextureLoader().load(require('@/assets/image/model-bg-1.jpg'));this.spotLight.decay = 2;this.spotLight.shadow.mapSize.width = 1920;this.spotLight.shadow.mapSize.height = 1080;this.spotLight.shadow.camera.near = 1;this.spotLight.shadow.camera.far = 10;this.scene.add(this.spotLight);//创建聚光灯辅助线this.spotLightHelper = new THREE.SpotLightHelper(this.spotLight);this.spotLightHelper.visible = falsethis.scene.add(this.spotLightHelper)// 模型平面const geometry = new THREE.PlaneGeometry(4, 4);let  groundMaterial = new THREE.MeshStandardMaterial({ color: '#939393' });this.planeGeometry = new THREE.Mesh(geometry, groundMaterial);this.planeGeometry.rotation.x = -Math.PI / 2this.planeGeometry.position.set(0, -.59, 0)// 让地面接收阴影this.planeGeometry.receiveShadow = true;this.planeGeometry.visible = falsethis.scene.add(this.planeGeometry);}
}完整的代码可参考:https://gitee.com/ZHANG_6666/Three.js3D
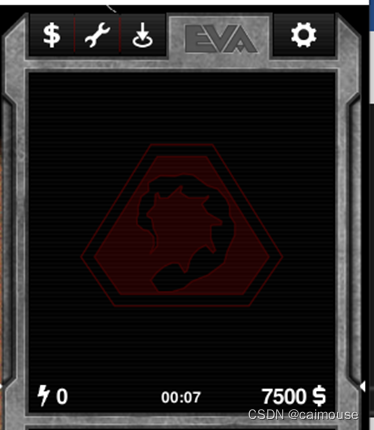
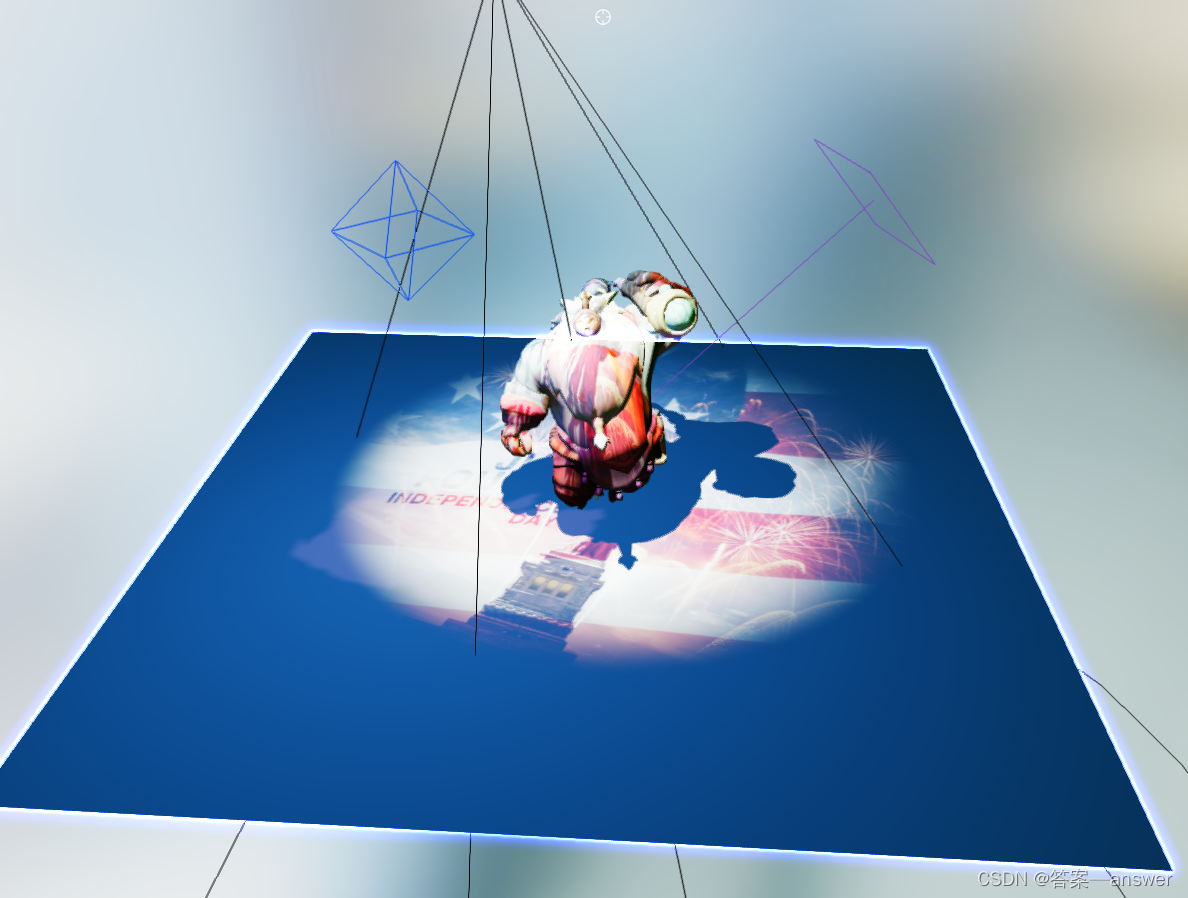
界面效果:
![[论文分享]MR-MAE:重构前的模拟:用特征模拟增强屏蔽自动编码器](https://img-blog.csdnimg.cn/img_convert/911c2502b9c872c52b26ddda75f8e965.png)