一、配置扫描路径
要想将对象成功的存储到Spring中,必须配置一下存储对象的扫描包路径,只有被配置的包下的所有类,添加了注解才能被正确的识别并保存到Spring中。
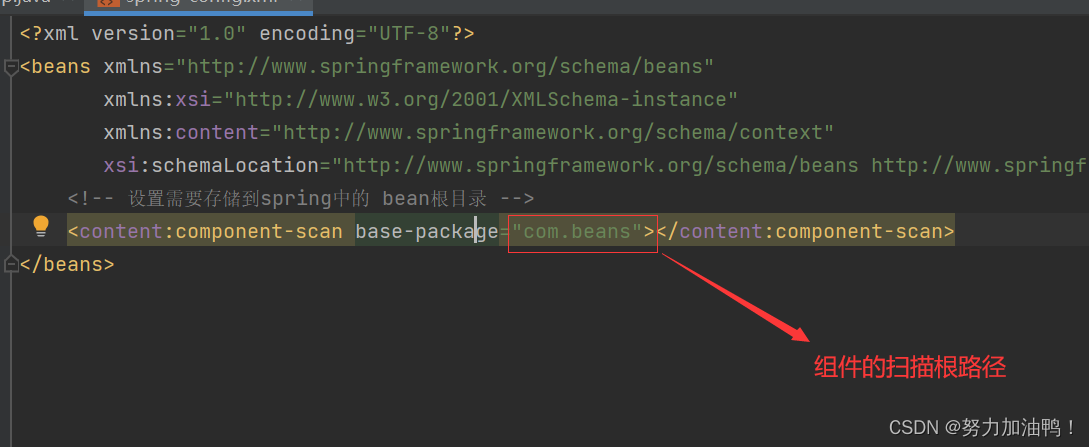
在 配置文件spring-config.xml中添加如下配置:
<?xml version="1.0" encoding="UTF-8"?>
<beans xmlns="http://www.springframework.org/schema/beans"xmlns:xsi="http://www.w3.org/2001/XMLSchema-instance"xmlns:content="http://www.springframework.org/schema/context"xsi:schemaLocation="http://www.springframework.org/schema/beans http://www.springframework.org/schema/beans/spring-beans.xsd http://www.springframework.org/schema/context https://www.springframework.org/schema/context/spring-context.xsd"><!-- 设置需要存储到spring中的 bean根目录 --><content:component-scan base-package="com.beans"></content:component-scan>
</beans>
二、添加注解存储Bean对象
有两种类注解:
a.类注解:
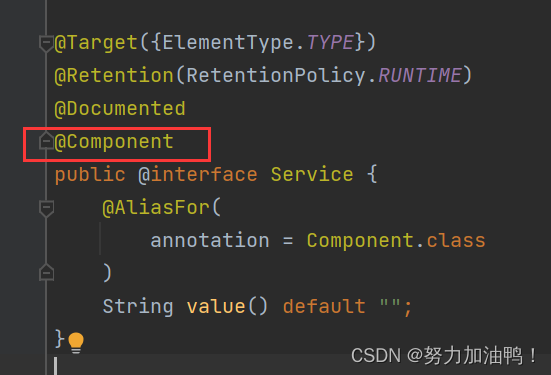
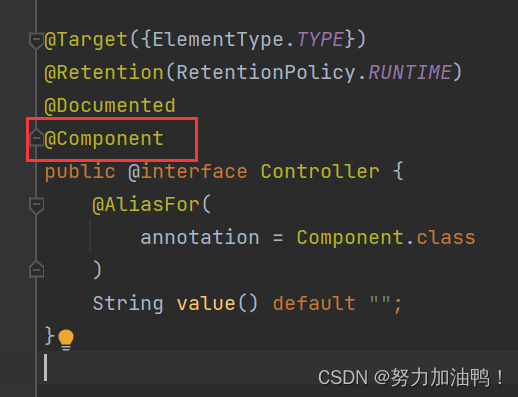
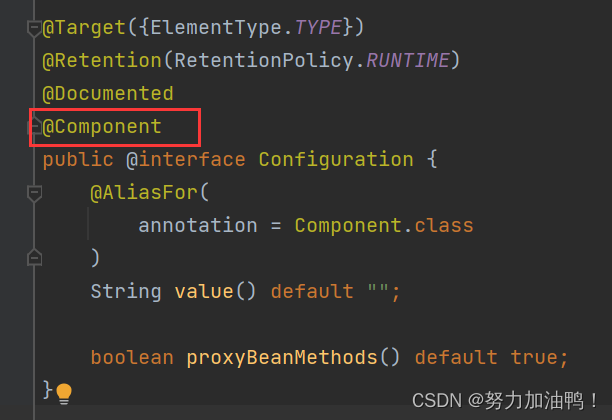
@Controller(控制器)、@Service(服务)、@Repository(仓库)、@Component(组件)、@Configuration(配置)
b.方法注解:
@Bean
2.1类注解
注意事项:
a.即使在配置文件中配置了bean扫描路径,但五大类注解不能省略。
b.即使加了五大类注解,但类没有放在spring配置的bean路径下,那么也是不能将类注入到spring中的。
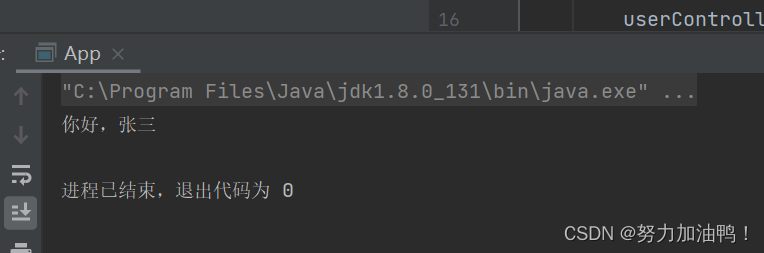
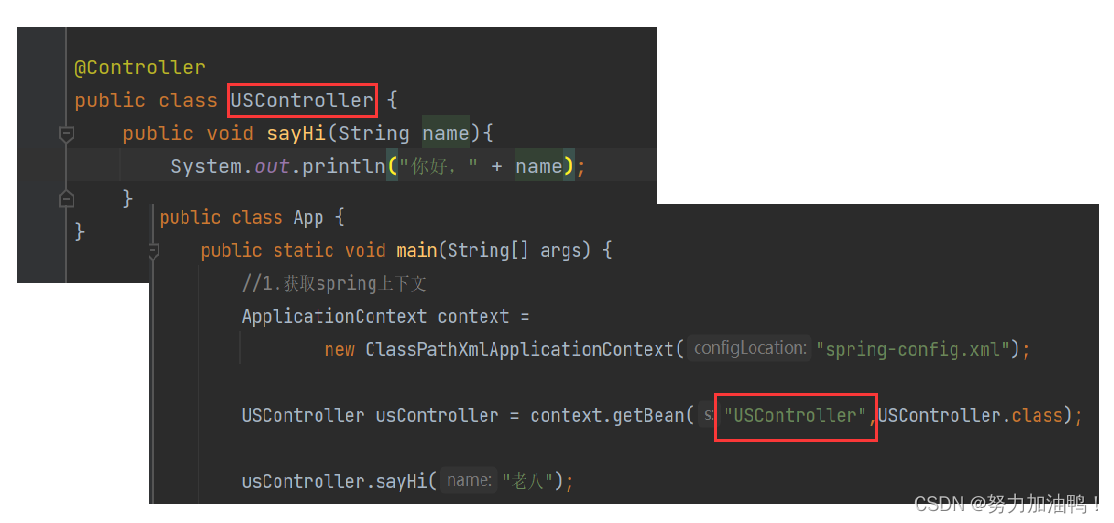
2.1.1 @Controller(控制器存储)
1.使用@Controller存储Bean对象
package com.beans;import org.springframework.stereotype.Controller;@Controller//将当前对象存储到spring中public class UserController {public void sayHi(String name){System.out.println("你好," + name);}
}
2.使用之前的方式获取Bean对象:
import com.beans.UserController;
import org.springframework.context.ApplicationContext;
import org.springframework.context.support.ClassPathXmlApplicationContext;/*** 启动类*/
public class App {public static void main(String[] args) {//1.获取spring上下文ApplicationContext context =new ClassPathXmlApplicationContext("spring-config.xml");//2.得到beanUserController userController = context.getBean(UserController.class);//3.使用beanuserController.sayHi("张三");}
}
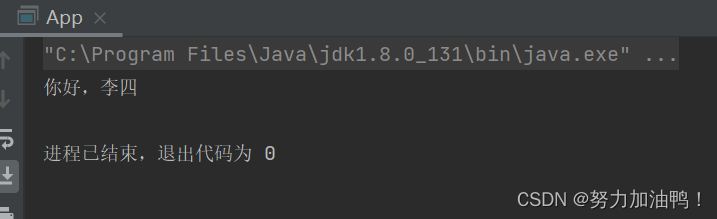
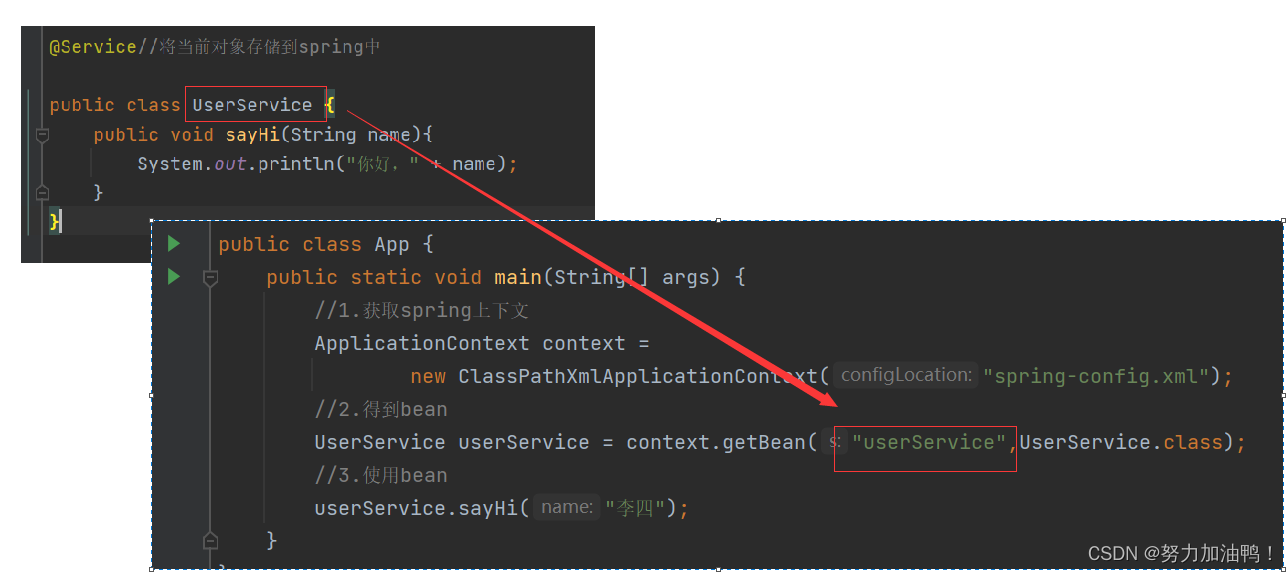
2.1.2 @Service(服务存储)
1.使用@Service存储Bean对象
package com.beans;import org.springframework.stereotype.Service;@Service//将当前对象存储到spring中public class UserService {public void sayHi(String name){System.out.println("你好," + name);}
}
2.使用之前的方式获取Bean对象:
import com.beans.UserService;
import org.springframework.context.ApplicationContext;
import org.springframework.context.support.ClassPathXmlApplicationContext;/*** 启动类*/
public class App {public static void main(String[] args) {//1.获取spring上下文ApplicationContext context =new ClassPathXmlApplicationContext("spring-config.xml");//2.得到beanUserService userService = context.getBean("userService",UserService.class);//3.使用beanuserService.sayHi("李四");}
}
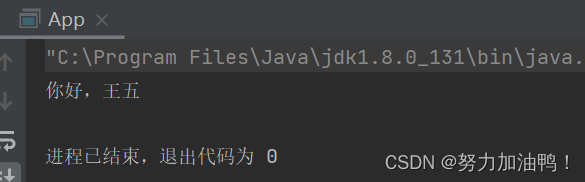
2.1.3 @Repository(仓库存储)
1.使用@Repository存储Bean对象
package com.beans;import org.springframework.stereotype.Repository;@Repository//将当前对象存储到spring中public class UserRepository {public void sayHi(String name){System.out.println("你好," + name);}
}
2.使用之前的方式获取Bean对象:
/*** 启动类*/
public class App {public static void main(String[] args) {//1.获取spring上下文ApplicationContext context =new ClassPathXmlApplicationContext("spring-config.xml");UserRepository userRepository = context.getBean("userRepository",UserRepository.class);userRepository.sayHi("王五");}
}
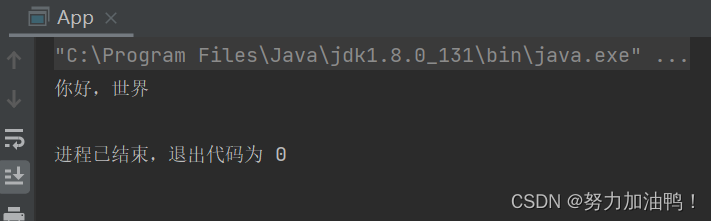
2.1.4 @Component(组件存储)
1.使用@Component存储Bean对象
package com.beans;
import org.springframework.stereotype.Component;@Component//将当前对象存储到spring中public class UserComponent {public void sayHi(String name){System.out.println("你好," + name);}
}
2.使用之前的方式获取Bean对象:
/*** 启动类*/
public class App {public static void main(String[] args) {//1.获取spring上下文ApplicationContext context =new ClassPathXmlApplicationContext("spring-config.xml");//2.得到beanUserComponent userComponent = context.getBean("userComponent",UserComponent.class);//3.使用beanuserComponent.sayHi("世界");}
}
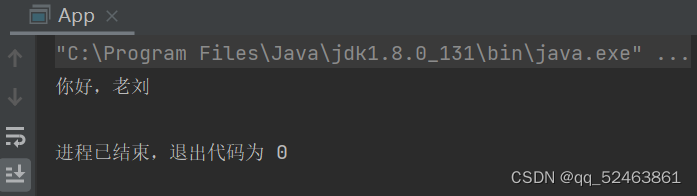
2.1.5 @Configuration(配置存储)
1.使用@Configuration存储对象
package com.beans;import org.springframework.context.annotation.Configuration;@Configuration//将当前对象存储到spring中public class UserConfiguration {public void sayHi(String name){System.out.println("你好," + name);}
}
2.使用之前的方式获取Bean对象:
import com.beans.UserComponent;
import com.beans.UserController;
import com.beans.UserRepository;
import com.beans.UserService;
import org.springframework.context.ApplicationContext;
import org.springframework.context.support.ClassPathXmlApplicationContext;/*** 启动类*/
public class App {public static void main(String[] args) {//1.获取spring上下文ApplicationContext context =new ClassPathXmlApplicationContext("spring-config.xml");//2.得到beanUserComponent userComponent= context.getBean("userComponent",UserComponent.class);//3.使用beanuserComponent.sayHi("老刘");}
}
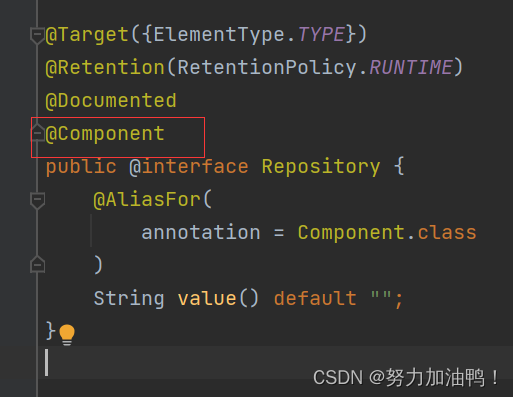
2.1.6五大类注解之间的关系
查看除了@Component外,剩余四大注解的源码,不难发现都是依靠@Component实现的;因此**@Component是其他四个注解的父类。**
2.1.7为什么需要这么多注解
按理来说,@Component是其他四个注解的父类,那就只需要用@Component就可以了,为什么还需要其他四个注解呢?看下面解释:
这和为什么每个省/市都有⾃⼰的⻋牌号是⼀样的?⽐如陕⻄的⻋牌号就是:陕X:XXXXXX,北京的⻋牌号:京X:XXXXXX,⼀样。甚⾄⼀个省不同的县区也是不同的,⽐如⻄安就是,陕A:XXXXX,咸阳:陕B:XXXXXX,宝鸡,陕C:XXXXXX,⼀样。这样做的好处除了可以节约号码之外,更重要的作⽤是可以直观的标识⼀辆⻋的归属地。
那么为什么需要怎么多的类注解也是相同的原因,就是让程序员看到类注解之后,就能直接了解当前类的⽤途。
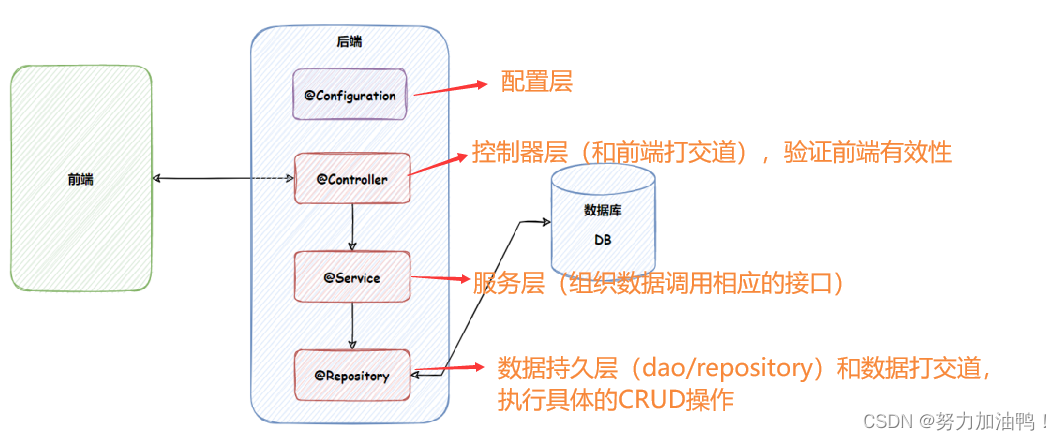
程序的⼯程分层,调⽤流程如下:
2.2 Bean的命名规则
a.通常情况下,将大驼峰的类名改为小驼峰即可获取Bean对象。
b.当类名的首字母和第二个字母都大写,则使用原类名进行读取。
2.3方法注解@Bean
注意:此方法注解必须配合五大类注解之一才能有效果。
package com.beans;import com.model.User;
import org.springframework.context.annotation.Bean;
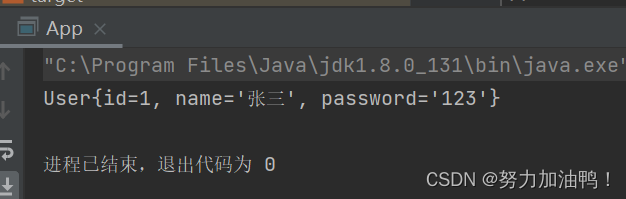
import org.springframework.stereotype.Component;@Componentpublic class UserBeans {@Bean//将对象存储到spring中public User user1(){User user = new User();user.setId(1);user.setName("张三");user.setPassword("123");return user;}}/*** 启动类*/
public class App {public static void main(String[] args) {//1.获取spring上下文ApplicationContext context =new ClassPathXmlApplicationContext("spring-config.xml");User user1 = context.getBean("user1",User.class);System.out.println(user1);}
}

2.3.1 重命名Bean
a.给当前对象起一个别名
package com.beans;import com.model.User;
import org.springframework.context.annotation.Bean;
import org.springframework.stereotype.Component;@Componentpublic class UserBeans {@Bean(name = "user1")//将对象存储到spring中public User getUser(){User user = new User();user.setId(1);user.setName("张三");user.setPassword("123");return user;}}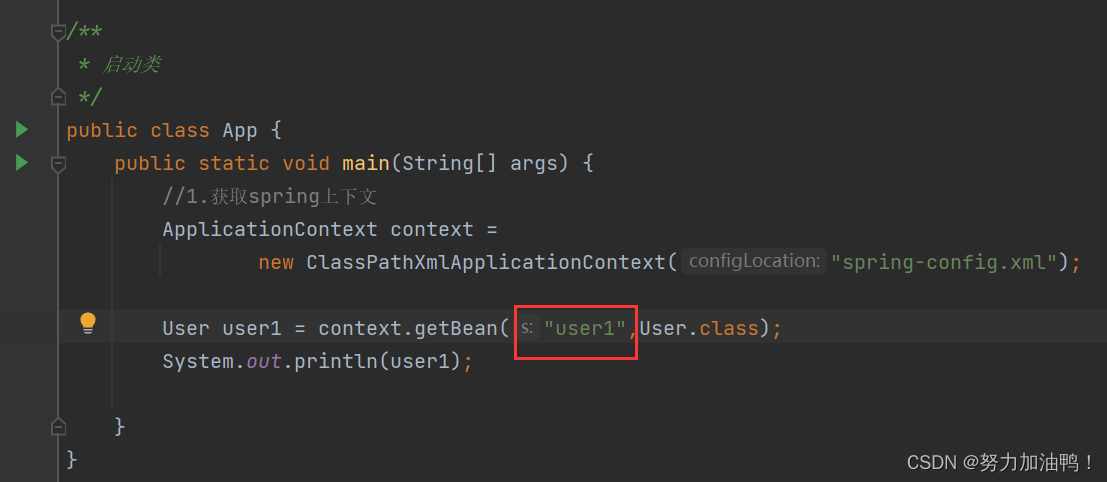
b.给当前对象起多个别名
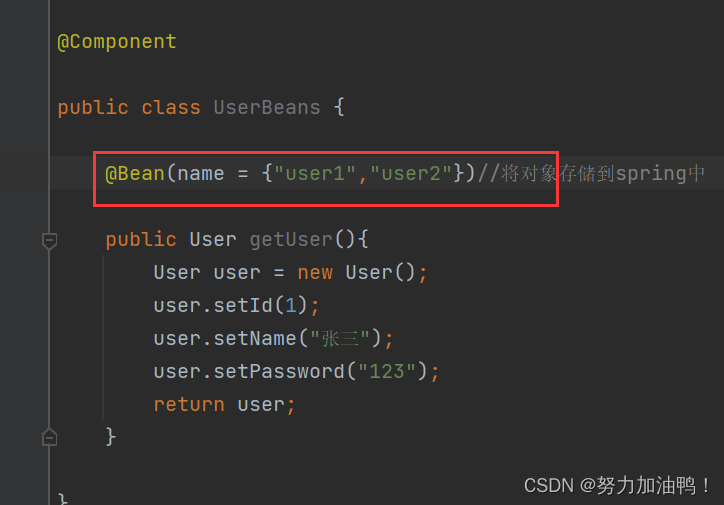
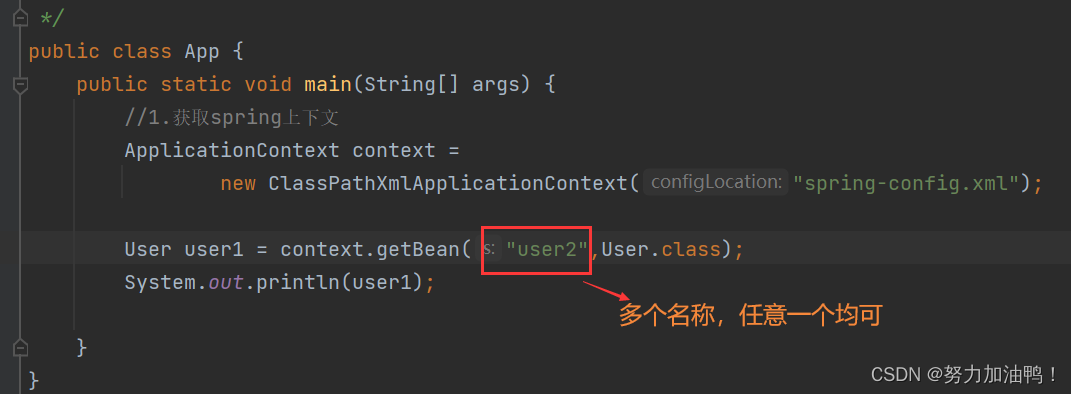
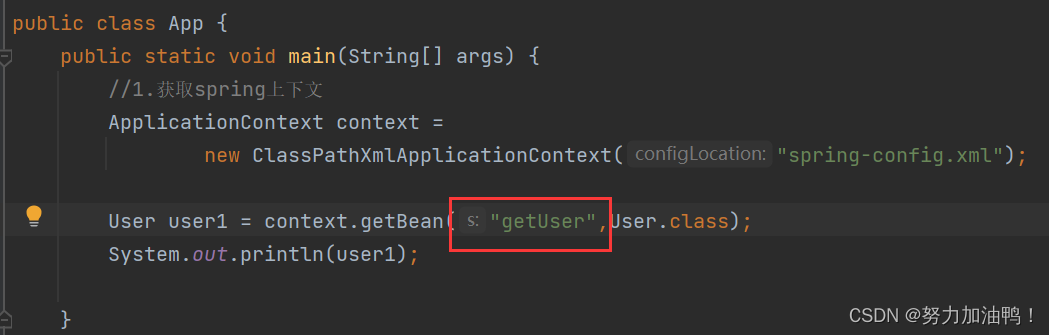
当重命名之后,如果使用之前的方法名,则会报错:

三、获取Bean对象(对象装配)
获取Bean对象也叫对象装配,是把某对象取出来放入某个类中,也叫对象注入。
有以下三种实现方法:
1.属性注⼊
2.构造⽅法注⼊
3.Setter 注⼊
3.1 属性注入
在属性上加上**@Autowired**,将Service注入到Controller类中。
UserService类:
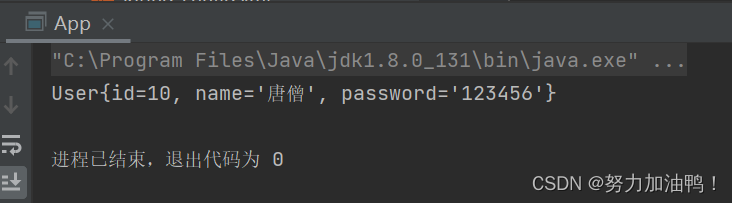
package com.beans;import com.model.User;
import org.springframework.stereotype.Service;@Service//将当前对象存储到spring中public class UserService {/*** 根据Id获取用户* @param id* @return*/public User getUserById(int id){//伪代码User user = new User();user.setId(id);user.setName("唐僧");user.setPassword("123456");return user;}
}
UserController类:
package com.beans;import com.model.User;
import org.springframework.beans.factory.annotation.Autowired;
import org.springframework.stereotype.Controller;@Controller//将当前对象存储到spring中public class UserController {//1.属性注入@Autowiredprivate UserService userService;public User getUserById(Integer id){return userService.getUserById(id);}
}
获取Controller中的getUserById的方法:
/*** 启动类*/
public class App {public static void main(String[] args) {//1.获取spring上下文ApplicationContext context =new ClassPathXmlApplicationContext("spring-config.xml");UserController userController = context.getBean(UserController.class);System.out.println(userController.getUserById(10));}
}
3.2 构造方法注入
package com.beans;import com.model.User;
import org.springframework.beans.factory.annotation.Autowired;
import org.springframework.stereotype.Controller;@Controller//将当前对象存储到spring中public class UserController2 {//2.构造方法注入@Autowiredprivate UserService userService;public UserController2(UserService userService){this.userService = userService;}public User getUserById(Integer id){return userService.getUserById(id);}
}
/*** 启动类*/
public class App {public static void main(String[] args) {//1.获取spring上下文ApplicationContext context =new ClassPathXmlApplicationContext("spring-config.xml");UserController2 userController2 = context.getBean(UserController2.class);System.out.println(userController2.getUserById(12));}
}
注意:如果当前类中只有一个构造方法,那么不加@Autowied注解也是可以获取到User对象,但是如果有多个构造方法,那就必须加@Autowied注解。
3.3 Setter注入
package com.beans;import com.model.User;
import org.springframework.beans.factory.annotation.Autowired;
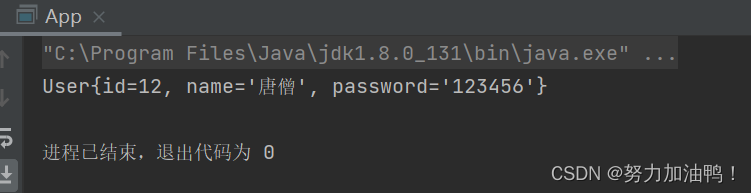
import org.springframework.stereotype.Controller;@Controller//将当前对象存储到spring中public class UserController3 {private UserService userService;//2. Setter注入@Autowiredpublic void setUserService(UserService userService) {this.userService = userService;}public UserController3(UserService userService){this.userService = userService;}public User getUserById(Integer id){return userService.getUserById(id);}
}/*** 启动类*/
public class App {public static void main(String[] args) {//1.获取spring上下文ApplicationContext context =new ClassPathXmlApplicationContext("spring-config.xml");UserController3 userController3 = context.getBean(UserController3.class);System.out.println(userController3.getUserById(14));}
}

3.4 三种注入方式的比较(面试常问)
a.属性注入:写法最简单,也最简洁。缺点是不通用,它只适用于loC框架,非loC框架不可用,只有在使用时会出现空指针异常。
b.Setter注入:Spring 早期版本推荐的注入方式,它的通用性不如构造方法注入。
c.构造方法注入:缺点是可能存在传递多个参数来实现构造方法的初始化,会导致代码很臃肿,那么如果出现了这种情况那么开发者应该反思自己代码是否符合单一职责的设计模式了;优点是通用性更好,并且他能保证在调用对象之前,此对象一定是存在的。Spring后期版本官方推荐的注入方式。
3.5 @Resource:另一种注入关键字
package com.beans;import com.model.User;
import org.springframework.beans.factory.annotation.Autowired;
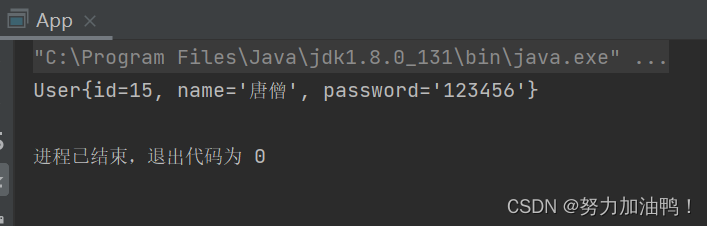
import org.springframework.stereotype.Controller;import javax.annotation.Resource;@Controller//将当前对象存储到spring中public class UserController4 {//@Autowired@Resource//属性注入private UserService userService;public User getUserById(Integer id){return userService.getUserById(id);}
}/*** 启动类*/
public class App {public static void main(String[] args) {//1.获取spring上下文ApplicationContext context =new ClassPathXmlApplicationContext("spring-config.xml");UserController4 userController4 = context.getBean(UserController4.class);System.out.println(userController4.getUserById(15));}
}
3.5.1@Resource和@Autowired的区别
a.出身不同:
@Autowired来自Spring,而 @Resource来自于JDK。
b.使用时设置的参数不同:
@Autowired只支持required参数设置,@Resource支持更多的参数设置。如name等。
c.支持不同:
@Autowired支持属性注入、构造方法注入、Setter注入,而@Resourc只支持属性注入和Setter注入,不支持构造方法注入。
3.6同一个类型下,多个bean报错
package com.beans;import com.model.User;
import org.springframework.context.annotation.Bean;
import org.springframework.stereotype.Component;@Componentpublic class UserBeans {@Bean(name = "user1")//将对象存储到spring中public User getUser(){User user = new User();user.setId(1);user.setName("张三");user.setPassword("123");return user;}@Bean(name = "user2")//将对象存储到spring中public User getUser2(){User user = new User();user.setId(1);user.setName("李四");user.setPassword("456");return user;}}
package com.beans;import com.model.User;
import org.springframework.stereotype.Controller;import javax.annotation.Resource;@Controller
public class UserController6 {@Resourceprivate User user;public void sayHi(){System.out.println(user);}
}
报错的原因是, Bean 对象不是唯一的。
解决方法:
1.使用@Resource注解,设置name属性
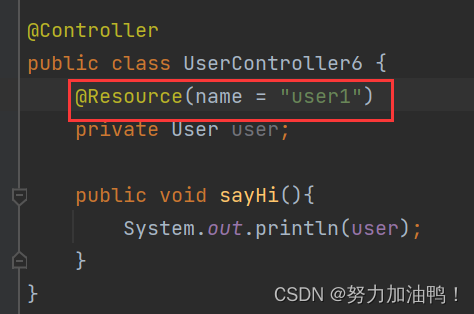
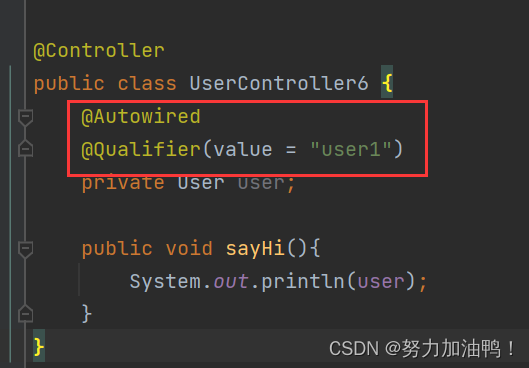
2.使用@Autowired+@Qualifier注解定义